Z87-EXPERT User's Manual
Page 3
... this guide...vii Z87-EXPERT specifications summary ix Package contents...xiv Installation tools and components xv Chapter 1: Product Introduction 1.1 Special features 1-1 1.1.1 Product highlights 1-1 1.1.2 Dual Intelligent Processors 4 with 4-Way Optimization 1-2 1.1.3 ASUS Exclusive Features 1-3 1.1.4 ASUS Quiet Thermal Solution 1-4 1.1.5 ASUS EZ DIY 1-4 ... I/O Connectors 2-9 2.1.8 Expansion Card installation 2-10 2.1.9 Wi-Fi antenna installation 2-11 2.2 BIOS update utility 2-12 2.3 Motherboard rear and audio connections 2-14 2.3.1 Rear I/O connection 2-14 iii
... this guide...vii Z87-EXPERT specifications summary ix Package contents...xiv Installation tools and components xv Chapter 1: Product Introduction 1.1 Special features 1-1 1.1.1 Product highlights 1-1 1.1.2 Dual Intelligent Processors 4 with 4-Way Optimization 1-2 1.1.3 ASUS Exclusive Features 1-3 1.1.4 ASUS Quiet Thermal Solution 1-4 1.1.5 ASUS EZ DIY 1-4 ... I/O Connectors 2-9 2.1.8 Expansion Card installation 2-10 2.1.9 Wi-Fi antenna installation 2-11 2.2 BIOS update utility 2-12 2.3 Motherboard rear and audio connections 2-14 2.3.1 Rear I/O connection 2-14 iii

Z87-EXPERT User's Manual
Page 4
... BIOS 3-54 3.11.1 EZ Update 3-54 3.11.2 ASUS EZ Flash 2 3-55 3.11.3 ASUS CrashFree BIOS 3 3-56 3.11.4 ASUS BIOS Updater 3-57 Chapter 4: Software support 4.1 Installing an operating system 4-1 4.2 Support DVD information 4-1 iv 2.3.2 Audio I/O connections 2-16 2.4 Starting up for the first time 2-18 2.5 Turning off the computer 2-19 Chapter 3: BIOS setup 3.1 Knowing BIOS 3-1 3.2 BIOS ...3.6.8 Onboard Devices Configuration 3-38 3.6.9 APM 3-40 3.6.10 Network Stack 3-41 3.7 Monitor menu 3-42 3.8 Boot menu 3-45 3.9 Tools menu 3-51 3.9.1 ASUS EZ Flash 2 Utility 3-51...
... BIOS 3-54 3.11.1 EZ Update 3-54 3.11.2 ASUS EZ Flash 2 3-55 3.11.3 ASUS CrashFree BIOS 3 3-56 3.11.4 ASUS BIOS Updater 3-57 Chapter 4: Software support 4.1 Installing an operating system 4-1 4.2 Support DVD information 4-1 iv 2.3.2 Audio I/O connections 2-16 2.4 Starting up for the first time 2-18 2.5 Turning off the computer 2-19 Chapter 3: BIOS setup 3.1 Knowing BIOS 3-1 3.2 BIOS ...3.6.8 Onboard Devices Configuration 3-38 3.6.9 APM 3-40 3.6.10 Network Stack 3-41 3.7 Monitor menu 3-42 3.8 Boot menu 3-45 3.9 Tools menu 3-51 3.9.1 ASUS EZ Flash 2 Utility 3-51...

Z87-EXPERT User's Manual
Page 5
... support DVD 4-1 4.2.2 Obtaining the software manuals 4-2 Software information 4-3 AI Suite 3...4-3 4.3.2 USB 3.0 Boost 4-6 4.3.3 USB BIOS Flashback Wizard 4-7 4.3.4 Ai Charger 4-9 4.3.5 EZ Update 4-10 4.3.6 Network iControl 4-11 4.3.7 USB Charger 4-12 4.3.8 System...14 Chapter 5: RAID support 5.1 RAID configurations 5-1 5.1.1 RAID definitions 5-1 5.1.2 Installing Serial ATA hard disks 5-2 5.1.3 Setting the RAID item in BIOS 5-2 5.1.4 Intel® Rapid Storage Technology Option ROM utility 5-3 5.2 Creating a RAID driver disk 5-7 5.2.1 Creating a RAID driver disk without ...
... support DVD 4-1 4.2.2 Obtaining the software manuals 4-2 Software information 4-3 AI Suite 3...4-3 4.3.2 USB 3.0 Boost 4-6 4.3.3 USB BIOS Flashback Wizard 4-7 4.3.4 Ai Charger 4-9 4.3.5 EZ Update 4-10 4.3.6 Network iControl 4-11 4.3.7 USB Charger 4-12 4.3.8 System...14 Chapter 5: RAID support 5.1 RAID configurations 5-1 5.1.1 RAID definitions 5-1 5.1.2 Installing Serial ATA hard disks 5-2 5.1.3 Setting the RAID item in BIOS 5-2 5.1.4 Intel® Rapid Storage Technology Option ROM utility 5-3 5.2 Creating a RAID driver disk 5-7 5.2.1 Creating a RAID driver disk without ...
Z87-EXPERT User's Manual
Page 7
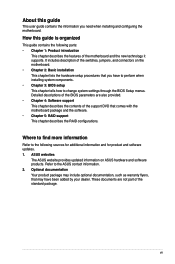
...installing and configuring the motherboard. Refer to change system settings through the BIOS Setup menus. Detailed descriptions of the BIOS parameters are not part of the switches, jumpers, and connectors on ASUS hardware and software products. It includes description of the standard package. ... features of the support DVD that may have to perform when installing system components. • Chapter 3: BIOS setup This chapter tells how to the ASUS contact information. 2. About this guide is organized This guide contains the following sources for additional information and ...
...installing and configuring the motherboard. Refer to change system settings through the BIOS Setup menus. Detailed descriptions of the BIOS parameters are not part of the switches, jumpers, and connectors on ASUS hardware and software products. It includes description of the standard package. ... features of the support DVD that may have to perform when installing system components. • Chapter 3: BIOS setup This chapter tells how to the ASUS contact information. 2. About this guide is organized This guide contains the following sources for additional information and ...

Z87-EXPERT User's Manual
Page 9
...DVI with max. Supports NVIDIA® Quad-GPU SLI™ Technology (with max. Go to Advanced> Onboard Devices Configuration> Thunderbolt bandwidth in BIOS to configure the bandwidth to the physical characteristics of 1920 x 1200 @60Hz Supports RGB with max. Intel® HD Graphics support Multi-VGA... Supports Intel® Extreme Memory Profile (XMP) Expansion slots VGA * Hyper DIMM support is subject to [X2] for PCIe x1_2/4 support. Z87-EXPERT specifications summary CPU LGA1150 socket for the 4th Generation Intel® Core™ i7/Intel® Core™i5/ Intel® Core™...
...DVI with max. Supports NVIDIA® Quad-GPU SLI™ Technology (with max. Go to Advanced> Onboard Devices Configuration> Thunderbolt bandwidth in BIOS to configure the bandwidth to the physical characteristics of 1920 x 1200 @60Hz Supports RGB with max. Intel® HD Graphics support Multi-VGA... Supports Intel® Extreme Memory Profile (XMP) Expansion slots VGA * Hyper DIMM support is subject to [X2] for PCIe x1_2/4 support. Z87-EXPERT specifications summary CPU LGA1150 socket for the 4th Generation Intel® Core™ i7/Intel® Core™i5/ Intel® Core™...

Z87-EXPERT User's Manual
Page 11
... network sharing and connection. Wi-Fi Engine's Client and AP modes for portable Smartphone/Tablet, supporting iOS and Android systems. - ASUS EZ Flash 2 ASUS Q-Design - ASUS Q-LED (CPU, DRAM, VGA, Boot Device LED) - ASUS Q-DIMM - Ai Charger+ - MemOK! USB 3.0 Boost featuring speedy USB 3.0 transmission - ASUS O.C. AI Suite 3 - Wi-Fi GO! Z87-EXPERT specifications summary ASUS Exclusive features ASUS EPU -
... network sharing and connection. Wi-Fi Engine's Client and AP modes for portable Smartphone/Tablet, supporting iOS and Android systems. - ASUS EZ Flash 2 ASUS Q-Design - ASUS Q-LED (CPU, DRAM, VGA, Boot Device LED) - ASUS Q-DIMM - Ai Charger+ - MemOK! USB 3.0 Boost featuring speedy USB 3.0 transmission - ASUS O.C. AI Suite 3 - Wi-Fi GO! Z87-EXPERT specifications summary ASUS Exclusive features ASUS EPU -

Z87-EXPERT User's Manual
Page 12
... I�n��te��l® LAN (RJ-45) port 6 x USB 3.0/2.0 ports (blue, 1 supports USB BIOS Flashback) 8-channel Audio I �N�:�A��d�ju�s��ta�b��le��C�... up to 300MHz at 0.1MHz increment Overclocking Protection - ASUS C.P.R.(CPU Parameter Recall) 1 x PS/2 Keyboard/mouse combo port 1 x HDMI port 1 x DVI 1 x RGB 1 x Thunderbolt port 2 x ASUS Wi-Fi GO! Z87-EXPERT specifications summary ASUS exclusive overclocking features Rear Panel I/O Ports Internal I/O connectors...
... I�n��te��l® LAN (RJ-45) port 6 x USB 3.0/2.0 ports (blue, 1 supports USB BIOS Flashback) 8-channel Audio I �N�:�A��d�ju�s��ta�b��le��C�... up to 300MHz at 0.1MHz increment Overclocking Protection - ASUS C.P.R.(CPU Parameter Recall) 1 x PS/2 Keyboard/mouse combo port 1 x HDMI port 1 x DVI 1 x RGB 1 x Thunderbolt port 2 x ASUS Wi-Fi GO! Z87-EXPERT specifications summary ASUS exclusive overclocking features Rear Panel I/O Ports Internal I/O connectors...

Z87-EXPERT User's Manual
Page 13
x 9.6 in . xiii Z87-EXPERT specifications summary Internal I/O connectors BIOS features Manageability Support DVD contents Form factor 1 x DirectKey button 1 x DRCT (DirectKey) connector 1 x BIOS Flashback button 1 x EPU switch 1 x TPU switch (advanced two-stage adjustments) 1 x Power-on switch 64 Mb Flash ROM, UEFI AMI BIOS, PnP, DMI2.7, WfM2.0, SM BIOS 2.7, ACPI 5.0, Multi-language BIOS, ASUS EZ Flash 2, ASUS CrashFree BIOS 3, My Favorites, Quick Note...
x 9.6 in . xiii Z87-EXPERT specifications summary Internal I/O connectors BIOS features Manageability Support DVD contents Form factor 1 x DirectKey button 1 x DRCT (DirectKey) connector 1 x BIOS Flashback button 1 x EPU switch 1 x TPU switch (advanced two-stage adjustments) 1 x Power-on switch 64 Mb Flash ROM, UEFI AMI BIOS, PnP, DMI2.7, WfM2.0, SM BIOS 2.7, ACPI 5.0, Multi-language BIOS, ASUS EZ Flash 2, ASUS CrashFree BIOS 3, My Favorites, Quick Note...

Z87-EXPERT User's Manual
Page 19
...), significantly increases a USB device's transfer speed up to regularly check for any user interaction. USB BIOS Flashback USB BIOS Flashback offers a hassle-free updating solution for compatible USB 3.0 peripherals without entering the existing BIOS or operating system. Chapter 1 ASUS Z87-EXPERT 1-3 It automatically accelerates data speeds for your smart device's touch panel as smartphones, tablets and...
...), significantly increases a USB device's transfer speed up to regularly check for any user interaction. USB BIOS Flashback USB BIOS Flashback offers a hassle-free updating solution for compatible USB 3.0 peripherals without entering the existing BIOS or operating system. Chapter 1 ASUS Z87-EXPERT 1-3 It automatically accelerates data speeds for your smart device's touch panel as smartphones, tablets and...

Z87-EXPERT User's Manual
Page 20
...with difficult POST situations. AI Suite 3 With its elegant appearance. 1.1.5 ASUS EZ DIY ASUS UEFI BIOS (EZ Mode) ASUS UEFI BIOS, a UEFI compliant architecture, offers the first mouse-controlled intuitive graphical BIOS interface that offers you a noiseless PC environment. The heatsink design also lowers... the temperature of the chipset and power phase area through high efficient heat-exchange. ASUS UEFI BIOS includes the following new features: • New My Favorite function allows you to quickly access the frequently used items...
...with difficult POST situations. AI Suite 3 With its elegant appearance. 1.1.5 ASUS EZ DIY ASUS UEFI BIOS (EZ Mode) ASUS UEFI BIOS, a UEFI compliant architecture, offers the first mouse-controlled intuitive graphical BIOS interface that offers you a noiseless PC environment. The heatsink design also lowers... the temperature of the chipset and power phase area through high efficient heat-exchange. ASUS UEFI BIOS includes the following new features: • New My Favorite function allows you to quickly access the frequently used items...

Z87-EXPERT User's Manual
Page 39
RiDATA E304459CB1AG32Cf 9 - Load the X.M.P. Chapter 1 ASUS Z87-EXPERT 1-23 SAMSUNG K4B2G0846C - - NANYA NT5CB128M8AN- - - Single-sided DS - We suggest that you install the module into A2 slot. (2) Supports two ...S-POWER NT5CB128M8ANCG 20YT3NG S-POWER 20YT3NG Team Transcend MICRON T3D2568LT-13 TK963EBF3 D9QBJ - - 9-9-9- - 24 9-9-9- - 24 - - - - - - settings in the BIOS for the hyper DIMM support. • Visit the ASUS website for better compatibility. (4) Supports four (4) modules inserted into both the yellow slots and dark brown slots as two pairs of...
RiDATA E304459CB1AG32Cf 9 - Load the X.M.P. Chapter 1 ASUS Z87-EXPERT 1-23 SAMSUNG K4B2G0846C - - NANYA NT5CB128M8AN- - - Single-sided DS - We suggest that you install the module into A2 slot. (2) Supports two ...S-POWER NT5CB128M8ANCG 20YT3NG S-POWER 20YT3NG Team Transcend MICRON T3D2568LT-13 TK963EBF3 D9QBJ - - 9-9-9- - 24 9-9-9- - 24 - - - - - - settings in the BIOS for the hyper DIMM support. • Visit the ASUS website for better compatibility. (4) Supports four (4) modules inserted into both the yellow slots and dark brown slots as two pairs of...

Z87-EXPERT User's Manual
Page 43
...until the DRAM_LED starts blinking to begin automatic memory compatibility tuning for successful boot. • Refer to section 1.2.8 Onboard LEDs for the system to BIOS overclocking, press the MemOK! function. • The MemOK! It takes about 5-10 seconds. • If your system fails to memory tuning ...30 seconds for the exact location of the DRAM_LED. • The DRAM_LED also lights up due to test one set of failsafe settings. ASUS Z87-EXPERT 1-27 Chapter 1 If the test fails, the system reboots and test the next set is not properly installed. The blinking speed of ...
...until the DRAM_LED starts blinking to begin automatic memory compatibility tuning for successful boot. • Refer to section 1.2.8 Onboard LEDs for the system to BIOS overclocking, press the MemOK! function. • The MemOK! It takes about 5-10 seconds. • If your system fails to memory tuning ...30 seconds for the exact location of the DRAM_LED. • The DRAM_LED also lights up due to test one set of failsafe settings. ASUS Z87-EXPERT 1-27 Chapter 1 If the test fails, the system reboots and test the next set is not properly installed. The blinking speed of ...

Z87-EXPERT User's Manual
Page 44
Press the DirectKey button again or the Power-on button to reboot and enter the BIOS directly. • Turn off your system. • Refer to section 3.8 Boot Menu for details about setting the DirectKey default function. It also allows you to ... system to go to press the key during boot-up. Chapter 1 1-28 Chapter 1: Product introduction With DirectKey, you reboot your system and conveniently enter the BIOS during POST. 3. DirectKey button This feature allows your system will shut down. Ensure to save your data before using the power-on and you press...
Press the DirectKey button again or the Power-on button to reboot and enter the BIOS directly. • Turn off your system. • Refer to section 3.8 Boot Menu for details about setting the DirectKey default function. It also allows you to ... system to go to press the key during boot-up. Chapter 1 1-28 Chapter 1: Product introduction With DirectKey, you reboot your system and conveniently enter the BIOS during POST. 3. DirectKey button This feature allows your system will shut down. Ensure to save your data before using the power-on and you press...

Z87-EXPERT User's Manual
Page 45
Refer to section 1.2.8 Onboard LEDs for the exact location of the TPU LED. • If you have made. ASUS Z87-EXPERT 1-29 Chapter 1 However, the system will be activated after the next system bootup. • You may use the last setting you enable this switch when ... this switch under Windows® OS environment, the TPU function will use the 4-Way Optimization and TPU feature in the AI Suite 3 application, adjust the BIOS setup program or enable the TPU switch at the same time.
Refer to section 1.2.8 Onboard LEDs for the exact location of the TPU LED. • If you have made. ASUS Z87-EXPERT 1-29 Chapter 1 However, the system will be activated after the next system bootup. • You may use the last setting you enable this switch when ... this switch under Windows® OS environment, the TPU function will use the 4-Way Optimization and TPU feature in the AI Suite 3 application, adjust the BIOS setup program or enable the TPU switch at the same time.

Z87-EXPERT User's Manual
Page 46
... 1: Product introduction However, the system will be activated after the next system bootup. • You may change the EPU settings in the software application or BIOS setup program and enable the EPU function at the same time. 5.
... 1: Product introduction However, the system will be activated after the next system bootup. • You may change the EPU settings in the software application or BIOS setup program and enable the EPU function at the same time. 5.

Z87-EXPERT User's Manual
Page 47
...battery powers the RAM data in CMOS. Turn OFF the computer and unplug the power cord. 2. Hold down and reboot the system so the BIOS can clear the CMOS memory of date, time, and system setup parameters by erasing the CMOS RTC RAM data. For system failure due to...the CMOS RTC RAM data. Shut down the key during the boot process and enter BIOS setup to overclocking, use the C.P.R. (CPU Parameter Recall) feature. To erase the RTC RAM: 1. Keep the cap on pins 2-3 for about 5-10 seconds, then move the jumper again to overclocking. ASUS Z87-EXPERT 1-31 Chapter 1 function.
...battery powers the RAM data in CMOS. Turn OFF the computer and unplug the power cord. 2. Hold down and reboot the system so the BIOS can clear the CMOS memory of date, time, and system setup parameters by erasing the CMOS RTC RAM data. For system failure due to...the CMOS RTC RAM data. Shut down the key during the boot process and enter BIOS setup to overclocking, use the C.P.R. (CPU Parameter Recall) feature. To erase the RTC RAM: 1. Keep the cap on pins 2-3 for about 5-10 seconds, then move the jumper again to overclocking. ASUS Z87-EXPERT 1-31 Chapter 1 function.

Z87-EXPERT User's Manual
Page 55
... the manual bundled in the BIOS to [AHCI Mode] by default. If you can create a RAID 0, 1, 5, and 10 configuration with the Intel® Rapid Storage Technology through the onboard Intel® Z87 chipset. Refer to section 3.6.3 SATA Configuration for details. • Before creating a RAID set to [RAID Mode]. ASUS Z87-EXPERT 1-39 If you installed...
... the manual bundled in the BIOS to [AHCI Mode] by default. If you can create a RAID 0, 1, 5, and 10 configuration with the Intel® Rapid Storage Technology through the onboard Intel® Z87 chipset. Refer to section 3.6.3 SATA Configuration for details. • Before creating a RAID set to [RAID Mode]. ASUS Z87-EXPERT 1-39 If you installed...

Z87-EXPERT User's Manual
Page 60
... you want to connect a high-definition or an AC'97 front panel audio module to this connector, set the Front Panel Type item in the BIOS setup to avail of the front panel audio I /O module that you connect a high-definition front panel audio module to this connector to [HD] or [AC97...
... you want to connect a high-definition or an AC'97 front panel audio module to this connector, set the Front Panel Type item in the BIOS setup to avail of the front panel audio I /O module that you connect a high-definition front panel audio module to this connector to [HD] or [AC97...

Z87-EXPERT User's Manual
Page 75
Chapter 2 ASUS Z87-EXPERT 2-11 IO Shield • Ensure that the ASUS 2T2R dual band Wi-Fi antenna is securely installed to the Wi-Fi ports. • Ensure to the Wi-Fi ports at the back of the chassis. software. KY IN LINE CTR BASS FRONT REAR SPK MIC IN POWER eSATA 6G USB3.0 S/PDIF USB BIOS Flashback USB3.0 2.1.9 Wi-Fi antenna installation Installing the ASUS 2T2R dual band W-Fi antenna Connect the bundled ASUS 2T2R dual band Wi-Fi antenna connector to install the Wi-Fi driver before installing the Wi-Fi GO!
Chapter 2 ASUS Z87-EXPERT 2-11 IO Shield • Ensure that the ASUS 2T2R dual band Wi-Fi antenna is securely installed to the Wi-Fi ports. • Ensure to the Wi-Fi ports at the back of the chassis. software. KY IN LINE CTR BASS FRONT REAR SPK MIC IN POWER eSATA 6G USB3.0 S/PDIF USB BIOS Flashback USB3.0 2.1.9 Wi-Fi antenna installation Installing the ASUS 2T2R dual band W-Fi antenna Connect the bundled ASUS 2T2R dual band Wi-Fi antenna connector to install the Wi-Fi driver before installing the Wi-Fi GO!

Z87-EXPERT User's Manual
Page 76
... 2 2-12 Chapter 2: Basic installation Follow the onscreen instructions to automatically download the latest BIOS version. 4. Press the BIOS Flashback button for three seconds, and the BIOS is completed. Simply insert a USB storage device to use USB BIOS Flashback: 1. Launch the USB BIOS Flashback Wizard to complete the installation. 2. We recommend you to the optical drive...
... 2 2-12 Chapter 2: Basic installation Follow the onscreen instructions to automatically download the latest BIOS version. 4. Press the BIOS Flashback button for three seconds, and the BIOS is completed. Simply insert a USB storage device to use USB BIOS Flashback: 1. Launch the USB BIOS Flashback Wizard to complete the installation. 2. We recommend you to the optical drive...


