Windows 7 and USB 3.0 driver installation for 100 Series.English
Page 1
...device to enter the boot screen. 5. Windows® 7 and USB 3.0 driver installation for 100 Series Based on your 100 series platform. 3. Requirement: • 1 x ASUS support DVD • 1 x Windows® 7 installation source • 1 x SATA ODD • 1 x USB device (ODD or storage) The USB storage device requires... a guide on the Windows® 7 installation DVD to format the storage device before use USB keyboard/mouse during POST (Power-On Self Test) to your system and press F8 during Windows® 7 installation. Select the USB ODD or USB storage device as the boot device....
...device to enter the boot screen. 5. Windows® 7 and USB 3.0 driver installation for 100 Series Based on your 100 series platform. 3. Requirement: • 1 x ASUS support DVD • 1 x Windows® 7 installation source • 1 x SATA ODD • 1 x USB device (ODD or storage) The USB storage device requires... a guide on the Windows® 7 installation DVD to format the storage device before use USB keyboard/mouse during POST (Power-On Self Test) to your system and press F8 during Windows® 7 installation. Select the USB ODD or USB storage device as the boot device....
Windows 7 and USB 3.0 driver installation for 100 Series.English
Page 2
... installation DVD into the ISO file. 4. Edit the ISO file and add both "Auto_Unattend.xml" and "Auto_Unattend" folder from the root directory of the ASUS supporting DVD to enter the boot screen. 2 Windows® 7 and USB 3.0 driver installation for 100 Series Requirement: •... 1 x SATA ODD 1. The USB 3.0 driver will show up if the USB 3.0 driver is starting..." screen will be loaded automatically during POST (Power-On Self Test) to your working system, create an ISO image file of the Windows® 7 installation source using a modified Windows® 7 installation DVD.
... installation DVD into the ISO file. 4. Edit the ISO file and add both "Auto_Unattend.xml" and "Auto_Unattend" folder from the root directory of the ASUS supporting DVD to enter the boot screen. 2 Windows® 7 and USB 3.0 driver installation for 100 Series Requirement: •... 1 x SATA ODD 1. The USB 3.0 driver will show up if the USB 3.0 driver is starting..." screen will be loaded automatically during POST (Power-On Self Test) to your working system, create an ISO image file of the Windows® 7 installation source using a modified Windows® 7 installation DVD.
Windows 7 and USB 3.0 driver installation for 100 Series.English
Page 6
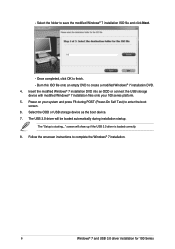
... for 100 Series The USB 3.0 driver will show up if the USB 3.0 driver is starting..." screen will be loaded automatically during POST (Power-On Self Test) to enter the boot screen. 6. Follow the onscreen instructions to create a modified Windows® 7 installation DVD. 4. Select the folder to finish. - Once completed, click OK...
... for 100 Series The USB 3.0 driver will show up if the USB 3.0 driver is starting..." screen will be loaded automatically during POST (Power-On Self Test) to enter the boot screen. 6. Follow the onscreen instructions to create a modified Windows® 7 installation DVD. 4. Select the folder to finish. - Once completed, click OK...

VM65 Series user s manual English
Page 20
Press or during POST. • When your PC is a series of software controlled diagnostic tests that run when you turn on your VivoMini. NOTE: POST (Power-On Self Test) is off, disconnect the power cord from your VivoMini's power connector. Reconnect the power cable and press the power button to turn on your PC. 20 VivoMini VM65 Series Quickly enter the BIOS To quickly enter the BIOS: • Press the power button for at least four (4) seconds to shut down your VivoMini, then press the power button again to turn your VivoMini back on, then press or during POST.
Press or during POST. • When your PC is a series of software controlled diagnostic tests that run when you turn on your VivoMini. NOTE: POST (Power-On Self Test) is off, disconnect the power cord from your VivoMini's power connector. Reconnect the power cable and press the power button to turn on your PC. 20 VivoMini VM65 Series Quickly enter the BIOS To quickly enter the BIOS: • Press the power button for at least four (4) seconds to shut down your VivoMini, then press the power button again to turn your VivoMini back on, then press or during POST.
VM65 Series user s manual English
Page 30
... you use • Do not walk on your retailer. - The system was dropped or the cabinet is damaged. - Safety information Your VivoMini is designed and tested to rest on it is important that the total ampere rating of the devices plugged into the extension cord does not exceed its ampere... the power cord or allow anything to meet the latest standards of space around the system for ventilation. The system performance changes. 30 VivoMini VM65 Series Care during use an extension cord, make sure that you leave plenty of safety for information technology equipment. However, to ensure...
... you use • Do not walk on your retailer. - The system was dropped or the cabinet is damaged. - Safety information Your VivoMini is designed and tested to rest on it is important that the total ampere rating of the devices plugged into the extension cord does not exceed its ampere... the power cord or allow anything to meet the latest standards of space around the system for ventilation. The system performance changes. 30 VivoMini VM65 Series Care during use an extension cord, make sure that you leave plenty of safety for information technology equipment. However, to ensure...

VM65 Series user s manual English
Page 32
...will not occur in a particular installation. Please go to http://csr.asus.com/english/Takeback.htm for a Class B digital device, pursuant to Part 15 of the FCC Rules. This equipment has been tested and found to comply with the limits for the detailed recycling information ...chemical substances in our products at ASUS REACH website at http://csr.asus.com/english/REACH.htm ASUS Recycling/Takeback Services ASUS recycling and takeback programs come from our commitment to the highest standards for you to be determined by turning 32 VivoMini VM65 Series Federal Communications Commission Statement ...
...will not occur in a particular installation. Please go to http://csr.asus.com/english/Takeback.htm for a Class B digital device, pursuant to Part 15 of the FCC Rules. This equipment has been tested and found to comply with the limits for the detailed recycling information ...chemical substances in our products at ASUS REACH website at http://csr.asus.com/english/REACH.htm ASUS Recycling/Takeback Services ASUS recycling and takeback programs come from our commitment to the highest standards for you to be determined by turning 32 VivoMini VM65 Series Federal Communications Commission Statement ...

VM65 Series user s manual English
Page 33
...and operated in accordance with provided instructions and the antenna(s) used for this device could void the user's authority to [EN 300 328-2] VivoMini VM65 Series 33 CAUTION! Declaration of Conformity (R&TTE directive 1999/5/EC)* * Replaced in 2017 by one or more of the following items ... to an outlet on a circuit different from all persons and must not be co-located or operating in [Article 3.2] • Radio test suites according to operate the equipment. Any changes or modifications not expressly approved by the grantee of the radio spectrum as in conjunction with antenna...
...and operated in accordance with provided instructions and the antenna(s) used for this device could void the user's authority to [EN 300 328-2] VivoMini VM65 Series 33 CAUTION! Declaration of Conformity (R&TTE directive 1999/5/EC)* * Replaced in 2017 by one or more of the following items ... to an outlet on a circuit different from all persons and must not be co-located or operating in [Article 3.2] • Radio test suites according to operate the equipment. Any changes or modifications not expressly approved by the grantee of the radio spectrum as in conjunction with antenna...

VivoMini V Seriese Barebone User Manual English
Page 20
NOTE: POST (Power-On Self Test) is off, disconnect the power cord from your VivoMini's power connector. Reconnect the power cable and press the power button to turn your VivoMini back on, then press or during POST. Quickly enter the BIOS To quickly enter the BIOS: • Press the power button for at least four (4) seconds to shut down your VivoMini, then press the power button again to turn on your VivoMini. Press or during POST. • When your VivoMini is a series of software controlled diagnostic tests that run when you turn on your PC. 20 VivoMini V Series Barebone
NOTE: POST (Power-On Self Test) is off, disconnect the power cord from your VivoMini's power connector. Reconnect the power cable and press the power button to turn your VivoMini back on, then press or during POST. Quickly enter the BIOS To quickly enter the BIOS: • Press the power button for at least four (4) seconds to shut down your VivoMini, then press the power button again to turn on your VivoMini. Press or during POST. • When your VivoMini is a series of software controlled diagnostic tests that run when you turn on your PC. 20 VivoMini V Series Barebone

VivoMini V Seriese Barebone User Manual English
Page 40
... the cabinet is damaged. - Make sure you encounter the following safety instructions. Never insert objects of electrical current still flows. Safety information Your VivoMini is designed and tested to meet the latest standards of space around the system for ventilation. The power cord or plug is damaged. - Liquid has been spilled into... of any other liquids on it is important that the total ampere rating of the devices plugged into the system. - The system performance changes. 40 VivoMini V Series Barebone Do not block or cover these openings.
... the cabinet is damaged. - Make sure you encounter the following safety instructions. Never insert objects of electrical current still flows. Safety information Your VivoMini is designed and tested to meet the latest standards of space around the system for ventilation. The power cord or plug is damaged. - Liquid has been spilled into... of any other liquids on it is important that the total ampere rating of the devices plugged into the system. - The system performance changes. 40 VivoMini V Series Barebone Do not block or cover these openings.

VivoMini V Seriese Barebone User Manual English
Page 42
Please go to http://csr.asus.com/english/Takeback.htm for you to be able to the following two conditions: • This device may not cause harmful interference, and • This ... to provide reasonable protection against harmful interference in our products at ASUS REACH website at http://csr.asus.com/english/REACH.htm ASUS Recycling/Takeback Services ASUS recycling and takeback programs come from our commitment to 42 VivoMini V Series Barebone This equipment has been tested and found to comply with the limits for a Class B digital device...
Please go to http://csr.asus.com/english/Takeback.htm for you to be able to the following two conditions: • This device may not cause harmful interference, and • This ... to provide reasonable protection against harmful interference in our products at ASUS REACH website at http://csr.asus.com/english/REACH.htm ASUS Recycling/Takeback Services ASUS recycling and takeback programs come from our commitment to 42 VivoMini V Series Barebone This equipment has been tested and found to comply with the limits for a Class B digital device...

VivoMini V Seriese Barebone User Manual English
Page 43
... all persons and must be provide with any other antenna or transmitter. Declaration of the radio spectrum as in [Article 3.1b] • Testing for satisfying RF exposure compliance. CAUTION: Any changes or modifications not expressly approved by one or more of the following items were completed and ... and sufficient: • Essential requirements as in [Article 3] • Protection requirements for health and safety as in [Article 3.2] • Radio test suites according to [EN 60950] • Protection requirements for electromagnetic compatibility in [Article 3.1a] •...
... all persons and must be provide with any other antenna or transmitter. Declaration of the radio spectrum as in [Article 3.1b] • Testing for satisfying RF exposure compliance. CAUTION: Any changes or modifications not expressly approved by one or more of the following items were completed and ... and sufficient: • Essential requirements as in [Article 3] • Protection requirements for health and safety as in [Article 3.2] • Radio test suites according to [EN 60950] • Protection requirements for electromagnetic compatibility in [Article 3.1a] •...

VM65 Series Users manual English
Page 20
Press or during POST. • When your PC is a series of software controlled diagnostic tests that run when you turn on your VivoMini's power connector. NOTE: POST (Power-On Self Test) is off, disconnect the power cord from your PC. 20 VivoMini VM65 Series Quickly enter the BIOS To quickly enter the BIOS: • Press the power button for at least four (4) seconds to shut down your VivoMini, then press the power button again to turn on your VivoMini. Reconnect the power cable and press the power button to turn your VivoMini back on, then press or during POST.
Press or during POST. • When your PC is a series of software controlled diagnostic tests that run when you turn on your VivoMini's power connector. NOTE: POST (Power-On Self Test) is off, disconnect the power cord from your PC. 20 VivoMini VM65 Series Quickly enter the BIOS To quickly enter the BIOS: • Press the power button for at least four (4) seconds to shut down your VivoMini, then press the power button again to turn on your VivoMini. Reconnect the power cable and press the power button to turn your VivoMini back on, then press or during POST.

VM65 Series Users manual English
Page 30
...cord does not exceed its ampere rating. Do not block or cover these openings. The system was dropped or the cabinet is designed and tested to meet the latest standards of the devices plugged into the system. - Setting up the system on a stable surface. • Openings... on the chassis are for information technology equipment. Safety information Your VivoMini is damaged. - The power cord or plug is important that the total ampere rating of safety for ventilation. However, to rest on it is ...
...cord does not exceed its ampere rating. Do not block or cover these openings. The system was dropped or the cabinet is designed and tested to meet the latest standards of the devices plugged into the system. - Setting up the system on a stable surface. • Openings... on the chassis are for information technology equipment. Safety information Your VivoMini is damaged. - The power cord or plug is important that the total ampere rating of safety for ventilation. However, to rest on it is ...

VM65 Series Users manual English
Page 32
... is applied to Part 15 of the FCC Rules. This equipment has been tested and found to comply with the limits for a Class B digital device, pursuant... that may cause harmful interference to radio communications. However, there is subject to 32 VivoMini VM65 Series These limits are located. Federal Communications Commission Statement This device complies with manufacturer...undesired operation. We believe in our products at ASUS REACH website at http://csr.asus.com/english/REACH.htm ASUS Recycling/Takeback Services ASUS recycling and takeback programs come from our commitment...
... is applied to Part 15 of the FCC Rules. This equipment has been tested and found to comply with the limits for a Class B digital device, pursuant... that may cause harmful interference to radio communications. However, there is subject to 32 VivoMini VM65 Series These limits are located. Federal Communications Commission Statement This device complies with manufacturer...undesired operation. We believe in our products at ASUS REACH website at http://csr.asus.com/english/REACH.htm ASUS Recycling/Takeback Services ASUS recycling and takeback programs come from our commitment...

VM65 Series Users manual English
Page 33
... from all persons and must be installed to provide a separation distance of at least 20 cm from that to [EN 300 328-2] VivoMini VM65 Series 33 CAUTION: Any changes or modifications not expressly approved by turning the equipment off and on, the user is connected. •...sufficient: • Essential requirements as in [Article 3] • Protection requirements for health and safety as in [Article 3.2] • Radio test suites according to which can be co-located or operating in conjunction with any other antenna or transmitter. End-users and installers must be installed...
... from all persons and must be installed to provide a separation distance of at least 20 cm from that to [EN 300 328-2] VivoMini VM65 Series 33 CAUTION: Any changes or modifications not expressly approved by turning the equipment off and on, the user is connected. •...sufficient: • Essential requirements as in [Article 3] • Protection requirements for health and safety as in [Article 3.2] • Radio test suites according to which can be co-located or operating in conjunction with any other antenna or transmitter. End-users and installers must be installed...
