
User Manual
Page 7
With these features, you can enjoy the convenience and delightful visual experience that enhance your retailer immediately. The latest widescreen LED monitor from ASUS provides a crisper, broader, and brighter display, plus a host of features that the VW199 Series brings you for the following items...: LED monitor Monitor stand and base User manual CD Quick start guide Warranty card Power cord VGA cable Audio cable (VW199T/S) If any of the above items is damaged or missing, contact your viewing experience. Thank you ! 1.2 Package contents Check your VW199...
With these features, you can enjoy the convenience and delightful visual experience that enhance your retailer immediately. The latest widescreen LED monitor from ASUS provides a crisper, broader, and brighter display, plus a host of features that the VW199 Series brings you for the following items...: LED monitor Monitor stand and base User manual CD Quick start guide Warranty card Power cord VGA cable Audio cable (VW199T/S) If any of the above items is damaged or missing, contact your viewing experience. Thank you ! 1.2 Package contents Check your VW199...

User Manual
Page 8
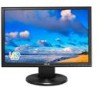
Adjust the monitor to the angle that you cover the table surface with the monitor. We recommend that is most comfortable. Connect the base with soft cloth to prevent damage to the monitor. 1 2 1.4 Monitor introduction 1.4.1 Front of the LED monitor 1.4.1.1 VW199T/VW199S 123 456 1-2 Chapter 1: Product Introduction 1.3 Assembling the monitor To assemble the monitor: 1. A click indicates that the base has been connected successfully. 2.
Adjust the monitor to the angle that you cover the table surface with the monitor. We recommend that is most comfortable. Connect the base with soft cloth to prevent damage to the monitor. 1 2 1.4 Monitor introduction 1.4.1 Front of the LED monitor 1.4.1.1 VW199T/VW199S 123 456 1-2 Chapter 1: Product Introduction 1.3 Assembling the monitor To assemble the monitor: 1. A click indicates that the base has been connected successfully. 2.

User Manual
Page 11
6. Power Indicator • The color definition of the LED monitor Screw holes for VESA Wall Mount Rear connectors 1 234 1 AC-IN port 2 Audio Line-in port (VW199T/S) 3 DVI port (VW199T/N) 4 VGA port ASUS LED Monitor VW199 Series 1-5 Status Blue Amber OFF Description ON Standby mode OFF 1.4.2 Rear of the power indicator is as the below table.
6. Power Indicator • The color definition of the LED monitor Screw holes for VESA Wall Mount Rear connectors 1 234 1 AC-IN port 2 Audio Line-in port (VW199T/S) 3 DVI port (VW199T/N) 4 VGA port ASUS LED Monitor VW199 Series 1-5 Status Blue Amber OFF Description ON Standby mode OFF 1.4.2 Rear of the power indicator is as the below table.

User Manual
Page 16
... Select System Setup Move Menu Exit 2-5 Chapter 3: General Instruction The adjusting range is from this main function. The adjusting range is from VGA or DVI (VW199T/N). The adjusting range is from 0 to 100 (Only available for VGA input). • Focus: Reduces Horizonal-line noise and Vertical-line noise of the image...
... Select System Setup Move Menu Exit 2-5 Chapter 3: General Instruction The adjusting range is from this main function. The adjusting range is from VGA or DVI (VW199T/N). The adjusting range is from 0 to 100 (Only available for VGA input). • Focus: Reduces Horizonal-line noise and Vertical-line noise of the image...

User Manual
Page 17
... OFF English 1/2 2/2 Move Menu Exit • Splendid Demo Mode: Activate the demo mode for the Splendid function. • Volume: Adjusts the Volume level of speakers. (VW199T/S). • ECO Mode: Turns the ECO Mode Function on or off. • OSD Setup: Adjusts the horizontal position (H-Position), vertical position (V-Position), OSD Timeout, DDD...
... OFF English 1/2 2/2 Move Menu Exit • Splendid Demo Mode: Activate the demo mode for the Splendid function. • Volume: Adjusts the Volume level of speakers. (VW199T/S). • ECO Mode: Turns the ECO Mode Function on or off. • OSD Setup: Adjusts the horizontal position (H-Position), vertical position (V-Position), OSD Timeout, DDD...

User Manual
Page 18
..."W (48.3 cm) 1440x900 250cd/m2 1000:1 170°/160° 16.7 M 5ms (Tr+Tf) D-Sub DVI(VW199T/N only) 1W x 2 (VW199T/ S only) -5° ~ +20° Yes (100 mm x 100 mm) 444x369.26x210 mm 496x416x139 mm 4.0 kg 5.2 kg AC 100~240V(Built-in ) Tilt VESA Wall Mounting ...
..."W (48.3 cm) 1440x900 250cd/m2 1000:1 170°/160° 16.7 M 5ms (Tr+Tf) D-Sub DVI(VW199T/N only) 1W x 2 (VW199T/ S only) -5° ~ +20° Yes (100 mm x 100 mm) 444x369.26x210 mm 496x416x139 mm 4.0 kg 5.2 kg AC 100~240V(Built-in ) Tilt VESA Wall Mounting ...

User Manual
Page 19
... none of the pins are bent. • Connect the computer with another available monitor to check if the computer is properly installed and activated. ASUS LED Monitor VW199 Series 2-8 The power LED lights amber and • Check if the monitor and the computer are bent. • Perform All... are in the image the monitor and the computer. • Move electrical devices that may cause electrical interference. No sound or sound is low (VW199T/S) • Ensure that the audio cable is too light or dark • Adjust the Contrast and Brightness settings via OSD (for VGA input only...
... none of the pins are bent. • Connect the computer with another available monitor to check if the computer is properly installed and activated. ASUS LED Monitor VW199 Series 2-8 The power LED lights amber and • Check if the monitor and the computer are bent. • Perform All... are in the image the monitor and the computer. • Move electrical devices that may cause electrical interference. No sound or sound is low (VW199T/S) • Ensure that the audio cable is too light or dark • Adjust the Contrast and Brightness settings via OSD (for VGA input only...