User Manual
Page 8
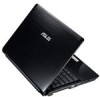
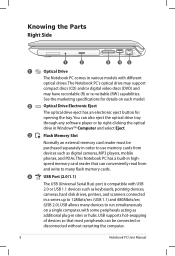
...(USB 2.0). See the marketing specifications for opening the tray. Optical Drive Electronic Eject The optical drive eject has an electronic eject button for details on a single computer, with different optical drives.The Notebook PC's optical drive may support compact discs (CD) and/or digital video discs (...memory card reader that can also eject the optical drive tray through any software player or by right-clicking the optical drive in various models with some peripherals acting as keyboards, pointing devices, cameras, hard disk drives, printers, and scanners connected in sites or hubs...
...(USB 2.0). See the marketing specifications for opening the tray. Optical Drive Electronic Eject The optical drive eject has an electronic eject button for details on a single computer, with different optical drives.The Notebook PC's optical drive may support compact discs (CD) and/or digital video discs (...memory card reader that can also eject the optical drive tray through any software player or by right-clicking the optical drive in various models with some peripherals acting as keyboards, pointing devices, cameras, hard disk drives, printers, and scanners connected in sites or hubs...
User Manual
Page 13
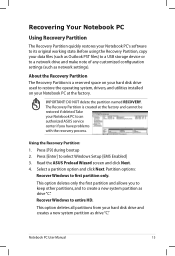
... The Recovery Partition is created at the factory. Press [F9] during bootup 2. This option deletes all partitions from your hard disk drive and creates a new system partition as drive "C". DO NOT delete the partition named RECOVERY. Select a partition option and click Next. Recovering Your Notebook PC Using Recovery... and cannot be restored if deleted. Notebook PC User Manual 13 IMPORTANT! Recover Windows to its original working state. Read the ASUS Preload Wizard screen and click Next. 4. Take your data files (such as Outlook PST files) to a USB storage device or to ...
... The Recovery Partition is created at the factory. Press [F9] during bootup 2. This option deletes all partitions from your hard disk drive and creates a new system partition as drive "C". DO NOT delete the partition named RECOVERY. Select a partition option and click Next. Recovering Your Notebook PC Using Recovery... and cannot be restored if deleted. Notebook PC User Manual 13 IMPORTANT! Recover Windows to its original working state. Read the ASUS Preload Wizard screen and click Next. 4. Take your data files (such as Outlook PST files) to a USB storage device or to ...
User Manual
Page 14
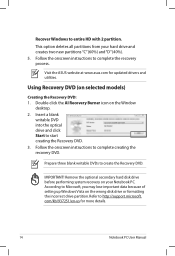
This option deletes all partitions from your Notebook PC. Visit the ASUS website at www.asus.com for more details. 14 Notebook PC User Manual Using Recovery DVD (on your hard drive and creates two new partitions "C" (60%) and "D" (40%). 5. Remove the optional secondary hard disk drive before performing system recovery on selected models) Creating the Recovery...
This option deletes all partitions from your Notebook PC. Visit the ASUS website at www.asus.com for more details. 14 Notebook PC User Manual Using Recovery DVD (on your hard drive and creates two new partitions "C" (60%) and "D" (40%). 5. Remove the optional secondary hard disk drive before performing system recovery on selected models) Creating the Recovery...
User Manual
Page 15
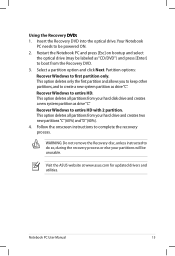
... partition as "CD/DVD") and press [Enter] to boot from your hard drive and creates two new partitions"C"(60%) and"D"(40%). 4. Insert the Recovery DVD into the optical drive.Your Notebook PC needs to be labeled as drive"C". Visit the ASUS website at www.asus.com for updated drivers and utilities. Using the Recovery D��...
... partition as "CD/DVD") and press [Enter] to boot from your hard drive and creates two new partitions"C"(60%) and"D"(40%). 4. Insert the Recovery DVD into the optical drive.Your Notebook PC needs to be labeled as drive"C". Visit the ASUS website at www.asus.com for updated drivers and utilities. Using the Recovery D��...


