
User's Manual for English Edition
Page 3
... the touchpad automatically 55 Storage Devices 56 Flash Memory Card Reader 56 Hard Disk Drive 57 Memory (RAM 60 Connections...61 Network Connection 61 Wireless LAN Connection (on selected models 63 Windows Wireless Network Connection 65 Bluetooth Wireless Connection 67 Instant On...70 USB Charger+...70 Appendix Optional Accessories A-2 Optional Connections A-2 Operating System and Software A-3 System BIOS Settings A-4 Common Problems and Solutions A-10 Recovering Your Notebook PC A-16 Using Recovery Partition A-16 Using Recovery DVD on your external DVD-ROM A-17 Internal Modem...
... the touchpad automatically 55 Storage Devices 56 Flash Memory Card Reader 56 Hard Disk Drive 57 Memory (RAM 60 Connections...61 Network Connection 61 Wireless LAN Connection (on selected models 63 Windows Wireless Network Connection 65 Bluetooth Wireless Connection 67 Instant On...70 USB Charger+...70 Appendix Optional Accessories A-2 Optional Connections A-2 Operating System and Software A-3 System BIOS Settings A-4 Common Problems and Solutions A-10 Recovering Your Notebook PC A-16 Using Recovery Partition A-16 Using Recovery DVD on your external DVD-ROM A-17 Internal Modem...
User's Manual for English Edition
Page 6
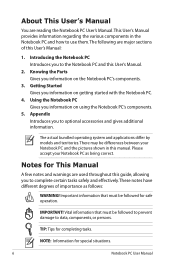
... tasks. Getting Started Gives you to optional accessories and gives additional information. Appendix Introduces you information on the Notebook PC's components. 3. Notes for safe operation. TIP: Tips for special situations. 6 Notebook PC User Manual There may be followed to prevent damage to complete certain tasks safely and effectively.These notes have different degrees of this User's Manual. 2. Introducing the Notebook PC Introduces...
... tasks. Getting Started Gives you to optional accessories and gives additional information. Appendix Introduces you information on the Notebook PC's components. 3. Notes for safe operation. TIP: Tips for special situations. 6 Notebook PC User Manual There may be followed to prevent damage to complete certain tasks safely and effectively.These notes have different degrees of this User's Manual. 2. Introducing the Notebook PC Introduces...

User's Manual for English Edition
Page 7
... any foreign objects into the Notebook PC. Seek servicing if the casing has been damaged. DO NOT operate during electrical storms. Battery safety warning: DO NOT throw the battery in this manual, refer all precautions and instructions. DO NOT press or touch the display panel. DO NOT short circuit the contacts. Disconnect the AC power and remove the battery pack(s) before cleaning. Except...
... any foreign objects into the Notebook PC. Seek servicing if the casing has been damaged. DO NOT operate during electrical storms. Battery safety warning: DO NOT throw the battery in this manual, refer all precautions and instructions. DO NOT press or touch the display panel. DO NOT short circuit the contacts. Disconnect the AC power and remove the battery pack(s) before cleaning. Except...
User's Manual for English Edition
Page 21
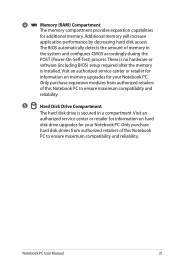
... and reliability. 5 Hard Disk Drive Compartment The hard disk drive is installed. Visit an authorized service center or retailer for information on hard disk drive upgrades for your Notebook PC. Notebook PC User Manual 21 Only purchase expansion modules from authorized retailers of this Notebook PC to ensure maximum compatibility and reliability. There is no hardware or software (including BIOS) setup required after the memory is secured in the system and configures CMOS accordingly during...
... and reliability. 5 Hard Disk Drive Compartment The hard disk drive is installed. Visit an authorized service center or retailer for information on hard disk drive upgrades for your Notebook PC. Notebook PC User Manual 21 Only purchase expansion modules from authorized retailers of this Notebook PC to ensure maximum compatibility and reliability. There is no hardware or software (including BIOS) setup required after the memory is secured in the system and configures CMOS accordingly during...

User's Manual for English Edition
Page 22
.... 22 Notebook PC User Manual Use this feature for video conferencing, voice narrations, or simple audio recordings. 3 USB Port 3.0 The USB (Universal Serial Bus) port is used to connect an external microphone or output signals from audio devices. Right Side 12 3 4 56 1 Headphone Output Jack The stereo headphone jack (1/8 inch) is compatible with some peripherals acting as keyboards, pointing devices, cameras, hard disk drives, printers, and scanners connected in a series up to 4.8Gbits/sec (USB 3.0), 480Mbits/sec (USB 2.0), and...
.... 22 Notebook PC User Manual Use this feature for video conferencing, voice narrations, or simple audio recordings. 3 USB Port 3.0 The USB (Universal Serial Bus) port is used to connect an external microphone or output signals from audio devices. Right Side 12 3 4 56 1 Headphone Output Jack The stereo headphone jack (1/8 inch) is compatible with some peripherals acting as keyboards, pointing devices, cameras, hard disk drives, printers, and scanners connected in a series up to 4.8Gbits/sec (USB 3.0), 480Mbits/sec (USB 2.0), and...

User's Manual for English Edition
Page 23
... audio on a single cable. It transmits all -digital audio/video interface between any audio/video source, such as a set-top box, DVD player, and A/V receiver and an audio and/or video monitor, such as a digital television (DTV). Power supplied through this jack. Some may become warm to sound an alarm when moved. The adapter may also include a motion detector to hot when in use the supplied power adapter. Notebook PC User Manual...
... audio on a single cable. It transmits all -digital audio/video interface between any audio/video source, such as a set-top box, DVD player, and A/V receiver and an audio and/or video monitor, such as a digital television (DTV). Power supplied through this jack. Some may become warm to sound an alarm when moved. The adapter may also include a motion detector to hot when in use the supplied power adapter. Notebook PC User Manual...

User's Manual for English Edition
Page 24
... (USB 1.1). USB allows many devices to a local network. Left Side 1 23 4 5 1 Display (Monitor) Output The 15-pin D-sub monitor port supports a standard VGA-compatible device such as a monitor or projector to allow viewing on a larger external display. 2 LAN Port The RJ-45 LAN port with eight pins is compatible with some peripherals acting as keyboards, pointing devices, cameras, hard disk drives, printers, and scanners connected in a series up to charge mobile devices via your ASUS Notebook PC's USB charge port. 24 Notebook PC User Manual
... (USB 1.1). USB allows many devices to a local network. Left Side 1 23 4 5 1 Display (Monitor) Output The 15-pin D-sub monitor port supports a standard VGA-compatible device such as a monitor or projector to allow viewing on a larger external display. 2 LAN Port The RJ-45 LAN port with eight pins is compatible with some peripherals acting as keyboards, pointing devices, cameras, hard disk drives, printers, and scanners connected in a series up to charge mobile devices via your ASUS Notebook PC's USB charge port. 24 Notebook PC User Manual
User's Manual for English Edition
Page 32
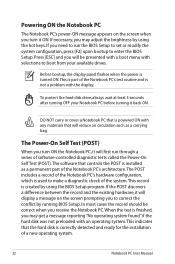
... adjust the brightness by using the hot keys. This indicates that will first run the BIOS Setup to set or modify the system configuration, press [F2] upon bootup to make a diagnostic check of a new operating system. 32 Notebook PC User Manual Press [ESC] and you will display a message on the screen when you turn ON the Notebook PC, it ON. When the test is installed as a carrying bag. To protect the hard disk drive...
... adjust the brightness by using the hot keys. This indicates that will first run the BIOS Setup to set or modify the system configuration, press [F2] upon bootup to make a diagnostic check of a new operating system. 32 Notebook PC User Manual Press [ESC] and you will display a message on the screen when you turn ON the Notebook PC, it ON. When the test is installed as a carrying bag. To protect the hard disk drive...

User's Manual for English Edition
Page 39
... the Windows button and the arrowhead next to the lock icon to see this option.You can also use the keyboard shortcut [Fn F1] to activate this mode. Recover by pressing the power button. (NOTE: The power indicator will blink in this mode.) Notebook PC User Manual 39 Hibernate saves more power compared to Sleep. Because RAM is the same as Suspend-toRAM (STR). Recover by pressing any keyboard key except [Fn]. (NOTE: The power indicator...
... the Windows button and the arrowhead next to the lock icon to see this option.You can also use the keyboard shortcut [Fn F1] to activate this mode. Recover by pressing the power button. (NOTE: The power indicator will blink in this mode.) Notebook PC User Manual 39 Hibernate saves more power compared to Sleep. Because RAM is the same as Suspend-toRAM (STR). Recover by pressing any keyboard key except [Fn]. (NOTE: The power indicator...
User's Manual for English Edition
Page 41
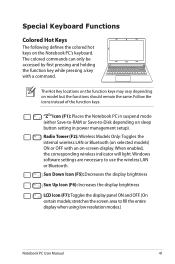
stretches the screen area to use the wireless LAN or Bluetooth. When enabled, the corresponding wireless indicator will light. The Hot Key locations on the function keys may vary depending on sleep button setting in power management setup). "ZZ" Icon (F1): Places the Notebook PC in suspend mode (either Save-to-RAM or Save-to-Disk depending on model but the functions should remain the same. Radio Tower (F2): Wireless Models Only:Toggles the internal wireless LAN or Bluetooth (on selected models) ON or...
stretches the screen area to use the wireless LAN or Bluetooth. When enabled, the corresponding wireless indicator will light. The Hot Key locations on the function keys may vary depending on sleep button setting in power management setup). "ZZ" Icon (F1): Places the Notebook PC in suspend mode (either Save-to-RAM or Save-to-Disk depending on model but the functions should remain the same. Radio Tower (F2): Wireless Models Only:Toggles the internal wireless LAN or Bluetooth (on selected models) ON or...

User's Manual for English Edition
Page 42
... UNLOCKED (enabled). LCD/Monitor Icons (F8): Toggles between the Notebook PC's LCD display and an external monitor in this series: LCD Only -> CRT Only (External Monitor) -> LCD + CRT Clone -> LCD + CRT Extend. (This function does not work in 256 Colors, select High Color in order to improve contrast, brightness, skin tone, and color saturation for red, green, and blue independently. Fn+V: Toggles "Life Frame" software application. 42 Notebook PC User Manual Locking the touchpad will light...
... UNLOCKED (enabled). LCD/Monitor Icons (F8): Toggles between the Notebook PC's LCD display and an external monitor in this series: LCD Only -> CRT Only (External Monitor) -> LCD + CRT Clone -> LCD + CRT Extend. (This function does not work in 256 Colors, select High Color in order to improve contrast, brightness, skin tone, and color saturation for red, green, and blue independently. Fn+V: Toggles "Life Frame" software application. 42 Notebook PC User Manual Locking the touchpad will light...
User's Manual for English Edition
Page 56
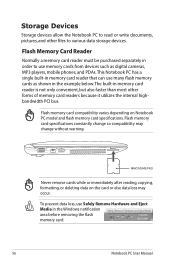
... reading, copying, formatting, or deleting data on Notebook PC model and flash memory card specifications. This Notebook PC has a single built-in memory card reader that can use many flash memory cards as digital cameras, MP3 players, mobile phones, and PDAs. To prevent data loss, use memory cards from devices such as shown in the example below.The built-in the Windows notification area before removing the flash memory card. 56 Notebook PC User Manual Flash memory card specifications constantly change so compatibility...
... reading, copying, formatting, or deleting data on Notebook PC model and flash memory card specifications. This Notebook PC has a single built-in memory card reader that can use many flash memory cards as digital cameras, MP3 players, mobile phones, and PDAs. To prevent data loss, use memory cards from devices such as shown in the example below.The built-in the Windows notification area before removing the flash memory card. 56 Notebook PC User Manual Flash memory card specifications constantly change so compatibility...
User's Manual for English Edition
Page 57
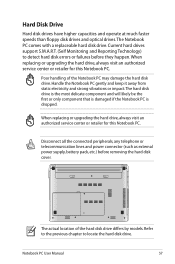
... to detect hard disk errors or failures before removing the hard disk cover. Notebook PC User Manual 57 Current hard drives support S.M.A.R.T. (Self Monitoring and Reporting Technology) to locate the hard disk drive. The actual location of the Notebook PC may damage the hard disk drive. Hard Disk Drive Hard disk drives have higher capacities and operate at much faster speeds than floppy disk drives and optical drives. Disconnect all the connected peripherals, any telephone or telecommunication lines and power connector (such as external power supply, battery pack...
... to detect hard disk errors or failures before removing the hard disk cover. Notebook PC User Manual 57 Current hard drives support S.M.A.R.T. (Self Monitoring and Reporting Technology) to locate the hard disk drive. The actual location of the Notebook PC may damage the hard disk drive. Hard Disk Drive Hard disk drives have higher capacities and operate at much faster speeds than floppy disk drives and optical drives. Disconnect all the connected peripherals, any telephone or telecommunication lines and power connector (such as external power supply, battery pack...
User's Manual for English Edition
Page 75
... add functionality not provided by the native operating system. The stability and compatibility of the factory pre-install. The choices and languages will depend on the hard drive at the factory.The recovery disc provides a comprehensive recovery solution that quickly restores the Notebook PC's operating system to its customers the choice of hardware and software support may not work until the device drivers and utilities are installed. If updates or replacement of the support disc is...
... add functionality not provided by the native operating system. The stability and compatibility of the factory pre-install. The choices and languages will depend on the hard drive at the factory.The recovery disc provides a comprehensive recovery solution that quickly restores the Notebook PC's operating system to its customers the choice of hardware and software support may not work until the device drivers and utilities are installed. If updates or replacement of the support disc is...
User's Manual for English Edition
Page 82
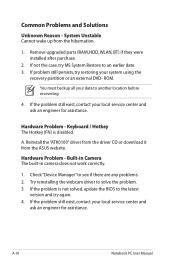
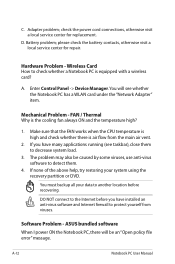
... must backup all your system using the recovery partition or an external DVD- Check "Device Manager" to solve the problem. 3. A-10 Notebook PC User Manual If not the case, try again. 4. Built-in Camera The built-in camera does not work correctly. 1. A. Hardware Problem - If the problem still exist, contact your local service center and ask an engineer for assistance. Try reinstalling the webcam driver to see if there are any problems. 2. Remove upgraded parts (RAM, HDD...
... must backup all your system using the recovery partition or an external DVD- Check "Device Manager" to solve the problem. 3. A-10 Notebook PC User Manual If not the case, try again. 4. Built-in Camera The built-in camera does not work correctly. 1. A. Hardware Problem - If the problem still exist, contact your local service center and ask an engineer for assistance. Try reinstalling the webcam driver to see if there are any problems. 2. Remove upgraded parts (RAM, HDD...
User's Manual for English Edition
Page 84
... whether the Notebook PC has a WLAN card under the "Network Adapter" item. You must backup all your system using the recovery partition or DVD. A-12 Notebook PC User Manual D. Hardware Problem - You will be caused by some viruses, use anti-virus software to detect them to check whether a Notebook PC is equipped with a wireless card? DO NOT connect to another location before you have installed an anti-virus software and Internet firewall to protect...
... whether the Notebook PC has a WLAN card under the "Network Adapter" item. You must backup all your system using the recovery partition or DVD. A-12 Notebook PC User Manual D. Hardware Problem - You will be caused by some viruses, use anti-virus software to detect them to check whether a Notebook PC is equipped with a wireless card? DO NOT connect to another location before you have installed an anti-virus software and Internet firewall to protect...

User's Manual for English Edition
Page 85
... purchase, power OFF, remove the additional memory, and power ON to un-install them in DOS mode. If problem still cannot be downloaded from the ASUS website. Unknown Reason - Check your problem. Reinstall the latest version "Power4 Gear" utility to incompatible memory. 2. Blue screen with white text A blue screen with Easy Flash in Windows or AFLASH in Windows Safe Mode. 3. Un-install software applications. Notebook PC User Manual A-13 A. Remove additional memory. If you have installed software applications...
... purchase, power OFF, remove the additional memory, and power ON to un-install them in DOS mode. If problem still cannot be downloaded from the ASUS website. Unknown Reason - Check your problem. Reinstall the latest version "Power4 Gear" utility to incompatible memory. 2. Blue screen with white text A blue screen with Easy Flash in Windows or AFLASH in Windows Safe Mode. 3. Un-install software applications. Notebook PC User Manual A-13 A. Remove additional memory. If you have installed software applications...
User's Manual for English Edition
Page 87
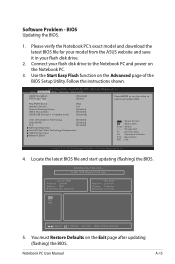
... model and download the latest BIOS file for your model from the ASUS website and save it in battery mode [Disabled] [Static] [No] [4] [Enabled] [Enabled] [Disabled] Press ENTER to run the utility to the Notebook PC and power on the Notebook PC. 3. Connect your flash disk drive. 2. Aptio Setup Utility - Main Advanced Boot Security Save & Exit ASUS FancyStart POST Logo Type Start Easy Flash Play POST Sound Speaker Volume Internal Pointing Device Wake On Lid Open ASUS USB Charger+ in your flash disk drive to select and update BIOS...
... model and download the latest BIOS file for your model from the ASUS website and save it in battery mode [Disabled] [Static] [No] [4] [Enabled] [Enabled] [Disabled] Press ENTER to run the utility to the Notebook PC and power on the Notebook PC. 3. Connect your flash disk drive. 2. Aptio Setup Utility - Main Advanced Boot Security Save & Exit ASUS FancyStart POST Logo Type Start Easy Flash Play POST Sound Speaker Volume Internal Pointing Device Wake On Lid Open ASUS USB Charger+ in your flash disk drive to select and update BIOS...
User's Manual for English Edition
Page 89
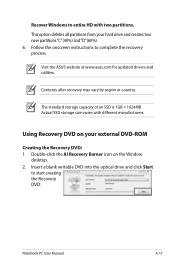
This option deletes all partitions from your external DVD-ROM Creating the Recovery DVD: 1. Follow the onscreen instructions to start creating the Recovery DVD. Visit the ASUS website at www.asus.com for updated drivers and utilities. Using Recovery DVD on the Window desktop. 2. Contents after recovery may vary by region or country. Recover Windows to entire HD with different manufacturers. The standard storage capacity of an SSD is 1GB = 1024MB. Insert a blank writable DVD into the...
This option deletes all partitions from your external DVD-ROM Creating the Recovery DVD: 1. Follow the onscreen instructions to start creating the Recovery DVD. Visit the ASUS website at www.asus.com for updated drivers and utilities. Using Recovery DVD on the Window desktop. 2. Contents after recovery may vary by region or country. Recover Windows to entire HD with different manufacturers. The standard storage capacity of an SSD is 1GB = 1024MB. Insert a blank writable DVD into the...
User's Manual for English Edition
Page 90
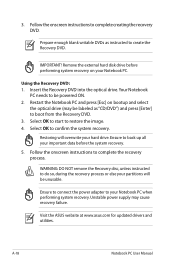
... the optical drive (may cause recovery failure. A-18 Notebook PC User Manual Prepare enough blank writable DVDs as "CD/DVD") and press [Enter] to create the Recovery DVD. Using the Recovery DVD: 1. Visit the ASUS website at www.asus.com for updated drivers and utilities. Insert the Recovery DVD into the optical drive.Your Notebook PC needs to be labeled as instructed to boot from the Recovery DVD. 3. Ensure to connect the power adapter to back up all your hard drive. Select OK...
... the optical drive (may cause recovery failure. A-18 Notebook PC User Manual Prepare enough blank writable DVDs as "CD/DVD") and press [Enter] to create the Recovery DVD. Using the Recovery DVD: 1. Visit the ASUS website at www.asus.com for updated drivers and utilities. Insert the Recovery DVD into the optical drive.Your Notebook PC needs to be labeled as instructed to boot from the Recovery DVD. 3. Ensure to connect the power adapter to back up all your hard drive. Select OK...


