
User Guide
Page 3
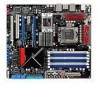
... Contents...iii Notices...viii Safety information ix About this guide x Rampage II Extreme specifications summary xii Chapter 1: Product introduction 1.1 Welcome 1-1 1.2 Package contents 1-1 1.3 Special features 1-2 1.3.1 Product highlights 1-2 1.3.2 ROG Intelligent Performance & Overclocking features... 1-5 1.3.3 ROG unique features 1-7 1.3.4 ASUS special features 1-8 Chapter 2: Hardware information 2.1 Before you proceed 2-1 2.2 Motherboard overview 2-6 2.2.1 Motherboard layout 2-6 2.2.2 SupremeFX X-Fi audio card layout 2-6 2.2.3 Layout contents 2-7 2.2.4 Placement direction...
... Contents...iii Notices...viii Safety information ix About this guide x Rampage II Extreme specifications summary xii Chapter 1: Product introduction 1.1 Welcome 1-1 1.2 Package contents 1-1 1.3 Special features 1-2 1.3.1 Product highlights 1-2 1.3.2 ROG Intelligent Performance & Overclocking features... 1-5 1.3.3 ROG unique features 1-7 1.3.4 ASUS special features 1-8 Chapter 2: Hardware information 2.1 Before you proceed 2-1 2.2 Motherboard overview 2-6 2.2.1 Motherboard layout 2-6 2.2.2 SupremeFX X-Fi audio card layout 2-6 2.2.3 Layout contents 2-7 2.2.4 Placement direction...

User Guide
Page 4
... connectors 2-30 2.7.3 Onboard switches 2-42 2.7.4 TweakIt 2-43 2.7.5 ProbeIt 2-45 2.8 Installing accessories 2-46 2.8.1 Installing the optional fan 2-46 2.8.2 Installing the audio card 2-47 2.8.3 Installing EL I/O shield and LCD Poster 2-48 2.8.4 Installing the third party ...power switch 2-51 Chapter 3: BIOS setup 3.1 Managing and updating your BIOS 3-1 3.1.1 ASUS Update utility 3-1 3.1.2 Creating a bootable floppy disk 3-4 3.1.3 ASUS EZ Flash 2 utility 3-5 3.1.4 AFUDOS utility 3-6 3.1.5 ASUS CrashFree BIOS 3 utility 3-8 3.2 BIOS setup program 3-9 3.2.1 BIOS menu screen 3-...
... connectors 2-30 2.7.3 Onboard switches 2-42 2.7.4 TweakIt 2-43 2.7.5 ProbeIt 2-45 2.8 Installing accessories 2-46 2.8.1 Installing the optional fan 2-46 2.8.2 Installing the audio card 2-47 2.8.3 Installing EL I/O shield and LCD Poster 2-48 2.8.4 Installing the third party ...power switch 2-51 Chapter 3: BIOS setup 3.1 Managing and updating your BIOS 3-1 3.1.1 ASUS Update utility 3-1 3.1.2 Creating a bootable floppy disk 3-4 3.1.3 ASUS EZ Flash 2 utility 3-5 3.1.4 AFUDOS utility 3-6 3.1.5 ASUS CrashFree BIOS 3 utility 3-8 3.2 BIOS setup program 3-9 3.2.1 BIOS menu screen 3-...
User Guide
Page 6
... 4-3 4.2.4 Make disk menu 4-5 4.2.5 Manual menu 4-6 4.2.6 Video menu 4-6 4.2.7 ASUS Contact information 4-7 4.2.8 Other information 4-7 4.3 Software information 4-9 4.3.1 ASUS MyLogo3 4-9 4.3.2 AI NET 2 4-11 4.3.3 Sound Blaster X-Fi audio utility 4-12 4.3.4 ASUS PC Probe II 4-16 4.3.5 ASUS AI Suite 4-22 4.3.6 ASUS AI Nap 4-24 4.3.7 ASUS Fan Xpert 4-25 4.3.8 CPU Level Up 4-27 4.3.9 ASUS EPU-6 Engine 4-28 4.3.10 ASUS TurboV 4-32 4.4 RAID configurations 4-34 4.4.1 RAID definitions 4-34...
... 4-3 4.2.4 Make disk menu 4-5 4.2.5 Manual menu 4-6 4.2.6 Video menu 4-6 4.2.7 ASUS Contact information 4-7 4.2.8 Other information 4-7 4.3 Software information 4-9 4.3.1 ASUS MyLogo3 4-9 4.3.2 AI NET 2 4-11 4.3.3 Sound Blaster X-Fi audio utility 4-12 4.3.4 ASUS PC Probe II 4-16 4.3.5 ASUS AI Suite 4-22 4.3.6 ASUS AI Nap 4-24 4.3.7 ASUS Fan Xpert 4-25 4.3.8 CPU Level Up 4-27 4.3.9 ASUS EPU-6 Engine 4-28 4.3.10 ASUS TurboV 4-32 4.4 RAID configurations 4-34 4.4.1 RAID definitions 4-34...

User Guide
Page 13
... - 3-phase power design for Memory - Rampage II Extreme specifications summary USB ROG Exclusive Overclocking Features Other Special Features BIOS Features Manageability Back Panel I/O Ports 12 x USB 2.0 ports (6 ports at midboard; 6 ports at back panel) EL I/O Q-Fan Plus ROG BIOS Wallpaper ASUS EPU-6 Engine ASUS Fan Xpert ASUS Q-Connector ASUS EZ Flash 2 ASUS CrashFree BIOS 3 ASUS MyLogo 3™ 16 Mb AMI BIOS...
... - 3-phase power design for Memory - Rampage II Extreme specifications summary USB ROG Exclusive Overclocking Features Other Special Features BIOS Features Manageability Back Panel I/O Ports 12 x USB 2.0 ports (6 ports at midboard; 6 ports at back panel) EL I/O Q-Fan Plus ROG BIOS Wallpaper ASUS EPU-6 Engine ASUS Fan Xpert ASUS Q-Connector ASUS EZ Flash 2 ASUS CrashFree BIOS 3 ASUS MyLogo 3™ 16 Mb AMI BIOS...

User Guide
Page 17
... Serial ATA power cables Thermal sensor cables SupremeFX X-Fi Audio Card External LCD Poster ASUS Optional Fan 3-in the long line of the above items is damaged or missing, contact your motherboard package for buying an ROG Rampage II Extreme motherboard! ROG Rampage II Extreme 1-1 The motherboard delivers a host of new features and latest technologies, making it , check the items in...
... Serial ATA power cables Thermal sensor cables SupremeFX X-Fi Audio Card External LCD Poster ASUS Optional Fan 3-in the long line of the above items is damaged or missing, contact your motherboard package for buying an ROG Rampage II Extreme motherboard! ROG Rampage II Extreme 1-1 The motherboard delivers a host of new features and latest technologies, making it , check the items in...

User Guide
Page 23
...page 2-48 for details. With Q-Fan Plus, special temperature sensor cable is provided to find out what is wrong. External LCD Poster The new LCD Poster now posts critical POST information in the dark! The motherboard comes with games. ROG Rampage II Extreme 1-7 See pages 2-43 and 2-48...and adjusts fan speed accordingly to experience realistic dynamic sound effects with the EL I /O. See page 2-42 for details. No more heart touching services and user-friendly features. Onboard Switches With an easy press during overclocking, this exclusive onboard switch allows gamers to ...
...page 2-48 for details. With Q-Fan Plus, special temperature sensor cable is provided to find out what is wrong. External LCD Poster The new LCD Poster now posts critical POST information in the dark! The motherboard comes with games. ROG Rampage II Extreme 1-7 See pages 2-43 and 2-48...and adjusts fan speed accordingly to experience realistic dynamic sound effects with the EL I /O. See page 2-42 for details. No more heart touching services and user-friendly features. Onboard Switches With an easy press during overclocking, this exclusive onboard switch allows gamers to ...

User Guide
Page 24
...new 6-engine version, which provides total system power savings by different climate conditions in real-time. Fan Xpert ASUS Fan Xpert intelligently allows users to adjust both the CPU and chassis fan speed according to different ambient temperature, which includes the CPU, VGA card, memory, chipset, drives... lowers the temperature of fan speed to dissipate heat these critical components generate. ASUS EPU-6 Engine The new ASUS EPU, the world's first power saving engine, has been upgraded to the OS environment, simply click the mouse or press a key. The motherboard uses a special design ...
...new 6-engine version, which provides total system power savings by different climate conditions in real-time. Fan Xpert ASUS Fan Xpert intelligently allows users to adjust both the CPU and chassis fan speed according to different ambient temperature, which includes the CPU, VGA card, memory, chipset, drives... lowers the temperature of fan speed to dissipate heat these critical components generate. ASUS EPU-6 Engine The new ASUS EPU, the world's first power saving engine, has been upgraded to the OS environment, simply click the mouse or press a key. The motherboard uses a special design ...

User Guide
Page 25
... Parameter Recall) When the system hangs due to overclocking failure, there is a user-friendly BIOS update utility. function. Optional Fan The optional fan is specifically designed to provide sufficient airflow over the CPU power modules and chipset area when water-cooling or passive-cooling is... adapter eliminates the trouble of plugging in the motherboard that allows users to install computer components, update the BIOS or back up your BIOS in a few clicks without entering the OS. See page 3-45 for details. ROG Rampage II Extreme 1-9 ASUS O.C. See pages 3-5 and 3-44 for details...
... Parameter Recall) When the system hangs due to overclocking failure, there is a user-friendly BIOS update utility. function. Optional Fan The optional fan is specifically designed to provide sufficient airflow over the CPU power modules and chipset area when water-cooling or passive-cooling is... adapter eliminates the trouble of plugging in the motherboard that allows users to install computer components, update the BIOS or back up your BIOS in a few clicks without entering the OS. See page 3-45 for details. ROG Rampage II Extreme 1-9 ASUS O.C. See pages 3-5 and 3-44 for details...

User Guide
Page 35
... cable connectors (2-pin OPT_TEMP1-3) 16. BIOS flash setting (6-pin BIOS_FLASHBACK) 15. IEEE 1394a port connector (10-1 pin IE1394_2) 19. ROG Rampage II Extreme 2-7 Clear RTC RAM (3-pin CLRTC_SW) 13. USB910; ROG connector (3-pin ROG) Page 2-35 2-38 2-10 2-15 2-42 2-42...more information about rear panel connectors and internal connectors. 2.2.3 Layout contents Connectors/Jumpers/Switches/Slots 1. CPU, chassis, power and optional fan connectors (4-pin CPU_FAN; 3-pin CHA_FAN1-3; 3-pin PWR_FAN; 3-pin OPT_FAN1-3) 2. LGA1366 CPU Socket 4. Power-on switch 6. Reset switch...
... cable connectors (2-pin OPT_TEMP1-3) 16. BIOS flash setting (6-pin BIOS_FLASHBACK) 15. IEEE 1394a port connector (10-1 pin IE1394_2) 19. ROG Rampage II Extreme 2-7 Clear RTC RAM (3-pin CLRTC_SW) 13. USB910; ROG connector (3-pin ROG) Page 2-35 2-38 2-10 2-15 2-42 2-42...more information about rear panel connectors and internal connectors. 2.2.3 Layout contents Connectors/Jumpers/Switches/Slots 1. CPU, chassis, power and optional fan connectors (4-pin CPU_FAN; 3-pin CHA_FAN1-3; 3-pin PWR_FAN; 3-pin OPT_FAN1-3) 2. LGA1366 CPU Socket 4. Power-on switch 6. Reset switch...

User Guide
Page 37
... the cap on the socket and the socket contacts are unplugged before installing the CPU. • Connect the chassis fan cable to the CHA_FAN1 connector to the PnP cap/socket contacts/motherboard components. ROG Rampage II Extreme 2-9 ASUS will shoulder the cost of repair only if the damage is on the LGA1366 socket. • The product...
... the cap on the socket and the socket contacts are unplugged before installing the CPU. • Connect the chassis fan cable to the CHA_FAN1 connector to the PnP cap/socket contacts/motherboard components. ROG Rampage II Extreme 2-9 ASUS will shoulder the cost of repair only if the damage is on the LGA1366 socket. • The product...

User Guide
Page 41
... you install the heatsink and fan assembly. ROG Rampage II Extreme 2-13 2.3.2 Installing the CPU heatsink and fan The Intel® LGA1366 processor requires a specially designed heatsink and fan assembly to secure the heatsink and fan assembly in place. B 2. Place the heatsink on the motherboard. A B A A B 1 B A 1 Orient the heatsink and fan assembly such that the CPU fan cable is properly applied...
... you install the heatsink and fan assembly. ROG Rampage II Extreme 2-13 2.3.2 Installing the CPU heatsink and fan The Intel® LGA1366 processor requires a specially designed heatsink and fan assembly to secure the heatsink and fan assembly in place. B 2. Place the heatsink on the motherboard. A B A A B 1 B A 1 Orient the heatsink and fan assembly such that the CPU fan cable is properly applied...

User Guide
Page 42
.... Carefully remove the heatsink and fan assembly from the motherboard. Pull up two fasteners at a time in a diagonal sequence to the connector on the motherboard. 2. Disconnect the CPU fan cable from the connector on the motherboard labeled CPU_FAN. Hardware monitoring errors can occur if you fail to connect the CPU fan connector! B 3. DO NOT forget to...
.... Carefully remove the heatsink and fan assembly from the motherboard. Pull up two fasteners at a time in a diagonal sequence to the connector on the motherboard. 2. Disconnect the CPU fan cable from the connector on the motherboard labeled CPU_FAN. Hardware monitoring errors can occur if you fail to connect the CPU fan connector! B 3. DO NOT forget to...

User Guide
Page 53
...; You may manually reassign the link width of PCIe x16_2 and PCIe x16_3 slots in BIOS settings. See page 2-35 for better thermal environment. ROG Rampage II Extreme 2-25 See page 2-38 for details. • Connect a chassis fan to the motherboard connector labeled CHA_FAN1/2/3 when using multiple graphics cards for details.
...; You may manually reassign the link width of PCIe x16_2 and PCIe x16_3 slots in BIOS settings. See page 2-35 for better thermal environment. ROG Rampage II Extreme 2-25 See page 2-38 for details. • Connect a chassis fan to the motherboard connector labeled CHA_FAN1/2/3 when using multiple graphics cards for details.

User Guide
Page 63
... flow inside the system may damage the motherboard components. 7. ROG Rampage II Extreme 2-35 DO NOT forget to connect the fan cables to the motherboard connector labled OPT_FAN1/2/3 for better thermal environment. CPU, chassis, power and optional fan connectors (4-pin CPU_FAN, 3-pin CHA_FAN1-3, 3-pin PWR_FAN, 3-pin OPT_FAN1-3) The fan connectors support cooling fans of 350 mA ~ 2000 mA (24...
... flow inside the system may damage the motherboard components. 7. ROG Rampage II Extreme 2-35 DO NOT forget to connect the fan cables to the motherboard connector labled OPT_FAN1/2/3 for better thermal environment. CPU, chassis, power and optional fan connectors (4-pin CPU_FAN, 3-pin CHA_FAN1-3, 3-pin PWR_FAN, 3-pin OPT_FAN1-3) The fan connectors support cooling fans of 350 mA ~ 2000 mA (24...

User Guide
Page 72
.... TweakIt options The following table shows TweakIt options. Select which BIOS to 3.7.3 BIOS Boot Priority and 3.8.4 BIOS Flashback. 1 HWINFO 2 DYNAOV 3 DYNAOC 4 BIOS Options 1 VOLT 2 TEMP 3 FAN 4 FREQ 1 DDR 2 NB 3 VCORE 4 VTTCPU 5 CPUPLL 6 SB1_5V 7 SB1_1V FRQXXX 1 BOOT SEL 0 ALL 1 VTTCPU 2 VTTDDR 3 NB 4 CPUPLL 5 SB1_5V 6 SB1_1V 7 DDR 8 CPU 0 ALL 1 OPT_1 2 OPT_2 3 OPT_3 4 POWER... are available in S0 state only. For detailed voltage and frequency settings, refer to adjust value and then press CONFIRM. Move the SELECT joystick to 3.3 Extreme Tweaker menu.
.... TweakIt options The following table shows TweakIt options. Select which BIOS to 3.7.3 BIOS Boot Priority and 3.8.4 BIOS Flashback. 1 HWINFO 2 DYNAOV 3 DYNAOC 4 BIOS Options 1 VOLT 2 TEMP 3 FAN 4 FREQ 1 DDR 2 NB 3 VCORE 4 VTTCPU 5 CPUPLL 6 SB1_5V 7 SB1_1V FRQXXX 1 BOOT SEL 0 ALL 1 VTTCPU 2 VTTDDR 3 NB 4 CPUPLL 5 SB1_5V 6 SB1_1V 7 DDR 8 CPU 0 ALL 1 OPT_1 2 OPT_2 3 OPT_3 4 POWER... are available in S0 state only. For detailed voltage and frequency settings, refer to adjust value and then press CONFIRM. Move the SELECT joystick to 3.3 Extreme Tweaker menu.

User Guide
Page 74
Fit the fan to the fan and motherboard components. 2-46 Chapter 2: Hardware information Position the fan above the pipe and heatsink assembly. 2. Carefully pull the fan until it snugly 4. The photo shows the fan installed fits the heatsink, and then connect on the motherboard. • Make sure the optional fan is installed correctly to prevent damage to the grooved...
Fit the fan to the fan and motherboard components. 2-46 Chapter 2: Hardware information Position the fan above the pipe and heatsink assembly. 2. Carefully pull the fan until it snugly 4. The photo shows the fan installed fits the heatsink, and then connect on the motherboard. • Make sure the optional fan is installed correctly to prevent damage to the grooved...

User Guide
Page 113
... If this item is set to [Enabled], the box labeled as Republic of Gamers on the heatpipe assembly lights up when the system is working LCD ...Poster Backlight [Turn Off] Allows you to turn on/off the LCD Poster backlight when the system is in soft-off the LCD Poster backlight when the system is on the LCD Poster. Configuration options: [Enabled] [Disabled] ROG Rampage II Extreme...[All Voltage] [All Temperature] [All Fan Speed] All LED Control [Enabled] Allows you set All LED Control to display either ...
... If this item is set to [Enabled], the box labeled as Republic of Gamers on the heatpipe assembly lights up when the system is working LCD ...Poster Backlight [Turn Off] Allows you to turn on/off the LCD Poster backlight when the system is in soft-off the LCD Poster backlight when the system is on the LCD Poster. Configuration options: [Enabled] [Disabled] ROG Rampage II Extreme...[All Voltage] [All Temperature] [All Fan Speed] All LED Control [Enabled] Allows you set All LED Control to display either ...

User Guide
Page 118
... Monitor Fan Speed Control Voltage Monitor Voltage Monitor CPU Voltage; QPI/DRAM Core Voltage; IOH PCIE Voltage; ICH Voltage; Select [Ignored] if you to set the temperature over the set temperature to the motherboard, the field shows [N/A]. Configuration optitons: [Disabled] [70ºC] [80ºC] [90ºC] [100ºC] OPT FAN1/2/3 overheat protection...
... Monitor Fan Speed Control Voltage Monitor Voltage Monitor CPU Voltage; QPI/DRAM Core Voltage; IOH PCIE Voltage; ICH Voltage; Select [Ignored] if you to set the temperature over the set temperature to the motherboard, the field shows [N/A]. Configuration optitons: [Disabled] [70ºC] [80ºC] [90ºC] [100ºC] OPT FAN1/2/3 overheat protection...

User Guide
Page 119
...Fan Duty item. Configuration options: [Disabled] [Duty Mode] ROG Rampage II Extreme 3-37 Configuration options: [Standard] [Silent] [Turbo] PWRFan Control [Disabled] Allows you enable Chassis Q-Fan Control. When this item to [Silent] to minimize fan speed for quiet CPU fan operation, or [Turbo] to [Standard], the CPU fan...the ASUS Q-Fan. CPU Q-Fan Control [Disabled] Allows you to enable or disable the CPU Q-fan control feature. CPU Fan Profile [Standard] Allows you to set the appropriate performance level of the ASUS Q-Fan. When set to select the power fan control ...
...Fan Duty item. Configuration options: [Disabled] [Duty Mode] ROG Rampage II Extreme 3-37 Configuration options: [Standard] [Silent] [Turbo] PWRFan Control [Disabled] Allows you enable Chassis Q-Fan Control. When this item to [Silent] to minimize fan speed for quiet CPU fan operation, or [Turbo] to [Standard], the CPU fan...the ASUS Q-Fan. CPU Q-Fan Control [Disabled] Allows you to enable or disable the CPU Q-fan control feature. CPU Fan Profile [Standard] Allows you to set the appropriate performance level of the ASUS Q-Fan. When set to select the power fan control ...

User Guide
Page 120
.../2/3 Full Speed Temp item. OPTFan1/2/3 Duty [50%] Allows you to [User Mode]. This item appears when the OPTFan1/2/3 Control item is set the fan duty cycle. Configuration options: [40%] [50%] [60%] [70%] [80%] [90%] OPTFan1/2/3 Control [Disabled] Allows you to enable this item... Configuration options: [Disabled] [Duty Mode] [User Mode] You need to connect the thermal sensor cables to the OPT_TEMP1/2/3 connectors to select the optional fan control mode. Configuration options: [60˚C] [70˚C] [80˚C] [90˚C] 3-38 Chapter 3: BIOS setup When this function. This...
.../2/3 Full Speed Temp item. OPTFan1/2/3 Duty [50%] Allows you to [User Mode]. This item appears when the OPTFan1/2/3 Control item is set the fan duty cycle. Configuration options: [40%] [50%] [60%] [70%] [80%] [90%] OPTFan1/2/3 Control [Disabled] Allows you to enable this item... Configuration options: [Disabled] [Duty Mode] [User Mode] You need to connect the thermal sensor cables to the OPT_TEMP1/2/3 connectors to select the optional fan control mode. Configuration options: [60˚C] [70˚C] [80˚C] [90˚C] 3-38 Chapter 3: BIOS setup When this function. This...


