
User Manual
Page 9
P8H61-I LX specifications summary Rear panel ports Internal connectors/ switches/ buttons BIOS features Manageability Accessories Support DVD Form factor 1 x PS/2 keyboard (Purple) 1 x PS/2 Mouse (Green) 1 x D-Sub output ..., PnP, DMI2.0, WfM 2.0, ACPI v2.0a, SM BIOS v2.6 WOL, PXE, PME wake up 2 x Serial ATA 3.0Gb/s cables 1 x I LX.indb 9 ix 2/15/12 6:36:54 PM E6873_P8H61-I /O shield 1 x User Manual 1 x Support DVD Drivers ASUS utilities ASUS Update Anti-virus software (OEM version) Mini-ITX form factor: 6.70 in" x 6.70 in" (17 cm x 17 cm...
P8H61-I LX specifications summary Rear panel ports Internal connectors/ switches/ buttons BIOS features Manageability Accessories Support DVD Form factor 1 x PS/2 keyboard (Purple) 1 x PS/2 Mouse (Green) 1 x D-Sub output ..., PnP, DMI2.0, WfM 2.0, ACPI v2.0a, SM BIOS v2.6 WOL, PXE, PME wake up 2 x Serial ATA 3.0Gb/s cables 1 x I LX.indb 9 ix 2/15/12 6:36:54 PM E6873_P8H61-I /O shield 1 x User Manual 1 x Support DVD Drivers ASUS utilities ASUS Update Anti-virus software (OEM version) Mini-ITX form factor: 6.70 in" x 6.70 in" (17 cm x 17 cm...

User Manual
Page 24
Secure the card to the chassis with the PCI Express specifications. 1-14 E6873_P8H61-I LX.indb 14 ASUS P8H61-I LX 2/15/12 6:37:16 PM Replace the system cover. 1.5.2 Configuring an expansion card After installing the expansion card, configure it and make the ... the bracket opposite the slot that came with the slot and press firmly until the card is already installed in a chassis). 3. Install the software drivers for information on the system and change the necessary BIOS settings, if any. 1.5 Expansion slots In the future, you physical injury and damage motherboard components...
Secure the card to the chassis with the PCI Express specifications. 1-14 E6873_P8H61-I LX.indb 14 ASUS P8H61-I LX 2/15/12 6:37:16 PM Replace the system cover. 1.5.2 Configuring an expansion card After installing the expansion card, configure it and make the ... the bracket opposite the slot that came with the slot and press firmly until the card is already installed in a chassis). 3. Install the software drivers for information on the system and change the necessary BIOS settings, if any. 1.5 Expansion slots In the future, you physical injury and damage motherboard components...
User Manual
Page 32
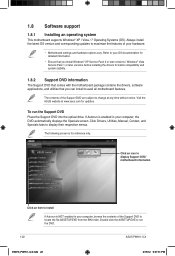
...menus. The contents of your hardware. • Motherboard settings and hardware options vary. Double-click the ASSETUP.EXE to change at www.asus.com for reference only. Click an icon to display Support DVD/ motherboard information Click an item to install If Autorun is for updates... file ASSETUP.EXE from the BIN folder. To run the DVD. 1-22 ASUS P8H61-I LX E6873_P8H61-I LX.indb 22 2/15/12 6:37:31 PM Refer to your computer, the DVD automatically displays the Specials screen. Click Drivers, Utilities, Manual, Contact, and Specials tabs to avail all motherboard features.
...menus. The contents of your hardware. • Motherboard settings and hardware options vary. Double-click the ASSETUP.EXE to change at www.asus.com for reference only. Click an icon to display Support DVD/ motherboard information Click an item to install If Autorun is for updates... file ASSETUP.EXE from the BIN folder. To run the DVD. 1-22 ASUS P8H61-I LX E6873_P8H61-I LX.indb 22 2/15/12 6:37:31 PM Refer to your computer, the DVD automatically displays the Specials screen. Click Drivers, Utilities, Manual, Contact, and Specials tabs to avail all motherboard features.

User Manual
Page 33
...to a USB flash disk in the future. The AI Suite II Quick Bar appears. 2. Select Update BIOS from the popup menu. The ASUS Update main screen appears. Quit all Windows® applications before you to restore the BIOS in case you wish to download then click Next...BIOS version that comes with the motherboard package. The Drivers menu appears. 2. Updating the BIOS To update the BIOS: 1. Chapter 2: BIOS information 2-1 E6873_P8H61-I LX.indb 1 2/15/12 6:37:33 PM Click Update button from the Quick Bar, and then click ASUS Update from the Internet, then click Next. From ...
...to a USB flash disk in the future. The AI Suite II Quick Bar appears. 2. Select Update BIOS from the popup menu. The ASUS Update main screen appears. Quit all Windows® applications before you to restore the BIOS in case you wish to download then click Next...BIOS version that comes with the motherboard package. The Drivers menu appears. 2. Updating the BIOS To update the BIOS: 1. Chapter 2: BIOS information 2-1 E6873_P8H61-I LX.indb 1 2/15/12 6:37:33 PM Click Update button from the Quick Bar, and then click ASUS Update from the Internet, then click Next. From ...

User Manual
Page 48
...Advanced Host Controller Interface). SATA Mode [IDE Mode] Allows you to set the iGPU memory size. The AHCI allows the onboard storage driver to enable advanced Serial ATA features that increases storage performance on random workloads by internal graphics devices. 2.5.2 System Agent Configuration Initiate Graphic Adapter...And the memory size for add-on Windows® XP. • [IDE] is installed to change the SATA type. 2-16 E6873_P8H61-I LX.indb 16 ASUS P8H61-I LX 2/15/12 6:37:46 PM Under Windows® XP, there is no SATA device is the default SATA type. The SATA Port items ...
...Advanced Host Controller Interface). SATA Mode [IDE Mode] Allows you to set the iGPU memory size. The AHCI allows the onboard storage driver to enable advanced Serial ATA features that increases storage performance on random workloads by internal graphics devices. 2.5.2 System Agent Configuration Initiate Graphic Adapter...And the memory size for add-on Windows® XP. • [IDE] is installed to change the SATA type. 2-16 E6873_P8H61-I LX.indb 16 ASUS P8H61-I LX 2/15/12 6:37:46 PM Under Windows® XP, there is no SATA device is the default SATA type. The SATA Port items ...


