
User Manual
Page 2
... trademarks or copyrights of their respective companies, and are used only for backup purposes, without intent to infringe. ii SPECIFICATIONS AND INFORMATION CONTAINED IN THIS MANUAL ARE FURNISHED FOR INFORMATIONAL USE ONLY, AND ARE SUBJECT TO CHANGE AT ANY TIME WITHOUT NOTICE, AND SHOULD NOT...or translated into any language in any form or by any means, except documentation kept by ASUS; ASUS ASSUMES NO RESPONSIBILITY OR LIABILITY FOR ANY ERRORS OR INACCURACIES THAT MAY APPEAR IN THIS MANUAL, INCLUDING THE PRODUCTS AND SOFTWARE DESCRIBED IN IT. or (2) the serial number of ASUSTeK...
... trademarks or copyrights of their respective companies, and are used only for backup purposes, without intent to infringe. ii SPECIFICATIONS AND INFORMATION CONTAINED IN THIS MANUAL ARE FURNISHED FOR INFORMATIONAL USE ONLY, AND ARE SUBJECT TO CHANGE AT ANY TIME WITHOUT NOTICE, AND SHOULD NOT...or translated into any language in any form or by any means, except documentation kept by ASUS; ASUS ASSUMES NO RESPONSIBILITY OR LIABILITY FOR ANY ERRORS OR INACCURACIES THAT MAY APPEAR IN THIS MANUAL, INCLUDING THE PRODUCTS AND SOFTWARE DESCRIBED IN IT. or (2) the serial number of ASUSTeK...

User Manual
Page 6
... 4: Software support 4.1 Installing an operating system 4-1 4.2 Support DVD information 4-1 4.2.1 Running the support DVD 4-1 4.2.2 Drivers menu 4-2 4.2.3 Utilities menu 4-3 4.2.4 Make disk menu 4-5 4.2.5 Manual menu 4-5 4.2.6 Video menu 4-6 vi Contents 3.4.7 System Information 3-22 3.5 Advanced menu 3-23 3.5.1 CPU Configuration 3-23 3.5.2 Chipset 3-25 3.5.3 Onboard Device Configuration 3-26 3.5.4 USB Configuration ...3-34 3.7 Boot menu 3-37 3.7.1 Boot Device Priority 3-37 3.7.2 Boot Settings Configuration 3-38 3.7.3 Security 3-39 3.8 Tools menu 3-41 3.8.1 ASUS EZ Flash 2 3-41...
... 4: Software support 4.1 Installing an operating system 4-1 4.2 Support DVD information 4-1 4.2.1 Running the support DVD 4-1 4.2.2 Drivers menu 4-2 4.2.3 Utilities menu 4-3 4.2.4 Make disk menu 4-5 4.2.5 Manual menu 4-5 4.2.6 Video menu 4-6 vi Contents 3.4.7 System Information 3-22 3.5 Advanced menu 3-23 3.5.1 CPU Configuration 3-23 3.5.2 Chipset 3-25 3.5.3 Onboard Device Configuration 3-26 3.5.4 USB Configuration ...3-34 3.7 Boot menu 3-37 3.7.1 Boot Device Priority 3-37 3.7.2 Boot Settings Configuration 3-38 3.7.3 Security 3-39 3.8 Tools menu 3-41 3.8.1 ASUS EZ Flash 2 3-41...

User Manual
Page 9
... any damage, contact your dealer immediately. • To avoid short circuits, keep paper clips, screws, and staples away from the motherboard, ensure that all the manuals that the power cables for the devices are unplugged before the signal cables are connected. Do not place the product in municipal waste. This product...
... any damage, contact your dealer immediately. • To avoid short circuits, keep paper clips, screws, and staples away from the motherboard, ensure that all the manuals that the power cables for the devices are unplugged before the signal cables are connected. Do not place the product in municipal waste. This product...

User Manual
Page 11
Conventions used throughout this manual. DANGER/WARNING: Information to prevent injury to yourself when trying to help you must press the enclosed key. NOTE: Tips and additional information to complete a ...
Conventions used throughout this manual. DANGER/WARNING: Information to prevent injury to yourself when trying to help you must press the enclosed key. NOTE: Tips and additional information to complete a ...
User Manual
Page 12
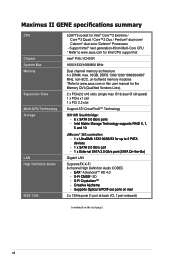
.../667 MHz, non-ECC, un-buffered memory modules *Refer to www.asus.com or this user manual for Intel® Core™2 Extreme / Core™2 Quad / Core™2 Duo / Pentium® dual-core/ Celeron® dual-core /Celeron® Processors - Maximus II GENE specifications summary CPU Chipset System Bus Memory Expansion Slots Multi-GPU Technology...
.../667 MHz, non-ECC, un-buffered memory modules *Refer to www.asus.com or this user manual for Intel® Core™2 Extreme / Core™2 Quad / Core™2 Duo / Pentium® dual-core/ Celeron® dual-core /Celeron® Processors - Maximus II GENE specifications summary CPU Chipset System Bus Memory Expansion Slots Multi-GPU Technology...

User Manual
Page 40
... and 4GB unbuffered, non‑ECC DDR2 DIMMs into the DIMM sockets. • You may operate at a higher frequency, see section 3.3 Extreme Tweaker menu for manual memory frequency adjustment. • For system stability, use of memory, we recommend that you obtain memory modules from the higher-sized channel is dependent on...
... and 4GB unbuffered, non‑ECC DDR2 DIMMs into the DIMM sockets. • You may operate at a higher frequency, see section 3.3 Extreme Tweaker menu for manual memory frequency adjustment. • For system stability, use of memory, we recommend that you obtain memory modules from the higher-sized channel is dependent on...

User Manual
Page 84
...you want to the selected CPU level. If you to select a CPU level, and the related parameters will be automatically adjusted according to manually configure the settings in this menu show the CPU-related information that the BIOS automatically detects. The value of freedom to adjust the FSB frequency... ability. Use the and keys to the extreme. The Extreme OC mode offers the maximum tuning degree of this item may need to [Manual] after selecting a CPU level. This item appears only when you to individually set Ai Overclock Tuner to adjust the NB Clock Skew item...
...you want to the selected CPU level. If you to select a CPU level, and the related parameters will be automatically adjusted according to manually configure the settings in this menu show the CPU-related information that the BIOS automatically detects. The value of freedom to adjust the FSB frequency... ability. Use the and keys to the extreme. The Extreme OC mode offers the maximum tuning degree of this item may need to [Manual] after selecting a CPU level. This item appears only when you to individually set Ai Overclock Tuner to adjust the NB Clock Skew item...

User Manual
Page 85
...] Configuration options: [3 DRAM Clocks]-[18 DRAM Clocks] DRAM RAS# Precharge [5 DRAM Clocks] Configuration options: [3 DRAM Clocks]-[18 DRAM Clocks] ROG Maximus II GENE 3-11 Configuration options: [Auto] [200MHz] [266MHz] [333MHz] [400MHz] 3.3.10 DRAM Frequency [Auto] Allows you install on the motherboard. 1st... Clocks]-[11 DRAM Clocks] DRAM RAS# to a different work mode. When set to set the DRAM Timing Control item to [Manual]. • The configuration options for some of the following items vary �d�e�p�e�n�d��in�g�...
...] Configuration options: [3 DRAM Clocks]-[18 DRAM Clocks] DRAM RAS# Precharge [5 DRAM Clocks] Configuration options: [3 DRAM Clocks]-[18 DRAM Clocks] ROG Maximus II GENE 3-11 Configuration options: [Auto] [200MHz] [266MHz] [333MHz] [400MHz] 3.3.10 DRAM Frequency [Auto] Allows you install on the motherboard. 1st... Clocks]-[11 DRAM Clocks] DRAM RAS# to a different work mode. When set to set the DRAM Timing Control item to [Manual]. • The configuration options for some of the following items vary �d�e�p�e�n�d��in�g�...

User Manual
Page 87
...] The BIOS automatically controls this function. Enhances the DRAM overclocking ability. Enables this function. Enhances the DRAM overclocking ability. ROG Maximus II GENE 3-13 OC Charger [Auto] [Auto] [Enabled] [Disabled] The BIOS automatically controls this function. Maintains the normal DRAM performance...16 Ai Clock Twister [Auto] Allows you set the system performance. [Auto] BIOS automatically adjusts the system performance. [Manual] Select [Manual] to adjust the following two sub-items. The following two sub-items appear only when you to configure the DRAM performance...
...] The BIOS automatically controls this function. Enhances the DRAM overclocking ability. Enables this function. Enhances the DRAM overclocking ability. ROG Maximus II GENE 3-13 OC Charger [Auto] [Auto] [Enabled] [Disabled] The BIOS automatically controls this function. Maintains the normal DRAM performance...16 Ai Clock Twister [Auto] Allows you set the system performance. [Auto] BIOS automatically adjusts the system performance. [Manual] Select [Manual] to adjust the following two sub-items. The following two sub-items appear only when you to configure the DRAM performance...

User Manual
Page 88
... Calibration [Auto] Allows you to select the CPU Amplitude. Refer to adjust the PCIE frequency. This item appears when you set Ai Overclock Tuner to [Manual]. 3.3.21 CPU Voltage [Auto] Allows you to set the North Bridge 1.1 voltage. 3-14 Chapter 3: BIOS setup Different Amplitude might enhance FSB overclocking ability. Use the...
... Calibration [Auto] Allows you to select the CPU Amplitude. Refer to adjust the PCIE frequency. This item appears when you set Ai Overclock Tuner to [Manual]. 3.3.21 CPU Voltage [Auto] Allows you to set the North Bridge 1.1 voltage. 3-14 Chapter 3: BIOS setup Different Amplitude might enhance FSB overclocking ability. Use the...

User Manual
Page 127
...to create an ICH10R 32/64bit AHCI/RAID driver disk. Click an item to create the Intel ICH10R driver disk. Most user manual files are in Portable Document Format (PDF). 4.2.4 Make disk menu The Make disk menu contains items to open the folder of supplementary ...user manuals. JMicron JMB36X 32/64 bit RAID/AHCI Driver Allows you to create a JMicron® JMB36X RAID/AHCI driver disk for 32/64bit system. 4.2.5 Manual menu The Manuals menu contains a list of the user manual. ROG Maximus II GENE 4-5
...to create an ICH10R 32/64bit AHCI/RAID driver disk. Click an item to create the Intel ICH10R driver disk. Most user manual files are in Portable Document Format (PDF). 4.2.4 Make disk menu The Make disk menu contains items to open the folder of supplementary ...user manuals. JMicron JMB36X 32/64 bit RAID/AHCI Driver Allows you to create a JMicron® JMB36X RAID/AHCI driver disk for 32/64bit system. 4.2.5 Manual menu The Manuals menu contains a list of the user manual. ROG Maximus II GENE 4-5

User Manual
Page 152
...takes effect in TurboV. Use the Save Profile function to save your customized overclocking settings and manually load the profile after Windows starts. • For system stability, set ASUS EPU 6-Engine to 250MHz in BIOS below 200MHz for an adjustment range from 200MHz to 500MHz...more settings Default settings Target settings Applies all changes immediately Undoes all changes made in BIOS, and then proceed more detailed adjustments using ASUS TurboV. For advanced overclocking: Set CPU Frequency in BIOS to 200MHz or above for an adjustment range from the motherboard support DVD...
...takes effect in TurboV. Use the Save Profile function to save your customized overclocking settings and manually load the profile after Windows starts. • For system stability, set ASUS EPU 6-Engine to 250MHz in BIOS below 200MHz for an adjustment range from 200MHz to 500MHz...more settings Default settings Target settings Applies all changes immediately Undoes all changes made in BIOS, and then proceed more detailed adjustments using ASUS TurboV. For advanced overclocking: Set CPU Frequency in BIOS to 200MHz or above for an adjustment range from the motherboard support DVD...


