
User Guide
Page 2
...., Beitou, Taipei 112 Taiwan In your reQuest please provide the name, model number and version, as source code archives, etc. ASUS PROVIDES THIS MANUAL "AS IS" WITHOUT WARRANTY OF ANY KIND, EITHER EXPRESS OR IMPLIED, INCLUDING BUT NOT LIMITED TO THE IMPLIED WARRANTIES OR CONDITIONS OF... ERROR IN THIS MANUAL OR PRODUCT. This offer is licensed under the General Public License ("GPL"), under various Free Open Source Software licenses. Copies of their respective companies, and are included in writing by sending a reQuest to this information. E9266 First Edition May 2014 Copyright&#...
...., Beitou, Taipei 112 Taiwan In your reQuest please provide the name, model number and version, as source code archives, etc. ASUS PROVIDES THIS MANUAL "AS IS" WITHOUT WARRANTY OF ANY KIND, EITHER EXPRESS OR IMPLIED, INCLUDING BUT NOT LIMITED TO THE IMPLIED WARRANTIES OR CONDITIONS OF... ERROR IN THIS MANUAL OR PRODUCT. This offer is licensed under the General Public License ("GPL"), under various Free Open Source Software licenses. Copies of their respective companies, and are included in writing by sending a reQuest to this information. E9266 First Edition May 2014 Copyright&#...

User Guide
Page 4
... 3-36 3.6.6 Platform Misc Configuration 3-37 3.6.7 Onboard Devices Configuration 3-39 3.6.8 APM Configuration 3-40 3.6.9 Network Stack Configuration 3-41 3.7 Monitor menu 3-42 3.8 Boot menu 3-48 3.9 Tool menu 3-54 3.9.1 ASUS EZ Flash 2 Utility 3-54 3.9.2 ASUS Overclocking Profile 3-55 3.9.3 ASUS SPD Information 3-56 3.10 Exit menu 3-57 3.11 Updating BIOS 3-58 3.11.1 EZ Update 3-58 3.11...
... 3-36 3.6.6 Platform Misc Configuration 3-37 3.6.7 Onboard Devices Configuration 3-39 3.6.8 APM Configuration 3-40 3.6.9 Network Stack Configuration 3-41 3.7 Monitor menu 3-42 3.8 Boot menu 3-48 3.9 Tool menu 3-54 3.9.1 ASUS EZ Flash 2 Utility 3-54 3.9.2 ASUS Overclocking Profile 3-55 3.9.3 ASUS SPD Information 3-56 3.10 Exit menu 3-57 3.11 Updating BIOS 3-58 3.11.1 EZ Update 3-58 3.11...

User Guide
Page 6
.... These devices could interrupt the grounding circuit. • Ensure that your power supply is broken, do not try to fix it , carefully read all the manuals that came with the product, contact a Qualified service technician or your dealer immediately. • To avoid short circuits, keep paper clips, screws, and staples away...
.... These devices could interrupt the grounding circuit. • Ensure that your power supply is broken, do not try to fix it , carefully read all the manuals that came with the product, contact a Qualified service technician or your dealer immediately. • To avoid short circuits, keep paper clips, screws, and staples away...

User Guide
Page 8
... you complete a task. viii Italics Used to select. DANGER/WARNING: Information to prevent injury to yourself when trying to complete a task. Conventions used throughout this manual.
... you complete a task. viii Italics Used to select. DANGER/WARNING: Information to prevent injury to yourself when trying to complete a task. Conventions used throughout this manual.

User Guide
Page 13
x 9.6 in . xiii GRYPHON Z97 ARMOR EDITION specifications summary Accessories Form factor 4 x Serial ATA 6Gb/s cables 1 x ASUS SLI bridge connector 7cm 1 x ASUS Q-Shield 1 x 2-in-1 Q-connector 1 x Assistant Fan (40mm) 1 x TUF Accessory Package - 3 x Thermistor cables - 1 x back I/O dust frame - 1 x back I/O... slot dust cover - 2 x Short fan screws 1 x TUF Inside sticker 1 x TUF Certification card 1 x TUF 5-Year Warranty manual (by region) TUF Accessory Installation Guide User's manual µATX form factor: 9.6 in . (24.4 cm x 24.4 cm) Specifications are subject to change without notice.
x 9.6 in . xiii GRYPHON Z97 ARMOR EDITION specifications summary Accessories Form factor 4 x Serial ATA 6Gb/s cables 1 x ASUS SLI bridge connector 7cm 1 x ASUS Q-Shield 1 x 2-in-1 Q-connector 1 x Assistant Fan (40mm) 1 x TUF Accessory Package - 3 x Thermistor cables - 1 x back I/O dust frame - 1 x back I/O... slot dust cover - 2 x Short fan screws 1 x TUF Inside sticker 1 x TUF Certification card 1 x TUF 5-Year Warranty manual (by region) TUF Accessory Installation Guide User's manual µATX form factor: 9.6 in . (24.4 cm x 24.4 cm) Specifications are subject to change without notice.

User Guide
Page 14
Package contents Check your motherboard package for the following items User Manual ASUS GRYPHON Z97 ARMOR EDITIONmotherboard Technical documentations, certification and warranty card Support DVD 4 x Serial ATA 6.0 Gb/s cables 1 x ASUS SLI™ bridge connector (7 cm) 1 x ASUS Q-Shield 1 x 2-in-1 ASUS Q-Connector kit 1 x 40 mm Assistant fan 2 x short fan screws 3 x PCIe x16 slot covers 1 x PCIe x1 slot covers 2 x DRAM slot covers...
Package contents Check your motherboard package for the following items User Manual ASUS GRYPHON Z97 ARMOR EDITIONmotherboard Technical documentations, certification and warranty card Support DVD 4 x Serial ATA 6.0 Gb/s cables 1 x ASUS SLI™ bridge connector (7 cm) 1 x ASUS Q-Shield 1 x 2-in-1 ASUS Q-Connector kit 1 x 40 mm Assistant fan 2 x short fan screws 3 x PCIe x16 slot covers 1 x PCIe x1 slot covers 2 x DRAM slot covers...
User Guide
Page 18
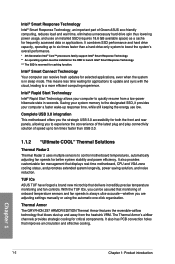
...3.0 accessibility for both the front and rear panels, allowing you are adjusting settings manually or using the automatic one-click organization. With the TUF ICe, you can receive... fan management that delivers incredibly precise temperature monitoring and fan controls. TUF ICe ASUS TUF have forged a brand new microchip that displays real-time motherboard, CPU and...state in sleep mode. This means less time waiting for critical components. Thermal Armor The GRYPHON Z97 ARMOR EDITION Thermal Armor features the reversible-airflow technology that blows dust up response time, while still...
...3.0 accessibility for both the front and rear panels, allowing you are adjusting settings manually or using the automatic one-click organization. With the TUF ICe, you can receive... fan management that delivers incredibly precise temperature monitoring and fan controls. TUF ICe ASUS TUF have forged a brand new microchip that displays real-time motherboard, CPU and...state in sleep mode. This means less time waiting for critical components. Thermal Armor The GRYPHON Z97 ARMOR EDITION Thermal Armor features the reversible-airflow technology that blows dust up response time, while still...

User Guide
Page 28
... to the memory address limitation on the CPU's capabilities and other installed devices. The system maps the total size of the lower-sized channel for manual memory frequency adjustment. • For system stability, use of 512 Mb (64 MB) chips or less (Memory chip capacity counts in Channel A and Channel B. Install...
... to the memory address limitation on the CPU's capabilities and other installed devices. The system maps the total size of the lower-sized channel for manual memory frequency adjustment. • For system stability, use of 512 Mb (64 MB) chips or less (Memory chip capacity counts in Channel A and Channel B. Install...

User Guide
Page 41
...button to enhance system performance. 1. This is ideal for successful boot. • Refer to BIOS overclocking, press the MemOK! switch lights continuously. ASUS GRYPHON Z97 ARMOR EDITION 1-25 Chapter 1 A message will appear during the tuning process, the system continues memory tuning after turning on a bare or opencase system. 1.2.6... recommend that are not compatible with ones recommended in the Memory QVL (Qualified Vendors Lists) in this user manual or on the ASUS website at www.asus.com after the whole tuning process, the DRAM_LED lights continuously. function.
...button to enhance system performance. 1. This is ideal for successful boot. • Refer to BIOS overclocking, press the MemOK! switch lights continuously. ASUS GRYPHON Z97 ARMOR EDITION 1-25 Chapter 1 A message will appear during the tuning process, the system continues memory tuning after turning on a bare or opencase system. 1.2.6... recommend that are not compatible with ones recommended in the Memory QVL (Qualified Vendors Lists) in this user manual or on the ASUS website at www.asus.com after the whole tuning process, the DRAM_LED lights continuously. function.

User Guide
Page 46
... can create a RAID 0, 1, 5, and 10 configuration with the Intel® Rapid Storage Technology through the onboard Intel® Z97 chipset. Refer to [RAID Mode]. Intel® Z97 Serial ATA 6.0 Gb/s connectors (7-pin SATA6G_1-6 [brown]) These connectors connect to [AHCI Mode] by default. Chapter 1 •...disk drives, you intend to create a Serial ATA RAID set using these connectors, set , refer to section 5.1 RAID configurations or the manual bundled in the BIOS to section 3.6.3 SATA Configuration for details. • Before creating a RAID set the SATA Mode item in the motherboard...
... can create a RAID 0, 1, 5, and 10 configuration with the Intel® Rapid Storage Technology through the onboard Intel® Z97 chipset. Refer to [RAID Mode]. Intel® Z97 Serial ATA 6.0 Gb/s connectors (7-pin SATA6G_1-6 [brown]) These connectors connect to [AHCI Mode] by default. Chapter 1 •...disk drives, you intend to create a Serial ATA RAID set using these connectors, set , refer to section 5.1 RAID configurations or the manual bundled in the BIOS to section 3.6.3 SATA Configuration for details. • Before creating a RAID set the SATA Mode item in the motherboard...

User Guide
Page 73
... further BIOS settings or update. We strongly recommend that are needed for this user manual refers to ensure optimal performance. Chapter 3: BIOS setup BIOS setup 3.1 Knowing BIOS 3 The new ASUS UEFI BIOS is a Unified Extensible Interface that complies with UEFI architecture, offering a ... appears on the screen during the system bootup and requests you change the default BIOS settings except in this motherboard. Chapter 3 ASUS GRYPHON Z97 ARMOR EDITION 3-1 You can easily navigate the new UEFI BIOS with the same smoothness as Z97GP.CAP for system startup in the motherboard CMOS...
... further BIOS settings or update. We strongly recommend that are needed for this user manual refers to ensure optimal performance. Chapter 3: BIOS setup BIOS setup 3.1 Knowing BIOS 3 The new ASUS UEFI BIOS is a Unified Extensible Interface that complies with UEFI architecture, offering a ... appears on the screen during the system bootup and requests you change the default BIOS settings except in this motherboard. Chapter 3 ASUS GRYPHON Z97 ARMOR EDITION 3-1 You can easily navigate the new UEFI BIOS with the same smoothness as Z97GP.CAP for system startup in the motherboard CMOS...

User Guide
Page 75
.... Click the button to manually tune the fans Shows the bootable devices Saves the changes and resets the system Loads optimized default settings Displays the Advanced mode menus Selects the boot device priority The boot device options vary depending on the devices you enter the BIOS setup program. ASUS GRYPHON Z97 ARMOR EDITION 3-3 3.2.1 EZ Mode By...
.... Click the button to manually tune the fans Shows the bootable devices Saves the changes and resets the system Loads optimized default settings Displays the Advanced mode menus Selects the boot device priority The boot device options vary depending on the devices you enter the BIOS setup program. ASUS GRYPHON Z97 ARMOR EDITION 3-3 3.2.1 EZ Mode By...

User Guide
Page 77
Click this button to manually tweak the fans to view and tweak the overclocking settings of the screen has the following main items: My Favorites Main Ai Tweaker Advanced For ... BIOS items in your BIOS. EZ Tuning Wizard (F11) This button above the menu bar contains the languages that you to your desired settings. Chapter 3 ASUS GRYPHON Z97 ARMOR EDITION 3-5 Boot For changing the system boot configuration Tool For configuring options for special functions Exit For selecting the exit options and loading default settings Menu...
Click this button to manually tweak the fans to view and tweak the overclocking settings of the screen has the following main items: My Favorites Main Ai Tweaker Advanced For ... BIOS items in your BIOS. EZ Tuning Wizard (F11) This button above the menu bar contains the languages that you to your desired settings. Chapter 3 ASUS GRYPHON Z97 ARMOR EDITION 3-5 Boot For changing the system boot configuration Tool For configuring options for special functions Exit For selecting the exit options and loading default settings Menu...

User Guide
Page 79
3.2.3 Q-Fan Control The Q-Fan Control allows you to manually configure your CPU and chassis fans. Click to select a fan to be configured Click to activate PWM Mode Click to activate DC Mode Chapter 3 Select a profile to apply to your fans Click to apply the fan setting Click to undo the changes Click to go back to main menu Select to set a fan profile or manually configure the operating speed of your fans ASUS GRYPHON Z97 ARMOR EDITION 3-7
3.2.3 Q-Fan Control The Q-Fan Control allows you to manually configure your CPU and chassis fans. Click to select a fan to be configured Click to activate PWM Mode Click to activate DC Mode Chapter 3 Select a profile to apply to your fans Click to apply the fan setting Click to undo the changes Click to go back to main menu Select to set a fan profile or manually configure the operating speed of your fans ASUS GRYPHON Z97 ARMOR EDITION 3-7

User Guide
Page 80
Click and drag the speed points to save the changes then click Exit (ESC). 3-8 Chapter 3: BIOS setup Chapter 3 Speed points Click or tap to manually configure your fans To configure your fans' operating speed. Click Apply to adjust the fans' operating speed. 3. Select the fan that you want to configure and to view its current status. 2. Configuring fans manually Select Manual from the list of profiles to manually configure your fans: 1.
Click and drag the speed points to save the changes then click Exit (ESC). 3-8 Chapter 3: BIOS setup Chapter 3 Speed points Click or tap to manually configure your fans To configure your fans' operating speed. Click Apply to adjust the fans' operating speed. 3. Select the fan that you want to configure and to view its current status. 2. Configuring fans manually Select Manual from the list of profiles to manually configure your fans: 1.

User Guide
Page 87
... PLL [Auto] Set this item to high BCLK (base clock) mode when using a very high BCLK to adjust the value. Configuration options: [Auto] [Manual] [XMP] The following items appear only when you set to [Per Core], the following items appear: 1-Core Ratio Limit [Auto] Select [Auto] to ... equal to the 2-Core Ratio Limit. 2-Core Ratio Limit [Auto] Select [Auto] to apply the CPU default Turbo Ratio setting or manually assign a 2-Core Limit value that must be higher than or equal to adjust the value. Use the or to the 3-Core Ratio Limit. Chapter 3 ASUS GRYPHON Z97 ARMOR EDITION 3-15
... PLL [Auto] Set this item to high BCLK (base clock) mode when using a very high BCLK to adjust the value. Configuration options: [Auto] [Manual] [XMP] The following items appear only when you set to [Per Core], the following items appear: 1-Core Ratio Limit [Auto] Select [Auto] to ... equal to the 2-Core Ratio Limit. 2-Core Ratio Limit [Auto] Select [Auto] to apply the CPU default Turbo Ratio setting or manually assign a 2-Core Limit value that must be higher than or equal to adjust the value. Use the or to the 3-Core Ratio Limit. Chapter 3 ASUS GRYPHON Z97 ARMOR EDITION 3-15

User Guide
Page 92
... stability. Higher load-line calibration could get higher voltage and good overclocking performance, but increases the CPU and VRM thermal conditions. Select [Manual] to CPU loading. Configuration options: [Optimized (ASUS] [Default (MRC)] MCH Full Check [Auto] Enable this item to 125%. Configuration options: [Auto] [Enabled] [Disabled] External DIGI+ Power Control CPU Load...
... stability. Higher load-line calibration could get higher voltage and good overclocking performance, but increases the CPU and VRM thermal conditions. Select [Manual] to CPU loading. Configuration options: [Optimized (ASUS] [Default (MRC)] MCH Full Check [Auto] Enable this item to 125%. Configuration options: [Auto] [Enabled] [Disabled] External DIGI+ Power Control CPU Load...

User Guide
Page 93
... conditions should be monitored. The following item appears only when you set a fixed DRAM switching frequency for CPU overclocking. Chapter 3 ASUS GRYPHON Z97 ARMOR EDITION 3-21 The values range from 300 KHz to 500 KHz with an interval of the CPU. CPU Current Capability [Auto] This item...speed. VRM Spread Spectrum [Disabled] This item allows to enhance the system stability. Set this item to [Manual] to manually set the CPU VRM Switching Frequency to [Manual]. DO NOT remove the thermal module. A higher value setting provides higher power consumption delivery and extends the...
... conditions should be monitored. The following item appears only when you set a fixed DRAM switching frequency for CPU overclocking. Chapter 3 ASUS GRYPHON Z97 ARMOR EDITION 3-21 The values range from 300 KHz to 500 KHz with an interval of the CPU. CPU Current Capability [Auto] This item...speed. VRM Spread Spectrum [Disabled] This item allows to enhance the system stability. Set this item to [Manual] to manually set the CPU VRM Switching Frequency to [Manual]. DO NOT remove the thermal module. A higher value setting provides higher power consumption delivery and extends the...

User Guide
Page 95
... between optimal regulating while staying below the current threshold. Configuration options: [Auto] [0.00] - [1.50] Chapter 3 ASUS GRYPHON Z97 ARMOR EDITION 3-23 The values range from 0.00 to set the slew rate for the Fully Integrated Voltage Regulator when it exits manual override mode. Configuration options: [Auto] [Regular] [Fast] Power Current Slope [Auto] This item allows you.... Select a higher power current slope levels for power saving enhancement or lower power current slope levels for the Fully Integrated Voltage Regulator when it enters manual override mode.
... between optimal regulating while staying below the current threshold. Configuration options: [Auto] [0.00] - [1.50] Chapter 3 ASUS GRYPHON Z97 ARMOR EDITION 3-23 The values range from 0.00 to set the slew rate for the Fully Integrated Voltage Regulator when it exits manual override mode. Configuration options: [Auto] [Regular] [Fast] Power Current Slope [Auto] This item allows you.... Select a higher power current slope levels for power saving enhancement or lower power current slope levels for the Fully Integrated Voltage Regulator when it enters manual override mode.

User Guide
Page 96
...V interval. The values range from 0.001 V to the CPU cores. Power Saving Level 2 Threshold [Auto] Lower value provides sufficient overclocking tolerance to [Manual Mode]. Offset Mode Sign [+] [+] To offset the voltage by a positive value. [-] To offset the voltage by a negative value. Higher value provides ...a high level voltage to 1.920 V with a 0.001 V interval. The values range from 0 A to [Offset Mode]. Configuration options: [Auto] [Manual Mode] [Offset Mode] The following items appear only when you to set the CPU Core Voltage to 50 A at 1A increment. CPU Core Voltage [Auto...
...V interval. The values range from 0.001 V to the CPU cores. Power Saving Level 2 Threshold [Auto] Lower value provides sufficient overclocking tolerance to [Manual Mode]. Offset Mode Sign [+] [+] To offset the voltage by a positive value. [-] To offset the voltage by a negative value. Higher value provides ...a high level voltage to 1.920 V with a 0.001 V interval. The values range from 0 A to [Offset Mode]. Configuration options: [Auto] [Manual Mode] [Offset Mode] The following items appear only when you to set the CPU Core Voltage to 50 A at 1A increment. CPU Core Voltage [Auto...


