
User Manual
Page 4
English Placing on the desktop...22 Mounting to the wall...22 Setting up your ASUS All-in-one PC 25 Connecting the wired keyboard and mouse 25 Connecting the wireless keyboard and mouse 25 Powering on the system...26 Powering off...26 Calibrating the screen...27 Configuring a wireless connection 28 Configuring a wired connection 29 Using a static IP...29 Using a dynamic IP (PPPoE 31 Configuring the audio output...34 Speaker configurations...34 Connecting to speakers...34 Recovering your system 35 Using the hidden partition...35
English Placing on the desktop...22 Mounting to the wall...22 Setting up your ASUS All-in-one PC 25 Connecting the wired keyboard and mouse 25 Connecting the wireless keyboard and mouse 25 Powering on the system...26 Powering off...26 Calibrating the screen...27 Configuring a wireless connection 28 Configuring a wired connection 29 Using a static IP...29 Using a dynamic IP (PPPoE 31 Configuring the audio output...34 Speaker configurations...34 Connecting to speakers...34 Recovering your system 35 Using the hidden partition...35

User Manual
Page 14
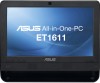
English Welcome Congratulations on your purchase of your retailer. Package contents ASUS All-in-one PC ET1611 Series Actual product specifications may vary with territories. 14 ASUS All-in -one PC ET1611 Series. The following items is damaged or missing, contact your new ... If any of the following illustration displays the package contents of ASUS All-in -one PC ET1611 Series Keyboard (wired or wireless) Mouse (wired or wireless) AC adapter Power cord Quick Guide Wall mount kit (optional) Wall mount adapter (optional) Quick guide Warranty card Note: The keyboard,...
English Welcome Congratulations on your purchase of your retailer. Package contents ASUS All-in-one PC ET1611 Series Actual product specifications may vary with territories. 14 ASUS All-in -one PC ET1611 Series. The following items is damaged or missing, contact your new ... If any of the following illustration displays the package contents of ASUS All-in -one PC ET1611 Series Keyboard (wired or wireless) Mouse (wired or wireless) AC adapter Power cord Quick Guide Wall mount kit (optional) Wall mount adapter (optional) Quick guide Warranty card Note: The keyboard,...

User Manual
Page 22
... on the stand to the wall To mount your ASUS All-in-one PC ET1611 Series Keep the screws for future use in case you want to reinstall the stand. 22 ASUS All-in-one PC to the wall, purchase an optional wall mount adapter (160mm x 92mm) and a wall mount kit (pad and rack). ...English Positioning your ASUS All-in-one PC Placing on the desktop Place your ASUS All-in-one PC according to the following instructions. 1. Mount your ASUS All-in-one ...
... on the stand to the wall To mount your ASUS All-in-one PC ET1611 Series Keep the screws for future use in case you want to reinstall the stand. 22 ASUS All-in-one PC to the wall, purchase an optional wall mount adapter (160mm x 92mm) and a wall mount kit (pad and rack). ...English Positioning your ASUS All-in-one PC Placing on the desktop Place your ASUS All-in-one PC according to the following instructions. 1. Mount your ASUS All-in-one ...

User Manual
Page 23
Secure the wall mount pad to the rear panel with the four screws noting the correct orientation. Secure the wall mount adapter to the adapter with the four screws (M3 x 8L) you removed in -one PC ET1611 Series 23 Remove the four screws from the panel. Keep the screws for later use. 3. ASUS All-in the previous step noting the correct orientation. 4. English 2.
Secure the wall mount pad to the rear panel with the four screws noting the correct orientation. Secure the wall mount adapter to the adapter with the four screws (M3 x 8L) you removed in -one PC ET1611 Series 23 Remove the four screws from the panel. Keep the screws for later use. 3. ASUS All-in the previous step noting the correct orientation. 4. English 2.

User Manual
Page 24
Hook your wall mount kit package. For ventilation's sake, ensure that came with your All-in -one PC to the wall following the instructions described in this illustration is for reference only. 6. English 5. Fasten the wall mount rack to the wall mount rack securely. The wall mount rack in the installation manual that you leave a distance of 6cm at least between the system and the wall. 24 ASUS All-in -one PC ET1611 Series
Hook your wall mount kit package. For ventilation's sake, ensure that came with your All-in -one PC to the wall following the instructions described in this illustration is for reference only. 6. English 5. Fasten the wall mount rack to the wall mount rack securely. The wall mount rack in the installation manual that you leave a distance of 6cm at least between the system and the wall. 24 ASUS All-in -one PC ET1611 Series
