

User Manual
Page 15
... monitors to your computer, refer to a power source. • If your computer. 2. Plug the monitor to Connecting multiple external monitors in the BIOS. To connect an external monitor using the onboard display output ports: 1. Hence, connect your monitor to a display output port on the rear panel ...of your computer comes with an ASUS Graphics Card, the graphics card is set as the primary display device in Chapter 3 of this user manual for details. 1-6 Chapter 1: Getting ...
... monitors to your computer, refer to a power source. • If your computer. 2. Plug the monitor to Connecting multiple external monitors in the BIOS. To connect an external monitor using the onboard display output ports: 1. Hence, connect your monitor to a display output port on the rear panel ...of your computer comes with an ASUS Graphics Card, the graphics card is set as the primary display device in Chapter 3 of this user manual for details. 1-6 Chapter 1: Getting ...
User Manual
Page 42
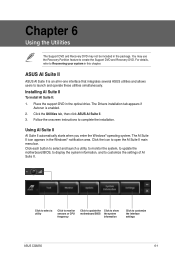
...starts when you enter the Windows® operating system. Click each button to select and launch a utility, to monitor the system, to update the motherboard BIOS, to display the system information, and to complete the installation. Installing AI Suite II To install AI Suite II: 1. Follow the onscreen instructions to ... is an all-in the optical drive. The AI Suite II icon appears in this chapter. Click the icon to customize the interface settings ASUS CG8250 6-1 For details, refer to Recovering your system in the Windows® notification area. Click the Utilities tab, then click...
...starts when you enter the Windows® operating system. Click each button to select and launch a utility, to monitor the system, to update the motherboard BIOS, to display the system information, and to complete the installation. Installing AI Suite II To install AI Suite II: 1. Follow the onscreen instructions to ... is an all-in the optical drive. The AI Suite II icon appears in this chapter. Click the icon to customize the interface settings ASUS CG8250 6-1 For details, refer to Recovering your system in the Windows® notification area. Click the Utilities tab, then click...
User Manual
Page 46
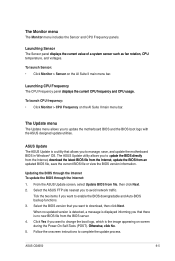
...; Click Monitor > CPU Frequency on the AI Suite II main menu bar. The ASUS Update utility allows you to manage, save the current BIOS file or view the BIOS version information. When no new BIOS file from file, then click Next. 2. ASUS CG8250 6-5 The Update menu The Update menu allows you to download, then click Next...
...; Click Monitor > CPU Frequency on the AI Suite II main menu bar. The ASUS Update utility allows you to manage, save the current BIOS file or view the BIOS version information. When no new BIOS file from file, then click Next. 2. ASUS CG8250 6-5 The Update menu The Update menu allows you to download, then click Next...

User Manual
Page 47
... the motherboard, CPU, and memory slots. • Click the MB tab to see the details on the motherboard manufacturer, product name, version, and BIOS. • Click the CPU tab to see the details on the processor and the Cache. • Click the SPD tab and then select the... memory slot to change the boot logo, which is the image appearing on the corresponding slot. From the ASUS Update screen, select Update BIOS from the Open window, click Open, and click Next. 3. Follow the onscreen instructions to customize the interface's contrast, brightness, saturation, ...
... the motherboard, CPU, and memory slots. • Click the MB tab to see the details on the motherboard manufacturer, product name, version, and BIOS. • Click the CPU tab to see the details on the processor and the Cache. • Click the SPD tab and then select the... memory slot to change the boot logo, which is the image appearing on the corresponding slot. From the ASUS Update screen, select Update BIOS from the Open window, click Open, and click Next. 3. Follow the onscreen instructions to customize the interface's contrast, brightness, saturation, ...
User Manual
Page 50
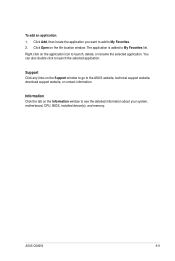
Information Click the tab on the application icon to see the detailed information about your system, motherboard, CPU, BIOS, installed device(s), and memory. Right click on the Information window to launch, delete, or rename the selected application. Click Add, ... is added to My Favorites. 2. You can also double click to the ASUS website, technical support website, download support website, or contact information. Click Open on the Support window to go to launch the selected application. ASUS CG8250 6-9 Support Click any links on the file location window. To add an ...
Information Click the tab on the application icon to see the detailed information about your system, motherboard, CPU, BIOS, installed device(s), and memory. Right click on the Information window to launch, delete, or rename the selected application. Click Add, ... is added to My Favorites. 2. You can also double click to the ASUS website, technical support website, download support website, or contact information. Click Open on the Support window to go to launch the selected application. ASUS CG8250 6-9 Support Click any links on the file location window. To add an ...

User Manual
Page 60
... is too high. Visit the ASUS Support site at http://support.asus.com for the computer. Move your Desktop PC's warranty card and contact the ASUS Service Center. The system temperature is booting up. ASUS CG8250 7-7 Update the BIOS to download the latest BIOS versions. Action It is powering ...on the computer. CPU Problem Too noisy right after entering the OS. The BIOS settings have been changed. The...
... is too high. Visit the ASUS Support site at http://support.asus.com for the computer. Move your Desktop PC's warranty card and contact the ASUS Service Center. The system temperature is booting up. ASUS CG8250 7-7 Update the BIOS to download the latest BIOS versions. Action It is powering ...on the computer. CPU Problem Too noisy right after entering the OS. The BIOS settings have been changed. The...


