Asus A72F Support and Manuals
Get Help and Manuals for this Asus item
Popular Asus A72F Manual Pages
User Manual - Page 2
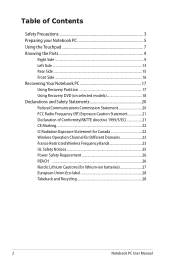
...5 Using the Touchpad 7 Knowing the Parts 9
Right Side...9 Left Side ...13 Rear Side...15 Front Side...16 Recovering Your Notebook PC 17 Using Recovery Partition 17 Using Recovery DVD (on selected models 18 Declarations and Safety Statements 20 Federal...REACH ...26 Nordic Lithium Cautions (for lithium-ion batteries 27 European Union Eco-label 28 Takeback and Recycling 28
Notebook PC User...
User Manual - Page 3
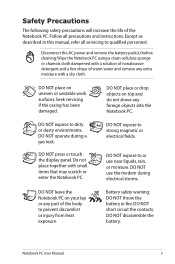
... warning: DO NOT throw the battery in this manual, refer all precautions and instructions. Follow all servicing to qualified personnel.
DO NOT operate during electrical storms.
DO NOT leave the Notebook PC on your lap or any part of the body to or use the modem during a gas leak.
DO NOT place or drop objects...
User Manual - Page 6
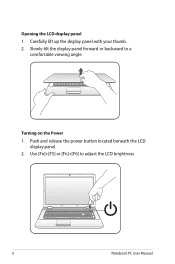
Push and release the power button located beneath the LCD
display panel. 2. Use [Fn]+[F5] or [Fn]+[F6] to a
comfortable viewing angle. Slowly tilt the display panel forward or backward to adjust the LCD brightness.
Notebook PC User Manual Turning on the Power 1. Carefully lift up the display panel with your thumb. 2. Opening the LCD display panel 1.
User Manual - Page 9
... User Manual
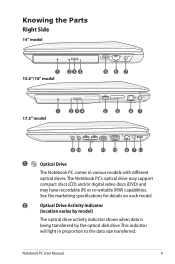
This indicator will light in various models with different optical drives.The Notebook PC's optical drive may support compact discs (CD) and/or digital video discs (DVD) and may have recordable (R) or re-writable (RW) capabilities. Knowing the Parts Right Side
14" model
1 15.6"/16" model
23 4
5 67
1 2 34 17.3" model
58
67
HDMI
9 10 5 11...
User Manual - Page 10
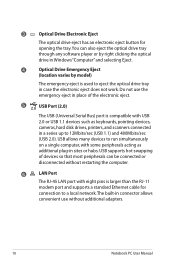
... drive tray through any software player or by right clicking the optical drive in Windows "Computer" and selecting Eject.
4
Optical Drive Emergency Eject
(location varies by model)
The emergency eject is larger than the RJ-11
modem port and supports a standard Ethernet cable for opening the tray. USB allows many devices to run...
User Manual - Page 12

...sound an alarm when moved.
12
Notebook PC User Manual It transmits all -digital audio/video interface between any audio/video source, such as a set-top box, DVD player, and A/V receiver and an...HDMI (High-Definition Multimedia Interface) is an uncompressed all ATSC HDTV standards and supports 8-channel digital audio, with bandwidth to spare to accommodate future enhancements or requirements.
12...
User Manual - Page 13
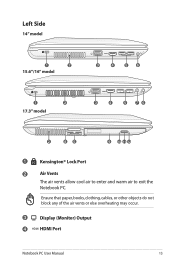
Left Side
14" model
1
2
15.6"/16" model
1
2
17.3" model
HDMI
3
4
5
6
HDMI
3
4
5
76
2
85
9 10 11 12
1
Kensington® Lock Port
2
Air Vents
The air vents allow cool air to enter and warm air to exit the Notebook PC. ... other objects do not block any of the air vents or else overheating may occur.
3
Display (Monitor) Output
4 HDMI HDMI Port
Notebook PC User Manual
13
User Manual - Page 14
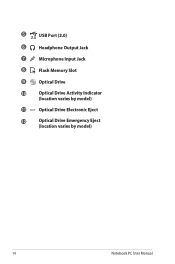
5
USB Port (2.0)
6
Headphone Output Jack
7
Microphone Input Jack
8
Flash Memory Slot
9
Optical Drive
10
Optical Drive Activity Indicator
(location varies by model)
11
Optical Drive Electronic Eject
12
Optical Drive Emergency Eject
(location varies by model)
14
Notebook PC User Manual
User Manual - Page 17
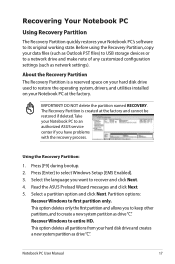
... click Next. Recover Windows to an authorized ASUS service center if you have problems with the recovery process. Take your Notebook PC to entire HD. Using the Recovery Partition:
1. Press [Enter] to recover and click Next. 4. Select the language you to keep other partitions,and to restore the operating system, drivers, and utilities installed on your Notebook PC...
User Manual - Page 18
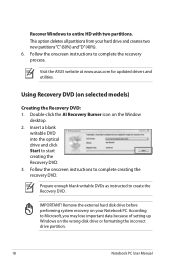
... Start to create the Recovery DVD. According to complete creating the recovery DVD. Visit the ASUS website at www.asus.com for updated drivers and utilities.
Using Recovery DVD (on the wrong disk drive or formatting the incorrect drive partition.
18
Notebook PC User Manual
Prepare enough blank writable DVDs as instructed to start creating the Recovery DVD. 3. This option...
User Manual - Page 19
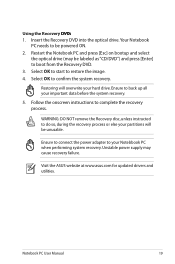
... the Recovery disc, unless instructed to boot from the Recovery DVD. 3. Insert the Recovery DVD into the optical drive.Your Notebook
PC needs to be labeled as "CD/DVD") and press [Enter] to do so, during the recovery process or else your important data before the system recovery.
5.
Visit the ASUS website at www.asus.com for updated drivers and...
User Manual - Page 22

...
that is installed outdoors is subject to the licensed service (i.e.
To prevent radio interference to licensing.
22
Notebook PC User Manual Equipment (or its transmit antenna) that may cause undesired operation of the European Parliament and Commission from windows to the transmitting antenna during transmitting. To maintain compliance with IC radiation exposure limits set forth...
User Manual - Page 30
TAIWAN ASUS COMPUTER GmbH HARKORT STR. 21-23, 40880 RATINGEN GERMANY
declare the following apparatus:
Product name : Model name :
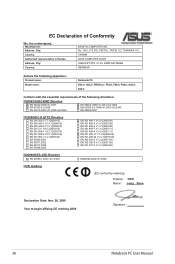
Notebook PC K42Jr, X8CJr, PRO8CJr, F85Jr, F86Jr, P82Jr, A42Jr, X42Jr
conform with the essential requirements...Date: Nov. 20, 2009 Year to begin affixing CE marking:2009
Signature
30
Notebook PC User Manual No. 150, LI-TE RD., PEITOU, TAIPEI 112, TAIWAN R.O.C.
User Manual - Page 31

TAIWAN ASUS COMPUTER GmbH HARKORT STR. 21-23, 40880 RATINGEN GERMANY
declare the following apparatus:
Product name : Model name :
Notebook PC K52J, X5IJ, PRO5IJ, P52J, A52J...A1:2001+A2:2005 EN 55020:2007
1999/5/EC-R &TTE Directive
EN 300 328 V1.7.1(2006-10) EN 300 440-1 V1.4.1(2008-05) EN 300 440-2 V1.2.1(2008-03) EN 301 511...begin affixing CE marking:2009
Signature
Notebook PC User Manual
31
User Manual - Page 32
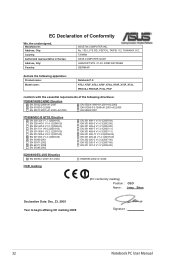
...the following apparatus:
Product name : Model name :
Notebook P.C. No. 150, LI-TE RD., PEITOU, TAIPEI 112, TAIWAN R.O.C. TAIWAN ASUS COMPUTER GmbH HARKORT STR. 21-23...Declaration Date: Dec. 23, 2009 Year to begin affixing CE marking:2009
Signature
32
Notebook PC User Manual K72J, K72F, A72J, A72F, X7AJ, X7AF, X72F, X72J, PRO7AJ, PRO7AF, P72J, P72F
conform with the essential requirements of...
Asus A72F Reviews
We have not received any reviews for Asus yet.