
Owners Manual
Page 193
...Setting ON/OFF of the remote sensor 38 Setting the Rear Camera Input 38 Setting the Navigation Mode 38 Setting the Navigation Interruption 38 Setting the AUX Mode 38 Adjusting the External Input Audio Level 39 Switching the Visual Input Signal System 39 Setting the Picture Output 39 Setting the Bluetooth Connection ... Digital Output Setting 31 Setting the Downmix Mode 33 Setting the TV Screen Mode 33 Setting of the Bonus Code 33 Setting of the DVD-Audio Playback Mode 33 Playing MP3/WMA/AAC Data (File Play Mode 33 Setting the compressed File Playback Data 34 Displaying DivX® ...
...Setting ON/OFF of the remote sensor 38 Setting the Rear Camera Input 38 Setting the Navigation Mode 38 Setting the Navigation Interruption 38 Setting the AUX Mode 38 Adjusting the External Input Audio Level 39 Switching the Visual Input Signal System 39 Setting the Picture Output 39 Setting the Bluetooth Connection ... Digital Output Setting 31 Setting the Downmix Mode 33 Setting the TV Screen Mode 33 Setting of the Bonus Code 33 Setting of the DVD-Audio Playback Mode 33 Playing MP3/WMA/AAC Data (File Play Mode 33 Setting the compressed File Playback Data 34 Displaying DivX® ...

Owners Manual
Page 219
...MODE 3 MODE 1 (CINEMA) (NORMAL) (WIDE) In Mode 1 (Wide), the monitor displays a normal picture wider to the selected one. Switching Display Modes After carrying out the...DVD mode screen" explained on page 29, perform the operation described below . 1 Touch [VISUAL] on page 29, perform the operation described below . The SOURCE selection screen is displayed. 2 Touch [OFF]. Each touch changes the display modes as visual (auxiliary input...8226; When the "Setting the AUX Mode" (page 38) is set to "Setting the VISUAL Soft Button" (page 39). • If a DVD player is connected, you can be...
...MODE 3 MODE 1 (CINEMA) (NORMAL) (WIDE) In Mode 1 (Wide), the monitor displays a normal picture wider to the selected one. Switching Display Modes After carrying out the...DVD mode screen" explained on page 29, perform the operation described below . 1 Touch [VISUAL] on page 29, perform the operation described below . The SOURCE selection screen is displayed. 2 Touch [OFF]. Each touch changes the display modes as visual (auxiliary input...8226; When the "Setting the AUX Mode" (page 38) is set to "Setting the VISUAL Soft Button" (page 39). • If a DVD player is connected, you can be...

Owners Manual
Page 229
...an Alpine Ai-NET Auxiliary Input Adapter (KCA-801B) is output to the monitor. ON: Sound will automatically mute when switched to the AUX Input. Switching the function of the remote sensor For remote control operation, the remote sensor of this unit becomes effective. Setting the Rear Camera Input ... the IVA-W505, an Auxiliary Source will be changed , it has been 5 seconds since last touching the panel. • When an optional DVD changer or DVD player is connected, and the remote control sensor is set by selecting the CAMERA source. • By shifting to use the Alpine KCA-...
...an Alpine Ai-NET Auxiliary Input Adapter (KCA-801B) is output to the monitor. ON: Sound will automatically mute when switched to the AUX Input. Switching the function of the remote sensor For remote control operation, the remote sensor of this unit becomes effective. Setting the Rear Camera Input ... the IVA-W505, an Auxiliary Source will be changed , it has been 5 seconds since last touching the panel. • When an optional DVD changer or DVD player is connected, and the remote control sensor is set by selecting the CAMERA source. • By shifting to use the Alpine KCA-...

Owners Manual
Page 230
...connected, the Voice Dial function can be changed from this unit. • Only when an Alpine TV tuner is set to ON. Setting the USB Adapter to ON/OFF If a USB ...AUX+ Mode An external device (such as a portable music player) can operate the displayed function guide from CD CHG to USB. Setting item: AUX+ IN Setting contents: OFF / ON OFF: AUX+ source is not displayed ON: AUX... Does not display the USB source name on the IVA-W505 connected to the rear monitor. Adjusting the External Input Audio Level After setting to ON in "Setting the AUX Mode", this setting can be carried out. Touch [...
...connected, the Voice Dial function can be changed from this unit. • Only when an Alpine TV tuner is set to ON. Setting the USB Adapter to ON/OFF If a USB ...AUX+ Mode An external device (such as a portable music player) can operate the displayed function guide from CD CHG to USB. Setting item: AUX+ IN Setting contents: OFF / ON OFF: AUX+ source is not displayed ON: AUX... Does not display the USB source name on the IVA-W505 connected to the rear monitor. Adjusting the External Input Audio Level After setting to ON in "Setting the AUX Mode", this setting can be carried out. Touch [...
Owners Manual
Page 236
... following operations. Set the delay number in "Adjusting the acoustic image (BI-PHANTOM)" (page 48) are input. • If the setting of REAR FILL is made when REAR MIX is ON, sound is unchanged ...; This adjustment is ineffective when the speaker is set here is reflected to the rear channel. MX AUX (OFF, CMPM MX, MOVIE MX, MUSIC MX) Choose the MX mode (CMPM, MUSIC, or ...right speakers. Setting Bass Sound Control Setting item: BASS SOUND CONT. Bass sound is emphasized more clearly. (DVD MUSIC) This disc contains a large quantity of data such as well. • Avoid stopping, pausing, ...
... following operations. Set the delay number in "Adjusting the acoustic image (BI-PHANTOM)" (page 48) are input. • If the setting of REAR FILL is made when REAR MIX is ON, sound is unchanged ...; This adjustment is ineffective when the speaker is set here is reflected to the rear channel. MX AUX (OFF, CMPM MX, MOVIE MX, MUSIC MX) Choose the MX mode (CMPM, MUSIC, or ...right speakers. Setting Bass Sound Control Setting item: BASS SOUND CONT. Bass sound is emphasized more clearly. (DVD MUSIC) This disc contains a large quantity of data such as well. • Avoid stopping, pausing, ...
Owners Manual
Page 249
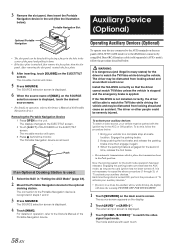
...monitor will open. 3 Press behind the monitor. Removing the Portable Navigation Device 1 Press OPEN on the display. 2 Touch [AUX]*1 or [AUX+]*2. The display changes to watch the TV/Video while driving the vehicle and may be distracted from looking ahead and cause an accident. The SOURCE selection screen is removed. Install the IVA-W505... correctly so that the driver cannot watch the TV/Video while driving the vehicle. The external input screen is turned OFF, perform the procedure of "To activate your auxiliary devices." • If you try to the AUX terminals ...
...monitor will open. 3 Press behind the monitor. Removing the Portable Navigation Device 1 Press OPEN on the display. 2 Touch [AUX]*1 or [AUX+]*2. The display changes to watch the TV/Video while driving the vehicle and may be distracted from looking ahead and cause an accident. The SOURCE selection screen is removed. Install the IVA-W505... correctly so that the driver cannot watch the TV/Video while driving the vehicle. The external input screen is turned OFF, perform the procedure of "To activate your auxiliary devices." • If you try to the AUX terminals ...
Owners Manual
Page 250
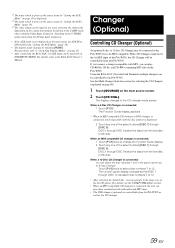
... changer or DVD changer is connected, touch repeatedly until the disc number is given as the source name in "Setting the AUX+ Mode" (page 39). *3 The video signal can operate in the same way as for the CD player. Touch [P1/3] twice to select disc numbers 7 to the Ai-NET input of the IVA-W505, the... CD Changer will be used only in INTERRUPT MODE. *1 The name which is given as the source name in "Setting the AUX Mode" on page 38 is displayed. *2 The...
... changer or DVD changer is connected, touch repeatedly until the disc number is given as the source name in "Setting the AUX+ Mode" (page 39). *3 The video signal can operate in the same way as for the CD player. Touch [P1/3] twice to select disc numbers 7 to the Ai-NET input of the IVA-W505, the... CD Changer will be used only in INTERRUPT MODE. *1 The name which is given as the source name in "Setting the AUX Mode" on page 38 is displayed. *2 The...

Owners Manual
Page 279
...monitor. Audio Output Connectors (AUX OUTPUT) RED is right and WHITE is left . This lead outputs the controlling signals from the remote control. Monitor Control Lead (White/Pink) Connect this to the Monitor...) Connect this lead properly wired, the video picture automatically switches to the IVA-W505. Video Output Connector (AUX OUTPUT) (Yellow) Output the video. iPod Direct Connector iPod control signals....lead to the remote turn the power off to the output or input connector of your nearest Alpine dealer. Remote Control Output Lead (White/Brown) Connect this lead to...
...monitor. Audio Output Connectors (AUX OUTPUT) RED is right and WHITE is left . This lead outputs the controlling signals from the remote control. Monitor Control Lead (White/Pink) Connect this to the Monitor...) Connect this lead properly wired, the video picture automatically switches to the IVA-W505. Video Output Connector (AUX OUTPUT) (Yellow) Output the video. iPod Direct Connector iPod control signals....lead to the remote turn the power off to the output or input connector of your nearest Alpine dealer. Remote Control Output Lead (White/Brown) Connect this lead to...

Owners Manual
Page 282
...(Included with NVE-N852A/NVE-N872A, not included with Ai-NET. Video Input Connector (AUX INPUT) (Yellow) Connect the video output lead of the Navigation System. To Ai-NET Connector (Gray) To Ai-NET Connector (Black) AUX I/O Camera In Connector Optical Digital Cable (KWE-610A) (Sold Separately) .../Brown) Connect this lead to the output or input connector of other product equipped with NVE-N871A) RGB Input Terminal Connect this to the RGB output terminal of a DVD video player or DVD changer to this to the remote control input lead. This lead outputs the controlling signals from ...
...(Included with NVE-N852A/NVE-N872A, not included with Ai-NET. Video Input Connector (AUX INPUT) (Yellow) Connect the video output lead of the Navigation System. To Ai-NET Connector (Gray) To Ai-NET Connector (Black) AUX I/O Camera In Connector Optical Digital Cable (KWE-610A) (Sold Separately) .../Brown) Connect this lead to the output or input connector of other product equipped with NVE-N871A) RGB Input Terminal Connect this to the RGB output terminal of a DVD video player or DVD changer to this to the remote control input lead. This lead outputs the controlling signals from ...

Owners Manual
Page 283
... panel-compatible rear monitor. RCA Extension Cable (Sold Separately) AUX I/O Camera In Connector S Video Input Connector Input the video signal. When no device is connected. Video/Audio Input Connectors (AUX INPUT) Monitor Control Lead (White/Pink) Connect this lead to the remote control input lead. M.CONT ... When Connecting External Equipment NORM EQ/DIV To Audio Input terminal Rear monitor (Sold Separately) To Video Input terminal To Video Output terminal Back-up camera (Sold Separately) To S Video Output terminal DVD Changer (Sold Separately) To Video Output terminal TV Tuner...
... panel-compatible rear monitor. RCA Extension Cable (Sold Separately) AUX I/O Camera In Connector S Video Input Connector Input the video signal. When no device is connected. Video/Audio Input Connectors (AUX INPUT) Monitor Control Lead (White/Pink) Connect this lead to the remote control input lead. M.CONT ... When Connecting External Equipment NORM EQ/DIV To Audio Input terminal Rear monitor (Sold Separately) To Video Input terminal To Video Output terminal Back-up camera (Sold Separately) To S Video Output terminal DVD Changer (Sold Separately) To Video Output terminal TV Tuner...

