Owners Manual
Page 1
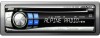
... CDE-9842 ES • OWNER'S MANUAL Please read before using this equipment. • MODE D'EMPLOI Veuillez lire avant d'utiliser cet appareil. • MANUAL DE OPERACIÓN Léalo antes de utilizar este equipo. Viale C. ALPINE ELECTRONICS MARKETING, INC. 1-1-8 Nishi Gotanda..., Shinagawa-ku, Tokyo 141-0031, Japan Phone 03-5496-8231 ALPINE ELECTRONICS OF AMERICA, INC. 19145 Gramercy Place, ...
... CDE-9842 ES • OWNER'S MANUAL Please read before using this equipment. • MODE D'EMPLOI Veuillez lire avant d'utiliser cet appareil. • MANUAL DE OPERACIÓN Léalo antes de utilizar este equipo. Viale C. ALPINE ELECTRONICS MARKETING, INC. 1-1-8 Nishi Gotanda..., Shinagawa-ku, Tokyo 141-0031, Japan Phone 03-5496-8231 ALPINE ELECTRONICS OF AMERICA, INC. 19145 Gramercy Place, ...
Owners Manual
Page 2
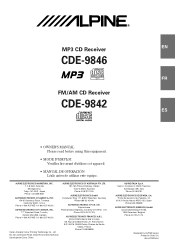
... Front Panel ......... 5 Initial System Start-Up 5 Adjusting Volume 5 Lowering Volume Quickly 5 Radio Changing the Radio Frequencies for each Country (CDE-9846 only 6 Listening to Radio 6 Manual Storing of Station Presets 6 Automatic Memory of Station Presets 7 Tuning to Preset Stations 7 CD/MP3 Playback 8 Repeat Play 9 M.I.X. (Random Play 9 Scanning Programs 9 Searching CD Text...
... Front Panel ......... 5 Initial System Start-Up 5 Adjusting Volume 5 Lowering Volume Quickly 5 Radio Changing the Radio Frequencies for each Country (CDE-9846 only 6 Listening to Radio 6 Manual Storing of Station Presets 6 Automatic Memory of Station Presets 7 Tuning to Preset Stations 7 CD/MP3 Playback 8 Repeat Play 9 M.I.X. (Random Play 9 Scanning Programs 9 Searching CD Text...
Owners Manual
Page 7
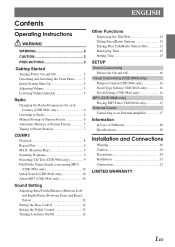
... Tuning). The selected station is Distance mode. F1 (FM1) → F2 (FM2) → AM → F1 (FM1) 3 Press TUNE/A.ME to store in . Manual mode: The frequency is tuned in the preset memory. 2 Press and hold MUTE/SETUP for at least 2 seconds to tune in a preset memory which already... station. 6-EN Holding down g or f will be cleared every time you want to store the station on the display when a stereo FM station is manually tuned in steps (Manual tuning). 4 Press g or f to select the SETUP mode. 2 Select the "AREA" mode by pressing g or f. 3 Choose either AREA 1 or AREA 2 ...
... Tuning). The selected station is Distance mode. F1 (FM1) → F2 (FM2) → AM → F1 (FM1) 3 Press TUNE/A.ME to store in . Manual mode: The frequency is tuned in the preset memory. 2 Press and hold MUTE/SETUP for at least 2 seconds to tune in a preset memory which already... station. 6-EN Holding down g or f will be cleared every time you want to store the station on the display when a stereo FM station is manually tuned in steps (Manual tuning). 4 Press g or f to select the SETUP mode. 2 Select the "AREA" mode by pressing g or f. 3 Choose either AREA 1 or AREA 2 ...

Owners Manual
Page 11
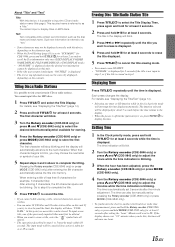
... Search mode, press 3 to switch to File Name Search mode. • "NO FILE" is displayed for tracks (files). 1 Press and hold up to the user's manual for that is selected by pressing and holding 3 for at least 2 seconds in Folder Name Search mode. • While in the selected folder. • Search...
... Search mode, press 3 to switch to File Name Search mode. • "NO FILE" is displayed for tracks (files). 1 Press and hold up to the user's manual for that is selected by pressing and holding 3 for at least 2 seconds in Folder Name Search mode. • While in the selected folder. • Search...
Owners Manual
Page 16
... display momentarily. You cannot input titles for about 5 seconds before the time returns to 00. When entering a title of the previously inputted titles must be manually set by pressing the Rotary encoder (CDE-9846 only) or press MODE (CDE-9842 only). • To synchronize the clock to another clock/watch or...
... display momentarily. You cannot input titles for about 5 seconds before the time returns to 00. When entering a title of the previously inputted titles must be manually set by pressing the Rotary encoder (CDE-9846 only) or press MODE (CDE-9842 only). • To synchronize the clock to another clock/watch or...
Owners Manual
Page 17
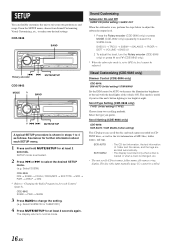
... if you prefer. From the SETUP menu, choose from two scrolling methods. This mode is too bright at least 2 seconds again. The disc titles input manually (page 15) cannot be adjusted. Select SUBW ON or SUBW OFF.) 4 Press MUTE/SETUP for further information about each Country" (page 6). BASS LV → TRE...
... if you prefer. From the SETUP menu, choose from two scrolling methods. This mode is too bright at least 2 seconds again. The disc titles input manually (page 15) cannot be adjusted. Select SUBW ON or SUBW OFF.) 4 Press MUTE/SETUP for further information about each Country" (page 6). BASS LV → TRE...
Owners Manual
Page 21
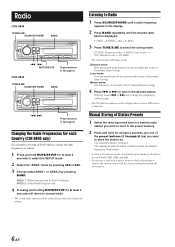
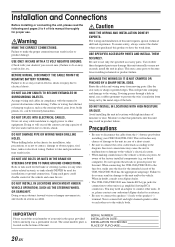
...unit in the space provided below and keep it as a permanent record. If wiring passes through a hole in doubt, consult your authorized Alpine dealer for the intended circuit of the CDE-9846/CDE-9842 has the appropriate amperage. DO NOT INSTALL IN LOCATIONS WITH HIGH MOISTURE OR ... hazards or product failure. Installation and Connections Before installing or connecting the unit, please read the following and pages 2 to 4 of this manual thoroughly for proper use only the specified accessory parts. Caution HAVE THE WIRING AND INSTALLATION DONE BY EXPERTS. When connecting the CDE-9846/CDE-...
...unit in the space provided below and keep it as a permanent record. If wiring passes through a hole in doubt, consult your authorized Alpine dealer for the intended circuit of the CDE-9846/CDE-9842 has the appropriate amperage. DO NOT INSTALL IN LOCATIONS WITH HIGH MOISTURE OR ... hazards or product failure. Installation and Connections Before installing or connecting the unit, please read the following and pages 2 to 4 of this manual thoroughly for proper use only the specified accessory parts. Caution HAVE THE WIRING AND INSTALLATION DONE BY EXPERTS. When connecting the CDE-9846/CDE-...
Owners Manual
Page 22
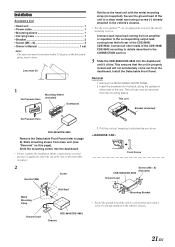
... the installation. Installation Accessory List • Head unit 1 • Power cable 1 • Mounting sleeve 1 • Carrying case 1 • Bracket 2 • Screw (M5 × 8 4 • Owner's Manual 1 set Note: The main unit must be removed from the mounting sleeve. Connect each input lead coming from an amplifier or equalizer to page 5). Install...
... the installation. Installation Accessory List • Head unit 1 • Power cable 1 • Mounting sleeve 1 • Carrying case 1 • Bracket 2 • Screw (M5 × 8 4 • Owner's Manual 1 set Note: The main unit must be removed from the mounting sleeve. Connect each input lead coming from an amplifier or equalizer to page 5). Install...
Owners Manual
Page 25
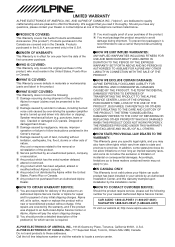
...the telephone numbers listed below. [PRODUCTS COVERED: This Warranty covers Car Audio Products and Related Accessories ("the product"). http://www.alpine-usa.com ALPINE ELECTRONICS OF AMERICA, INC., 19145 Gramercy Place, Torrance, California 90501, U.S.A. Call the toll free telephone number or visit ...This Warranty covers defects in materials or workmanship (parts and labor) in the Owner's manual. 4 Damage caused by act of incidental or consequential damages. To prevent lost packages it thoroughly. ALPINE ELECTRONICS OF CANADA, INC., 777 Supertest Road, Toronto, Ontario M3J 2M9, Canada Do ...
...the telephone numbers listed below. [PRODUCTS COVERED: This Warranty covers Car Audio Products and Related Accessories ("the product"). http://www.alpine-usa.com ALPINE ELECTRONICS OF AMERICA, INC., 19145 Gramercy Place, Torrance, California 90501, U.S.A. Call the toll free telephone number or visit ...This Warranty covers defects in materials or workmanship (parts and labor) in the Owner's manual. 4 Damage caused by act of incidental or consequential damages. To prevent lost packages it thoroughly. ALPINE ELECTRONICS OF CANADA, INC., 777 Supertest Road, Toronto, Ontario M3J 2M9, Canada Do ...


