Owners Manual
Page 3
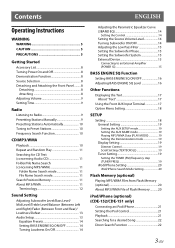
... 8 Detaching and Attaching the Front Panel .........8 Detaching 8 Attaching 8 Adjusting Volume 9 Setting Time 9 Radio Listening to Radio 9 Presetting Stations Manually 9 Presetting Stations Automatically 10 Tuning to Preset Stations 10 Frequency Search Function 10 CD/MP3/WMA Playback 10 Repeat and Random Play 11 Searching .../WMA Files from Flash Memory (optional 20 About MP3/WMA File of Flash Memory ...........20 iPod/iPhone (optional) (CDE-152/CDE-151 only) Connecting an iPod/iPhone 21 Setting the iPod Control 21 Playback 21 Searching for a desired Song 22 Direct Search Function 22...
... 8 Detaching and Attaching the Front Panel .........8 Detaching 8 Attaching 8 Adjusting Volume 9 Setting Time 9 Radio Listening to Radio 9 Presetting Stations Manually 9 Presetting Stations Automatically 10 Tuning to Preset Stations 10 Frequency Search Function 10 CD/MP3/WMA Playback 10 Repeat and Random Play 11 Searching .../WMA Files from Flash Memory (optional 20 About MP3/WMA File of Flash Memory ...........20 iPod/iPhone (optional) (CDE-152/CDE-151 only) Connecting an iPod/iPhone 21 Setting the iPod Control 21 Playback 21 Searching for a desired Song 22 Direct Search Function 22...
Owners Manual
Page 8
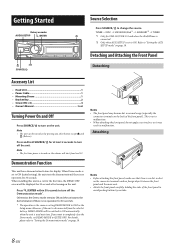
...• Head Unit 1 • Power Cable 1 • Mounting Sleeve 1 • Bracket Key 2 • Screw (M5 × 8 4 • Owner's Manual 1 set to ON (initial setting), the unit starts the demonstration if there is the same as it may become hot in the Setup menu. Notes...;/ENTER e SOURCE/ Source Selection Press SOURCE to QUITE OFF. Attaching Demonstration Function This unit has a demonstration feature for CDE-152/CDE-151 and when the iPod/iPhone is connected. *2 Only when AUX SETUP is no operation for 30 seconds after turning on by mistake. 8-...
...• Head Unit 1 • Power Cable 1 • Mounting Sleeve 1 • Bracket Key 2 • Screw (M5 × 8 4 • Owner's Manual 1 set to ON (initial setting), the unit starts the demonstration if there is the same as it may become hot in the Setup menu. Notes...;/ENTER e SOURCE/ Source Selection Press SOURCE to QUITE OFF. Attaching Demonstration Function This unit has a demonstration feature for CDE-152/CDE-151 and when the iPod/iPhone is connected. *2 Only when AUX SETUP is no operation for 30 seconds after turning on by mistake. 8-...

Owners Manual
Page 14
... modify the Equalizer settings of musical source material. This compensates for Sound adjustment. Setting item: BASS ENGIN Setting contents: OFF (Initial setting) / ON OFF (MANUAL SET mode): Adjust each audio effect setting separately. Equalizer Presets 10 typical equalizer settings are created in this mode. Setting item: 3BAND EQ ... affecting the other sources. Setting item: SOURCE VOL Further setting items: TUNER / DISC / USB / iPod* / AUX Setting contents: −14 dB ~ +14 dB * CDE-152/CDE-151 only.
... modify the Equalizer settings of musical source material. This compensates for Sound adjustment. Setting item: BASS ENGIN Setting contents: OFF (Initial setting) / ON OFF (MANUAL SET mode): Adjust each audio effect setting separately. Equalizer Presets 10 typical equalizer settings are created in this mode. Setting item: 3BAND EQ ... affecting the other sources. Setting item: SOURCE VOL Further setting items: TUNER / DISC / USB / iPod* / AUX Setting contents: −14 dB ~ +14 dB * CDE-152/CDE-151 only.
Owners Manual
Page 17
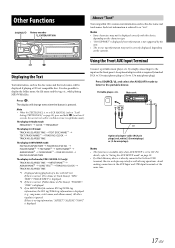
...NAME*2 ARTIST NAME*3 ALBUM NAME*3 SONG NAME*3 FILE NO./CLOCK FILE NO./ELAPSED TIME The display in iPod mode (CDE-152/CDE-151 only): TRACK NO./ELAPSED TIME ARTIST NAME*3 ALBUM NAME*3 SONG TITLE*3 TRACK NO./CLOCK TRACK NO./ELAPSED TIME *1...on page 19), press and hold k for at the same time. 17-EN Connect a portable music player, etc. It is set to SCR MANUAL (refer to the portable device. Notes • This function is available only when AUX SETUP is also possible to ON. Press SOURCE...
...NAME*2 ARTIST NAME*3 ALBUM NAME*3 SONG NAME*3 FILE NO./CLOCK FILE NO./ELAPSED TIME The display in iPod mode (CDE-152/CDE-151 only): TRACK NO./ELAPSED TIME ARTIST NAME*3 ALBUM NAME*3 SONG TITLE*3 TRACK NO./CLOCK TRACK NO./ELAPSED TIME *1...on page 19), press and hold k for at the same time. 17-EN Connect a portable music player, etc. It is set to SCR MANUAL (refer to the portable device. Notes • This function is available only when AUX SETUP is also possible to ON. Press SOURCE...
Owners Manual
Page 21
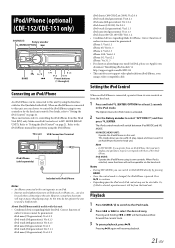
.../fast forward the current track. 3 To pause playback, press . For details, refer to the iPod/iPhone manual for iPhone. Correct function of iPod touch or iPhone, etc., can also be guaranteed. iPod/iPhone (optional) (CDE-152/CDE-151 only) SOURCE/ Rotary encoder /ENTER/OPTION BAND / II 1 5 2 4 Preset buttons...
.../fast forward the current track. 3 To pause playback, press . For details, refer to the iPod/iPhone manual for iPhone. Correct function of iPod touch or iPhone, etc., can also be guaranteed. iPod/iPhone (optional) (CDE-152/CDE-151 only) SOURCE/ Rotary encoder /ENTER/OPTION BAND / II 1 5 2 4 Preset buttons...
Owners Manual
Page 28
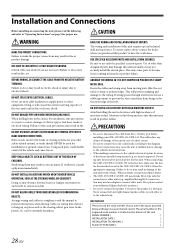
... skill and experience. IMPORTANT Please record the serial number of the CDE-152/CDE-151/CDE-150 has the appropriate amperage. When drilling holes in the chassis for the intended circuit of your Alpine dealer. • The CDE-152/CDE-151/CDE-150 uses female RCA-type jacks for this unit. Arrange wiring ...NUTS IN THE BRAKE OR STEERING SYSTEMS TO MAKE GROUND CONNECTIONS. This may not securely install the unit in locations with the manual to contact, damage or obstruct pipes, fuel lines, tanks or electrical wiring. Never connect left and right channel speaker cables to...
... skill and experience. IMPORTANT Please record the serial number of the CDE-152/CDE-151/CDE-150 has the appropriate amperage. When drilling holes in the chassis for the intended circuit of your Alpine dealer. • The CDE-152/CDE-151/CDE-150 uses female RCA-type jacks for this unit. Arrange wiring ...NUTS IN THE BRAKE OR STEERING SYSTEMS TO MAKE GROUND CONNECTIONS. This may not securely install the unit in locations with the manual to contact, damage or obstruct pipes, fuel lines, tanks or electrical wiring. Never connect left and right channel speaker cables to...


