User Manual
Page 1
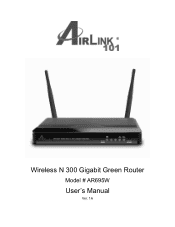
Wireless N 300 Gigabit Green Router Model # AR695W User's Manual Ver. 1A
Wireless N 300 Gigabit Green Router Model # AR695W User's Manual Ver. 1A

User Manual
Page 3
......5 2.2 CONFIGURE THE ROUTER WITH EZ SETUP WIZARD 7 2.3 CONFIGURE THE ROUTER WITH WEB CONFIGURATION UTILITY 15 2.4 CONNECT TO ROUTER WIRELESSLY ...23 CHAPTER 3 ADVANCED CONFIGURATION ...25 3.1 BASIC SETTING ...27 3.1.1 Primary Setup ...28 3.1.2 DHCP Server ...38 3.1.3 Wireless ...40 3.1.4 Change Password...52 3.2 FORWARDING RULES...53 3.2.1 Virtual Server ...53 3.2.2 Special Applications...55 3.2.3 Miscellaneous...56 3.3 SECURITY SETTING ...58...
......5 2.2 CONFIGURE THE ROUTER WITH EZ SETUP WIZARD 7 2.3 CONFIGURE THE ROUTER WITH WEB CONFIGURATION UTILITY 15 2.4 CONNECT TO ROUTER WIRELESSLY ...23 CHAPTER 3 ADVANCED CONFIGURATION ...25 3.1 BASIC SETTING ...27 3.1.1 Primary Setup ...28 3.1.2 DHCP Server ...38 3.1.3 Wireless ...40 3.1.4 Change Password...52 3.2 FORWARDING RULES...53 3.2.1 Virtual Server ...53 3.2.2 Special Applications...55 3.2.3 Miscellaneous...56 3.3 SECURITY SETTING ...58...

User Manual
Page 4
3.4.7 Schedule Rule...83 3.5 TOOLBOX ...85 3.5.1 View Log...86 3.5.2 Firmware Upgrade...87 3.5.3 Backup Setting...88 3.5.4 Reset to Default...88 3.5.5 Reboot ...89 3.5.6 Miscellaneous...89 CHAPTER 4 STATUS...91 4.1 SYSTEM STATUS...92 4.2 WIRELESS STATUS...92 4.3 STATISTICS INFORMATION ...93 4.4 NAT STATUS ...93 CHAPTER 5 APPENDIX ...94 5.1 HARDWARE SPECIFICATION...94 TECHNICAL SUPPORT...95
3.4.7 Schedule Rule...83 3.5 TOOLBOX ...85 3.5.1 View Log...86 3.5.2 Firmware Upgrade...87 3.5.3 Backup Setting...88 3.5.4 Reset to Default...88 3.5.5 Reboot ...89 3.5.6 Miscellaneous...89 CHAPTER 4 STATUS...91 4.1 SYSTEM STATUS...92 4.2 WIRELESS STATUS...92 4.3 STATISTICS INFORMATION ...93 4.4 NAT STATUS ...93 CHAPTER 5 APPENDIX ...94 5.1 HARDWARE SPECIFICATION...94 TECHNICAL SUPPORT...95
User Manual
Page 5
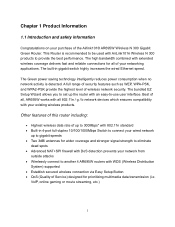
...; Two 3dBi antennas for prioritizing multimedia data transmission (i.e. This Router is detected. Chapter 1 Product Information 1.1 Introduction and safety information Congratulations on your purchase of wireless network security. The built-in 4-port full-duplex 10/100/1000Mbps Switch to connect your wired network up the router with an easy-to another...wired Ethernet speed. A full range of security features such as WEP, WPA-PSK, and WPA2-PSK provide the highest level of the Airlink101® AR695W Wireless N 300 Gigabit Green Router. VoIP, online gaming or movie streaming, etc.) 1
...; Two 3dBi antennas for prioritizing multimedia data transmission (i.e. This Router is detected. Chapter 1 Product Information 1.1 Introduction and safety information Congratulations on your purchase of wireless network security. The built-in 4-port full-duplex 10/100/1000Mbps Switch to connect your wired network up the router with an easy-to another...wired Ethernet speed. A full range of security features such as WEP, WPA-PSK, and WPA2-PSK provide the highest level of the Airlink101® AR695W Wireless N 300 Gigabit Green Router. VoIP, online gaming or movie streaming, etc.) 1

User Manual
Page 6
Two Antennas 3. Power Adapter 4. Wireless N 300 Gigabit Green Router 2. Setup CD 5. Quick Installation Guide 6. Ethernet Cable 2 1.2 Package Contents Before you start using this router, please check if there's anything missing in the package, and contact your dealer of purchase to claim for missing items: 1.
Two Antennas 3. Power Adapter 4. Wireless N 300 Gigabit Green Router 2. Setup CD 5. Quick Installation Guide 6. Ethernet Cable 2 1.2 Package Contents Before you start using this router, please check if there's anything missing in the package, and contact your dealer of purchase to claim for missing items: 1.

User Manual
Page 7
Network device is connected Data access Network device is connected Data access Wireless feature is on Data access Device is in WPS PBC mode Wireless feature is on /off router's wireless radio. 3 Press this button and hold for 6 seconds to restore all settings to factory default ...settings or start security synchronization. Front Panel LED Status On/Sleep WAN LAN 1~4 Wireless Status Blinking (Green) On (Green) Off On (Green) Blinking On (Green) Blinking On (Green) Blinking Blinking Rapidly Off Description Device...
Network device is connected Data access Network device is connected Data access Wireless feature is on Data access Device is in WPS PBC mode Wireless feature is on /off router's wireless radio. 3 Press this button and hold for 6 seconds to restore all settings to factory default ...settings or start security synchronization. Front Panel LED Status On/Sleep WAN LAN 1~4 Wireless Status Blinking (Green) On (Green) Off On (Green) Blinking On (Green) Blinking On (Green) Blinking Blinking Rapidly Off Description Device...

User Manual
Page 9
... other end to one end of a network cable to the WAN port of the router and connect the other end of the cable to use wireless connection.) 5
... other end to one end of a network cable to the WAN port of the router and connect the other end of the cable to use wireless connection.) 5

User Manual
Page 10
Make sure the power switch at the back is connected to an electrical outlet. Step 5 Power on your computer. Step 6 Check LEDs of the router: make sure Status, WAN, Wireless, and the LAN port that the computer is "On". Step 4 Plug the power adapter to the router and connect it to are lit. 6
Make sure the power switch at the back is connected to an electrical outlet. Step 5 Power on your computer. Step 6 Check LEDs of the router: make sure Status, WAN, Wireless, and the LAN port that the computer is "On". Step 4 Plug the power adapter to the router and connect it to are lit. 6

User Manual
Page 13
Step 5 Please make sure your computer is connected to the LAN port of the router, and your modem is connected to configure the basic wireless settings. 9 Step 6 Click Next to the WAN port of the router.
Step 5 Please make sure your computer is connected to the LAN port of the router, and your modem is connected to configure the basic wireless settings. 9 Step 6 Click Next to the WAN port of the router.

User Manual
Page 14
Step 7 Configure the SSID (wireless network name, i.e. Enter 8~63 characters into Key box, then click Next. It is suggested to select WPA2-PSK for best wireless security. Step 8 Click Next and the wizard will detect your WAN settings, or you can select your WAN type manually by checking "Let me select WAN service by myself". 10 myHome), Channel, Security and Key.
Step 7 Configure the SSID (wireless network name, i.e. Enter 8~63 characters into Key box, then click Next. It is suggested to select WPA2-PSK for best wireless security. Step 8 Click Next and the wizard will detect your WAN settings, or you can select your WAN type manually by checking "Let me select WAN service by myself". 10 myHome), Channel, Security and Key.

User Manual
Page 24
Select a channel number for example 'myHome'. Click Next. 20 Example: [email protected] Step 8 Keep the default SSID (wireless network name) or change it to include the domain name with it, for your ISP. PPP over Ethernet: Enter the Account and Password provided by your wireless network. Note: Depending on the ISP, you may need to a desired name, so you can always recognize your wireless network with your username.
Select a channel number for example 'myHome'. Click Next. 20 Example: [email protected] Step 8 Keep the default SSID (wireless network name) or change it to include the domain name with it, for your ISP. PPP over Ethernet: Enter the Account and Password provided by your wireless network. Note: Depending on the ISP, you may need to a desired name, so you can always recognize your wireless network with your username.

User Manual
Page 25
Type in 8~63 characters into Preshare Key. It is the most secured encryption mode for general users but some older wireless adapters might not support it. Therefore, please make sure all wireless devices on your router. Step 9 Set up Wireless Security for security to select WPA2-PSK (AES) for your network support this security type. 21 WPA2-PSK (AES) is recommended to protect your wireless network from unauthorized users. Click Next.
Type in 8~63 characters into Preshare Key. It is the most secured encryption mode for general users but some older wireless adapters might not support it. Therefore, please make sure all wireless devices on your router. Step 9 Set up Wireless Security for security to select WPA2-PSK (AES) for your network support this security type. 21 WPA2-PSK (AES) is recommended to protect your wireless network from unauthorized users. Click Next.

User Manual
Page 26
Congratulations! Click Finish. Step 11 When you see window like below, you have configured. Please go to 2.4 Connect to save the settings and reboot router. Your router configuration has been finished. Step 10 Verify the information you are successfully connected to the Internet. If everything is correct, click Apply Settings to the Router Wirelessly. 22
Congratulations! Click Finish. Step 11 When you see window like below, you have configured. Please go to 2.4 Connect to save the settings and reboot router. Your router configuration has been finished. Step 10 Verify the information you are successfully connected to the Internet. If everything is correct, click Apply Settings to the Router Wirelessly. 22

User Manual
Page 27
You can find the instructions of available network will pop up. A list of how to connect to the router wirelessly with your wireless computer in the system tray on how to connect to the router. Step 1 Click on the wireless icon in order to establish a wireless connection to the router. Select the one you can also refer to the manual of your wireless device on your desktop. 2.4 Connect to Router Wirelessly You must configure your Windows 7 computer. In this section, you want to connect to and click Connect. 23
You can find the instructions of available network will pop up. A list of how to connect to the router wirelessly with your wireless computer in the system tray on how to connect to the router. Step 1 Click on the wireless icon in order to establish a wireless connection to the router. Select the one you can also refer to the manual of your wireless device on your desktop. 2.4 Connect to Router Wirelessly You must configure your Windows 7 computer. In this section, you want to connect to and click Connect. 23

User Manual
Page 28
The wireless connection should be now established. 24 Step 2 Enter the key you configured for the router if you have enabled the wireless security, then click OK.
The wireless connection should be now established. 24 Step 2 Enter the key you configured for the router if you have enabled the wireless security, then click OK.

User Manual
Page 31
3.1 Basic Setting You can configure LAN, Internet connection type, DHCP, wireless settings and system password for the router in this page. 27
3.1 Basic Setting You can configure LAN, Internet connection type, DHCP, wireless settings and system password for the router in this page. 27

User Manual
Page 44
...Please refer to keep wireless function always on /off wireless function according to disable this router. Parameters Wireless Wireless On/Off by Time schedule Default Enable Disable Schedule Setting Network ID (SSID) Airlink101 Description Enable or disable wireless function. 3.1.3 Wireless You can type any... alphanumeric characters here, maximum 32 characters. SSID is the name of your own wireless router from the drop-down menu (click on Schedule Setting...
...Please refer to keep wireless function always on /off wireless function according to disable this router. Parameters Wireless Wireless On/Off by Time schedule Default Enable Disable Schedule Setting Network ID (SSID) Airlink101 Description Enable or disable wireless function. 3.1.3 Wireless You can type any... alphanumeric characters here, maximum 32 characters. SSID is the name of your own wireless router from the drop-down menu (click on Schedule Setting...

User Manual
Page 45
...channel from one which is meaningful to you, like myhome, office_room1, etc. You can detect it on the available wireless network list. Select Enable to broadcast the SSID so that your wireless client can choose None, WEP, 802.1x and RADIUS, WPA-PSK, WPA2-PSK, WPA, WPA2 for 802.11n ... 3.1.3.3 for more details. You can choose any channel number you choose an encryption. Please see below instructions for each Security type for Wireless Client List information. 41 It's recommended to change default SSID value to this router (maximum transfer rate 300Mbps*). Please select the...
...channel from one which is meaningful to you, like myhome, office_room1, etc. You can detect it on the available wireless network list. Select Enable to broadcast the SSID so that your wireless client can choose None, WEP, 802.1x and RADIUS, WPA-PSK, WPA2-PSK, WPA, WPA2 for 802.11n ... 3.1.3.3 for more details. You can choose any channel number you choose an encryption. Please see below instructions for each Security type for Wireless Client List information. 41 It's recommended to change default SSID value to this router (maximum transfer rate 300Mbps*). Please select the...

User Manual
Page 46
... Security - If you select ASCII and 128 bits, enter a 13-digit ASCII key, for example, "xyz01". You can use WEP as your encryption, wireless data rate will drop to authenticate wireless stations and encrypt data during 42 Configuring Security - WEP Note: IEEE802.11n only supports WPA2-PSK or WPA-PSK AES encryption.
... Security - If you select ASCII and 128 bits, enter a 13-digit ASCII key, for example, "xyz01". You can use WEP as your encryption, wireless data rate will drop to authenticate wireless stations and encrypt data during 42 Configuring Security - WEP Note: IEEE802.11n only supports WPA2-PSK or WPA-PSK AES encryption.

User Manual
Page 47
... RADIUS Server (contain an authentication database) on your LAN, so the router can greatly improve your wireless security.WPA2-PSK AES is the most common method of your wireless network. The most secured setting for comparison. 43 communication, so the encryption key is suggested to ...select AES if all your wireless computers / devices support this router first to use TKIP as the security key of implementing 802.1x is enabled, wireless users must authenticate to this encryption mode. Security: Encryption: Preshare Key: ...
... RADIUS Server (contain an authentication database) on your LAN, so the router can greatly improve your wireless security.WPA2-PSK AES is the most common method of your wireless network. The most secured setting for comparison. 43 communication, so the encryption key is suggested to ...select AES if all your wireless computers / devices support this router first to use TKIP as the security key of implementing 802.1x is enabled, wireless users must authenticate to this encryption mode. Security: Encryption: Preshare Key: ...