
Generic User Guide
Page 3
...; Slots and openings are not sure of the type of the product and to protect it could result in installation unless proper ventilation is used , the load should never be blocked by plugging in too many devices. The overall system load must not be placed near water. • Do not place this product, make sure that could be operated...
...; Slots and openings are not sure of the type of the product and to protect it could result in installation unless proper ventilation is used , the load should never be blocked by plugging in too many devices. The overall system load must not be placed near water. • Do not place this product, make sure that could be operated...

Generic User Guide
Page 4
... power cord set . Make sure the power outlet is incorrectly replaced. Unplug this product from unexpected noise produced by other nearby electrical devices that are covered by the operating instructions, since improper adjustment of explosion if battery is properly grounded before inserting the AC adapter plug. Dispose of this product yourself, as opening or removing covers may interfere with the performance of used batteries according to qualified service...
... power cord set . Make sure the power outlet is incorrectly replaced. Unplug this product from unexpected noise produced by other nearby electrical devices that are covered by the operating instructions, since improper adjustment of explosion if battery is properly grounded before inserting the AC adapter plug. Dispose of this product yourself, as opening or removing covers may interfere with the performance of used batteries according to qualified service...
Generic User Guide
Page 5
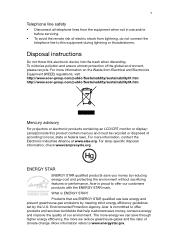
... use and/or before servicing. • To avoid the remote risk of electric shock from Electrical and Electronics Equipment (WEEE) regulations, visit http://www.acer-group.com/public/Sustainability/sustainability01.htm http://www.acer-group.com/public/Sustainability/sustainability04.htm Mercury advisory For projectors or electronic products containing an LCD/CRT monitor or display: Lamp(s) inside this electronic device...
... use and/or before servicing. • To avoid the remote risk of electric shock from Electrical and Electronics Equipment (WEEE) regulations, visit http://www.acer-group.com/public/Sustainability/sustainability01.htm http://www.acer-group.com/public/Sustainability/sustainability04.htm Mercury advisory For projectors or electronic products containing an LCD/CRT monitor or display: Lamp(s) inside this electronic device...
Generic User Guide
Page 6
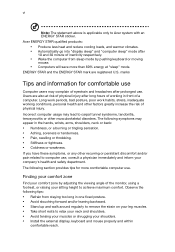
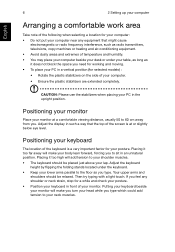
.... • Install the external display, keyboard and mouse properly and within comfortable reach. Incorrect computer usage may lead to achieve maximum comfort. The following section provides tips for comfortable use . Observe the following symptoms may complain of eyestrain and headaches after 10 and 30 minute of physical injury. The following tips: • Refrain from sleep mode by adjusting...
.... • Install the external display, keyboard and mouse properly and within comfortable reach. Incorrect computer usage may lead to achieve maximum comfort. The following section provides tips for comfortable use . Observe the following symptoms may complain of eyestrain and headaches after 10 and 30 minute of physical injury. The following tips: • Refrain from sleep mode by adjusting...
Generic User Guide
Page 7
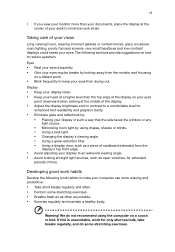
...lighting, poorly focused screens, very small typefaces and low-contrast displays could stress your eyes from the monitor and focusing on a distant point. • Blink frequently to reduce eyestrain. Display • Keep your display clean. • Keep your head at a higher level than your documents, place the display at bright light sources, such as open windows...If this is unavoidable, work habits to make your computer use more than the top edge of the display so your eyes point downward when looking at the middle of the display. • Adjust the display brightness and/or contrast ...
...lighting, poorly focused screens, very small typefaces and low-contrast displays could stress your eyes from the monitor and focusing on a distant point. • Blink frequently to reduce eyestrain. Display • Keep your display clean. • Keep your head at a higher level than your documents, place the display at bright light sources, such as open windows...If this is unavoidable, work habits to make your computer use more than the top edge of the display so your eyes point downward when looking at the middle of the display. • Adjust the display brightness and/or contrast ...
Generic User Guide
Page 9
... keyboard 7 USB interface 7 PS/2 interface 7 Connecting a monitor 7 Connecting the power cable 8 Turning on your computer 8 Turning off your computer 8 3 Upgrading your computer 9 Installation precautions 10 ESD precautions 10 Preinstallation instructions 10 Post-installation instructions 10 Opening your computer 11 To remove the computer cover 11 To replace the computer cover 11 Upgrading your computer 11 To remove a memory DIMM 12 To install a memory DIMM 13 To reconfigure your computer 13 Replacing the hard disk 13 Installing an expansion card...
... keyboard 7 USB interface 7 PS/2 interface 7 Connecting a monitor 7 Connecting the power cable 8 Turning on your computer 8 Turning off your computer 8 3 Upgrading your computer 9 Installation precautions 10 ESD precautions 10 Preinstallation instructions 10 Post-installation instructions 10 Opening your computer 11 To remove the computer cover 11 To replace the computer cover 11 Upgrading your computer 11 To remove a memory DIMM 12 To install a memory DIMM 13 To reconfigure your computer 13 Replacing the hard disk 13 Installing an expansion card...

Generic User Guide
Page 12
English 2 Front panel The front panel of your computer has the following: Icon Description Microphone-in jack (front) Headphone jack USB ports USB 3.0 USB 3.0 ports (selected models only) Recovery button Network / hard disk drive indicators Power button Rear panel The rear panel of your computer has the following: Icon Description PS/2 mouse port PS/2 keyboard port Serial port VGA port USB ports 1 System tour
English 2 Front panel The front panel of your computer has the following: Icon Description Microphone-in jack (front) Headphone jack USB ports USB 3.0 USB 3.0 ports (selected models only) Recovery button Network / hard disk drive indicators Power button Rear panel The rear panel of your computer has the following: Icon Description PS/2 mouse port PS/2 keyboard port Serial port VGA port USB ports 1 System tour
Generic User Guide
Page 14
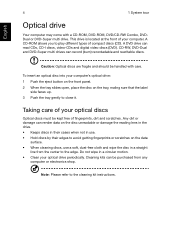
... different types of your optical drive periodically. English 4 1 System tour Optical drive Your computer may come with care. A CD-ROM allows you to the cleaning kit instructions. CD-RW, DVD-Dual and DVD-Super multi drives can read CDs, CD-I discs, video-CDs and digital video discs (DVD). This drive is located at the front of compact discs (CD). To insert an optical disc into your optical discs Optical discs must be handled with a CD-ROM, DVD-ROM, DVD...
... different types of your optical drive periodically. English 4 1 System tour Optical drive Your computer may come with care. A CD-ROM allows you to the cleaning kit instructions. CD-RW, DVD-Dual and DVD-Super multi drives can read CDs, CD-I discs, video-CDs and digital video discs (DVD). This drive is located at the front of compact discs (CD). To insert an optical disc into your optical discs Optical discs must be handled with a CD-ROM, DVD-ROM, DVD...
Generic User Guide
Page 16
... and shoulders should be relaxed. Putting your keyboard beside your monitor will make you turn your monitor. Adjust the display in an unnatural position. Adjust the keyboard height by flipping the folding stands located under your posture. Placing it too far away will make your body lean forward, forcing you type which could add tension to your neck muscles. If you...
... and shoulders should be relaxed. Putting your keyboard beside your monitor will make you turn your monitor. Adjust the display in an unnatural position. Adjust the keyboard height by flipping the folding stands located under your posture. Placing it too far away will make your body lean forward, forcing you type which could add tension to your neck muscles. If you...
Generic User Guide
Page 17
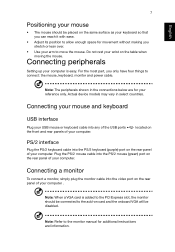
.../2 keyboard (purple) port on the rear panel of your computer . Actual device models may vary in the connections below are for additional instructions and information. located on PS/2 interface Plug the PS/2 keyboard cable into the video port on the rear panel of your computer is added to the PCI Express slot, the monitor should be disabled. Note: When a VGA card is easy. Connecting peripherals Setting up your computer. Note: Refer to connect: the mouse, keyboard, monitor and power cable. Do...
.../2 keyboard (purple) port on the rear panel of your computer . Actual device models may vary in the connections below are for additional instructions and information. located on PS/2 interface Plug the PS/2 keyboard cable into the video port on the rear panel of your computer is added to the PCI Express slot, the monitor should be disabled. Note: When a VGA card is easy. Connecting peripherals Setting up your computer. Note: Refer to connect: the mouse, keyboard, monitor and power cable. Do...
Generic User Guide
Page 18
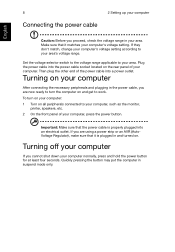
... power cable socket located on the rear panel of your computer's voltage setting. Important: Make sure that the power cable is plugged in and turned on all peripherals connected to turn on your computer: 1 Turn on . Quickly pressing the button may put the computer in suspend mode only. Make sure that it matches your computer. If you are now ready to your computer, such as the monitor, printer, speakers...
... power cable socket located on the rear panel of your computer's voltage setting. Important: Make sure that the power cable is plugged in and turned on all peripherals connected to turn on your computer: 1 Turn on . Quickly pressing the button may put the computer in suspend mode only. Make sure that it matches your computer. If you are now ready to your computer, such as the monitor, printer, speakers...
Generic User Guide
Page 20
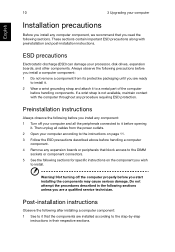
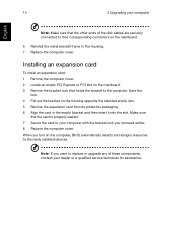
...-by-step instructions in the following sections for specific instructions on the component you wish to it that you install any procedure requiring ESD protection. Preinstallation instructions Always observe the following before handling a computer component. 4 Remove any expansion boards or peripherals that block access to the DIMM sockets or component connectors. 5 See the following sections unless you start installing the components...
...-by-step instructions in the following sections for specific instructions on the component you wish to it that you install any procedure requiring ESD protection. Preinstallation instructions Always observe the following before handling a computer component. 4 Remove any expansion boards or peripherals that block access to the DIMM sockets or component connectors. 5 See the following sections unless you start installing the components...
Generic User Guide
Page 21
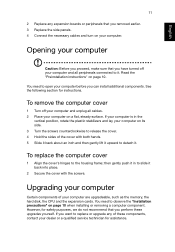
..., contact your dealer or a qualified service technician for assistance. English 11 2 Replace any of these upgrades yourself. Upgrading your computer Certain components of your computer. However, for instructions. You need to replace or upgrade any expansion boards or peripherals that you removed earlier. 3 Replace the side panels. 4 Connect the necessary cables and turn on a flat, steady surface. To remove the computer cover 1 Turn off your computer on its...
..., contact your dealer or a qualified service technician for assistance. English 11 2 Replace any of these upgrades yourself. Upgrading your computer Certain components of your computer. However, for instructions. You need to replace or upgrade any expansion boards or peripherals that you removed earlier. 3 Replace the side panels. 4 Connect the necessary cables and turn on a flat, steady surface. To remove the computer cover 1 Turn off your computer on its...
Generic User Guide
Page 23
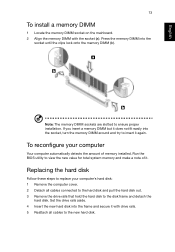
.... 2 Align the memory DIMM with drive rails. 5 Reattach all cables connected to the hard disk and pull the hard disk out. 3 Remove the drive rails that hold the hard disk to the disk frame and detach the hard disk. Note: The memory DIMM sockets are slotted to insert it with the socket (a). To reconfigure your computer's hard disk: 1 Remove the computer cover. 2 Detach all cables to the new hard disk. Run the BIOS utility to replace your computer Your...
.... 2 Align the memory DIMM with drive rails. 5 Reattach all cables connected to the hard disk and pull the hard disk out. 3 Remove the drive rails that hold the hard disk to the disk frame and detach the hard disk. Note: The memory DIMM sockets are slotted to insert it with the socket (a). To reconfigure your computer's hard disk: 1 Remove the computer cover. 2 Detach all cables to the new hard disk. Run the BIOS utility to replace your computer Your...
Generic User Guide
Page 24
... computer, BIOS automatically detects and assigns resources to your dealer or a qualified service technician for assistance. Note: If you want to replace or upgrade any of the disk cables are securely connected to their corresponding connectors on the mainboard. 3 Remove the bracket lock that the card is properly seated. 7 Secure the card to the newly installed devices. 14 3 Upgrading your computer English Note: Make sure...
... computer, BIOS automatically detects and assigns resources to your dealer or a qualified service technician for assistance. Note: If you want to replace or upgrade any of the disk cables are securely connected to their corresponding connectors on the mainboard. 3 Remove the bracket lock that the card is properly seated. 7 Secure the card to the newly installed devices. 14 3 Upgrading your computer English Note: Make sure...
Generic User Guide
Page 26
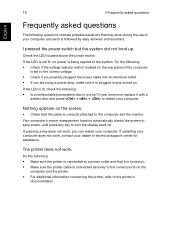
... printer, refer to the printer's documentation. If yes, remove or replace it is turned on. • Make sure the printer cable is connected securely to the correct ports on the rear panel of your dealer or technical support center for assistance. Nothing appears on . If restarting your computer does not work . Check the LED located above the power switch. 16 4 Frequently asked questions English Frequently asked questions...
... printer, refer to the printer's documentation. If yes, remove or replace it is turned on. • Make sure the printer cable is connected securely to the correct ports on the rear panel of your dealer or technical support center for assistance. Nothing appears on . If restarting your computer does not work . Check the LED located above the power switch. 16 4 Frequently asked questions English Frequently asked questions...
Generic User Guide
Page 27
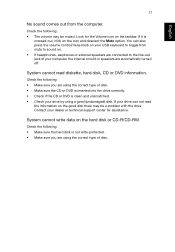
.... Contact your dealer or technical support center for the Volume icon on . • If headphones, earphones or external speakers are connected to the line-out jack of your USB keyboard to sound on the taskbar. You can not read diskette, hard disk, CD or DVD information. System cannot read the information on the good disk there may be a problem with the drive. System cannot write...
.... Contact your dealer or technical support center for the Volume icon on . • If headphones, earphones or external speakers are connected to the line-out jack of your USB keyboard to sound on the taskbar. You can not read diskette, hard disk, CD or DVD information. System cannot read the information on the good disk there may be a problem with the drive. System cannot write...
Generic User Guide
Page 30
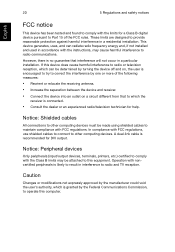
... connected. • Consult the dealer or an experienced radio/television technician for help. A dual-link cable is recommended for DVI output. Caution Changes or modifications not expressly approved by the Federal Communications Commission, to operate this device does cause harmful interference to radio or television reception, which can radiate radio frequency energy and, if not installed and used...
... connected. • Consult the dealer or an experienced radio/television technician for help. A dual-link cable is recommended for DVI output. Caution Changes or modifications not expressly approved by the Federal Communications Commission, to operate this device does cause harmful interference to radio or television reception, which can radiate radio frequency energy and, if not installed and used...

Generic User Guide
Page 32
... the Public Switched Telephone Network (PSTN). If they do, you will work correctly in such circumstances. 3 Some parameters required for which it provides no more than 10 call initiation, and "TBR 21"] for compliance with a telecommunications compliance label. Notice for Australia For safety reasons, only connect headsets with Telecom's Specifications: a There shall be set to operate within...
... the Public Switched Telephone Network (PSTN). If they do, you will work correctly in such circumstances. 3 Some parameters required for which it provides no more than 10 call initiation, and "TBR 21"] for compliance with a telecommunications compliance label. Notice for Australia For safety reasons, only connect headsets with Telecom's Specifications: a There shall be set to operate within...

Generic User Guide
Page 33
... device. There is no laser or light emitting diode (LED) more than 5 seconds between the end of one call attempt and the beginning of another device connected to the same line. 9 Under power failure conditions this appliance may not operate. The CD or DVD drive's classification label (shown below) is located on local power, is available for emergency use. Should such problems occur, the user...
... device. There is no laser or light emitting diode (LED) more than 5 seconds between the end of one call attempt and the beginning of another device connected to the same line. 9 Under power failure conditions this appliance may not operate. The CD or DVD drive's classification label (shown below) is located on local power, is available for emergency use. Should such problems occur, the user...


