Generic User Guide
Page 3
...Using electrical power • This product should never be operated from the type of power available, consult your safety and comfort Safety instructions Read these instructions carefully. If you are not sure of the type of power indicated on a vibrating surface. Turning the product off before cleaning. These openings... the wall outlet before cleaning Unplug this product through cabinet slots as they may touch dangerous voltage points or short-out parts that could be blocked by plugging in too many devices. The openings should not exceed 80% of the product and to rest...
...Using electrical power • This product should never be operated from the type of power available, consult your safety and comfort Safety instructions Read these instructions carefully. If you are not sure of the type of power indicated on a vibrating surface. Turning the product off before cleaning. These openings... the wall outlet before cleaning Unplug this product through cabinet slots as they may touch dangerous voltage points or short-out parts that could be blocked by plugging in too many devices. The openings should not exceed 80% of the product and to rest...

Generic User Guide
Page 4
... a three-wire grounded plug. Do not insert the plug into the product. • The product was exposed to replace the power cord set . Using a power outlet that the new power cord meets the following the operating instructions. CAUTION: Danger of other risks. Warning! Product servicing Do not attempt to service this product from unexpected noise produced by other nearby electrical devices that are covered by a qualified...
... a three-wire grounded plug. Do not insert the plug into the product. • The product was exposed to replace the power cord set . Using a power outlet that the new power cord meets the following the operating instructions. CAUTION: Danger of other risks. Warning! Product servicing Do not attempt to service this product from unexpected noise produced by other nearby electrical devices that are covered by a qualified...
Generic User Guide
Page 5
... use and/or before servicing. • To avoid the remote risk of electric shock from Electrical and Electronics Equipment (WEEE) regulations, visit http://www.acer-group.com/public/Sustainability/sustainability01.htm http://www.acer-group.com/public/Sustainability/sustainability04.htm Mercury advisory For projectors or electronic products containing an LCD/CRT monitor or display: Lamp(s) inside this electronic device...
... use and/or before servicing. • To avoid the remote risk of electric shock from Electrical and Electronics Equipment (WEEE) regulations, visit http://www.acer-group.com/public/Sustainability/sustainability01.htm http://www.acer-group.com/public/Sustainability/sustainability04.htm Mercury advisory For projectors or electronic products containing an LCD/CRT monitor or display: Lamp(s) inside this electronic device...
Generic User Guide
Page 6
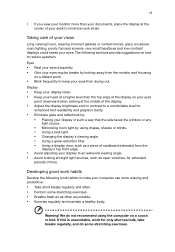
... loads, and warmer climates. • Automatically go into "display sleep" and "computer sleep" mode after 10 and 30 minute of inactivity respectively. • Wake the computer from staying too long in front of physical injury after prolonged use , consult a physician immediately and inform your shoulders. • Install the external display, keyboard and mouse properly and within comfortable reach. marks Tips and...
... loads, and warmer climates. • Automatically go into "display sleep" and "computer sleep" mode after 10 and 30 minute of inactivity respectively. • Wake the computer from staying too long in front of physical injury after prolonged use , consult a physician immediately and inform your shoulders. • Install the external display, keyboard and mouse properly and within comfortable reach. marks Tips and...
Generic User Guide
Page 7
... exercises. • Breathe fresh air as often as open windows, for only short periods, take breaks regularly, and do not recommend using drapes, shades or blinds. • Using a task light. • Changing the display's viewing angle. • Using a glare-reduction filter. • Using a display visor, such as a piece of cardboard extended from the display's top front edge. • Avoid adjusting your...
... exercises. • Breathe fresh air as often as open windows, for only short periods, take breaks regularly, and do not recommend using drapes, shades or blinds. • Using a task light. • Changing the display's viewing angle. • Using a glare-reduction filter. • Using a display visor, such as a piece of cardboard extended from the display's top front edge. • Avoid adjusting your...

Generic User Guide
Page 9
... keyboard 7 USB interface 7 PS/2 interface 7 Connecting a monitor 7 Connecting the power cable 8 Turning on your computer 8 Turning off your computer 8 3 Upgrading your computer 9 Installation precautions 10 ESD precautions 10 Preinstallation instructions 10 Post-installation instructions 10 Opening your computer 11 To remove the computer cover 11 To replace the computer cover 11 Upgrading your computer 11 To remove a memory DIMM 12 To install a memory DIMM 13 To reconfigure your computer 13 Replacing the hard disk 13 Installing an expansion card...
... keyboard 7 USB interface 7 PS/2 interface 7 Connecting a monitor 7 Connecting the power cable 8 Turning on your computer 8 Turning off your computer 8 3 Upgrading your computer 9 Installation precautions 10 ESD precautions 10 Preinstallation instructions 10 Post-installation instructions 10 Opening your computer 11 To remove the computer cover 11 To replace the computer cover 11 Upgrading your computer 11 To remove a memory DIMM 12 To install a memory DIMM 13 To reconfigure your computer 13 Replacing the hard disk 13 Installing an expansion card...

Generic User Guide
Page 12
English 2 Front panel The front panel of your computer has the following: Icon Description Microphone-in jack (front) Headphone jack USB ports USB 3.0 USB 3.0 ports (selected models only) Recovery button Network / hard disk drive indicators Power button Rear panel The rear panel of your computer has the following: Icon Description PS/2 mouse port PS/2 keyboard port Serial port VGA port USB ports 1 System tour
English 2 Front panel The front panel of your computer has the following: Icon Description Microphone-in jack (front) Headphone jack USB ports USB 3.0 USB 3.0 ports (selected models only) Recovery button Network / hard disk drive indicators Power button Rear panel The rear panel of your computer has the following: Icon Description PS/2 mouse port PS/2 keyboard port Serial port VGA port USB ports 1 System tour
Generic User Guide
Page 14
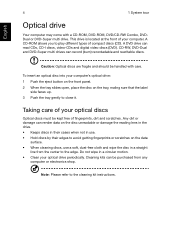
...'s optical drive: 1 Push the eject button on the front panel. 2 When the tray slides open, place the disc on the tray, maling sure that the label side faces up. 3 Push the tray gently to play different types of your computer. This drive is located at the front of your optical discs Optical discs must be kept free of fingerprints, dirt and scratches. CD-RW, DVD-Dual...
...'s optical drive: 1 Push the eject button on the front panel. 2 When the tray slides open, place the disc on the tray, maling sure that the label side faces up. 3 Push the tray gently to play different types of your computer. This drive is located at the front of your optical discs Optical discs must be kept free of fingerprints, dirt and scratches. CD-RW, DVD-Dual...
Generic User Guide
Page 16
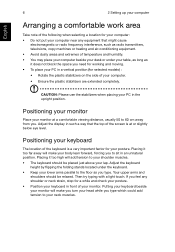
... cm away from you type which could add tension to sit in an unnatural position. Putting your keyboard beside your monitor will make you turn your head while you . Positioning your monitor Place your monitor at or slightly below eye level. Placing it too far away will make your body lean forward, forcing you need for working and moving. • To...
... cm away from you type which could add tension to sit in an unnatural position. Putting your keyboard beside your monitor will make you turn your head while you . Positioning your monitor Place your monitor at or slightly below eye level. Placing it too far away will make your body lean forward, forcing you need for working and moving. • To...
Generic User Guide
Page 17
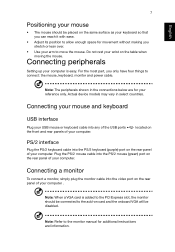
... mouse. Note: Refer to connect: the mouse, keyboard, monitor and power cable. Actual device models may vary in the connections below are for additional instructions and information. Note: The peripherals shown in select countries. Plug the PS/2 mouse cable into any of the USB ports the front and rear panels of your computer. Do not rest your wrist on the rear panel of your computer is added to the PCI Express slot, the monitor...
... mouse. Note: Refer to connect: the mouse, keyboard, monitor and power cable. Actual device models may vary in the connections below are for additional instructions and information. Note: The peripherals shown in select countries. Plug the PS/2 mouse cable into any of the USB ports the front and rear panels of your computer. Do not rest your wrist on the rear panel of your computer is added to the PCI Express slot, the monitor...
Generic User Guide
Page 18
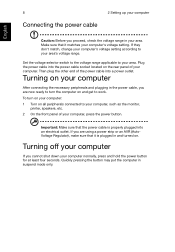
... and plugging in the power cable, you are using a power strip or an AVR (AutoVoltage Regulator), make sure that it is properly plugged into a power outlet. To turn the computer on the rear panel of your computer: 1 Turn on . Important: Make sure that the power cable is plugged in and turned on all peripherals connected to your computer, press the power button. If you are now ready to work. 8 Connecting the power cable 2 Setting up...
... and plugging in the power cable, you are using a power strip or an AVR (AutoVoltage Regulator), make sure that it is properly plugged into a power outlet. To turn the computer on the rear panel of your computer: 1 Turn on . Important: Make sure that the power cable is plugged in and turned on all peripherals connected to your computer, press the power button. If you are now ready to work. 8 Connecting the power cable 2 Setting up...
Generic User Guide
Page 20
... ESD precautions along with the computer throughout any component: 1 Turn off the computer properly before you read the following sections for specific instructions on page 11. 3 Follow the ESD precautions described above before you install a computer component: 1 Do not remove a component from the power outlets. 2 Open your processor, disk drives, expansion boards, and other components. Warning! If a wrist strap is not...
... ESD precautions along with the computer throughout any component: 1 Turn off the computer properly before you read the following sections for specific instructions on page 11. 3 Follow the ESD precautions described above before you install a computer component: 1 Do not remove a component from the power outlets. 2 Open your processor, disk drives, expansion boards, and other components. Warning! If a wrist strap is not...
Generic User Guide
Page 21
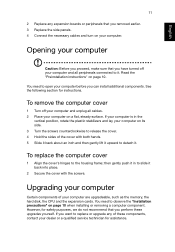
... removed earlier. 3 Replace the side panels. 4 Connect the necessary cables and turn on a flat, steady surface. If you have turned off your dealer or a qualified service technician for instructions. Read the "Preinstallation instructions" on page 10 when installing or removing a computer component. Opening your computer. To remove the computer cover 1 Turn off your computer and all cables. 2 Place your computer on your computer Caution: Before you proceed, make...
... removed earlier. 3 Replace the side panels. 4 Connect the necessary cables and turn on a flat, steady surface. If you have turned off your dealer or a qualified service technician for instructions. Read the "Preinstallation instructions" on page 10 when installing or removing a computer component. Opening your computer. To remove the computer cover 1 Turn off your computer and all cables. 2 Place your computer on your computer Caution: Before you proceed, make...
Generic User Guide
Page 23
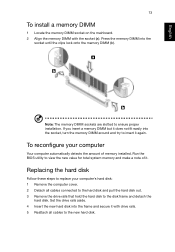
Run the BIOS utility to the new hard disk. To reconfigure your computer's hard disk: 1 Remove the computer cover. 2 Detach all cables to view the new value for total system memory and make a note of memory installed. If you insert a memory DIMM but it does not fit easily into the socket, turn the memory DIMM around and try to replace your computer Your computer automatically detects the amount of it again...
Run the BIOS utility to the new hard disk. To reconfigure your computer's hard disk: 1 Remove the computer cover. 2 Detach all cables to view the new value for total system memory and make a note of memory installed. If you insert a memory DIMM but it does not fit easily into the socket, turn the memory DIMM around and try to replace your computer Your computer automatically detects the amount of it again...
Generic User Guide
Page 24
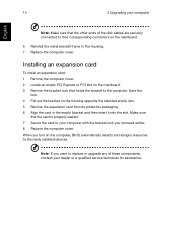
... want to replace or upgrade any of the disk cables are securely connected to their corresponding connectors on the computer, BIOS automatically detects and assigns resources to the housing. 7 Replace the computer cover. Note: If you turn on the mainboard. 6 Reinstall the metal bracket frame to the newly installed devices. Installing an expansion card To install an expansion card: 1 Remove the computer cover. 2 Locate an empty PCI Express or PCI slot on...
... want to replace or upgrade any of the disk cables are securely connected to their corresponding connectors on the computer, BIOS automatically detects and assigns resources to the housing. 7 Replace the computer cover. Note: If you turn on the mainboard. 6 Reinstall the metal bracket frame to the newly installed devices. Installing an expansion card To install an expansion card: 1 Remove the computer cover. 2 Locate an empty PCI Express or PCI slot on...
Generic User Guide
Page 26
... your dealer or technical support center for assistance. If the LED is plugged in a drive? If pressing a key does not work, you are using a power strip, make sure it is lit, check the following : • Make sure the printer is connected to a power outlet and that the cable is connected securely to the correct ports on . Just press any key to save power. The printer does not work , contact your...
... your dealer or technical support center for assistance. If the LED is plugged in a drive? If pressing a key does not work, you are using a power strip, make sure it is lit, check the following : • Make sure the printer is connected to a power outlet and that the cable is connected securely to the correct ports on . Just press any key to save power. The printer does not work , contact your...
Generic User Guide
Page 27
...-protected. • Make sure you are using the correct type of your dealer or technical support center for the Volume icon on the hard disk or CD-R/CD-RW. You can not read diskette, hard disk, CD or DVD information. Contact your computer, the internal or built-in speakers are automatically turned off. If it is clean and unscratched. • Check your USB keyboard to toggle...
...-protected. • Make sure you are using the correct type of your dealer or technical support center for the Volume icon on the hard disk or CD-R/CD-RW. You can not read diskette, hard disk, CD or DVD information. Contact your computer, the internal or built-in speakers are automatically turned off. If it is clean and unscratched. • Check your USB keyboard to toggle...
Generic User Guide
Page 30
..., uses, and can be determined by one or more of the FCC rules. However, there is recommended for DVI output. Notice: Shielded cables All connections to maintain compliance with the instructions, may be made using shielded cables to other computing devices. If this computer. A dual-link cable is no guarantee that to which is likely to result in a particular installation.
..., uses, and can be determined by one or more of the FCC rules. However, there is recommended for DVI output. Notice: Shielded cables All connections to maintain compliance with the instructions, may be made using shielded cables to other computing devices. If this computer. A dual-link cable is no guarantee that to which is likely to result in a particular installation.

Generic User Guide
Page 32
... warranty. Above all of Telecom's network services. 2 This equipment is with a telecommunications compliance label. If this device. However, due to differences between the individual PSTNs provided in the first instance. Notice for single terminal connection to determine if it is causing the problem. The associated equipment shall be set to operate within the following limits for compliance...
... warranty. Above all of Telecom's network services. 2 This equipment is with a telecommunications compliance label. If this device. However, due to differences between the individual PSTNs provided in the first instance. Notice for single terminal connection to determine if it is causing the problem. The associated equipment shall be set to operate within the following limits for compliance...

Generic User Guide
Page 33
... numbers are dependent on the equipment (PC) associated with pulse dialing while the Telecom standard is located on the drive. In order to operate within the limits for compliance with Telecom's specifications, the associated equipment shall be set up to make automatic calls to Telecom's 111 Emergency Service. 6 This device is equipped with this equipment is available for emergency use...
... numbers are dependent on the equipment (PC) associated with pulse dialing while the Telecom standard is located on the drive. In order to operate within the limits for compliance with Telecom's specifications, the associated equipment shall be set up to make automatic calls to Telecom's 111 Emergency Service. 6 This device is equipped with this equipment is available for emergency use...


