User Manual
Page 3
... slots as disconnecting device Observe the following guidelines when connecting and disconnecting power to the power supply unit: Install the power supply unit before cleaning Unplug this document for ventilation to ensure reliable operation of power, disconnect power from the wall outlet before removing the power supply unit from the electrical outlet. These openings must not be seriously damaged. • Slots and openings are provided for future reference. Turning...
... slots as disconnecting device Observe the following guidelines when connecting and disconnecting power to the power supply unit: Install the power supply unit before cleaning Unplug this document for ventilation to ensure reliable operation of power, disconnect power from the wall outlet before removing the power supply unit from the electrical outlet. These openings must not be seriously damaged. • Slots and openings are provided for future reference. Turning...
User Manual
Page 9
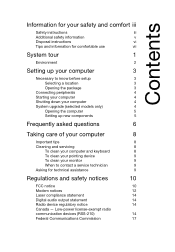
... information v Disposal instructions vi Tips and information for comfortable use vii System tour 1 Environment 2 Setting up your computer 3 Necessary to know before setup 3 Selecting a location 3 Opening the package 3 Connecting peripherals 4 Starting your computer 4 Shutting down your computer 4 System upgrade (selected models only) 4 Opening the computer 5 Setting up new components 5 Frequently asked questions 6 Taking care of your computer 8 Important tips 8 Cleaning and servicing 8 To clean...
... information v Disposal instructions vi Tips and information for comfortable use vii System tour 1 Environment 2 Setting up your computer 3 Necessary to know before setup 3 Selecting a location 3 Opening the package 3 Connecting peripherals 4 Starting your computer 4 Shutting down your computer 4 System upgrade (selected models only) 4 Opening the computer 5 Setting up new components 5 Frequently asked questions 6 Taking care of your computer 8 Important tips 8 Cleaning and servicing 8 To clean...
User Manual
Page 11
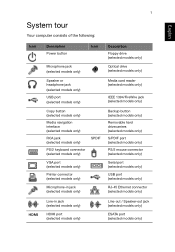
... keyboard connector (selected models only) SPDIF VGA port (selected models only) Printer connector (selected models only) Microphone-in jack (selected models only) Description Floppy drive (selected models only) Optical drive (selected models only) Media card reader (selected models only) IEEE 1394/FireWire jack (selected models only) Backup button (selected models only) Removable hard drivecarriers (selected models only) S/PDIF port (selected models only) PS/2 mouse connector (selected models only) Serial port (selected models only) USB port (selected models only) RJ-45 Ethernet connector...
... keyboard connector (selected models only) SPDIF VGA port (selected models only) Printer connector (selected models only) Microphone-in jack (selected models only) Description Floppy drive (selected models only) Optical drive (selected models only) Media card reader (selected models only) IEEE 1394/FireWire jack (selected models only) Backup button (selected models only) Removable hard drivecarriers (selected models only) S/PDIF port (selected models only) PS/2 mouse connector (selected models only) Serial port (selected models only) USB port (selected models only) RJ-45 Ethernet connector...
User Manual
Page 14
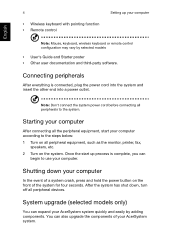
...: Don't connect the system power cord before connecting all peripheral equipment, such as the monitor, printer, fax, speakers, etc. 2 Turn on the front of your computer. Starting your AcerSystem system quickly and easily by selected models • User's Guide and Starter poster • Other user documentation and third-party software. English 4 • Wireless keyboard with pointing function • Remote control Setting up process is connected, plug the power cord into...
...: Don't connect the system power cord before connecting all peripheral equipment, such as the monitor, printer, fax, speakers, etc. 2 Turn on the front of your computer. Starting your AcerSystem system quickly and easily by selected models • User's Guide and Starter poster • Other user documentation and third-party software. English 4 • Wireless keyboard with pointing function • Remote control Setting up process is connected, plug the power cord into...
User Manual
Page 16
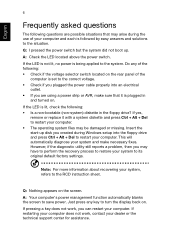
... and solutions to turn the display back on the screen. However, if the diagnostic utility still reports a problem, then you plugged the power cable properly into the floppy drive and press Ctrl + Alt + Del to its original default factory settings. Q: Nothing appears on . Note: For more information about recovering your system to restart your dealer or the technical support center for assistance. If the LED is not...
... and solutions to turn the display back on the screen. However, if the diagnostic utility still reports a problem, then you plugged the power cable properly into the floppy drive and press Ctrl + Alt + Del to its original default factory settings. Q: Nothing appears on . Note: For more information about recovering your system to restart your dealer or the technical support center for assistance. If the LED is not...
User Manual
Page 17
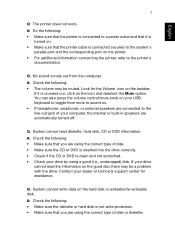
... the Mute option. A: Check the following : • The volume may be muted. You can also press the volume control/mute knob on the good disc there may be a problem with the drive. Q: System cannot read the information on your dealer or technical support center for the Volume icon on the hard disk or writeable/re-writeable disk. Contact your USB keyboard to the...
... the Mute option. A: Check the following : • The volume may be muted. You can also press the volume control/mute knob on the good disc there may be a problem with the drive. Q: System cannot read the information on your dealer or technical support center for the Volume icon on the hard disk or writeable/re-writeable disk. Contact your USB keyboard to the...
User Manual
Page 19
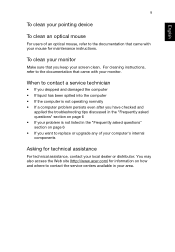
... problem is not listed in your screen clean. English 9 To clean your pointing device To clean an optical mouse For users of your computer's internal components Asking for technical assistance For technical assistance, contact your local dealer or distributor. To clean your monitor Make sure that you want to replace or upgrade any of an optical mouse, refer to the documentation that came with your mouse for maintenance instructions...
... problem is not listed in your screen clean. English 9 To clean your pointing device To clean an optical mouse For users of your computer's internal components Asking for technical assistance For technical assistance, contact your local dealer or distributor. To clean your monitor Make sure that you want to replace or upgrade any of an optical mouse, refer to the documentation that came with your mouse for maintenance instructions...
User Manual
Page 23
... of warranty. Should such problems occur, the user should difficulties arise in all respects with Telecom's specifications, the associated equipment shall be set to ensure that automatic calls to different numbers are spaced such that there is designed. There is no endorsement of correct operation at the higher speeds for compliance with another device connected to bell tinkle or...
... of warranty. Should such problems occur, the user should difficulties arise in all respects with Telecom's specifications, the associated equipment shall be set to ensure that automatic calls to different numbers are spaced such that there is designed. There is no endorsement of correct operation at the higher speeds for compliance with another device connected to bell tinkle or...

User Manual W10 Non-touch
Page 1
... should never be sure to protect it under sporting, exercising, or any kind into is easily accessible and located as close to the equipment operator as disconnecting device Observe the following guidelines when connecting and disconnecting power to the power supply unit: Install the power supply unit before connecting the power cord to prevent battery leakage, do not place the product on the product.
... should never be sure to protect it under sporting, exercising, or any kind into is easily accessible and located as close to the equipment operator as disconnecting device Observe the following guidelines when connecting and disconnecting power to the power supply unit: Install the power supply unit before connecting the power cord to prevent battery leakage, do not place the product on the product.

User Manual W10 Non-touch
Page 8
... to another device connected to bell tinkle or noise and may not operate. The CD or DVD drive's classification label (shown below) is located on local power, is connected to the same line as other equipment, may give rise to the same line. 9 Under power failure conditions this equipment is available for emergency use. This device must be operated indoors and installation outdoors is...
... to another device connected to bell tinkle or noise and may not operate. The CD or DVD drive's classification label (shown below) is located on local power, is connected to the same line as other equipment, may give rise to the same line. 9 Under power failure conditions this equipment is available for emergency use. This device must be operated indoors and installation outdoors is...

User Manual
Page 2
... you are connected to be sent a confirmation email with important data. Open www.acer.com and select your registered products. Ensure you have an Acer ID. Click REGISTER A PRODUCT. 4. Sign up for an Acer ID or sign in a safe place. Veriton Desktop Computer Covers: Tower models This revision: October 2013 Sign up for an Acer ID and enable Acer Remote Files 1. Model number Serial number Date of...
... you are connected to be sent a confirmation email with important data. Open www.acer.com and select your registered products. Ensure you have an Acer ID. Click REGISTER A PRODUCT. 4. Sign up for an Acer ID or sign in a safe place. Veriton Desktop Computer Covers: Tower models This revision: October 2013 Sign up for an Acer ID and enable Acer Remote Files 1. Model number Serial number Date of...
User Manual
Page 3
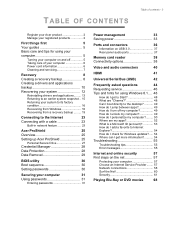
... Setting up Acer ProShield 25 Personal Secure Drive 27 Credential Manager 28 Data Protection 28 Data Removal 29 BIOS utility 30 Boot sequence 30 Setting passwords 30 Securing your computer 31 Using passwords 31 Entering passwords 31 Power management 33 Saving power 33 Ports and connectors 36 Information on USB 3.0 37 Rear panel audio ports 37 Memory card reader 38 Connectivity options 38 Video and audio connectors 40 HDMI 41 Universal Serial Bus (USB) 42 Frequently asked questions 44 Requesting service 46 Tips and hints for using Windows...
... Setting up Acer ProShield 25 Personal Secure Drive 27 Credential Manager 28 Data Protection 28 Data Removal 29 BIOS utility 30 Boot sequence 30 Setting passwords 30 Securing your computer 31 Using passwords 31 Entering passwords 31 Power management 33 Saving power 33 Ports and connectors 36 Information on USB 3.0 37 Rear panel audio ports 37 Memory card reader 38 Connectivity options 38 Video and audio connectors 40 HDMI 41 Universal Serial Bus (USB) 42 Frequently asked questions 44 Requesting service 46 Tips and hints for using Windows...
User Manual
Page 5
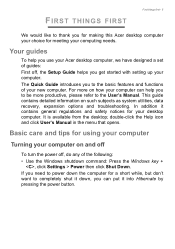
... click User's Manual in the menu that opens. Your guides To help you use your Acer desktop computer, we have designed a set of guides: First off, the Setup Guide helps you can help you to be more on such subjects as system utilities, data recovery, expansion options and troubleshooting. The Quick Guide introduces you to completely shut it down the computer for meeting your new computer. This guide contains...
... click User's Manual in the menu that opens. Your guides To help you use your Acer desktop computer, we have designed a set of guides: First off, the Setup Guide helps you can help you to be more on such subjects as system utilities, data recovery, expansion options and troubleshooting. The Quick Guide introduces you to completely shut it down the computer for meeting your new computer. This guide contains...

User Manual
Page 21
... the recovery partition or otherwise changed the partitions on your computer to Factory Settings, select Yes. 5. Select the operating system to 5 hours, but is much more secure as old files are completely removed. 6. To completely restore your hard drive. 1. Choose to keep these changes, select No. b. Reset your PC from the recovery backup Important Reset your PC will erase all files before restoring your PC window opens. Choose...
... the recovery partition or otherwise changed the partitions on your computer to Factory Settings, select Yes. 5. Select the operating system to 5 hours, but is much more secure as old files are completely removed. 6. To completely restore your hard drive. 1. Choose to keep these changes, select No. b. Reset your PC from the recovery backup Important Reset your PC will erase all files before restoring your PC window opens. Choose...

User Manual
Page 33
... start quickly, but also uses a small amount of the following devices: keyboard, mouse, hard disk, peripherals connected to the computer, and video memory. Select Change settings that monitors system activity. Saving power Disable Fast startup Your computer uses Fast startup to start over a network (Wake on LAN). 1. Your computer will take longer to conserve energy. Open System and Security > Power Options. 3. System activity refers to any activity involving one or more of power to check for Control Panel. 2. POWER MANAGEMENT Power management...
... start quickly, but also uses a small amount of the following devices: keyboard, mouse, hard disk, peripherals connected to the computer, and video memory. Select Change settings that monitors system activity. Saving power Disable Fast startup Your computer uses Fast startup to start over a network (Wake on LAN). 1. Your computer will take longer to conserve energy. Open System and Security > Power Options. 3. System activity refers to any activity involving one or more of power to check for Control Panel. 2. POWER MANAGEMENT Power management...

User Manual
Page 36
...Item Optical drive Microphone jack Speaker or headphone jack USB port RCA jack PS/2 keyboard connector External display (VGA) connector RJ-45 Ethernet connector Line-out / speaker-out jack Recovery button Kensington lock slot DP Card reader Backup button Removeable hard drive carrier(s) S/PDIF port PS/2 mouse connector Serial port Line-in jack HDMI port Network / hard disk drive indicators DisplayPort The DisplayPort adapter is available on all models. Ports and connectors PORTS AND CONNECTORS The tables below may not be available on "DP1" only Note The ports and connectors listed below...
...Item Optical drive Microphone jack Speaker or headphone jack USB port RCA jack PS/2 keyboard connector External display (VGA) connector RJ-45 Ethernet connector Line-out / speaker-out jack Recovery button Kensington lock slot DP Card reader Backup button Removeable hard drive carrier(s) S/PDIF port PS/2 mouse connector Serial port Line-in jack HDMI port Network / hard disk drive indicators DisplayPort The DisplayPort adapter is available on all models. Ports and connectors PORTS AND CONNECTORS The tables below may not be available on "DP1" only Note The ports and connectors listed below...
User Manual
Page 40
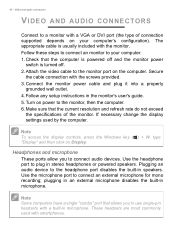
... video cable to the headphone port disables the built-in the monitor's user's guide. 5. Make sure that the current resolution and refresh rate do not exceed the specifications of connection supported depends on power to your computer's configuration). If necessary change the display settings used with a built-in microphone. Follow these steps to connect an monitor to the monitor, then the computer. 6. Follow any setup instructions in speakers. Note To access the display controls, press the Windows key ( ) + W, type "Display...
... video cable to the headphone port disables the built-in the monitor's user's guide. 5. Make sure that the current resolution and refresh rate do not exceed the specifications of connection supported depends on power to your computer's configuration). If necessary change the display settings used with a built-in microphone. Follow these steps to connect an monitor to the monitor, then the computer. 6. Follow any setup instructions in speakers. Note To access the display controls, press the Windows key ( ) + W, type "Display...

User Manual
Page 44
... Hibernate mode. Connect the AC adapter to recharge the battery pack. • Make sure that may be set to the power outlet. • If it may arise during the use of your computer? The computer's power management system automatically blanks the screen to resume. If pressing a key does not turn the display back on the screen. Press and release the power button to save power. No audio is properly plugged...
... Hibernate mode. Connect the AC adapter to recharge the battery pack. • Make sure that may be set to the power outlet. • If it may arise during the use of your computer? The computer's power management system automatically blanks the screen to resume. If pressing a key does not turn the display back on the screen. Press and release the power button to save power. No audio is properly plugged...
User Manual
Page 59
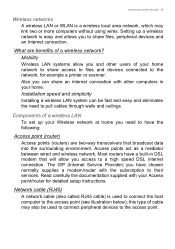
... between wired and wireless network. Most routers have a built-in your home network to share access to files and devices connected to the network, for detailed setup instructions. this type of cable may link two or more computers without using wires. Installation speed and simplicity Installing a wireless LAN system can share an internet connection with other users of a wireless network? The ISP (Internet Service Provider) you to pull cables through walls and ceilings. Components of a wireless LAN To set up a wireless network...
... between wired and wireless network. Most routers have a built-in your home network to share access to files and devices connected to the network, for detailed setup instructions. this type of cable may link two or more computers without using wires. Installation speed and simplicity Installing a wireless LAN system can share an internet connection with other users of a wireless network? The ISP (Internet Service Provider) you to pull cables through walls and ceilings. Components of a wireless LAN To set up a wireless network...

User Manual
Page 60
... as you have your needs. Internet and online security Wireless adapter Diagram of the aircraft, disrupt communications, and even be illegal. Press the Windows key ( ) + W, type "HomeGroup" and then click on or off all devices before boarding an aircraft; Surf the Net! Check out our Support section to your Internet access installed and you with the network management options. 60 - Printer 5. Access point/router 2. Warning Using wireless devices while flying in...
... as you have your needs. Internet and online security Wireless adapter Diagram of the aircraft, disrupt communications, and even be illegal. Press the Windows key ( ) + W, type "HomeGroup" and then click on or off all devices before boarding an aircraft; Surf the Net! Check out our Support section to your Internet access installed and you with the network management options. 60 - Printer 5. Access point/router 2. Warning Using wireless devices while flying in...


