
User Guide
Page 7
... things first iii Your guides iii Basic care and tips for using your computer iv 1 Getting to know your TravelMate 1 A TravelMate tour 3 Front view 3 Left view 4 Right view 5 Rear view 6 Bottom view 8 Features 9 Indicators... drive 20 Using software 21 Audio 22 Adjusting the volume 22 Power management 23 Moving around with your TravelMate 24 Disconnecting from the desktop 24 Moving around 24 Taking the computer home 25 Traveling with the computer ... options 35 Upgrade options 39 Using system utilities 41 Notebook Manager 41 BIOS Utility 41
... things first iii Your guides iii Basic care and tips for using your computer iv 1 Getting to know your TravelMate 1 A TravelMate tour 3 Front view 3 Left view 4 Right view 5 Rear view 6 Bottom view 8 Features 9 Indicators... drive 20 Using software 21 Audio 22 Adjusting the volume 22 Power management 23 Moving around with your TravelMate 24 Disconnecting from the desktop 24 Moving around 24 Taking the computer home 25 Traveling with the computer ... options 35 Upgrade options 39 Using system utilities 41 Notebook Manager 41 BIOS Utility 41
User Guide
Page 22
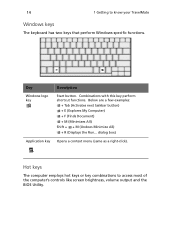
... functions. Key Description Windows logo key á Start button. 14 1 Getting to access most of the computer's controls like screen brightness, volume output and the BIOS Utility. dialog box) Application key Opens a context menu (same as a right-click). Hot keys The computer employs hot keys or key combinations to know your...
... functions. Key Description Windows logo key á Start button. 14 1 Getting to access most of the computer's controls like screen brightness, volume output and the BIOS Utility. dialog box) Application key Opens a context menu (same as a right-click). Hot keys The computer employs hot keys or key combinations to know your...
User Guide
Page 38
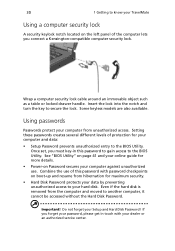
...the hard disk is removed from hibernation for more details. • Power-on boot-up and resume from the computer and moved to your TravelMate Using a computer security lock A security keylock notch located on the left panel of this password to gain access to know your hard disk...unauthorized access to another computer, it cannot be accessed without the Hard Disk Password. Do not forget your computer from unauthorized access. See "BIOS Utility" on page 41 and your online guide for maximum security. • Hard Disk Password protects your dealer or an authorized service center...
...the hard disk is removed from hibernation for more details. • Power-on boot-up and resume from the computer and moved to your TravelMate Using a computer security lock A security keylock notch located on the left panel of this password to gain access to know your hard disk...unauthorized access to another computer, it cannot be accessed without the Hard Disk Password. Do not forget your computer from unauthorized access. See "BIOS Utility" on page 41 and your online guide for maximum security. • Hard Disk Password protects your dealer or an authorized service center...

User Guide
Page 39
...password. Type the Setup Password and press Enter to use the computer. symbol appears for each character you type) and press Enter to enter the BIOS Utility at boot-up . Try again and press Enter. If you are presented with a correct entry symbol. If you press F2 to use the... computer. symbol appears for each character you type) and press Enter to access the BIOS Utility. • When the Power-on Password (a . Entering passwords When a password is set, a password prompt appears in the left-hand corner of the...
...password. Type the Setup Password and press Enter to use the computer. symbol appears for each character you type) and press Enter to enter the BIOS Utility at boot-up . Try again and press Enter. If you are presented with a correct entry symbol. If you press F2 to use the... computer. symbol appears for each character you type) and press Enter to access the BIOS Utility. • When the Power-on Password (a . Entering passwords When a password is set, a password prompt appears in the left-hand corner of the...
User Guide
Page 40
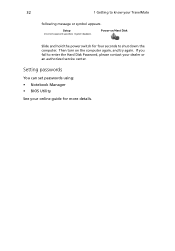
Setting passwords You can set passwords using: • Notebook Manager • BIOS Utility See your online guide for four seconds to enter the Hard Disk Password, please contact your TravelMate following message or symbol appears. If you fail to shut down the computer. Slide and hold the power switch for more details. Then turn on the computer again, and try again. 32 1 Getting to know your dealer or an authorized service center.
Setting passwords You can set passwords using: • Notebook Manager • BIOS Utility See your online guide for four seconds to enter the Hard Disk Password, please contact your TravelMate following message or symbol appears. If you fail to shut down the computer. Slide and hold the power switch for more details. Then turn on the computer again, and try again. 32 1 Getting to know your dealer or an authorized service center.

User Guide
Page 49
... Fn-F2 or follow these steps: 1 Click on Help for more information. Your computer is a hardware configuration program built into your computer's BIOS (basic input/ouput system). BIOS Utility The BIOS Utility is already properly configured and optimized, and you may need to run this utility. Click on Start, Programs, then Notebook Manager...
... Fn-F2 or follow these steps: 1 Click on Help for more information. Your computer is a hardware configuration program built into your computer's BIOS (basic input/ouput system). BIOS Utility The BIOS Utility is already properly configured and optimized, and you may need to run this utility. Click on Start, Programs, then Notebook Manager...

User Guide
Page 50
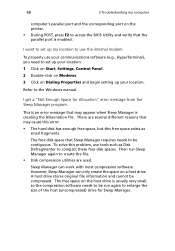
See your online guide for more information. 42 2 Customizing my computer To activate the BIOS Utility, press F2 during the POST (power-on selftest) while the TravelMate logo is being displayed.
See your online guide for more information. 42 2 Customizing my computer To activate the BIOS Utility, press F2 during the POST (power-on selftest) while the TravelMate logo is being displayed.

User Guide
Page 55
... the following : • Make sure that the serial cable is plugged securely into the serial port. • During the POST, press F2 to access the BIOS Utility and verify that the printer cable is a clear path between the two infrared ports. If it is turned on the rear of 1 meter apart... : • Make sure that it works, contact your online guide for printing to an infrared printer). • During the POST, press F2 to access the BIOS Utility and verify that the infrared port is enabled. • Make sure both have PS/2 connectors and there is enabled. The serial mouse does not...
... the following : • Make sure that the serial cable is plugged securely into the serial port. • During the POST, press F2 to access the BIOS Utility and verify that the printer cable is a clear path between the two infrared ports. If it is turned on the rear of 1 meter apart... : • Make sure that it works, contact your online guide for printing to an infrared printer). • During the POST, press F2 to access the BIOS Utility and verify that the infrared port is enabled. • Make sure both have PS/2 connectors and there is enabled. The serial mouse does not...
User Guide
Page 56
... on a host drive. 48 3 Troubleshooting my computer computer's parallel port and the corresponding port on the printer. • During POST, press F2 to access the BIOS Utility and verify that the parallel port is creating the Hibernation file. To properly use tools such as small fragments. The free disk space that...
... on a host drive. 48 3 Troubleshooting my computer computer's parallel port and the corresponding port on the printer. • During POST, press F2 to access the BIOS Utility and verify that the parallel port is creating the Hibernation file. To properly use tools such as small fragments. The free disk space that...
User Guide
Page 58
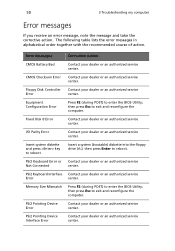
... messages If you receive an error message, note the message and take the corrective action. Equipment Configuration Error Press F2 (during POST) to enter the BIOS Utility; PS/2 Pointing Device Error Contact your dealer or an authorized service center. Fixed Disk 0 Error Contact your dealer or an authorized service center. The... authorized service center. Insert system diskette and press key to reboot Insert a system (bootable) diskette into the floppy drive (A:), then press Enter to enter the BIOS Utility; Memory Size Mismatch Press F2 (during POST) to reboot.
... messages If you receive an error message, note the message and take the corrective action. Equipment Configuration Error Press F2 (during POST) to enter the BIOS Utility; PS/2 Pointing Device Error Contact your dealer or an authorized service center. Fixed Disk 0 Error Contact your dealer or an authorized service center. The... authorized service center. Insert system diskette and press key to reboot Insert a system (bootable) diskette into the floppy drive (A:), then press Enter to enter the BIOS Utility; Memory Size Mismatch Press F2 (during POST) to reboot.
User Guide
Page 59
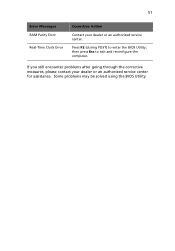
then press Esc to enter the BIOS Utility; Press F2 (during POST) to exit and reconfigure the computer. Some problems may be solved using the BIOS Utility. If you still encounter problems after going through the corrective measures, please contact your dealer or an authorized service center. 51 Error Messages RAM Parity Error Real-Time Clock Error Corrective Action Contact your dealer or an authorized service center for assistance.
then press Esc to enter the BIOS Utility; Press F2 (during POST) to exit and reconfigure the computer. Some problems may be solved using the BIOS Utility. If you still encounter problems after going through the corrective measures, please contact your dealer or an authorized service center. 51 Error Messages RAM Parity Error Real-Time Clock Error Corrective Action Contact your dealer or an authorized service center for assistance.
User Guide
Page 65
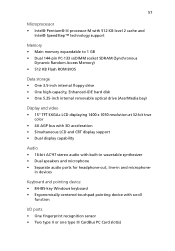
... • Main memory expandable to 1 GB • Dual 144-pin PC-133 soDIMM socket SDRAM (Synchronous Dynamic Random Access Memory) • 512 KB Flash ROM BIOS Data storage • One 3.5-inch internal floppy drive • One high-capacity, Enhanced-IDE hard disk • One 5.25-inch internal removable optical drive (AcerMedia...
... • Main memory expandable to 1 GB • Dual 144-pin PC-133 soDIMM socket SDRAM (Synchronous Dynamic Random Access Memory) • 512 KB Flash ROM BIOS Data storage • One 3.5-inch internal floppy drive • One high-capacity, Enhanced-IDE hard disk • One 5.25-inch internal removable optical drive (AcerMedia...


