
TravelMate 6592/6592G User's Guide EN
Page 5
... product does not operate normally after two or three complete charge and discharge cycles. If you to qualified service personnel. Do not pierce, open or disassemble the battery. v Note: The grounding pin also provides good protection from the wall outlet and refer servicing to leak acid, become hot, explode or ignite...
... product does not operate normally after two or three complete charge and discharge cycles. If you to qualified service personnel. Do not pierce, open or disassemble the battery. v Note: The grounding pin also provides good protection from the wall outlet and refer servicing to leak acid, become hot, explode or ignite...
TravelMate 6592/6592G User's Guide EN
Page 6
... that which could cause an explosion or fire resulting in temperatures well below deck on when wireless phone use any area with Acer approved chargers designated for its intended purpose. Always try to interference from children. Potentially explosive environments Switch off your pocket or purse...which came bundled with a hot or cold battery may explode if not handled properly. Do not short-circuit the battery. Do not disassemble or dispose of used batteries. Do not dispose as grain, dust or metal powders. The capacity and lifetime of the battery will eventually...
... that which could cause an explosion or fire resulting in temperatures well below deck on when wireless phone use any area with Acer approved chargers designated for its intended purpose. Always try to interference from children. Potentially explosive environments Switch off your pocket or purse...which came bundled with a hot or cold battery may explode if not handled properly. Do not short-circuit the battery. Do not disassemble or dispose of used batteries. Do not dispose as grain, dust or metal powders. The capacity and lifetime of the battery will eventually...

TravelMate 6592/6592G User's Guide EN
Page 86
... SE IKKE IND I ADVERTENCIA: RADIACIÓN LÁSER INVISIBLE AL SER ABIERTO. and 6,516,132." Use of this computer is protected by U.S. Reverse engineering or disassembly is located on the recorded image and does not constitute a malfunction. The CD or DVD drive's classification label (shown below) is prohibited. AVOID EXPOSURE TO...
... SE IKKE IND I ADVERTENCIA: RADIACIÓN LÁSER INVISIBLE AL SER ABIERTO. and 6,516,132." Use of this computer is protected by U.S. Reverse engineering or disassembly is located on the recorded image and does not constitute a malfunction. The CD or DVD drive's classification label (shown below) is prohibited. AVOID EXPOSURE TO...
TravelMate 6592G Service Guide
Page 7
... System Utilities 33 Acer GridVista (dual-display compatible 33 Launch Manager 34 Hardware Specifications and Configurations 35 Chapter 2 System Utilities 43 BIOS Setup Utility 43 Navigating the BIOS Utility 44 Information ...45 Main ...46 Advanced ...48 Security ...49 Boot ...54 Exit ...55 BIOS Flash Utility 56 Chapter 3 Machine Disassembly and Replacement 57...
... System Utilities 33 Acer GridVista (dual-display compatible 33 Launch Manager 34 Hardware Specifications and Configurations 35 Chapter 2 System Utilities 43 BIOS Setup Utility 43 Navigating the BIOS Utility 44 Information ...45 Main ...46 Advanced ...48 Security ...49 Boot ...54 Exit ...55 BIOS Flash Utility 56 Chapter 3 Machine Disassembly and Replacement 57...

TravelMate 6592G Service Guide
Page 8
... Removing the TouchPad 72 Removing the Mainboard 73 Removing the I/O Board 74 Removing the Heatsink and Fan Module 75 Removing the CPU 76 LCM Module Disassembly Procedure 77 Removing the LCM Bezel 77 Removing the LCD Panel 78 LCM Module Reassembly Procedure 81 Replacing the LCD Panel 81 Replacing the LCM...
... Removing the TouchPad 72 Removing the Mainboard 73 Removing the I/O Board 74 Removing the Heatsink and Fan Module 75 Removing the CPU 76 LCM Module Disassembly Procedure 77 Removing the LCM Bezel 77 Removing the LCD Panel 78 LCM Module Reassembly Procedure 81 Replacing the LCD Panel 81 Replacing the LCM...

TravelMate 6592G Service Guide
Page 67
During the disassembly process, group the screws with the corresponding components to avoid mismatch when putting back the components. Chapter 3 57 When you need the following tools: q Wrist ... mat for preventing electrostatic discharge q Small Philips screw driver q Philips screwdriver q Plastic flat head screw driver q Tweezers NOTE: The screws for maintenance and troubleshooting. To disassemble the computer, you remove the stripe cover, please be careful not to scrape the cover. Chapter 3 Machine...
During the disassembly process, group the screws with the corresponding components to avoid mismatch when putting back the components. Chapter 3 57 When you need the following tools: q Wrist ... mat for preventing electrostatic discharge q Small Philips screw driver q Philips screwdriver q Plastic flat head screw driver q Tweezers NOTE: The screws for maintenance and troubleshooting. To disassemble the computer, you remove the stripe cover, please be careful not to scrape the cover. Chapter 3 Machine...

TravelMate 6592G Service Guide
Page 68
Turn off the power to the system and all power and signal cables from the system. 58 Chapter 3 General Information Before You Begin Before proceeding with the disassembly procedure, make sure that you do the following: 1. Unplug the AC adapter and all peripherals. 2.
Turn off the power to the system and all power and signal cables from the system. 58 Chapter 3 General Information Before You Begin Before proceeding with the disassembly procedure, make sure that you do the following: 1. Unplug the AC adapter and all peripherals. 2.

TravelMate 6592G Service Guide
Page 69
For example, if you must first remove the keyboard, then disassemble the inside assembly frame in that order. Main Unit Disassembly Flowchart Chapter 3 59 Disassembly Procedure Flowcharts The following flowcharts give you a graphic representation on the entire disassembly sequence and instructs you on the components that need to remove the system board, you want to be removed during servicing.
For example, if you must first remove the keyboard, then disassemble the inside assembly frame in that order. Main Unit Disassembly Flowchart Chapter 3 59 Disassembly Procedure Flowcharts The following flowcharts give you a graphic representation on the entire disassembly sequence and instructs you on the components that need to remove the system board, you want to be removed during servicing.

TravelMate 6592G Service Guide
Page 71
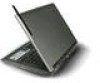
Release the battery lock as shown. Turn the computer over. Push the release latch, the battery pops up. 3. NOTE: It is not necessary to remove the screws from the cover. Remove the battery. Chapter 3 61 Locate and loosen the seventeen (17) screws as shown. 2. Removing the Cover Securing Screws and Covers 1. Main Unit Disassembly Procedure Removing the Battery Pack 1.
Release the battery lock as shown. Turn the computer over. Push the release latch, the battery pops up. 3. NOTE: It is not necessary to remove the screws from the cover. Remove the battery. Chapter 3 61 Locate and loosen the seventeen (17) screws as shown. 2. Removing the Cover Securing Screws and Covers 1. Main Unit Disassembly Procedure Removing the Battery Pack 1.

TravelMate 6592G Service Guide
Page 87
they are reusable. 2. Remove the six bezel securing screws. 3. NOTE: Do not discard the screw covers - Push in the cover locks to allow the bezel to scratch the computer casing. 1. Chapter 3 77 Locate and remove the four mylar (small red markers) and two rubber (large red markers) screw covers as shown. 4. Loosen the bezel by lifting all the edges upward as shown. LCM Module Disassembly Procedure Removing the LCM Bezel CAUTION: When using tools, be careful not to pass freely over them.
they are reusable. 2. Remove the six bezel securing screws. 3. NOTE: Do not discard the screw covers - Push in the cover locks to allow the bezel to scratch the computer casing. 1. Chapter 3 77 Locate and remove the four mylar (small red markers) and two rubber (large red markers) screw covers as shown. 4. Loosen the bezel by lifting all the edges upward as shown. LCM Module Disassembly Procedure Removing the LCM Bezel CAUTION: When using tools, be careful not to pass freely over them.


