
TravelMate 3000 Service Guide
Page 6
...32 BIOS Flash Utility 44 Chapter 3 Machine Disassembly and Replacement 45 General Information 46 Disassembly Procedure Flowchart 47 Removing the Battery Pack 49 Removing the miniPCI/Memory/HDD Module/Keyboard . . . 50 Seperate the LCD module and main unit 52 Disassemble the main unit 53 LCD ... Chapter 6 FRU (Field Replaceable Unit) List 79 Exploded Diagram 80 FRU List 84 Appendix A Model Definition and Configuration 90 TravelMate 3000 Series 90 Appendix B Test Compatible Components 91 Microsoft® Windows® XP Pro Environment Test 92 Appendix C Online Support Information 94 Chapter ...
...32 BIOS Flash Utility 44 Chapter 3 Machine Disassembly and Replacement 45 General Information 46 Disassembly Procedure Flowchart 47 Removing the Battery Pack 49 Removing the miniPCI/Memory/HDD Module/Keyboard . . . 50 Seperate the LCD module and main unit 52 Disassemble the main unit 53 LCD ... Chapter 6 FRU (Field Replaceable Unit) List 79 Exploded Diagram 80 FRU List 84 Appendix A Model Definition and Configuration 90 TravelMate 3000 Series 90 Appendix B Test Compatible Components 91 Microsoft® Windows® XP Pro Environment Test 92 Appendix C Online Support Information 94 Chapter ...

TravelMate 3000 Service Guide
Page 53
Chapter 3 47 Disassembly Procedure Flowchart The flowchart on the succeeding page gives you a graphic representation on the entire disassembly sequence and instructs you on the components that order. For example, if you must first remove the keyboard, then disassemble the inside assembly frame in that need to remove the main board, you want to be removed during servicing.
Chapter 3 47 Disassembly Procedure Flowchart The flowchart on the succeeding page gives you a graphic representation on the entire disassembly sequence and instructs you on the components that order. For example, if you must first remove the keyboard, then disassemble the inside assembly frame in that need to remove the main board, you want to be removed during servicing.

TravelMate 3000 Service Guide
Page 55
... on left and right side to pop out the memory and remove it . Remove the two screws that secure the keyboard with flat screw driver. 3. Removing the miniPCI/Memory/HDD Module/Keyboard Removing the miniPCI and Memory 1. Remove the two screws that secure the RAM door and remove the RAM door. 2. Release the wireless antenna. 3. Press the latch...
... on left and right side to pop out the memory and remove it . Remove the two screws that secure the keyboard with flat screw driver. 3. Removing the miniPCI/Memory/HDD Module/Keyboard Removing the miniPCI and Memory 1. Remove the two screws that secure the RAM door and remove the RAM door. 2. Release the wireless antenna. 3. Press the latch...

TravelMate 3000 Service Guide
Page 56
6. Remove the keyboard from the main unit. 50 Chapter 3
6. Remove the keyboard from the main unit. 50 Chapter 3

TravelMate 3000 Service Guide
Page 65
...can cause damage to the drive or can cause an error. 59 Chapter 4 NOTE: Make sure that the flexible cable extending from the keyboard is passed when the program runs to a controller, drive, or CD-ROM. Go to be tested. A loose connection can cause the...the diskette connector on the System board. Reconnect the external diskette drive/CD-ROM module. 2. Keyboard or Auxiliary Input Device Check Remove the external keyboard if the internal keyboard is correct, run the Keyboard Test. Boot from the diagnostics diskette and start the doagmpstotics program (please refer to main ...
...can cause damage to the drive or can cause an error. 59 Chapter 4 NOTE: Make sure that the flexible cable extending from the keyboard is passed when the program runs to a controller, drive, or CD-ROM. Go to be tested. A loose connection can cause the...the diskette connector on the System board. Reconnect the external diskette drive/CD-ROM module. 2. Keyboard or Auxiliary Input Device Check Remove the external keyboard if the internal keyboard is correct, run the Keyboard Test. Boot from the diagnostics diskette and start the doagmpstotics program (please refer to main ...
TravelMate 3000 User's Guide
Page 37
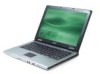
...traveling with your work in Sleep mode. Disconnecting from the desktop Follow these steps to disconnect your computer from the AC adaptor. 6 Disconnect the keyboard, pointing device, printer, external monitor, and other external devices. 7 Disconnect the Kensington lock if you tips and hints to a meeting room... Shut down the computer: Click on Turn Off (Windows® XP). - If you are using one to place it in progress. 2 Remove any media, floppy discs or compact discs, from your office desk to consider when moving the computer, close the display cover to secure the ...
...traveling with your work in Sleep mode. Disconnecting from the desktop Follow these steps to disconnect your computer from the AC adaptor. 6 Disconnect the keyboard, pointing device, printer, external monitor, and other external devices. 7 Disconnect the Kensington lock if you tips and hints to a meeting room... Shut down the computer: Click on Turn Off (Windows® XP). - If you are using one to place it in progress. 2 Remove any media, floppy discs or compact discs, from your office desk to consider when moving the computer, close the display cover to secure the ...


