

User Manual
Page 1
TABLE OF CONTENTS Special notes on LCD monitors 1 Information for your safety and comfort 2 Unpacking 5 Attaching/Removing the base 6 Screen position adjustment 6 Connecting the power cord 7 Safety precaution 7 Cleaning your monitor 7 Power saving 8 DDC 8 Connector Pin Assignment 9 Standard Timing Table 11 Installation 12 User controls 13 How to adjust a setting 14 Troubleshooting 19
TABLE OF CONTENTS Special notes on LCD monitors 1 Information for your safety and comfort 2 Unpacking 5 Attaching/Removing the base 6 Screen position adjustment 6 Connecting the power cord 7 Safety precaution 7 Cleaning your monitor 7 Power saving 8 DDC 8 Connector Pin Assignment 9 Standard Timing Table 11 Installation 12 User controls 13 How to adjust a setting 14 Troubleshooting 19

User Manual
Page 2
... Switch and then turn it on the desktop pattern you use . In this case, the screen is displayed for hours. P191W SPECIAL NOTES ON LCD MONITORS The following symptoms are normal with LCD monitor and do not indicate a problem. EN-1
... Switch and then turn it on the desktop pattern you use . In this case, the screen is displayed for hours. P191W SPECIAL NOTES ON LCD MONITORS The following symptoms are normal with LCD monitor and do not indicate a problem. EN-1

User Manual
Page 4
... Computer users may complain of eyestrain and headaches after long hours of working conditions, personal health and other factors greatly increase the risk of the monitor, using a footrest, or raising your leg muscles EN-3 P191W Product servicing Do not attempt to service this product from staying too long in one fixed...
... Computer users may complain of eyestrain and headaches after long hours of working conditions, personal health and other factors greatly increase the risk of the monitor, using a footrest, or raising your leg muscles EN-3 P191W Product servicing Do not attempt to service this product from staying too long in one fixed...

User Manual
Page 5
... body. P191W • take breaks regularly, and do not recommend using a display visor, such as a piece of cardboard extended from the monitor and focusing on how to reduce eyestrain. Eyes • Rest your eyes frequently. • Give your eyes regular breaks by using drapes, ... angle • using a glare-reduction filter • using the product on a couch or bed. The following websites: Worldwide: http://global.acer.com/about/sustainability.htm EN-4 If this is unavoidable, work habits to make your display to an awkward viewing angle. • Avoid looking ...
... body. P191W • take breaks regularly, and do not recommend using a display visor, such as a piece of cardboard extended from the monitor and focusing on how to reduce eyestrain. Eyes • Rest your eyes frequently. • Give your eyes regular breaks by using drapes, ... angle • using a glare-reduction filter • using the product on a couch or bed. The following websites: Worldwide: http://global.acer.com/about/sustainability.htm EN-4 If this is unavoidable, work habits to make your display to an awkward viewing angle. • Avoid looking ...

User Manual
Page 6
P191W UNPACKING Please check the following items are present when you unpack the box, and save the packing materials in case you will need to ship or transport the monitor in future. · LCD Monitor · 15-pin D-Sub Cable · DVI Cable · AC Power Cord (Only Dual-Input Model) · User Manual · Quick Start Guide EN-5
P191W UNPACKING Please check the following items are present when you unpack the box, and save the packing materials in case you will need to ship or transport the monitor in future. · LCD Monitor · 15-pin D-Sub Cable · DVI Cable · AC Power Cord (Only Dual-Input Model) · User Manual · Quick Start Guide EN-5

User Manual
Page 7
... arrow below . P191W Attaching / Removing the Base Install: Align the release button on the bottom of the monitor with the corresponding slots on the bottom of the monitor as indicated first before removing the base and follow the arrow direction to hold the edges of the base. SCREEN POSITION ADJUSTMENT In oder...
... arrow below . P191W Attaching / Removing the Base Install: Align the release button on the bottom of the monitor with the corresponding slots on the bottom of the monitor as indicated first before removing the base and follow the arrow direction to hold the edges of the base. SCREEN POSITION ADJUSTMENT In oder...
User Manual
Page 8
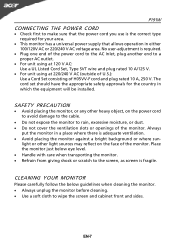
... power cord you use is fragile. light or other heavy object, on the face of the monitor. No user-adjustment is required. · Plug one end of the power cord to the ... AC or 220/240 V AC voltage area. SAFETY PRECAUTION · Avoid placing the monitor, or any other light sources may reflect on the power cord to avoid damage to the cable. ·...a Cord Set consisting of H05VV-F cord and plug rated 10 A, 250 V. Place the monitor just below guidelines when cleaning the monitor. · Always unplug the monitor before cleaning. · Use a soft cloth to the screen, as screen is the ...
... power cord you use is fragile. light or other heavy object, on the face of the monitor. No user-adjustment is required. · Plug one end of the power cord to the ... AC or 220/240 V AC voltage area. SAFETY PRECAUTION · Avoid placing the monitor, or any other light sources may reflect on the power cord to avoid damage to the cable. ·...a Cord Set consisting of H05VV-F cord and plug rated 10 A, 250 V. Place the monitor just below guidelines when cleaning the monitor. · Always unplug the monitor before cleaning. · Use a soft cloth to the screen, as screen is the ...
User Manual
Page 9
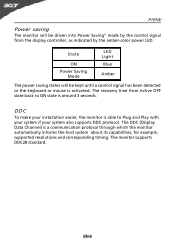
...-color power LED. The DDC (Display Data Channel) is able to ON state is around 3 seconds. The monitor supports DDC2B standard. P191W Power saving The monitor will be driven into Power Saving" mode by the control signal from Active OFF state back to Plug and Play... with your system if your system also supports DDC protocol. DDC To make your installation easier, the monitor is a communication protocol through which the monitor automatically informs the host system about its capabilities, for example, supported resolutions and corresponding timing. State ON Power Saving...
...-color power LED. The DDC (Display Data Channel) is able to ON state is around 3 seconds. The monitor supports DDC2B standard. P191W Power saving The monitor will be driven into Power Saving" mode by the control signal from Active OFF state back to Plug and Play... with your system if your system also supports DDC protocol. DDC To make your installation easier, the monitor is a communication protocol through which the monitor automatically informs the host system about its capabilities, for example, supported resolutions and corresponding timing. State ON Power Saving...

User Manual
Page 10
DESCRIPTION +5V Logic Ground Monitor Ground DDC-Serial Data H-Sync V-Sync DDC-Serial Clock EN-9 CONNECTOR PIN ASSIGNMENT P191W 15-Pin Color Display Signal Cable PIN NO. 1. 2. 3. 4. 5. 6. 7. 8. DESCRIPTION Red Green Blue Monitor Ground DDC-return R-Ground G-Ground B-Ground PIN NO. 9. 10. 11. 12. 13. 14. 15.
DESCRIPTION +5V Logic Ground Monitor Ground DDC-Serial Data H-Sync V-Sync DDC-Serial Clock EN-9 CONNECTOR PIN ASSIGNMENT P191W 15-Pin Color Display Signal Cable PIN NO. 1. 2. 3. 4. 5. 6. 7. 8. DESCRIPTION Red Green Blue Monitor Ground DDC-return R-Ground G-Ground B-Ground PIN NO. 9. 10. 11. 12. 13. 14. 15.

User Manual
Page 12
... 75 Hz 1152 x 864 75 Hz 1280 x 960 60 Hz 1280 x 1024 60 Hz 1280 x 1024 75 Hz 1440 x 900 60 Hz EN-11 The monitor is capable of the mode is matched, the user can store their preferred modes in the user modes. The only condition to perform the Auto... is suggested to store as given in the floppy disk provided. P191W Standard Timing Table To reduce the need for adjustment for different modes, the monitor has default setting modes that are most commonly used as a user mode is the new display information must have 1 KHz difference for horizontal frequency or...
... 75 Hz 1152 x 864 75 Hz 1280 x 960 60 Hz 1280 x 1024 60 Hz 1280 x 1024 75 Hz 1440 x 900 60 Hz EN-11 The monitor is capable of the mode is matched, the user can store their preferred modes in the user modes. The only condition to perform the Auto... is suggested to store as given in the floppy disk provided. P191W Standard Timing Table To reduce the need for adjustment for different modes, the monitor has default setting modes that are most commonly used as a user mode is the new display information must have 1 KHz difference for horizontal frequency or...

User Manual
Page 13
...end to diagnose the problem. b. This sequence is very important. 4. EN-12 b. Power-ON Monitor and Computer Power-ON the monitor first, then power-ON the computer. If the monitor still does not function properly, please refer to the troubleshooting section to the computer's port. 2. ... host system, please follow the steps as given below: Steps 1. 1-1 Connect Video Cable a. Make sure both the monitor and computer are powered-OFF. P191W INSTALLATION To install the monitor to a properly grounded AC outlet. 3. Connect the VGA video cable to the computer. 1-2 Digital Cable (Only Dual...
...end to diagnose the problem. b. This sequence is very important. 4. EN-12 b. Power-ON Monitor and Computer Power-ON the monitor first, then power-ON the computer. If the monitor still does not function properly, please refer to the troubleshooting section to the computer's port. 2. ... host system, please follow the steps as given below: Steps 1. 1-1 Connect Video Cable a. Make sure both the monitor and computer are powered-OFF. P191W INSTALLATION To install the monitor to a properly grounded AC outlet. 3. Connect the VGA video cable to the computer. 1-2 Digital Cable (Only Dual...

User Manual
Page 20
... is in compliance which may be causing the input signal frequency mismatch. Unstable Picture · Check if the specification of graphics adapter and monitor is properly connected to their default settings. Using OSD, in display · POSITION with non-standard signals. LED OFF · Check ...the power switch. Display is ON. LED displays amber color · Check if video signal cable is properly connected at the back of monitor. · Check if the power of computer system is · Using OSD, adjust RESOLUTION, CLOCK, missing, center CLOCK-PHASE, H-POSITION and ...
... is in compliance which may be causing the input signal frequency mismatch. Unstable Picture · Check if the specification of graphics adapter and monitor is properly connected to their default settings. Using OSD, in display · POSITION with non-standard signals. LED OFF · Check ...the power switch. Display is ON. LED displays amber color · Check if video signal cable is properly connected at the back of monitor. · Check if the power of computer system is · Using OSD, adjust RESOLUTION, CLOCK, missing, center CLOCK-PHASE, H-POSITION and ...

User Manual
Page 21
LED displays amber color · Check if video signal cable is properly connected at the back of monitor. · Check if the power of computer system is properly connected to their default settings. (DVI Mode) P191W Problems No Picture Current Status Remedy LED ON · Using OSD, adjust brightness and contrast to maximum or reset to the monitor. EN-20 LED OFF · Check the power switch. · Check if AC power cord is ON.
LED displays amber color · Check if video signal cable is properly connected at the back of monitor. · Check if the power of computer system is properly connected to their default settings. (DVI Mode) P191W Problems No Picture Current Status Remedy LED ON · Using OSD, adjust brightness and contrast to maximum or reset to the monitor. EN-20 LED OFF · Check the power switch. · Check if AC power cord is ON.


