

Altos G330 User's Guide
Page 4
Operation is subject to the following two conditions: (1) this device may not cause harmful interference, and (2) this server is likely to result in this device must accept any interference received, including interference that may cause undesired operation.... Peripheral devices Only peripherals (input/output devices, terminals, printers, etc.) certified to comply with the Class A limits may be attached to this server. Use conditions This part complies with noncertified peripherals is a laser product. CLASS 1 LASER PRODUCT CAUTION: INVISIBLE LASER RADIATION WHEN OPEN. Operation with ...
Operation is subject to the following two conditions: (1) this device may not cause harmful interference, and (2) this server is likely to result in this device must accept any interference received, including interference that may cause undesired operation.... Peripheral devices Only peripherals (input/output devices, terminals, printers, etc.) certified to comply with the Class A limits may be attached to this server. Use conditions This part complies with noncertified peripherals is a laser product. CLASS 1 LASER PRODUCT CAUTION: INVISIBLE LASER RADIATION WHEN OPEN. Operation with ...

Altos G330 User's Guide
Page 7
... 20 Turning off the system 21 3 System upgrade 23 Installation precautions 25 ESD precautions 25 Pre-installation instructions 26 Post-installation instructions 26 Opening the server 27 Removing the side panel 27 Removing the front bezels 28 Configuring a 5-25 inch storage device 29 Configuring a hard drive 31 Upgrading the processor 35...
... 20 Turning off the system 21 3 System upgrade 23 Installation precautions 25 ESD precautions 25 Pre-installation instructions 26 Post-installation instructions 26 Opening the server 27 Removing the side panel 27 Removing the front bezels 28 Configuring a 5-25 inch storage device 29 Configuring a hard drive 31 Upgrading the processor 35...

Altos G330 User's Guide
Page 8
... navigation keys 52 BIOS setup primary menus 54 Main menu 54 Advanced menu 55 Security menu 65 Server Management menu 70 Boot Options menu 73 Error Manager 75 Exit menu 76 Clearing the CMOS RAM 78 Upgrading the BIOS 79 5 System troubleshooting 81 Pre-troubleshooting procedure 83 Resetting the system 83 Initial...
... navigation keys 52 BIOS setup primary menus 54 Main menu 54 Advanced menu 55 Security menu 65 Server Management menu 70 Boot Options menu 73 Error Manager 75 Exit menu 76 Clearing the CMOS RAM 78 Upgrading the BIOS 79 5 System troubleshooting 81 Pre-troubleshooting procedure 83 Resetting the system 83 Initial...

Altos G330 User's Guide
Page 12
From simple networking functions to meet the needs of various network environments. It hosts a range of powerful and flexible features designed to computing-intensive applications, the Altos G330 delivers. The Acer Altos G330 server is a single processor system featuring the latest in computing technology.
From simple networking functions to meet the needs of various network environments. It hosts a range of powerful and flexible features designed to computing-intensive applications, the Altos G330 delivers. The Acer Altos G330 server is a single processor system featuring the latest in computing technology.
Altos G330 User's Guide
Page 14
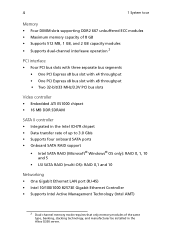
...8226; Four DIMM slots supporting DDR2 667 unbuffered ECC modules • Maximum memory capacity of 8 GB • Supports 512 MB, 1 GB, and 2 GB capacity modules • Supports dual-channel interleave operation 2 PCI interface • Four PCI bus slots...MB DDR SDRAM SATA II controller • Integrated in the Intel ICH7R chipset • Data transfer rate of up to 3.0 Gb/s • Supports four onboard SATA ports • Onboard SATA RAID support • Intel SATA RAID (Microsoft® Windows®... type, banking, stacking technology, and manufacturer be installed in the Altos G330 server.
...8226; Four DIMM slots supporting DDR2 667 unbuffered ECC modules • Maximum memory capacity of 8 GB • Supports 512 MB, 1 GB, and 2 GB capacity modules • Supports dual-channel interleave operation 2 PCI interface • Four PCI bus slots...MB DDR SDRAM SATA II controller • Integrated in the Intel ICH7R chipset • Data transfer rate of up to 3.0 Gb/s • Supports four onboard SATA ports • Onboard SATA RAID support • Intel SATA RAID (Microsoft® Windows®... type, banking, stacking technology, and manufacturer be installed in the Altos G330 server.

Altos G330 User's Guide
Page 16
...Management Technology for out-of-band remote system management Operating system • Microsoft Windows 2000 • Microsoft Windows Server 2003 x64 Edition • Microsoft Windows Server 2003 • Red Hat® Enterprise Linux® 4.0 EM64T • Red Hat Enterprise Linux 4.0 &#...8226; SUSE Linux® Enterprise Server 9.0 EM64T • SUSE Linux Enterprise Server 9.0 • Novell® NetWare® 6.5 Mechanical • Chassis • Tool-less chassis design for easy hardware access ...
...Management Technology for out-of-band remote system management Operating system • Microsoft Windows 2000 • Microsoft Windows Server 2003 x64 Edition • Microsoft Windows Server 2003 • Red Hat® Enterprise Linux® 4.0 EM64T • Red Hat Enterprise Linux 4.0 &#...8226; SUSE Linux® Enterprise Server 9.0 EM64T • SUSE Linux Enterprise Server 9.0 • Novell® NetWare® 6.5 Mechanical • Chassis • Tool-less chassis design for easy hardware access ...

Altos G330 User's Guide
Page 28
To ensure proper operation, plug the power cord into a properly grounded AC outlet only. Caution: Do not route the power cord where it . Note: Consult the operating system manual for information on or pinched by items placed against it will be walked on how to be electrically grounded (earthed). The server is designed to configure the network setup. 18 2 System setup Connecting peripherals The color-coded I/O ports on the rear panel support a variety of compatible peripherals.
To ensure proper operation, plug the power cord into a properly grounded AC outlet only. Caution: Do not route the power cord where it . Note: Consult the operating system manual for information on or pinched by items placed against it will be walked on how to be electrically grounded (earthed). The server is designed to configure the network setup. 18 2 System setup Connecting peripherals The color-coded I/O ports on the rear panel support a variety of compatible peripherals.
Altos G330 User's Guide
Page 31
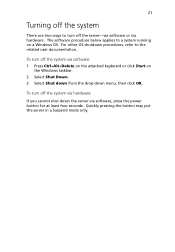
Quickly pressing the button may put the server in a Suspend mode only. For other OS shutdown procedures, refer to a system running on the Windows taskbar. 2 Select ...drop-down menu, then click OK. To turn off the system via hardware: If you cannot shut down the server via software: 1 Press Ctrl+Alt+Delete on the attached keyboard or click Start on a Windows OS. To turn off the... server-via software or via hardware. 21 Turning off the system There are two ways to turn off the system via...
Quickly pressing the button may put the server in a Suspend mode only. For other OS shutdown procedures, refer to a system running on the Windows taskbar. 2 Select ...drop-down menu, then click OK. To turn off the system via hardware: If you cannot shut down the server via software: 1 Press Ctrl+Alt+Delete on the attached keyboard or click Start on a Windows OS. To turn off the... server-via software or via hardware. 21 Turning off the system There are two ways to turn off the system via...

Altos G330 User's Guide
Page 35
..., such as the processor, disk drives, and the system boards. 25 Installation precautions Before you install any server component, it is not available, maintain contact with the server throughout any procedure requiring ESD protection. • Avoid moving around unnecessarily to minimize your body's ESD. &#...8226; Keep the work area free of the server before you install a server component: • Do not remove a component from its protective packaging until you are ready to install it. • Do not...
..., such as the processor, disk drives, and the system boards. 25 Installation precautions Before you install any server component, it is not available, maintain contact with the server throughout any procedure requiring ESD protection. • Avoid moving around unnecessarily to minimize your body's ESD. &#...8226; Keep the work area free of the server before you install a server component: • Do not remove a component from its protective packaging until you are ready to install it. • Do not...
Altos G330 User's Guide
Page 36
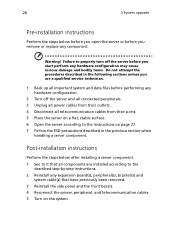
... on the system. Do not attempt the procedures described in the previous section when handling a server component. Post-installation instructions Perform the steps below before you open the server or before you remove or replace any component. 26 3 System upgrade Pre-installation instructions Perform... the steps below after installing a server component. 1 See to it that all components are a qualified service technician. 1 Back up all telecommunication cables from their ...
... on the system. Do not attempt the procedures described in the previous section when handling a server component. Post-installation instructions Perform the steps below before you open the server or before you remove or replace any component. 26 3 System upgrade Pre-installation instructions Perform... the steps below after installing a server component. 1 See to it that all components are a qualified service technician. 1 Back up all telecommunication cables from their ...

Altos G330 User's Guide
Page 37
27 Opening the server Caution: Before you proceed, make sure that you can install upgrade components. Removing the side panel 1 Perform the pre-installation instructions described on page 26. 2 ... panel from the chassis. The front bezels and (left) side panel are removable to allow access to the following sections for instructions. Refer to the server's internal components. You need to open the server before you have turned off the system and all the way down to it.
27 Opening the server Caution: Before you proceed, make sure that you can install upgrade components. Removing the side panel 1 Perform the pre-installation instructions described on page 26. 2 ... panel from the chassis. The front bezels and (left) side panel are removable to allow access to the following sections for instructions. Refer to the server's internal components. You need to open the server before you have turned off the system and all the way down to it.
Altos G330 User's Guide
Page 45
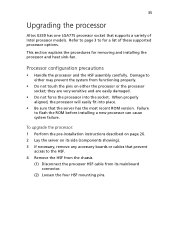
.... they are very sensitive and are easily damaged. • Do not force the processor into place. • Be sure that the server has the most recent ROM version. This section explains the procedures for a list of Intel processor models. Failure to either may prevent the... (2) Loosen the four HSF mounting pins. To upgrade the processor: 1 Perform the pre-installation instructions described on page 26. 2 Lay the server on either the processor or the processor socket; When properly aligned, the processor will easily fit into the socket. Processor configuration precautions • ...
.... they are very sensitive and are easily damaged. • Do not force the processor into place. • Be sure that the server has the most recent ROM version. This section explains the procedures for a list of Intel processor models. Failure to either may prevent the... (2) Loosen the four HSF mounting pins. To upgrade the processor: 1 Perform the pre-installation instructions described on page 26. 2 Lay the server on either the processor or the processor socket; When properly aligned, the processor will easily fit into the socket. Processor configuration precautions • ...

Altos G330 User's Guide
Page 51
... Channel A Channel B DIMM1A DIMM2A DIMM1B DIMM2B Total memory 512 MB 512 MB 1 GB Dual channel 1 GB 2 GB 512 MB 512 MB 1 GB 2 GB 512 MB 512 MB 2 GB 4 GB 2 GB 1 GB 1 GB 1 GB 1 GB 4 GB 2 GB 2 GB 2 GB 2 GB 8 GB To remove a memory module: 1 Perform the pre-installation instructions described on page 26. 2 Lay the server on its side (components showing). 3 If necessary, remove any cables that prevent access...
... Channel A Channel B DIMM1A DIMM2A DIMM1B DIMM2B Total memory 512 MB 512 MB 1 GB Dual channel 1 GB 2 GB 512 MB 512 MB 1 GB 2 GB 512 MB 512 MB 2 GB 4 GB 2 GB 1 GB 1 GB 1 GB 1 GB 4 GB 2 GB 2 GB 2 GB 2 GB 8 GB To remove a memory module: 1 Perform the pre-installation instructions described on page 26. 2 Lay the server on its side (components showing). 3 If necessary, remove any cables that prevent access...

Altos G330 User's Guide
Page 57
... area. 6 Remove the new CMOS battery from the battery. (2) Pull the battery out of the CMOS RAM. 47 To replace the CMOS battery: 1 Perform the pre-installation instructions described on page 26. 2 Lay the server on its socket. 5 Dispose the used CMOS battery according to the manufacturer's instructions or according to the...
... area. 6 Remove the new CMOS battery from the battery. (2) Pull the battery out of the CMOS RAM. 47 To replace the CMOS battery: 1 Perform the pre-installation instructions described on page 26. 2 Lay the server on its socket. 5 Dispose the used CMOS battery according to the manufacturer's instructions or according to the...
Altos G330 User's Guide
Page 62
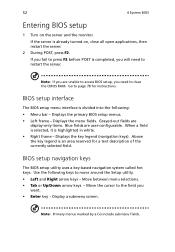
... system called hot keys. Display a submenu screen. When a field is selected, it is divided into the following keys to clear the CMOS RAM. Go to restart the server. Displays the menu fields. Displays the key legend (navigation keys). Move between menu selections. • Tab or Up/Down arrow keys - ... Note: If you need to page 78 for a text description of the currently selected field. Above the key legend is already turned on the server and the monitor. Move the cursor to the field you will need to move around the Setup utility. • Left and Right arrow keys...
... system called hot keys. Display a submenu screen. When a field is selected, it is divided into the following keys to clear the CMOS RAM. Go to restart the server. Displays the menu fields. Displays the key legend (navigation keys). Move between menu selections. • Tab or Up/Down arrow keys - ... Note: If you need to page 78 for a text description of the currently selected field. Above the key legend is already turned on the server and the monitor. Move the cursor to the field you will need to move around the Setup utility. • Left and Right arrow keys...

Altos G330 User's Guide
Page 64
... Setup menus, namely: • Main • Boot Options • Advanced • Boot Manager • Security • Error Manager • Server Management • Exit Main menu Parameter Logged in as BIOS Version BIOS Build Date Quiet Boot Description Option The kind of account used to display... the Acer logo screen (Enabled) or the BIOS POST messages (Disabled) during boot-up. Firmware version loaded on the hardware platform was compiled....
... Setup menus, namely: • Main • Boot Options • Advanced • Boot Manager • Security • Error Manager • Server Management • Exit Main menu Parameter Logged in as BIOS Version BIOS Build Date Quiet Boot Description Option The kind of account used to display... the Acer logo screen (Enabled) or the BIOS POST messages (Disabled) during boot-up. Firmware version loaded on the hardware platform was compiled....

Altos G330 User's Guide
Page 80
... event log entries during the next system boot-up fails. Enabled Disabled Displays the capacity status allotted for the DMI event log. Enabled Disabled 70 Server Management menu 4 System BIOS Parameter Clear Event Log Event Logging ECC Event Logging Event Log Area Status O/S Boot WD Timer ASF Support Description Option Select...
... event log entries during the next system boot-up fails. Enabled Disabled Displays the capacity status allotted for the DMI event log. Enabled Disabled 70 Server Management menu 4 System BIOS Parameter Clear Event Log Event Logging ECC Event Logging Event Log Area Status O/S Boot WD Timer ASF Support Description Option Select...

Altos G330 User's Guide
Page 83
Items on this screen are non-configurable. Boot Options menu The Boot Options menu allows you to set the boot time-out value and drive priority during system boot-up. By default, the server searches for basic system ID information. 73 System Information The System Information submenu is a simple display page for boot devices in the following order: 1 Optical disc drive 2 Floppy disk drive 3 Hard disk drive 4 EFI (Extensible Firmware Interface) shell
Items on this screen are non-configurable. Boot Options menu The Boot Options menu allows you to set the boot time-out value and drive priority during system boot-up. By default, the server searches for basic system ID information. 73 System Information The System Information submenu is a simple display page for boot devices in the following order: 1 Optical disc drive 2 Floppy disk drive 3 Hard disk drive 4 EFI (Extensible Firmware Interface) shell

Altos G330 User's Guide
Page 84
Boot Option # 1-4 Set the boot device options to determine the sequence in seconds) 10 before the system boots up. Select a boot order item, then use the +/- ODD FDD HDD EFI shell 74 4 System BIOS Parameter Description Option Boot Timeout Set the predefined time period (in which the server checks which device to boot from. keys to 65535 will disable the boot timer. Note: Setting the Boot Timeout to select the particular drive for that boot position.
Boot Option # 1-4 Set the boot device options to determine the sequence in seconds) 10 before the system boots up. Select a boot order item, then use the +/- ODD FDD HDD EFI shell 74 4 System BIOS Parameter Description Option Boot Timeout Set the predefined time period (in which the server checks which device to boot from. keys to 65535 will disable the boot timer. Note: Setting the Boot Timeout to select the particular drive for that boot position.

Altos G330 User's Guide
Page 85
...-On Self-Test or POST. For more information on , it either displays an error message or emits a beeping sounds. 75 Error Manager Every time the server is powered on POST beep codes, go to page 92. If POST detects an error, it performs a series of a non-critical POST failure, an error... properly functioning. These text messages are recorded by the Error Manager. In instances of diagnostic tests that checks firmware and assemblies to ensure that the server is referred to resolve the error.
...-On Self-Test or POST. For more information on , it either displays an error message or emits a beeping sounds. 75 Error Manager Every time the server is powered on POST beep codes, go to page 92. If POST detects an error, it performs a series of a non-critical POST failure, an error... properly functioning. These text messages are recorded by the Error Manager. In instances of diagnostic tests that checks firmware and assemblies to ensure that the server is referred to resolve the error.


