
Altos G330 User's Guide
Page 7
...-plug HDD LED indicators 14 LAN port LED indicators 14 2 System setup 15 Setting up the system 17 Pre-installation requirements 17 Connecting peripherals 18 Turning on the system 19 Power-on problems 20 Turning off the system 21 3 System upgrade 23 Installation precautions 25 ESD precautions 25 Pre-installation instructions 26 Post-installation instructions 26 Opening the server 27 Removing the side panel 27 Removing the front bezels 28 Configuring a 5-25 inch storage device 29 Configuring a hard drive 31 Upgrading...
...-plug HDD LED indicators 14 LAN port LED indicators 14 2 System setup 15 Setting up the system 17 Pre-installation requirements 17 Connecting peripherals 18 Turning on the system 19 Power-on problems 20 Turning off the system 21 3 System upgrade 23 Installation precautions 25 ESD precautions 25 Pre-installation instructions 26 Post-installation instructions 26 Opening the server 27 Removing the side panel 27 Removing the front bezels 28 Configuring a 5-25 inch storage device 29 Configuring a hard drive 31 Upgrading...

Altos G330 User's Guide
Page 15
...; Optical disc drive (ODD) installed in the HDD cage. 4 The processor HSF type will vary depending on the processor model. supports HostRAID 0,1, and 10 • Adaptec 29320ALP-R Ultra 320 SCSI HBA (for backup device only) I/O ports • Two front USB 2.0 ports • PS/2 keyboard port • PS/2 mouse port • Serial port • Monitor port • Two rear USB 2.0 ports • One Gigabit LAN port (RJ-45) Power supply and ventilation • 350-watts ATX 12V PFC power supply with auto switching...
...; Optical disc drive (ODD) installed in the HDD cage. 4 The processor HSF type will vary depending on the processor model. supports HostRAID 0,1, and 10 • Adaptec 29320ALP-R Ultra 320 SCSI HBA (for backup device only) I/O ports • Two front USB 2.0 ports • PS/2 keyboard port • PS/2 mouse port • Serial port • Monitor port • Two rear USB 2.0 ports • One Gigabit LAN port (RJ-45) Power supply and ventilation • 350-watts ATX 12V PFC power supply with auto switching...

Altos G330 User's Guide
Page 101
... monitor signal cable properly connected? • Does this monitor work correctly if plugged into a different system? • Remove all add-in cards and see if the system boots up . • Is the monitor plugged in one at a time with a reboot between each addition to determine if one of the beep codes emitted during POST. Test it again. If you are using the onboard video controller. 2 Verify that the add-in video controller card...
... monitor signal cable properly connected? • Does this monitor work correctly if plugged into a different system? • Remove all add-in cards and see if the system boots up . • Is the monitor plugged in one at a time with a reboot between each addition to determine if one of the beep codes emitted during POST. Test it again. If you are using the onboard video controller. 2 Verify that the add-in video controller card...
Altos G330 User's Guide
Page 119
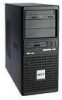
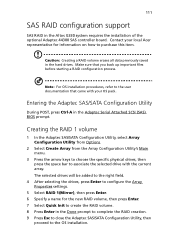
... local Acer representative for the new RAID volume, then press Enter. 7 Select Quick Init to create the RAID volume. 8 Press Enter in the Altos G330 system requires the installation of the optional Adaptec 44300 SAS controller board. Make sure that came with the current array. 109 SAS RAID configuration support SAS RAID in the Done prompt to complete the RAID creation. 9 Press Esc to close the Adaptec SAS/SATA Configuration Utility...
... local Acer representative for the new RAID volume, then press Enter. 7 Select Quick Init to create the RAID volume. 8 Press Enter in the Altos G330 system requires the installation of the optional Adaptec 44300 SAS controller board. Make sure that came with the current array. 109 SAS RAID configuration support SAS RAID in the Done prompt to complete the RAID creation. 9 Press Esc to close the Adaptec SAS/SATA Configuration Utility...
Altos G330 User's Guide
Page 121
... recovery jumper 12 upgrade 79 user default settings 77 view firmware version 54 view system information 73 BIOS setup utility Advanced menu 55 Boot Options menu 73 enter Setup 52 Error Manager 75 exit options 76 Main menu 54 navigation keys 52 Security menu 65 Server Management menu 70 user interface 52 boot-up sequence 73 C chassis intrusion connector 10 CMOS battery location 10 overview 46 replace 47 replacement warnings 46 CMOS RAM clear 78 overview 51 console redirection 72 D DVD-ROM drive remove 29 troubleshooting 89 E easy-swap HDD cable connections 32 install 34 remove...
... recovery jumper 12 upgrade 79 user default settings 77 view firmware version 54 view system information 73 BIOS setup utility Advanced menu 55 Boot Options menu 73 enter Setup 52 Error Manager 75 exit options 76 Main menu 54 navigation keys 52 Security menu 65 Server Management menu 70 user interface 52 boot-up sequence 73 C chassis intrusion connector 10 CMOS battery location 10 overview 46 replace 47 replacement warnings 46 CMOS RAM clear 78 overview 51 console redirection 72 D DVD-ROM drive remove 29 troubleshooting 89 E easy-swap HDD cable connections 32 install 34 remove...
Altos G330 User's Guide
Page 122
... upgrade option 5 memory BIOS settings 57 configuration guidelines 39 install 42 population order 40 remove 41 troubleshooting 89 monitor port 8 O ODD, see optical disc drive 7 operating system support 6 optical disc drive activity indicator 13 location 7 replace 29 P PCI bus slots 43 POST error beep codes 92 error pause 55 overview 75 power BIOS settings 62 boot-up problems 20 boot-up sequence 73 button, location 7 cable socket 8 power supply unit 9 status indicator 13 troubleshooting 88 turn off 21 turn on 19 power off via hardware 21 via software 21 Power-On Self-Test, see POST 75 processor...
... upgrade option 5 memory BIOS settings 57 configuration guidelines 39 install 42 population order 40 remove 41 troubleshooting 89 monitor port 8 O ODD, see optical disc drive 7 operating system support 6 optical disc drive activity indicator 13 location 7 replace 29 P PCI bus slots 43 POST error beep codes 92 error pause 55 overview 75 power BIOS settings 62 boot-up problems 20 boot-up sequence 73 button, location 7 cable socket 8 power supply unit 9 status indicator 13 troubleshooting 88 turn off 21 turn on 19 power off via hardware 21 via software 21 Power-On Self-Test, see POST 75 processor...

Altos G330 User's Guide
Page 123
...8 remove 27 specification chipset 3 hardware monitoring 6 I/O ports 5 mechanical 6 media storage 5 memory 4 networking 4 operating system 6 PCI interface 4 power supply 5 processor 3 server management 6 system cooling 5 video controller 4 system boards backplane board 11 mainboard 10 system event log clear 70 enable 70 view 71 system fan auto fan control 64 cable connector 10 location 9 system jumpers BIOS recovery 12 clear CMOS 11, 12 NIC1 NVM protect mode 12 system passwords admin password 66 change 67 remove 69 reset 69 set 66 user password 66 system profile, view 73 system reset cold boot...
...8 remove 27 specification chipset 3 hardware monitoring 6 I/O ports 5 mechanical 6 media storage 5 memory 4 networking 4 operating system 6 PCI interface 4 power supply 5 processor 3 server management 6 system cooling 5 video controller 4 system boards backplane board 11 mainboard 10 system event log clear 70 enable 70 view 71 system fan auto fan control 64 cable connector 10 location 9 system jumpers BIOS recovery 12 clear CMOS 11, 12 NIC1 NVM protect mode 12 system passwords admin password 66 change 67 remove 69 reset 69 set 66 user password 66 system profile, view 73 system reset cold boot...

User Manual
Page 23
... (DVD-ROM or combo drive) • Two 5.25-inch bays support installation of optional DAT and AIT tape drives • One hard disk drive (HDD) cage bay supports the following cooling components: • One rear system fan • One processor heat sink-fan (HSF) assembly 4 • Optional HDD fan for optional FDD installation • Adaptec 44300 SAS HBA - 5 Media storage • Three 5.25-inch device bays • Optical disc drive (ODD) installed in the HDD cage. 4 The processor HSF type...
... (DVD-ROM or combo drive) • Two 5.25-inch bays support installation of optional DAT and AIT tape drives • One hard disk drive (HDD) cage bay supports the following cooling components: • One rear system fan • One processor heat sink-fan (HSF) assembly 4 • Optional HDD fan for optional FDD installation • Adaptec 44300 SAS HBA - 5 Media storage • Three 5.25-inch device bays • Optical disc drive (ODD) installed in the HDD cage. 4 The processor HSF type...

User Manual
Page 111
... the problem. • Make sure that you reboot the system, reboot it again. If POST does not emit any beep code and characters still does not appear, the monitor or the video controller may be defective. Test it switched to take effect. 4 If there are using an add-in video controller card, do the following : • Is the keyboard functioning? Check the following : 1 Verify that you seek technical...
... the problem. • Make sure that you reboot the system, reboot it again. If POST does not emit any beep code and characters still does not appear, the monitor or the video controller may be defective. Test it switched to take effect. 4 If there are using an add-in video controller card, do the following : • Is the keyboard functioning? Check the following : 1 Verify that you seek technical...
User Manual
Page 129
... SAS/SATA Configuration Utility During POST, press Ctrl-A in the Altos G330 system requires the installation of the optional Adaptec 44300 SAS controller board. 111 SAS RAID configuration support SAS RAID in the Adaptec Serial Attached SCSI (SAS) BIOS prompt. Make sure that came with the current array. The selected drives will be added to the right field. 4 After selecting the drives, press Enter to configure the Array Properties settings. 5 Select RAID 1(Mirror...
... SAS/SATA Configuration Utility During POST, press Ctrl-A in the Altos G330 system requires the installation of the optional Adaptec 44300 SAS controller board. 111 SAS RAID configuration support SAS RAID in the Adaptec Serial Attached SCSI (SAS) BIOS prompt. Make sure that came with the current array. The selected drives will be added to the right field. 4 After selecting the drives, press Enter to configure the Array Properties settings. 5 Select RAID 1(Mirror...
User Manual
Page 131
... recovery jumper 12 upgrade 81 user default settings 79 view firmware version 56 view system information 75 BIOS setup utility Advanced menu 57 Boot Options menu 75 enter Setup 54 Error Manager 77 exit options 78 Main menu 56 navigation keys 54 Security menu 67 Server Management menu 72 user interface 54 boot-up sequence 75 C chassis intrusion connector 10 CMOS battery location 10 overview 47 replace 48 replacement warnings 47 CMOS RAM clear 80 overview 53 console redirection 74 D DVD-ROM drive remove 29 troubleshooting 91 E easy-swap HDD cable connections 32 install 34 remove...
... recovery jumper 12 upgrade 81 user default settings 79 view firmware version 56 view system information 75 BIOS setup utility Advanced menu 57 Boot Options menu 75 enter Setup 54 Error Manager 77 exit options 78 Main menu 56 navigation keys 54 Security menu 67 Server Management menu 72 user interface 54 boot-up sequence 75 C chassis intrusion connector 10 CMOS battery location 10 overview 47 replace 48 replacement warnings 47 CMOS RAM clear 80 overview 53 console redirection 74 D DVD-ROM drive remove 29 troubleshooting 91 E easy-swap HDD cable connections 32 install 34 remove...
User Manual
Page 132
... upgrade option 5 memory BIOS settings 59 configuration guidelines 40 install 43 population order 41 remove 42 troubleshooting 91 monitor port 8 O ODD, see optical disc drive 7 operating system support 6 optical disc drive activity indicator 13 location 7 replace 29 P PCI bus slots 44 POST error beep codes 94 error pause 57 overview 77 power BIOS settings 64 boot-up problems 20 boot-up sequence 75 button, location 7 cable socket 8 power supply unit 9 status indicator 13 troubleshooting 90 turn off 21 turn on 19 power off via hardware 21 via software 21 Power-On Self-Test, see POST 77 processor...
... upgrade option 5 memory BIOS settings 59 configuration guidelines 40 install 43 population order 41 remove 42 troubleshooting 91 monitor port 8 O ODD, see optical disc drive 7 operating system support 6 optical disc drive activity indicator 13 location 7 replace 29 P PCI bus slots 44 POST error beep codes 94 error pause 57 overview 77 power BIOS settings 64 boot-up problems 20 boot-up sequence 75 button, location 7 cable socket 8 power supply unit 9 status indicator 13 troubleshooting 90 turn off 21 turn on 19 power off via hardware 21 via software 21 Power-On Self-Test, see POST 77 processor...
User Manual
Page 133
...8 remove 27 specification chipset 3 hardware monitoring 6 I/O ports 5 mechanical 6 media storage 5 memory 4 networking 4 operating system 6 PCI interface 4 power supply 5 processor 3 server management 6 system cooling 5 video controller 4 system boards backplane board 11 mainboard 10 system event log clear 72 enable 72 view 73 system fan auto fan control 66 cable connector 10 location 9 system jumpers BIOS recovery 12 clear CMOS 11, 12 NIC1 NVM protect mode 12 system passwords admin password 68 change 69 remove 71 reset 71 set 68 user password 68 system profile, view 75 system reset cold boot...
...8 remove 27 specification chipset 3 hardware monitoring 6 I/O ports 5 mechanical 6 media storage 5 memory 4 networking 4 operating system 6 PCI interface 4 power supply 5 processor 3 server management 6 system cooling 5 video controller 4 system boards backplane board 11 mainboard 10 system event log clear 72 enable 72 view 73 system fan auto fan control 66 cable connector 10 location 9 system jumpers BIOS recovery 12 clear CMOS 11, 12 NIC1 NVM protect mode 12 system passwords admin password 68 change 69 remove 71 reset 71 set 68 user password 68 system profile, view 75 system reset cold boot...
Configuration Guide
Page 22
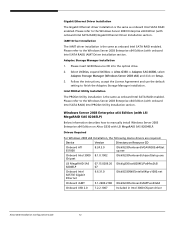
... iAMT driver installation is the same as onboard Intel SATA RAID enabled. Follow the instructions, accept the License Agreement and use the default setting to manually install Windows Server 2003 Enterprise x64 Edition on Setup. 3. Windows Server 2003 Enterprise x64 Edition (with onboard Intel SATA RAID) Intel PROSet Utility Installation section. Please refer to the Windows Server 2003 Enterprise x64 Edition (with onboard Intel SATA RAID) iAMT Driver Installation section. Please insert G330 Resource CD into the optical drive. 2. Device...
... iAMT driver installation is the same as onboard Intel SATA RAID enabled. Follow the instructions, accept the License Agreement and use the default setting to manually install Windows Server 2003 Enterprise x64 Edition on Setup. 3. Windows Server 2003 Enterprise x64 Edition (with onboard Intel SATA RAID) Intel PROSet Utility Installation section. Please refer to the Windows Server 2003 Enterprise x64 Edition (with onboard Intel SATA RAID) iAMT Driver Installation section. Please insert G330 Resource CD into the optical drive. 2. Device...
Configuration Guide
Page 30
...onboard Intel SATA RAID enabled. Select Utilities, expand Utilities -> Altos G330 -> Adaptec SAS 44300, select Adaptec Storage Manager (Windows Server 2003) and click on Altos G330 with onboard Intel SATA RAID) VGA Driver Installation section. Please refer to finish the Adaptec Storage Manager installation. Follow the instructions, accept the License Agreement and use the default setting to the Windows Server 2003 Enterprise Edition (with onboard Intel SATA RAID) Intel PROSet Utility Installation section. Altos G330 Installation Configuration Guide 20 2. Chipset Driver Installation The...
...onboard Intel SATA RAID enabled. Select Utilities, expand Utilities -> Altos G330 -> Adaptec SAS 44300, select Adaptec Storage Manager (Windows Server 2003) and click on Altos G330 with onboard Intel SATA RAID) VGA Driver Installation section. Please refer to finish the Adaptec Storage Manager installation. Follow the instructions, accept the License Agreement and use the default setting to the Windows Server 2003 Enterprise Edition (with onboard Intel SATA RAID) Intel PROSet Utility Installation section. Altos G330 Installation Configuration Guide 20 2. Chipset Driver Installation The...
Configuration Guide
Page 39
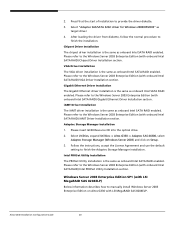
... use the default setting to manually install Windows 2000 on Setup. 3. Drivers Required For Windows 2000 Installation, the following device drivers are required. Chipset Driver Installation The chipset driver installation is the same as onboard Intel SATA RAID enabled. Please refer to the Windows 2000 Advanced Server (with LSI MegaRAID SAS 8204ELP) Below information describes how to finish the Adaptec Storage Manager installation. Please insert G330 Resource CD into the optical drive. 2. Intel PROSet Utility Installation The PROSet Utility installation...
... use the default setting to manually install Windows 2000 on Setup. 3. Drivers Required For Windows 2000 Installation, the following device drivers are required. Chipset Driver Installation The chipset driver installation is the same as onboard Intel SATA RAID enabled. Please refer to the Windows 2000 Advanced Server (with LSI MegaRAID SAS 8204ELP) Below information describes how to finish the Adaptec Storage Manager installation. Please insert G330 Resource CD into the optical drive. 2. Intel PROSet Utility Installation The PROSet Utility installation...
Configuration Guide
Page 60
... right window to the Installation Settings 8. Remove the module e1000 # rmmod e1000 2. Please refer to the Software Required section to the driver source and install the driver # cd /tmp/src/ # make install # insmod e1000.ko Onboard SATA RAID Utility Setup 1. Make the driver diskette for EasyBUILD 7.1 build 600 (or later). 3. Click on Accept and follow the instruction to Package Groups. 11. Follow the instructions to add kernel-source. 12. Altos G330 Installation Configuration Guide...
... right window to the Installation Settings 8. Remove the module e1000 # rmmod e1000 2. Please refer to the Software Required section to the driver source and install the driver # cd /tmp/src/ # make install # insmod e1000.ko Onboard SATA RAID Utility Setup 1. Make the driver diskette for EasyBUILD 7.1 build 600 (or later). 3. Click on Accept and follow the instruction to Package Groups. 11. Follow the instructions to add kernel-source. 12. Altos G330 Installation Configuration Guide...

Configuration Guide
Page 68
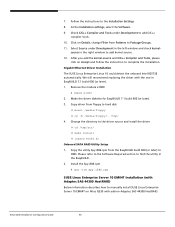
... and install the driver # cd /tmp/src/ # make install # insmod e1000.ko Onboard SATA RAID Utility Setup 1. At the Installation settings, select the Software and click on Adaptec SAS 44300 HostRAID. Change the directory to SUSE Linux Enterprise Server 9 CD #1. 7. Altos G330 Installation Configuration Guide 58 After you add the kernel-source and C/C++ Compiler and Tools, please click on Accept and follow the instructions to manually install SUSE Linux Enterprise Server 9 Service Pack 3 on Altos G330...
... and install the driver # cd /tmp/src/ # make install # insmod e1000.ko Onboard SATA RAID Utility Setup 1. At the Installation settings, select the Software and click on Adaptec SAS 44300 HostRAID. Change the directory to SUSE Linux Enterprise Server 9 CD #1. 7. Altos G330 Installation Configuration Guide 58 After you add the kernel-source and C/C++ Compiler and Tools, please click on Accept and follow the instructions to manually install SUSE Linux Enterprise Server 9 Service Pack 3 on Altos G330...
Configuration Guide
Page 91
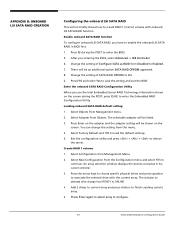
Select Objects from this menu. 4. An array selection window displays the devices connected to finish creating current array. 5. Add 2 drives to current array and press to the current controller. 3. Press F2 during the POST, press Ctrl-E to configure. 81 Altos G330 Installation Configuration Guide Change the setting of SATA RAID OPROM to Enabled. 7. The selectable adapter will be an additional option SATA RAID OPROM appeared. 8. You can change from the Configuration menu and select YES to create...
Select Objects from this menu. 4. An array selection window displays the devices connected to finish creating current array. 5. Add 2 drives to current array and press to the current controller. 3. Press F2 during the POST, press Ctrl-E to configure. 81 Altos G330 Installation Configuration Guide Change the setting of SATA RAID OPROM to Enabled. 7. The selectable adapter will be an additional option SATA RAID OPROM appeared. 8. You can change from the Configuration menu and select YES to create...

Configuration Guide
Page 94
..., the Adapter Selection page will show on Start to the Management Menu Initial RAID Volume 6. Select Objects from the Configuration menu. All logical drives should be listed. 3. Select Initialize from Management Menu. 2. Please click on the screen. Select Configuration from Management menu. The indicator for the RAID volume. 8. Press ESC to return to launch the configuration menu. An array selection window displays the devices connected to use the default setting for selected drive change the setting from Objects...
..., the Adapter Selection page will show on Start to the Management Menu Initial RAID Volume 6. Select Objects from the Configuration menu. All logical drives should be listed. 3. Select Initialize from Management Menu. 2. Please click on the screen. Select Configuration from Management menu. The indicator for the RAID volume. 8. Press ESC to return to launch the configuration menu. An array selection window displays the devices connected to use the default setting for selected drive change the setting from Objects...


