
User Manual
Page 4
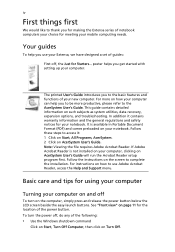
... the LCD screen beside the easy-launch buttons. Basic care and tips for the location of the power button. Follow these steps to use your Extensa, we have designed a set of guides: First off , do any of the following: • Use the Windows shutdown command Click on Start, ...notices for Starters... If Adobe Acrobat Reader is available in Portable Document Format (PDF) and comes preloaded on such subjects as system utilities, data recovery, expansion options, and troubleshooting. iv First things first We would like to the basic features and functions of your new computer. To turn on...
... the LCD screen beside the easy-launch buttons. Basic care and tips for the location of the power button. Follow these steps to use your Extensa, we have designed a set of guides: First off , do any of the following: • Use the Windows shutdown command Click on Start, ...notices for Starters... If Adobe Acrobat Reader is available in Portable Document Format (PDF) and comes preloaded on such subjects as system utilities, data recovery, expansion options, and troubleshooting. iv First things first We would like to the basic features and functions of your new computer. To turn on...

User Manual
Page 9
... Infrared 56 Universal Serial Bus (USB) 57 IEEE 1394 port 57 PC Card slot 58 BIOS utility 59 Boot sequence 59 Enable disk-to-disk recovery 60 Password 60 Using software 60 Playing DVD movies 60 Power management 61...
... Infrared 56 Universal Serial Bus (USB) 57 IEEE 1394 port 57 PC Card slot 58 BIOS utility 59 Boot sequence 59 Enable disk-to-disk recovery 60 Password 60 Using software 60 Playing DVD movies 60 Power management 61...
User Manual
Page 15
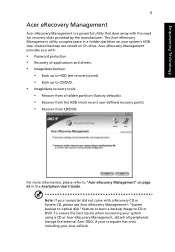
.... User-created backups are stored on your system's HDD. The Acer eRecovery Management utility occupies space in the AcerSystem User's Guide. Empowering Technology 5 Acer eRecovery Management Acer eRecovery Management is a powerful utility that does away with a Recovery CD or System CD, please use Acer eRecovery Management's "System backup to optical disk" feature to burn a backup...
.... User-created backups are stored on your system's HDD. The Acer eRecovery Management utility occupies space in the AcerSystem User's Guide. Empowering Technology 5 Acer eRecovery Management Acer eRecovery Management is a powerful utility that does away with a Recovery CD or System CD, please use Acer eRecovery Management's "System backup to optical disk" feature to burn a backup...
User Manual
Page 44
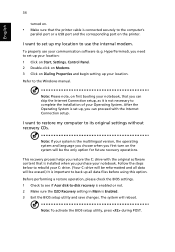
...setup utility and save changes. Before performing a restore operation, please check the BIOS settings. 1 Check to see if Acer disk-to its original settings without recovery CDs. HyperTerminal), you can proceed with the original software content that you need to use your notebook, that is installed ... Note: To activate the BIOS setup utility, press during POST. Note: If your system is important to the Windows manual. This recovery process helps you restore the C: drive with the Internet Connection setup. The system will be erased.) It is the multilingual version, ...
...setup utility and save changes. Before performing a restore operation, please check the BIOS settings. 1 Check to see if Acer disk-to its original settings without recovery CDs. HyperTerminal), you can proceed with the original software content that you need to use your notebook, that is installed ... Note: To activate the BIOS setup utility, press during POST. Note: If your system is important to the Windows manual. This recovery process helps you restore the C: drive with the Internet Connection setup. The system will be erased.) It is the multilingual version, ...
User Manual
Page 45
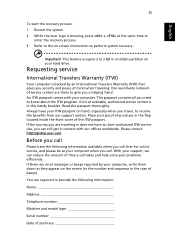
...have your hard drive. Please consult http://global.acer.com. Our worldwide network of service centers are required to perform system recovery. Before you call Acer for online service, and please be at the same time to enter the recovery process. 3 Refer to the on hand, ... peace of purchase Important: This feature occupies 2 to know about the ITW program. English 35 To start the recovery process: 1 Restart the system. 2 While the Acer logo is showing, press + at your computer. Always have the following information: Name Address Telephone number Machine and...
...have your hard drive. Please consult http://global.acer.com. Our worldwide network of service centers are required to perform system recovery. Before you call Acer for online service, and please be at the same time to enter the recovery process. 3 Refer to the on hand, ... peace of purchase Important: This feature occupies 2 to know about the ITW program. English 35 To start the recovery process: 1 Restart the system. 2 While the Acer logo is showing, press + at your computer. Always have the following information: Name Address Telephone number Machine and...
User Manual
Page 55
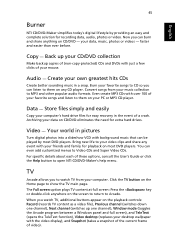
.... Now you can be played by providing an easy and complete solution for extra hard drives. Convert songs from your friends and family for easy recovery in the event of your favorite songs and listen to your data on any event with your computer. Video - Click the TV button on the...
.... Now you can be played by providing an easy and complete solution for extra hard drives. Convert songs from your friends and family for easy recovery in the event of your favorite songs and listen to your data on any event with your computer. Video - Click the TV button on the...
User Manual
Page 70
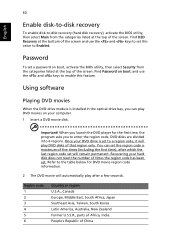
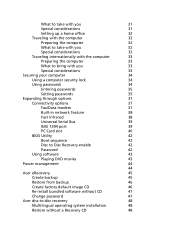
...of the screen. Password To set a password on boot: and use the and keys to set . Recovering your computer. 1 Insert a DVD movie disk. Find D2D Recovery at the top of that region only. DVD disks are divided into 6 regions. Important! English 60 Enable disk-to-disk... recovery To enable disk-to-disk recovery (hard disk recovery), activate the BIOS utility, then select Main from the categories listed at the bottom of times the region code has been set this ...
...of the screen. Password To set a password on boot: and use the and keys to set . Recovering your computer. 1 Insert a DVD movie disk. Find D2D Recovery at the top of that region only. DVD disks are divided into 6 regions. Important! English 60 Enable disk-to-disk... recovery To enable disk-to-disk recovery (hard disk recovery), activate the BIOS utility, then select Main from the categories listed at the bottom of times the region code has been set this ...
User Manual
Page 72
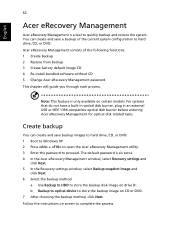
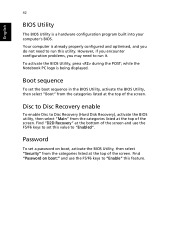
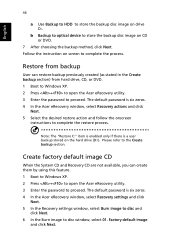
... screen to store the backup disk image on drive D:. Note: This feature is six zeros. 4 In the Acer eRecovery Management window, select Recovery settings and click Next. 5 In the Recovery settings window, select Backup snapshot image and click Next. 6 Select the backup method. Create backup You can create... and save backup images to hard drive, CD, or DVD. 1 Boot to Windows XP 2 Press + to open the Acer eRecovery Management utility. 3 Enter ...
... screen to store the backup disk image on drive D:. Note: This feature is six zeros. 4 In the Acer eRecovery Management window, select Recovery settings and click Next. 5 In the Recovery settings window, select Backup snapshot image and click Next. 6 Select the backup method. Create backup You can create... and save backup images to hard drive, CD, or DVD. 1 Boot to Windows XP 2 Press + to open the Acer eRecovery Management utility. 3 Enter ...
User Manual
Page 73
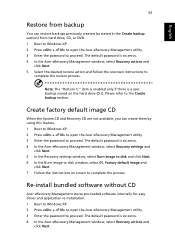
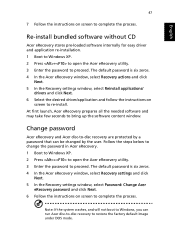
...and click Next. 7 Follow the instructions on the hard drive (D:\). The default password is six zeros. 4 In the Acer eRecovery Management window, select Recovery settings and click Next. 5 In the Recovery settings window, select Burn image to disk and click Next. 6 In the Burn image to proceed. Note: The "...Restore C:" item is enabled only if there is six zeros. 4 In the Acer eRecovery Management window, select Recovery actions and click Next. English 63 Restore from hard drive, CD, or DVD. 1 Boot to Windows XP. 2 Press + to open ...
...and click Next. 7 Follow the instructions on the hard drive (D:\). The default password is six zeros. 4 In the Acer eRecovery Management window, select Recovery settings and click Next. 5 In the Recovery settings window, select Burn image to disk and click Next. 6 In the Burn image to proceed. Note: The "...Restore C:" item is enabled only if there is six zeros. 4 In the Acer eRecovery Management window, select Recovery actions and click Next. English 63 Restore from hard drive, CD, or DVD. 1 Boot to Windows XP. 2 Press + to open ...
User Manual
Page 74
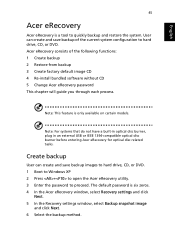
... restore the factory default image under DOS mode. The default password is six zeros. 4 In the Acer eRecovery Management window, select Recovery settings and click Next. 5 In the Recovery settings window, select Password: Change Acer eRecovery Management password and click Next. 6 Follow the instructions on screen to re-install. Follow the steps below to...
... restore the factory default image under DOS mode. The default password is six zeros. 4 In the Acer eRecovery Management window, select Recovery settings and click Next. 5 In the Recovery settings window, select Password: Change Acer eRecovery Management password and click Next. 6 Follow the instructions on screen to re-install. Follow the steps below to...
User Manual
Page 8
... port 39 PC Card slot 40 BIOS Utility 42 Boot sequence 42 Disc to Disc Recovery enable 42 Password 42 Using software 43 Playing DVD movies 43 Power management 44 44 Acer eRecovery 45 Create backup 45 Restore from backup 46 Create factory default image CD 46... Re-install bundled software without CD 47 Change password 47 Acer disc-to-disc recovery 48 Multilingual operating system installation 48 Restore without...
... port 39 PC Card slot 40 BIOS Utility 42 Boot sequence 42 Disc to Disc Recovery enable 42 Password 42 Using software 43 Playing DVD movies 43 Power management 44 44 Acer eRecovery 45 Create backup 45 Restore from backup 46 Create factory default image CD 46... Re-install bundled software without CD 47 Change password 47 Acer disc-to-disc recovery 48 Multilingual operating system installation 48 Restore without...
User Manual
Page 52
... the top of the screen and use the F5/F6 keys to "Enabled". Disc to Disc Recovery enable To enable Disc to Disc Recovery (Hard Disk Recovery), activate the BIOS utility, then select "Main" from the categories listed at the bottom of the screen. Find "Password on boot, activate the BIOS Utility, ...
... the top of the screen and use the F5/F6 keys to "Enabled". Disc to Disc Recovery enable To enable Disc to Disc Recovery (Hard Disk Recovery), activate the BIOS utility, then select "Main" from the categories listed at the bottom of the screen. Find "Password on boot, activate the BIOS Utility, ...
User Manual
Page 55
... disc related tasks. The default password is only available on certain models. Note: This feature is six zeros. 4 In the Acer eRecovery window, select Recovery settings and click Next. 5 In the Recovery settings window, select Backup snapshot image and click Next. 6 Select the backup method. Create backup User can create and save backup...
... disc related tasks. The default password is only available on certain models. Note: This feature is six zeros. 4 In the Acer eRecovery window, select Recovery settings and click Next. 5 In the Recovery settings window, select Backup snapshot image and click Next. 6 Select the backup method. Create backup User can create and save backup...
User Manual
Page 56
... feature. 1 Boot to Windows XP. 2 Press + to open the Acer eRecovery utility. 3 Enter the password to complete the restore process. The default password is six zeros. 4 In the Acer eRecovery window, select Recovery actions and click Next. 5 Select the desired restore action and follow the... onscreen instructions to proceed. The default password is six zeros. 4 In the Acer eRecovery window, select Recovery settings and click Next. 5 In the Recovery settings window, select Burn image to disc and click Next. 6 In the Burn image to proceed. Please ...
... feature. 1 Boot to Windows XP. 2 Press + to open the Acer eRecovery utility. 3 Enter the password to complete the restore process. The default password is six zeros. 4 In the Acer eRecovery window, select Recovery actions and click Next. 5 Select the desired restore action and follow the... onscreen instructions to proceed. The default password is six zeros. 4 In the Acer eRecovery window, select Recovery settings and click Next. 5 In the Recovery settings window, select Burn image to disc and click Next. 6 In the Burn image to proceed. Please ...
User Manual
Page 57
... and click Next. 6 Follow the instructions on screen to complete the process. The default password is six zeros. 4 In the Acer eRecovery window, select Recovery actions and click Next. 5 In the Recovery settings window, select Reinstall applications/ drivers and click Next. 6 Select the desired driver/application and follow the instructions on screen to...
... and click Next. 6 Follow the instructions on screen to complete the process. The default password is six zeros. 4 In the Acer eRecovery window, select Recovery actions and click Next. 5 In the Recovery settings window, select Reinstall applications/ drivers and click Next. 6 Select the desired driver/application and follow the instructions on screen to...
User Manual
Page 58
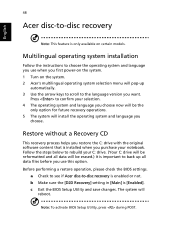
...-on the system. 1 Turn on certain models. Before performing a restore operation, please check the BIOS settings. a Check to see if Acer disc-to-disc recovery is [Enabled]. Follow the steps below to rebuild your selection. 4 The operating system and language you choose now will be erased.) It... Follow the instructions to choose the operating system and language you use this option. English 48 Acer disc-to-disc recovery Note: This feature is only available on the system. 2 Acer's multilingual operating system selection menu will pop-up all data will be the only option for future...
...-on the system. 1 Turn on certain models. Before performing a restore operation, please check the BIOS settings. a Check to see if Acer disc-to-disc recovery is [Enabled]. Follow the steps below to rebuild your selection. 4 The operating system and language you choose now will be erased.) It... Follow the instructions to choose the operating system and language you use this option. English 48 Acer disc-to-disc recovery Note: This feature is only available on the system. 2 Acer's multilingual operating system selection menu will pop-up all data will be the only option for future...
User Manual
Page 59
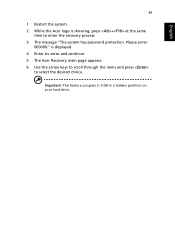
English 49 1 Restart the system. 2 While the Acer logo is displayed. 4 Enter six zeros and continue. 5 The Acer Recovery main page appears. 6 Use the arrow keys to scroll through the items and press to enter the recovery process. 3 The message "The system has password protection. Important: This feature occupies 2~3 GB in a hidden partition on your hard drive. Please enter 000000:" is showing, press + at the same time to select the desired choice.
English 49 1 Restart the system. 2 While the Acer logo is displayed. 4 Enter six zeros and continue. 5 The Acer Recovery main page appears. 6 Use the arrow keys to scroll through the items and press to enter the recovery process. 3 The message "The system has password protection. Important: This feature occupies 2~3 GB in a hidden partition on your hard drive. Please enter 000000:" is showing, press + at the same time to select the desired choice.


