Service Guide
Page 7
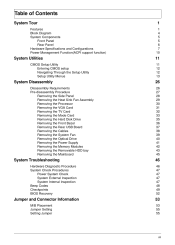
... Side Panel Removing the Heat Sink Fan Assembly Removing the Processor Removing the VGA Card Removing the TV Card Removing the Mode Card Removing the Hard Disk Drive Removing the Front Bezel Removing the Rear USB Board Removing the Cables Removing the System Fan Removing the Optical... Drive Removing the Power Supply Removing the Memory Modules Removing the Removable HDD bay Removing the Mainboard 26 26 27 28 29 30 31 32 33 ...
... Side Panel Removing the Heat Sink Fan Assembly Removing the Processor Removing the VGA Card Removing the TV Card Removing the Mode Card Removing the Hard Disk Drive Removing the Front Bezel Removing the Rear USB Board Removing the Cables Removing the System Fan Removing the Optical... Drive Removing the Power Supply Removing the Memory Modules Removing the Removable HDD bay Removing the Mainboard 26 26 27 28 29 30 31 32 33 ...
Service Guide
Page 18
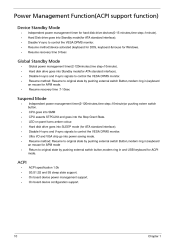
... CPU asserts STPCLK# and goes into power saving mode. Disable V-sync to control the VESA DPMS monitor. Hard disk drive goes into Standby mode(for hard disk drive devices(0-15 minutes,time step=1minute). Resume recovery time :7-10sec • Suspend Mode • Independent power ... support. 10 Chapter 1 Power Management Function(ACPI support function) Device Standby Mode Independent power management timer for ATA standard interface). Hard disk drive goes into SLEEP mode (for ACPI mode. • ACPI ACPI specification 1.0b S0,S1,S2 and S5 sleep state support....
... CPU asserts STPCLK# and goes into power saving mode. Disable V-sync to control the VESA DPMS monitor. Hard disk drive goes into Standby mode(for hard disk drive devices(0-15 minutes,time step=1minute). Resume recovery time :7-10sec • Suspend Mode • Independent power ... support. 10 Chapter 1 Power Management Function(ACPI support function) Device Standby Mode Independent power management timer for ATA standard interface). Hard disk drive goes into SLEEP mode (for ACPI mode. • ACPI ACPI specification 1.0b S0,S1,S2 and S5 sleep state support....
Service Guide
Page 24
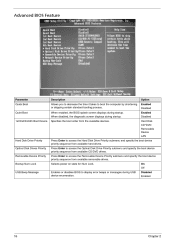
... 2 Press Enter to access the Hard Disk Drive Priority submenu and specify the boot device priority sequence from available CD/DVD drives. Option Enabled Disabled Enabled Disabled Hard Disk CD^DVD Removable Device LAN Hard Disk Drive Priority Optical Disk Drives Priority Removable Device Priority Bootup Num...-Lock USB Beep Message Press Enter to access the Optical Disk Drive Priority submenu and specify the boot device priority sequence from available hard drives. When enabled, the BIOS splash screen displays during startup. Enables or disables BIOS to...
... 2 Press Enter to access the Hard Disk Drive Priority submenu and specify the boot device priority sequence from available CD/DVD drives. Option Enabled Disabled Enabled Disabled Hard Disk CD^DVD Removable Device LAN Hard Disk Drive Priority Optical Disk Drives Priority Removable Device Priority Bootup Num...-Lock USB Beep Message Press Enter to access the Optical Disk Drive Priority submenu and specify the boot device priority sequence from available hard drives. When enabled, the BIOS splash screen displays during startup. Enables or disables BIOS to...

Service Guide
Page 42
Lift the bracket up and turn it over. Disconnect the data and power cables from the rear of the optical drive and the mainboard. 2. Remove the screw that secures the HDD bracket to the ODD bracket. Chapter 3 34 b. Remove the HDD bracket a. Removing the Hard Disk Drive 1.
Lift the bracket up and turn it over. Disconnect the data and power cables from the rear of the optical drive and the mainboard. 2. Remove the screw that secures the HDD bracket to the ODD bracket. Chapter 3 34 b. Remove the HDD bracket a. Removing the Hard Disk Drive 1.


