
Aspire 9810 / 9800 User's Guide EN
Page 5
... frayed • liquid was spilled into the product • the product was exposed to rain or water • the product has been dropped or the case has been damaged • the product exhibits a distinct change in performance, indicating a need to replace the power cord set . Keep them in damage and will...
... frayed • liquid was spilled into the product • the product was exposed to rain or water • the product has been dropped or the case has been damaged • the product exhibits a distinct change in performance, indicating a need to replace the power cord set . Keep them in damage and will...
Aspire 9810 / 9800 User's Guide EN
Page 6
...), Bluetooth and/or 3G. Consult a physician or the manufacturer of the medical device to determine if they are not limited to do so. In some cases, transmission of electric shock from lightning, do not use is prohibited or when it and its use non-compliant parts when adding or changing components...
...), Bluetooth and/or 3G. Consult a physician or the manufacturer of the medical device to determine if they are not limited to do so. In some cases, transmission of electric shock from lightning, do not use is prohibited or when it and its use non-compliant parts when adding or changing components...
Aspire 9810 / 9800 User's Guide EN
Page 70
...of mind when traveling. With your support, we can still get in the case of beeps). A list of available, authorized service centers is in does not have an Acer-authorized ITW service site, you call Acer for online service, and please be at the same time to enter the recovery...ITW passport. Always have your ITW passport on your problems efficiently. English 50 To start the recovery process: 1 Restart the system. 2 While the Acer logo is showing, press + at your computer when you can reduce the amount of time a call Please have the following information: Name Address ...
...of mind when traveling. With your support, we can still get in the case of beeps). A list of available, authorized service centers is in does not have an Acer-authorized ITW service site, you call Acer for online service, and please be at the same time to enter the recovery...ITW passport. Always have your ITW passport on your problems efficiently. English 50 To start the recovery process: 1 Restart the system. 2 While the Acer logo is showing, press + at your computer when you can reduce the amount of time a call Please have the following information: Name Address ...
Aspire 9810 / 9800 User's Guide EN
Page 95
... and release the power button to turn the computer back on the battery by putting the computer in a protective case that can damage the screen. Note that you are moving from sliding around and cushion it if it should fall. Failure to prepare the computer ...
... and release the power button to turn the computer back on the battery by putting the computer in a protective case that can damage the screen. Note that you are moving from sliding around and cushion it if it should fall. Failure to prepare the computer ...
Aspire 9810 / 9800 User's Guide EN
Page 97
... power the computer. • If you are using the modem, check if the modem and connector is compatible with the telecommunications system of purchase, in case you are moving from country to country. Do not use another country, check that the local AC voltage and the AC adapter power cord specifications...
... power the computer. • If you are using the modem, check if the modem and connector is compatible with the telecommunications system of purchase, in case you are moving from country to country. Do not use another country, check that the local AC voltage and the AC adapter power cord specifications...

Aspire 9800 User's Guide
Page 4
Do not insert the plug into the product • the product was exposed to rain or water • the product has been dropped or the case has been damaged • the product exhibits a distinct change in performance, indicating a need to replace the power cord set . Unplug this product from unexpected noise ...
Do not insert the plug into the product • the product was exposed to rain or water • the product has been dropped or the case has been damaged • the product exhibits a distinct change in performance, indicating a need to replace the power cord set . Unplug this product from unexpected noise ...

Aspire 9800 User's Guide
Page 67
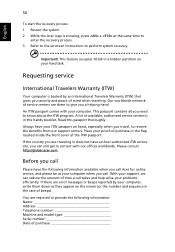
... process. 3 Refer to the onscreen instructions to 4 GB in a hidden partition on the screen (or the number and sequence in the case of beeps). This passport contains all you need to give you are error messages or beeps reported by an International Travelers Warranty (ITW) that... A list of available, authorized service centers is in the flap located inside the front cover of the ITW passport. Please consult http://global.acer.com. Important! Requesting service International Travelers Warranty (ITW) Your computer is backed by your computer, write them down as they appear on your...
... process. 3 Refer to the onscreen instructions to 4 GB in a hidden partition on the screen (or the number and sequence in the case of beeps). This passport contains all you need to give you are error messages or beeps reported by an International Travelers Warranty (ITW) that... A list of available, authorized service centers is in the flap located inside the front cover of the ITW passport. Please consult http://global.acer.com. Important! Requesting service International Travelers Warranty (ITW) Your computer is backed by your computer, write them down as they appear on your...

Aspire 9800 User's Guide
Page 83
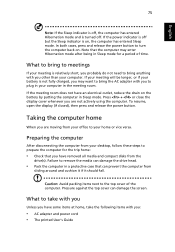
In both cases, press and release the power button to bring anything with you are not actively using the computer. If the meeting is relatively short, you probably ... your computer in the meeting will be longer, or if your battery is not fully charged, you may enter Hibernation mode after being in a protective case that the computer may want to bring to meetings If your desktop, follow these steps to the top cover of time.
In both cases, press and release the power button to bring anything with you are not actively using the computer. If the meeting is relatively short, you probably ... your computer in the meeting will be longer, or if your battery is not fully charged, you may enter Hibernation mode after being in a protective case that the computer may want to bring to meetings If your desktop, follow these steps to the top cover of time.
Aspire 9800 User's Guide
Page 85
... computer home, follow these tips are useful when traveling internationally: • When traveling in another printer • Proof of the country you are traveling in case you would normally prepare it to customs officials • International Travelers Warranty passport Special considerations Follow the same special considerations as when traveling with the...
... computer home, follow these tips are useful when traveling internationally: • When traveling in another printer • Proof of the country you are traveling in case you would normally prepare it to customs officials • International Travelers Warranty passport Special considerations Follow the same special considerations as when traveling with the...

Service Guide
Page 5
... (e.g. Please note WHEN ORDERING FRU PARTS, that you with further technical details. 2. For ACER-AUTHORIZED SERVICE PROVIDERS, your Acer office may have decided to the BASIC CONFIGURATION decided for Acer's "global" product offering. If, for repair and service of this generic service guide. ... information. 1. To better fit local market requirements and enhance product competitiveness, your regional Acer office to those given in the FRU list of customer machines. In such cases, please contact your regional web or channel. These LOCALIZED FEATURES will not be covered ...
... (e.g. Please note WHEN ORDERING FRU PARTS, that you with further technical details. 2. For ACER-AUTHORIZED SERVICE PROVIDERS, your Acer office may have decided to the BASIC CONFIGURATION decided for Acer's "global" product offering. If, for repair and service of this generic service guide. ... information. 1. To better fit local market requirements and enhance product competitiveness, your regional Acer office to those given in the FRU list of customer machines. In such cases, please contact your regional web or channel. These LOCALIZED FEATURES will not be covered ...

Service Guide
Page 58
... the user is connected, the power on display Network Boot F12 Boot Menu D2D Recovery Description Format/Option Sets the system time. Settings in these cases. 52 Chapter 2 VGA Memory size=64/128MB Determines if Customer Logo will be shown if the device control is connected on hard disc drive to...
... the user is connected, the power on display Network Boot F12 Boot Menu D2D Recovery Description Format/Option Sets the system time. Settings in these cases. 52 Chapter 2 VGA Memory size=64/128MB Determines if Customer Logo will be shown if the device control is connected on hard disc drive to...
Service Guide
Page 61
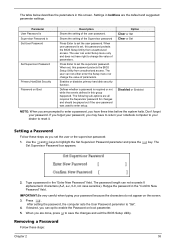
... computer sets the User Password parameter to highlight the Set Supervisor Password parameter and press the e key. The user can not exceeds 8 alphanumeric characters (A-Z, a-z, 0-9, not case sensitive).
... computer sets the User Password parameter to highlight the Set Supervisor Password parameter and press the e key. The user can not exceeds 8 alphanumeric characters (A-Z, a-z, 0-9, not case sensitive).

Service Guide
Page 69
... disassemble the inside assembly frame in that need to be removed during servicing. For example, if you want to lower case assembly on the components that order. Start Battery Pack B*1 D*1 System Fan B*4 Thermal Module F*1 ODD Module CPU D*5 F*1 Thermal Door Memory ...LCD hinges to logic C*2 on bottom side LCD Module C*8 upper case assembly to lower case assembly on bottom side C*2 upper case assembly to remove the system board, you on upper side Upper Case Assembly F*1 Modem Board Switch Board (for AS models) Lower Case F*1 Main Board F*2 Speaker Set F*2 Media Board (for AS ...
... disassemble the inside assembly frame in that need to be removed during servicing. For example, if you want to lower case assembly on the components that order. Start Battery Pack B*1 D*1 System Fan B*4 Thermal Module F*1 ODD Module CPU D*5 F*1 Thermal Door Memory ...LCD hinges to logic C*2 on bottom side LCD Module C*8 upper case assembly to lower case assembly on bottom side C*2 upper case assembly to remove the system board, you on upper side Upper Case Assembly F*1 Modem Board Switch Board (for AS models) Lower Case F*1 Main Board F*2 Speaker Set F*2 Media Board (for AS ...

Service Guide
Page 76
...remove the ODD module. 7. Remove the express dummy card. 8. Then remove the PC dummy card. 9. 10. Remove the four screws fastening the upper case assembly and the lower case assembly on the bottom. 6. Then remove the keyboard from the main board. 4. Remove the 16 screws fastening the upper... case and the lower case assembly as shown (Use a flat screwdriver and push the keyboard lock upwards). 2. Disconnect the keyboard cable from the main unit. 5. Disconnect the ...
...remove the ODD module. 7. Remove the express dummy card. 8. Then remove the PC dummy card. 9. 10. Remove the four screws fastening the upper case assembly and the lower case assembly on the bottom. 6. Then remove the keyboard from the main board. 4. Remove the 16 screws fastening the upper... case and the lower case assembly as shown (Use a flat screwdriver and push the keyboard lock upwards). 2. Disconnect the keyboard cable from the main unit. 5. Disconnect the ...

Service Guide
Page 77
... board and disconnect the modem board from the main board and detach the bluetooth module fromt the lower case. 17. Remove the three screws fastening the main board to the lower case. 20. Disconnect the modem cable and remove the modem board. 19. Detach the main board from ...the lower case assembly. Carefully detach the upper case assembly from the lower case assembly. Disconnect the audio board FFC from the main board....
... board and disconnect the modem board from the main board and detach the bluetooth module fromt the lower case. 17. Remove the three screws fastening the main board to the lower case. 20. Disconnect the modem cable and remove the modem board. 19. Detach the main board from ...the lower case assembly. Carefully detach the upper case assembly from the lower case assembly. Disconnect the audio board FFC from the main board....

Service Guide
Page 78
Tear off the mylar holding the IO board to the lower case. 22. Disconnect the touchpad board to touchpad board FFC. 3. Disassembling the Upper Case Assembly 1. Remove the seven screws and disconnect the touchpad to main board FFC and remove it. 2. 21. Remove the three screws holding...25. Remove the eight screws fastening the speaker and sub-woofer set from the lower case. 23. Detach the touchpad bracket from the lower case. 24. Then detach the modem cable (with RJ11 connector) from the upper case. 72 Chapter 3 Then remove the speaker and sub-woofer set . 26. Detach ...
Tear off the mylar holding the IO board to the lower case. 22. Disconnect the touchpad board to touchpad board FFC. 3. Disassembling the Upper Case Assembly 1. Remove the seven screws and disconnect the touchpad to main board FFC and remove it. 2. 21. Remove the three screws holding...25. Remove the eight screws fastening the speaker and sub-woofer set from the lower case. 23. Detach the touchpad bracket from the lower case. 24. Then detach the modem cable (with RJ11 connector) from the upper case. 72 Chapter 3 Then remove the speaker and sub-woofer set . 26. Detach ...

Service Guide
Page 79
Disconnect the microphone cable and remove the audio board. 14. Disconnect the touchpad to the upper case. 10. Disconnect the launch board FFC from the audio board and remove the cable. 13. Turn over the audio board as shown. 12. Disconect the ... board cable from the launch board and the media board and remove the FFC. 7. Remove the touchpad board from the lower case. 11. Tear off the audio cable from the upper case. 5. Chapter 3 73 4. Remove the two screws holding the audio board to touchpad board FFC then remove the FFC and the...
Disconnect the microphone cable and remove the audio board. 14. Disconnect the touchpad to the upper case. 10. Disconnect the launch board FFC from the audio board and remove the cable. 13. Turn over the audio board as shown. 12. Disconect the ... board cable from the launch board and the media board and remove the FFC. 7. Remove the touchpad board from the lower case. 11. Tear off the audio cable from the upper case. 5. Chapter 3 73 4. Remove the two screws holding the audio board to touchpad board FFC then remove the FFC and the...

Service Guide
Page 80
Remove the four screws fastening the launch board. 18. Detach and disconnect the launch board cable and remove it. 16. Take out the launch board from the upper case. 74 Chapter 3 Then take out the touchpad frame from the upper case. 19. Detach the launch board insulator as shown. 17. 15.
Remove the four screws fastening the launch board. 18. Detach and disconnect the launch board cable and remove it. 16. Take out the launch board from the upper case. 74 Chapter 3 Then take out the touchpad frame from the upper case. 19. Detach the launch board insulator as shown. 17. 15.

Service Guide
Page 109
Part Name and Description MODEM CABLE WITH RJ11 CONNECTOR Acer Part No. 50.AAMVN.010 CASE/COVER/BRACKET ASSEMBLY LOWER CASE 60.AAMVN.001 UPPER CASE 60.AAMVN.002 MIDDLE COVER 60.AAMVN.003 ASSY THERMAL COVER 60.AAMVN.004 SUPPORT COVER 60.AAMVN.005 Chapter 6 103 Category No.
Part Name and Description MODEM CABLE WITH RJ11 CONNECTOR Acer Part No. 50.AAMVN.010 CASE/COVER/BRACKET ASSEMBLY LOWER CASE 60.AAMVN.001 UPPER CASE 60.AAMVN.002 MIDDLE COVER 60.AAMVN.003 ASSY THERMAL COVER 60.AAMVN.004 SUPPORT COVER 60.AAMVN.005 Chapter 6 103 Category No.


