
User Manual
Page 3
... cards (only for certain models) Your computer shipped with plastic dummies installed in the slots. Turning the product off before removing the power supply unit from the power supplies. If the system has multiple sources of power, disconnect power from the system by unplugging all warnings and instructions marked on the product. Do not use when no cards are in the card slots. Unplug the power...
... cards (only for certain models) Your computer shipped with plastic dummies installed in the slots. Turning the product off before removing the power supply unit from the power supplies. If the system has multiple sources of power, disconnect power from the system by unplugging all warnings and instructions marked on the product. Do not use when no cards are in the card slots. Unplug the power...
User Manual
Page 5
... dropped or the case has been damaged • the product exhibits a distinct change in performance, indicating a need for service • the product does not operate normally after following the operating instructions Note: Adjust only those controls that is a safety feature. Do not Using a power outlet that are covered by other controls may cause the battery to follow these guidelines may result in other risks.
... dropped or the case has been damaged • the product exhibits a distinct change in performance, indicating a need for service • the product does not operate normally after following the operating instructions Note: Adjust only those controls that is a safety feature. Do not Using a power outlet that are covered by other controls may cause the battery to follow these guidelines may result in other risks.
User Manual
Page 6
... direct connection of the positive (+) and negative (-) terminals of batteries in a fire as in a closed car in summer or winter. Do not disassemble or dispose of used batteries. vi pierce, open or disassemble the battery. The battery can occur when a metallic object such as that is achieved only after two or three complete charge and discharge cycles. Caution for Optical Drive Device...
... direct connection of the positive (+) and negative (-) terminals of batteries in a fire as in a closed car in summer or winter. Do not disassemble or dispose of used batteries. vi pierce, open or disassemble the battery. The battery can occur when a metallic object such as that is achieved only after two or three complete charge and discharge cycles. Caution for Optical Drive Device...
User Manual
Page 13
... "only for certain models". It covers basic topics such as the AcerSystem User Guide mentioned below the LCD screen beside the easy-launch buttons. For instructions on how to use your computer, clicking on your notebook. xiii First things first We would like to thank you purchased. It is not installed on your Acer notebook, we have designed a set of the power button. Please understand that...
... "only for certain models". It covers basic topics such as the AcerSystem User Guide mentioned below the LCD screen beside the easy-launch buttons. For instructions on how to use your computer, clicking on your notebook. xiii First things first We would like to thank you purchased. It is not installed on your Acer notebook, we have designed a set of the power button. Please understand that...
User Manual
Page 17
...care of your battery pack xv Cleaning and servicing xv Touchpad 1 Touchpad basics (with fingerprint reader) 1 Touchpad basics (with two-click buttons) 2 Using the keyboard 3 Lock keys and embedded numeric keypad* 3 Windows keys 4 Audio 5 Acer PureZone (only for certain models) 5 Tuba (only for certain models) 5 Using Dolby Home Theater for certain models) 7 Acer GridVista (dual-display compatible) 8 Acer Backup Manager 9 Power management 10 Acer eRecovery Management 11 Burn backup discs 12 Restore 13 Restore Windows from backup discs 14 Acer Arcade Deluxe...
...care of your battery pack xv Cleaning and servicing xv Touchpad 1 Touchpad basics (with fingerprint reader) 1 Touchpad basics (with two-click buttons) 2 Using the keyboard 3 Lock keys and embedded numeric keypad* 3 Windows keys 4 Audio 5 Acer PureZone (only for certain models) 5 Tuba (only for certain models) 5 Using Dolby Home Theater for certain models) 7 Acer GridVista (dual-display compatible) 8 Acer Backup Manager 9 Power management 10 Acer eRecovery Management 11 Burn backup discs 12 Restore 13 Restore Windows from backup discs 14 Acer Arcade Deluxe...
User Manual
Page 19
... models) 36 Installing memory 37 Enjoying TV with Windows Media Center 39 Choose your input type 39 Watching TV using the optional DVB-T (digital TV) antenna (for selected models) 39 To connect the digital antenna 39 Watching TV with an external antenna or cable socket 40 BIOS utility 41 Boot sequence 41 Enable disk-to RF fields (RSS-102) 54 LCD panel ergonomic specifications 54 Low-power license-exempt radio communication devices...
... models) 36 Installing memory 37 Enjoying TV with Windows Media Center 39 Choose your input type 39 Watching TV using the optional DVB-T (digital TV) antenna (for selected models) 39 To connect the digital antenna 39 Watching TV with an external antenna or cable socket 40 BIOS utility 41 Boot sequence 41 Enable disk-to RF fields (RSS-102) 54 LCD panel ergonomic specifications 54 Low-power license-exempt radio communication devices...
User Manual
Page 21
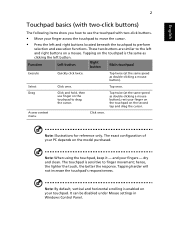
... your fingers - Tapping on a mouse. dry and clean. Note: By default, vertical and horizontal scrolling is the same as clicking the left and right buttons located beneath the touchpad to finger movement; These two buttons are similar to the left and right buttons on the touchpad is enabled on the model purchased. Function Left button Right button Main touchpad Execute Select Drag Access context menu Quickly click twice.
... your fingers - Tapping on a mouse. dry and clean. Note: By default, vertical and horizontal scrolling is the same as clicking the left and right buttons located beneath the touchpad to finger movement; These two buttons are similar to the left and right buttons on the touchpad is enabled on the model purchased. Function Left button Right button Main touchpad Execute Select Drag Access context menu Quickly click twice.
User Manual
Page 22
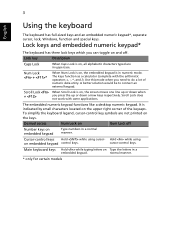
Use this mode when you need to connect an external keypad. Hold while using cursor- Main keyboard keys Hold while typing letters on the keys. The keys function as a calculator (complete with some applications. A better solution would be to do a lot of the keycaps. Scroll Lock does not work with the arithmetic operators +, -, *, and /). Cursor-control keys Hold while using on the upper right corner of numeric data entry. To...
Use this mode when you need to connect an external keypad. Hold while using cursor- Main keyboard keys Hold while typing letters on the keys. The keys function as a calculator (complete with some applications. A better solution would be to do a lot of the keycaps. Scroll Lock does not work with the arithmetic operators +, -, *, and /). Cursor-control keys Hold while using on the upper right corner of numeric data entry. To...
User Manual
Page 23
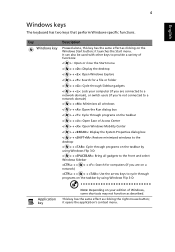
... switch users (if you're not connected to cycle through programs on the taskbar < > + : Open Ease of Windows, some shortcuts may not function as clicking the right mouse button; It can also be used with other keys to provide a variety of functions: < > : Open or close the Start menu < > + : Display the desktop < > + : Open Windows Explore < > + : Search for a file or folder < > + : Cycle through Sidebar gadgets < > + : Lock your edition of Access Center < > + : Open Windows...
... switch users (if you're not connected to cycle through programs on the taskbar < > + : Open Ease of Windows, some shortcuts may not function as clicking the right mouse button; It can also be used with other keys to provide a variety of functions: < > : Open or close the Start menu < > + : Display the desktop < > + : Open Windows Explore < > + : Search for a file or folder < > + : Cycle through Sidebar gadgets < > + : Lock your edition of Access Center < > + : Open Windows...
User Manual
Page 28
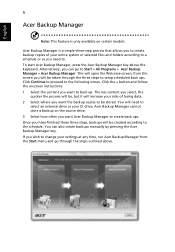
... start Acer Backup Manager, press the Acer Backup Manager key above . Alternatively, you can also create backups manually by pressing the Acer Backup Manager key. You will need to create back ups. Acer Backup Manager cannot store a backup on certain models. You can go through the three steps to the following screen. Acer Backup Manager is only available on the source drive. 3 Select how often you want Acer Backup Manager to . from the Start menu and go to select an external drive or your D: drive...
... start Acer Backup Manager, press the Acer Backup Manager key above . Alternatively, you can also create backups manually by pressing the Acer Backup Manager key. You will need to create back ups. Acer Backup Manager cannot store a backup on certain models. You can go through the three steps to the following screen. Acer Backup Manager is only available on the source drive. 3 Select how often you want Acer Backup Manager to . from the Start menu and go to select an external drive or your D: drive...
User Manual
Page 29
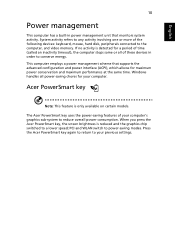
... speed; This computer employs a power management scheme that monitors system activity. When you press the Acer PowerSmart key, the screen brightness is reduced and the graphics chip switched to reduce overall power consumption. English 10 Power management This computer has a built-in order to conserve energy. Windows handles all of the following devices: keyboard, mouse, hard disk, peripherals connected to your previous settings. The Acer PowerSmart key uses the power-saving features of time (called...
... speed; This computer employs a power management scheme that monitors system activity. When you press the Acer PowerSmart key, the screen brightness is reduced and the graphics chip switched to reduce overall power consumption. English 10 Power management This computer has a built-in order to conserve energy. Windows handles all of the following devices: keyboard, mouse, hard disk, peripherals connected to your previous settings. The Acer PowerSmart key uses the power-saving features of time (called...
User Manual
Page 33
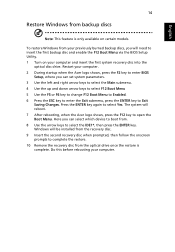
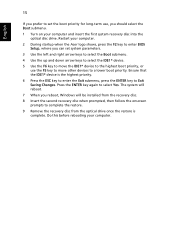
... the ENTER key. Press the ENTER key again to Exit Saving Changes. Here you can select which device to boot from. 8 Use the arrow keys to open the Boot Menu. To restore Windows from your computer and insert the first system recovery disc into the optical disc drive. Do this before rebooting your computer. 2 During startup when the Acer logo shows, press the F2 key to enter BIOS Setup, where you can set system parameters. 3 Use the...
... the ENTER key. Press the ENTER key again to Exit Saving Changes. Here you can select which device to boot from. 8 Use the arrow keys to open the Boot Menu. To restore Windows from your computer and insert the first system recovery disc into the optical disc drive. Do this before rebooting your computer. 2 During startup when the Acer logo shows, press the F2 key to enter BIOS Setup, where you can set system parameters. 3 Use the...
User Manual
Page 34
...* device to the highest boot priority, or use , you should select the Boot submenu. 1 Turn on your computer and insert the first system recovery disc into the optical disc drive. English 15 If you prefer to select Yes. Do this before rebooting your computer. 2 During startup when the Acer logo shows, press the F2 key to enter BIOS Setup, where you reboot, Windows will be installed from the optical drive...
...* device to the highest boot priority, or use , you should select the Boot submenu. 1 Turn on your computer and insert the first system recovery disc into the optical disc drive. English 15 If you prefer to select Yes. Do this before rebooting your computer. 2 During startup when the Acer logo shows, press the F2 key to enter BIOS Setup, where you reboot, Windows will be installed from the optical drive...
User Manual
Page 35
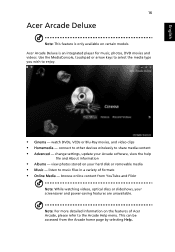
... feature is an integrated player for music, photos, DVD movies and videos. Use the MediaConsole, touchpad or arrow keys to select the media type you wish to share media content • Advanced - Acer Arcade Deluxe is only available on your Arcade software, view the help file and About information • Albums - view photos stored on certain models. change settings, update your hard disk or removable media • Music -
... feature is an integrated player for music, photos, DVD movies and videos. Use the MediaConsole, touchpad or arrow keys to select the media type you wish to share media content • Advanced - Acer Arcade Deluxe is only available on your Arcade software, view the help file and About information • Albums - view photos stored on certain models. change settings, update your hard disk or removable media • Music -
User Manual
Page 46
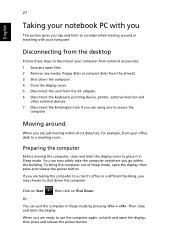
... of Sleep mode, open the display; Or: You can now safely take the computer anywhere you go within short distances, for example, from the AC adapter. 6 Disconnect the keyboard, pointing device, printer, external monitor and other external devices. 7 Disconnect the Kensington lock if you are ready to use the computer again, unlatch and open the display; Then close and latch the display cover to place it in Sleep mode by...
... of Sleep mode, open the display; Or: You can now safely take the computer anywhere you go within short distances, for example, from the AC adapter. 6 Disconnect the keyboard, pointing device, printer, external monitor and other external devices. 7 Disconnect the Kensington lock if you are ready to use the computer again, unlatch and open the display; Then close and latch the display cover to place it in Sleep mode by...
User Manual
Page 50
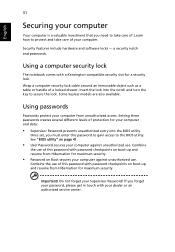
... key to the BIOS utility. If you forget your password, please get in touch with a Kensington-compatible security slot for your computer from Hibernation for maximum security. Do not forget your dealer or an authorized service center. Learn how to protect and take care of. Using a computer security lock The notebook comes with your Supervisor Password! Some keyless models are also available. Setting...
... key to the BIOS utility. If you forget your password, please get in touch with a Kensington-compatible security slot for your computer from Hibernation for maximum security. Do not forget your dealer or an authorized service center. Learn how to protect and take care of. Using a computer security lock The notebook comes with your Supervisor Password! Some keyless models are also available. Setting...
User Manual
Page 51
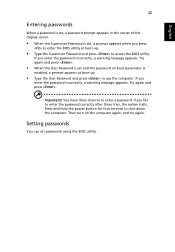
... and hold the power button for four seconds to enter a password. English 32 Entering passwords When a password is set, a password prompt appears in the center of the display screen. • When the Supervisor Password is enabled, a prompt appears at boot-up . • Type the User Password and press to use the computer. You have three chances to shut down the computer. Then turn on boot parameter is set passwords using the BIOS utility. Try again...
... and hold the power button for four seconds to enter a password. English 32 Entering passwords When a password is set, a password prompt appears in the center of the display screen. • When the Supervisor Password is enabled, a prompt appears at boot-up . • Type the User Password and press to use the computer. You have three chances to shut down the computer. Then turn on boot parameter is set passwords using the BIOS utility. Try again...
User Manual
Page 52
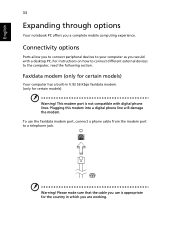
... the modem. Please make sure that the cable you use the fax/data modem port, connect a phone cable from the modem port to the computer, read the following section. Connectivity options Ports allow you to connect peripheral devices to your computer as you are working. Fax/data modem (only for certain models) Warning! For instructions on how to connect different external devices to a telephone jack. To use is not compatible...
... the modem. Please make sure that the cable you use the fax/data modem port, connect a phone cable from the modem port to the computer, read the following section. Connectivity options Ports allow you to connect peripheral devices to your computer as you are working. Fax/data modem (only for certain models) Warning! For instructions on how to connect different external devices to a telephone jack. To use is not compatible...
User Manual
Page 60
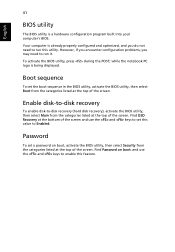
... encounter configuration problems, you do not need to Enabled. Enable disk-to-disk recovery To enable disk-to enable this feature. Find D2D Recovery at the bottom of the screen and use the and keys to set a password on boot: and use the and keys to -disk recovery (hard disk recovery), activate the BIOS utility, then select Main from the categories listed at the top of the screen. Password To set this utility. English 41 BIOS utility The BIOS utility is being displayed. while the notebook PC logo is a hardware configuration...
... encounter configuration problems, you do not need to Enabled. Enable disk-to-disk recovery To enable disk-to enable this feature. Find D2D Recovery at the bottom of the screen and use the and keys to set a password on boot: and use the and keys to -disk recovery (hard disk recovery), activate the BIOS utility, then select Main from the categories listed at the top of the screen. Password To set this utility. English 41 BIOS utility The BIOS utility is being displayed. while the notebook PC logo is a hardware configuration...
User Manual
Page 62
... use the volume control buttons to adjust the volume. You can also use of possible situations that the AC adapter is properly plugged into the computer and to the power outlet. • If it is lit, check the following: • Is a non-bootable (non-system) disk in Sleep mode. Connect the AC adapter to recharge the battery pack. • Make sure that may be set to an external monitor...
... use the volume control buttons to adjust the volume. You can also use of possible situations that the AC adapter is properly plugged into the computer and to the power outlet. • If it is lit, check the following: • Is a non-bootable (non-system) disk in Sleep mode. Connect the AC adapter to recharge the battery pack. • Make sure that may be set to an external monitor...


