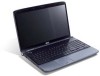
Acer Aspire 5739G Notebook Series Start Guide
Page 11
...technology, featuring: • Intel® Core™2 Duo processor • Mobile Intel® PM45/GM45 Express Chipset* • Intel® Wireless WiFi Link 5100/5300* Dual-Channel SDRAM support Up to 2 GB of DDR3 1066 MHz memory, upgradeable to 4 GB using two soDIMM modules 16:9 ...built-in stereo speakers True5.1-channel surround sound output High-definition audio support S/PDIF (Sony/Philips Digital Interface) support for digital speakers Acer PureZone technology with two built-in stereo microphones MS-Sound compatible 2.5" hard disk drive Optical drive options: • Blu-ray Disc...
Acer Aspire 5739G Notebook Series Start Guide
Page 12
... • subsystem • • • • • Special keys • and controls • I/O interface • • • Acer Video Conference, featuring: • Integrated Acer Crystal Eye webcam* • Acer PureZone technology* WLAN: Intel® Wireless WiFi Link 5100/5300* WPAN: Bluetooth® 2.1+Enhanced Data Rate (EDR)* Modem: 56K ITU V.92; Wake-on -LAN ready...
Acer Aspire 5739G Series Service Guide
Page 11
...® Centrino® 2 processor technology, featuring: • Intel® Core™2 Duo processor • Mobile Intel® PM45/GM45 Express Chipset* • Intel® Wireless WiFi Link 5100/5300* System Memory • Up to 2 GB of the computer's many features: NOTE: Items marked with * denote only selected models. System Specifications Features...
Acer Aspire 5739G Series Service Guide
Page 12
...; 103-/104-/107-key keyboard • Touchpad pointing device I/O interface • Acer Bio-Protection fingerprint reader • 5-in stereo microphones MS-Sound compatible Communication • Acer Video Conference, featuring: • Integrated Acer Crystal Eye webcam* • Acer PureZone technology • WLAN: Intel® Wireless WiFi Link 5100/5300* • WPAN: Bluetooth® 2.0+Enhanced Data Rate...
Acer Aspire 5739G Series Service Guide
Page 107
These slots are aligned. Chapter 3 97 7. IMPORTANT:When replacing the screws in place with 'X'. Replacing the Camera Module 1. Reconnect the camera to secure the Camera Module in the LCD brackets (red callout) do not use the screw holes marked with adhesive. 2. Place the Camera Module into the assembly so the pins are reserved for the Bezel securing screws. Ensure the WIFI Antenna Cables pass under the the bracket as shown. 8. Press down to the camera cable. Replace the four screws to secure the panel within the LCD module.