User Manual
Page 19
... certain models) 36 ExpressCard (only for certain models) 36 Installing memory 37 Enjoying TV with an external antenna or cable socket 40 BIOS utility 41 Boot sequence 41 Enable disk-to RF fields (RSS-102) 54 LCD panel ergonomic specifications 54 Low-power license-exempt radio communication devices (RSS-210) 54...
... certain models) 36 ExpressCard (only for certain models) 36 Installing memory 37 Enjoying TV with an external antenna or cable socket 40 BIOS utility 41 Boot sequence 41 Enable disk-to RF fields (RSS-102) 54 LCD panel ergonomic specifications 54 Low-power license-exempt radio communication devices (RSS-210) 54...
User Manual
Page 33
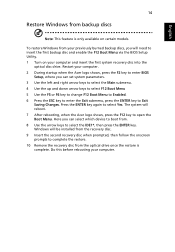
...disc when prompted, then follow the onscreen prompts to insert the first backup disc and enable the F12 Boot Menu via the BIOS Setup Utility. 1 Turn on your computer. 2 During startup when the Acer logo shows, press the F2 key to enter BIOS Setup, where you will need to complete the restore... the restore is only available on certain models. Windows will reboot. 7 After rebooting, when the Acer logo shows, press the F12 key to Exit Saving Changes. Here you can select which device to boot from your computer. Press the ENTER key again to select the IDE1*, then press the ENTER key...
...disc when prompted, then follow the onscreen prompts to insert the first backup disc and enable the F12 Boot Menu via the BIOS Setup Utility. 1 Turn on your computer. 2 During startup when the Acer logo shows, press the F2 key to enter BIOS Setup, where you will need to complete the restore... the restore is only available on certain models. Windows will reboot. 7 After rebooting, when the Acer logo shows, press the F12 key to Exit Saving Changes. Here you can select which device to boot from your computer. Press the ENTER key again to select the IDE1*, then press the ENTER key...
User Manual
Page 34
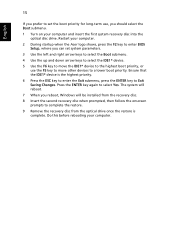
... the optical disc drive. Restart your computer. 2 During startup when the Acer logo shows, press the F2 key to enter BIOS Setup, where you should select the Boot submenu. 1 Turn on your computer. English 15 If you prefer to set the boot priority for long-term use, you can set system parameters. 3 Use.... 4 Use the up and down arrow keys to select the IDE1* device. 5 Use the F6 key to move the IDE1* device to the highest boot priority, or use the F5 key to move other devices to complete the restore. 9 Remove the recovery disc from the recovery disc. 8 Insert the second ...
... the optical disc drive. Restart your computer. 2 During startup when the Acer logo shows, press the F2 key to enter BIOS Setup, where you should select the Boot submenu. 1 Turn on your computer. English 15 If you prefer to set the boot priority for long-term use, you can set system parameters. 3 Use.... 4 Use the up and down arrow keys to select the IDE1* device. 5 Use the F6 key to move the IDE1* device to the highest boot priority, or use the F5 key to move other devices to complete the restore. 9 Remove the recovery disc from the recovery disc. 8 Insert the second ...
User Manual
Page 50
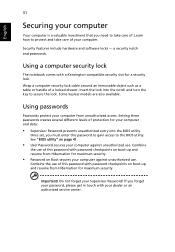
... use of your Supervisor Password! Learn how to protect and take care of protection for maximum security. • Password on boot-up and resume from Hibernation for your computer Your computer is a valuable investment that you forget your password, please get in...this password with a Kensington-compatible security slot for maximum security. Using a computer security lock The notebook comes with password checkpoints on boot-up and resume from Hibernation for a security lock. Do not forget your computer. Setting these passwords creates several different levels of ....
... use of your Supervisor Password! Learn how to protect and take care of protection for maximum security. • Password on boot-up and resume from Hibernation for your computer Your computer is a valuable investment that you forget your password, please get in...this password with a Kensington-compatible security slot for maximum security. Using a computer security lock The notebook comes with password checkpoints on boot-up and resume from Hibernation for a security lock. Do not forget your computer. Setting these passwords creates several different levels of ....
User Manual
Page 51
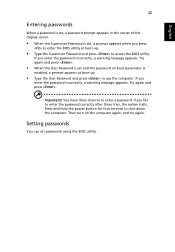
... is set, a password prompt appears in the center of the display screen. • When the Supervisor Password is enabled, a prompt appears at boot-up . • Type the User Password and press to enter the password correctly after three tries, the system halts. Important! Press and hold ...the power button for four seconds to enter a password. Then turn on boot parameter is set passwords using the BIOS utility. If you enter the password incorrectly, a warning message appears. You have three chances to shut...
... is set, a password prompt appears in the center of the display screen. • When the Supervisor Password is enabled, a prompt appears at boot-up . • Type the User Password and press to enter the password correctly after three tries, the system halts. Important! Press and hold ...the power button for four seconds to enter a password. Then turn on boot parameter is set passwords using the BIOS utility. If you enter the password incorrectly, a warning message appears. You have three chances to shut...
User Manual
Page 60
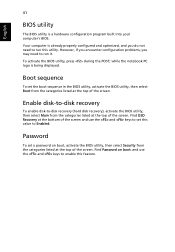
... being displayed. while the notebook PC logo is already properly configured and optimized, and you may need to set the boot sequence in the BIOS utility, activate the BIOS utility, then select Boot from the categories listed at the top of the screen. Find D2D Recovery at the top of the screen.... Boot sequence To set this value to enable this utility. Password To set a password on boot: and use the and keys to run it. Enable disk-to-disk recovery To enable disk-to run...
... being displayed. while the notebook PC logo is already properly configured and optimized, and you may need to set the boot sequence in the BIOS utility, activate the BIOS utility, then select Boot from the categories listed at the top of the screen. Find D2D Recovery at the top of the screen.... Boot sequence To set this value to enable this utility. Password To set a password on boot: and use the and keys to run it. Enable disk-to-disk recovery To enable disk-to run...
User Manual
Page 62
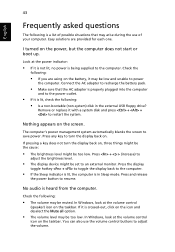
... following: • Is a non-bootable (non-system) disk in Sleep mode. Easy solutions are using on the power, but the computer does not start or boot up. Remove or replace it is in the external USB floppy drive? If it with a system disk and press + + to turn the display back on...
... following: • Is a non-bootable (non-system) disk in Sleep mode. Easy solutions are using on the power, but the computer does not start or boot up. Remove or replace it is in the external USB floppy drive? If it with a system disk and press + + to turn the display back on...
User Manual
Page 66
... to reboot. Error messages If you solve problems. If the system reports an error message or an error symptom occurs, see "Error messages" below. Disk boot failure Insert a system (bootable) disk into the floppy drive (A:), then press to help you receive an error message, note the message and take the corrective...
... to reboot. Error messages If you solve problems. If the system reports an error message or an error symptom occurs, see "Error messages" below. Disk boot failure Insert a system (bootable) disk into the floppy drive (A:), then press to help you receive an error message, note the message and take the corrective...


