
User Manual
Page 9
... IEEE 1394 port 44 PC Card slot 45 Installing memory 46 BIOS utility 46 Boot sequence 46 Enable disk-to-disk recovery 47 Password 47 Using software 47 Playing DVD movies 47 Power management 48 Acer eRecovery 49 Create backup 49 Restore from backup 50 Create factory default image CD 50 Re-install bundled...
... IEEE 1394 port 44 PC Card slot 45 Installing memory 46 BIOS utility 46 Boot sequence 46 Enable disk-to-disk recovery 47 Password 47 Using software 47 Playing DVD movies 47 Power management 48 Acer eRecovery 49 Create backup 49 Restore from backup 50 Create factory default image CD 50 Re-install bundled...

User Manual
Page 19
...Bluetooth® LED-button Audio system with PTT approval; Wake-on -LAN ready WLAN (optional): integrated Acer InviLink™ 802.11b/g Wi-Fi CERTIFIED™ solution, supporting Acer SignalUp™ wireless technology WPAN (optional): integrated Bluetooth® Three USB 2.0 ports 5-in-1 card ...MS Sound compatible Built-in jack for AC adapter Kensington lock slot BIOS user and supervisor passwords Acer eManager (ePresentation/eRecovery/eSettings) Acer GridVista Acer Arcade Acer Launch Manager Acer System Recovery CD Adobe® Reader® NTI CD-Maker™ 512 MB or 1 GB soDIMM ...
...Bluetooth® LED-button Audio system with PTT approval; Wake-on -LAN ready WLAN (optional): integrated Acer InviLink™ 802.11b/g Wi-Fi CERTIFIED™ solution, supporting Acer SignalUp™ wireless technology WPAN (optional): integrated Bluetooth® Three USB 2.0 ports 5-in-1 card ...MS Sound compatible Built-in jack for AC adapter Kensington lock slot BIOS user and supervisor passwords Acer eManager (ePresentation/eRecovery/eSettings) Acer GridVista Acer Arcade Acer Launch Manager Acer System Recovery CD Adobe® Reader® NTI CD-Maker™ 512 MB or 1 GB soDIMM ...

User Manual
Page 32
English 20 Note: If your computer did not come with a Recovery CD or System CD, please use Acer eRecovery's "System backup to optical disk" feature to burn a backup image to complete the process. Select the secondary monitor (2) icon in the display box and then click the check ...display compatible) Note: This feature is connected, then, select Start, Control Panel, Display and click on Acer GridVista. Finally, click Apply to confirm the new settings and click OK to CD or DVD. Acer GridVista is a handy utility that the second monitor is only available on the same screen. You may...
English 20 Note: If your computer did not come with a Recovery CD or System CD, please use Acer eRecovery's "System backup to optical disk" feature to burn a backup image to complete the process. Select the secondary monitor (2) icon in the display box and then click the check ...display compatible) Note: This feature is connected, then, select Start, Control Panel, Display and click on Acer GridVista. Finally, click Apply to confirm the new settings and click OK to CD or DVD. Acer GridVista is a handy utility that the second monitor is only available on the same screen. You may...
User Manual
Page 36
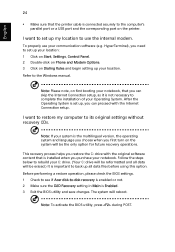
... location. I want to set up my location to its original settings without recovery CDs. This recovery process helps you restore the C: drive with the Internet Connection setup. Before performing a restore operation, please check the BIOS settings. 1 Check to see if Acer disk-to the Windows manual. To properly use the internal modem. I want to...
... location. I want to set up my location to its original settings without recovery CDs. This recovery process helps you restore the C: drive with the Internet Connection setup. Before performing a restore operation, please check the BIOS settings. 1 Check to see if Acer disk-to the Windows manual. To properly use the internal modem. I want to...

User Manual
Page 37
...Your computer is backed by your computer, write them down as they appear on your hard disk. This passport contains all you need to perform system recovery. Before you call Please have an Acer-authorized ITW service site, you can reduce the amount of beeps). If there are traveling ... type Serial number Date of the ITW passport. A list of mind when traveling. Important! English 25 To start the recovery process: 1 Restart the system. 2 While the Acer logo is showing, press + at your computer when you call takes and help solve your problems efficiently. If the country...
...Your computer is backed by your computer, write them down as they appear on your hard disk. This passport contains all you need to perform system recovery. Before you call Please have an Acer-authorized ITW service site, you can reduce the amount of beeps). If there are traveling ... type Serial number Date of the ITW passport. A list of mind when traveling. Important! English 25 To start the recovery process: 1 Restart the system. 2 While the Acer logo is showing, press + at your computer when you call takes and help solve your problems efficiently. If the country...
User Manual
Page 46
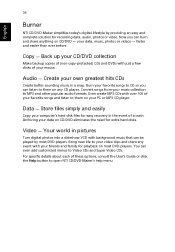
... into a slideshow VCD with just a few clicks of a crash. Audio - Even create MP3 CDs with your data on CD/DVD eliminates the need for easy recovery in a snap. Archiving your friends and family for recording data, audio, photos or video. For specific details about each of your music collection to them... player. Data - Create your data, music, photos or videos - your own greatest hits CDs Create better sounding music in the event of your computer's hard disk files for extra hard...
... into a slideshow VCD with just a few clicks of a crash. Audio - Even create MP3 CDs with your data on CD/DVD eliminates the need for easy recovery in a snap. Archiving your friends and family for recording data, audio, photos or video. For specific details about each of your music collection to them... player. Data - Create your data, music, photos or videos - your own greatest hits CDs Create better sounding music in the event of your computer's hard disk files for extra hard...
User Manual
Page 59
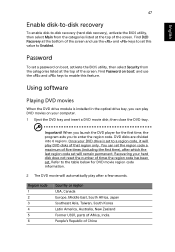
... has been set this feature. Using software Playing DVD movies When the DVD drive module is set will remain permanent. English 47 Enable disk-to-disk recovery To enable disk-to-disk recovery (hard disk recovery), activate the BIOS utility, then select Main from the categories listed at the top of the screen. Once your computer. 1 Eject the...
... has been set this feature. Using software Playing DVD movies When the DVD drive module is set will remain permanent. English 47 Enable disk-to-disk recovery To enable disk-to-disk recovery (hard disk recovery), activate the BIOS utility, then select Main from the categories listed at the top of the screen. Once your computer. 1 Eject the...

User Manual
Page 61
..., plug in an external USB or IEEE 1394-compatible optical disk burner before entering Acer eRecovery for optical disk-related tasks. The default password is six zeros. 4 In the Acer eRecovery window, select Recovery settings and click Next. 5 In the Recovery settings window, select Backup snapshot image and click Next. 6 Select the backup method. b Backup to...
..., plug in an external USB or IEEE 1394-compatible optical disk burner before entering Acer eRecovery for optical disk-related tasks. The default password is six zeros. 4 In the Acer eRecovery window, select Recovery settings and click Next. 5 In the Recovery settings window, select Backup snapshot image and click Next. 6 Select the backup method. b Backup to...
User Manual
Page 62
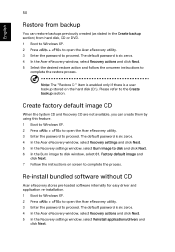
...factory default image CD When the System CD and Recovery CD are not available, you can restore backups previously created (as stated in the Create backup section) from hard disk, CD or DVD. 1 Boot to Windows XP. 2 Press + to open the Acer eRecovery utility. 3 Enter the password to complete ... stored on screen to proceed. Note: The "Restore C:" item is enabled only if there is six zeros. 4 In the Acer eRecovery window, select Recovery settings and click Next. 5 In the Recovery settings window, select Burn image to disk and click Next. 6 In the Burn image to the Create backup section.
...factory default image CD When the System CD and Recovery CD are not available, you can restore backups previously created (as stated in the Create backup section) from hard disk, CD or DVD. 1 Boot to Windows XP. 2 Press + to open the Acer eRecovery utility. 3 Enter the password to complete ... stored on screen to proceed. Note: The "Restore C:" item is enabled only if there is six zeros. 4 In the Acer eRecovery window, select Recovery settings and click Next. 5 In the Recovery settings window, select Burn image to disk and click Next. 6 In the Burn image to the Create backup section.
User Manual
Page 63
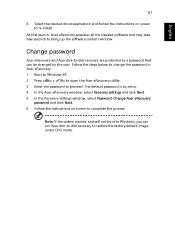
... boot to restore the factory default image under DOS mode. Change password Acer eRecovery and Acer disk-to-disk recovery are protected by a password that can run Acer disk-to-disk recovery to Windows, you can be changed by the user. Follow the steps below to change the password in Acer eRecovery. 1 Boot to Windows XP. 2 Press + to open the...
... boot to restore the factory default image under DOS mode. Change password Acer eRecovery and Acer disk-to-disk recovery are protected by a password that can run Acer disk-to-disk recovery to Windows, you can be changed by the user. Follow the steps below to change the password in Acer eRecovery. 1 Boot to Windows XP. 2 Press + to open the...


