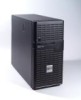

Altos G530 User's Guide
Page 7
...-installation instructions 36 Opening the server 37 Removing the left-side panel 37 Opening the bezel door 38 Removing the front bezel 38 Removing the HDD cage bay cover 39 Configuring the four-bay HDD cage 40 Installing the four-bay HDD cage 40 Removing the four-bay...
...-installation instructions 36 Opening the server 37 Removing the left-side panel 37 Opening the bezel door 38 Removing the front bezel 38 Removing the HDD cage bay cover 39 Configuring the four-bay HDD cage 40 Installing the four-bay HDD cage 40 Removing the four-bay...

Altos G530 User's Guide
Page 8
viii Installing an additional hard disk into the HDD cage carrier 53 Replacing the CD-ROM drive 55 Installing 5.25-inch drives 57 Upgrading the processor 59 Installing the CPU 59 Installing the HSF ...
viii Installing an additional hard disk into the HDD cage carrier 53 Replacing the CD-ROM drive 55 Installing 5.25-inch drives 57 Upgrading the processor 59 Installing the CPU 59 Installing the HSF ...

Altos G530 User's Guide
Page 14
...; Supports up to four 80-pin Ultra320 SCSI hard disk drives • Supports up to four SATA 150/300 hard disk drives • Easy-swap HDD cage • Supports up to four 68-pin SCSI hard disk drives • Supports up to four SATA 150/300 hard disk drives Note: The... main difference between a hot-plug HDD cage and an easy-swap HDD cage is the presence of a backplane board on the rear side of the hot-plug HDD cage. SCSI controller • Onboard SCSI: LSI® Logic 1020A Ultra320 SCSI controller • Dual...
...; Supports up to four 80-pin Ultra320 SCSI hard disk drives • Supports up to four SATA 150/300 hard disk drives • Easy-swap HDD cage • Supports up to four 68-pin SCSI hard disk drives • Supports up to four SATA 150/300 hard disk drives Note: The... main difference between a hot-plug HDD cage and an easy-swap HDD cage is the presence of a backplane board on the rear side of the hot-plug HDD cage. SCSI controller • Onboard SCSI: LSI® Logic 1020A Ultra320 SCSI controller • Dual...

Altos G530 User's Guide
Page 18
... of the system hard drive. LAN activity indicator 4 Indicates an active link on the LAN2 port (green). 10 Hot-plug HDD power Indicates drive activity (green). 8 1 System tour No. indicator 5 11 Four-bay hot-plug Houses four hot-plug or easy swap... HDD cage SCSI/SATA drives. 12 HDD cage bay For additional storage options. Icon 8 9 Component Hard disk activity indicator 2 LAN activity indicator 3 Description Indicates the status of ...
... of the system hard drive. LAN activity indicator 4 Indicates an active link on the LAN2 port (green). 10 Hot-plug HDD power Indicates drive activity (green). 8 1 System tour No. indicator 5 11 Four-bay hot-plug Houses four hot-plug or easy swap... HDD cage SCSI/SATA drives. 12 HDD cage bay For additional storage options. Icon 8 9 Component Hard disk activity indicator 2 LAN activity indicator 3 Description Indicates the status of ...

Altos G530 User's Guide
Page 19
HDD activity No HDD activity Network is established. • Network activity. • Network is not established. Hot-plug HDD LED indicators Below table lists the possible disk drive status. Network link is established and running at its supported speed. Description HDD activity HDD Status HDD access Green Blinking Amber - LED Power Color Green HDD Green LAN1 and 2 Green Status On Blinking Blinking Off On Blinking Off Description Power on the front panel. 9 Front panel LED indicators Below table lists the LED states on System in ACPI sleep mode.
HDD activity No HDD activity Network is established. • Network activity. • Network is not established. Hot-plug HDD LED indicators Below table lists the possible disk drive status. Network link is established and running at its supported speed. Description HDD activity HDD Status HDD access Green Blinking Amber - LED Power Color Green HDD Green LAN1 and 2 Green Status On Blinking Blinking Off On Blinking Off Description Power on the front panel. 9 Front panel LED indicators Below table lists the LED states on System in ACPI sleep mode.

Altos G530 User's Guide
Page 23
If the system comes bundled with a single 610-w redundant power supply module, you have the option to purchase an extra power supply module to provide the system with a redundant power source. Component 1 Power supply module (600 or 610-watts) 1 2 Rear system fan 3 Mainboard, CPU and heat sink fan assembly 4 PCI bus slot 5 Four-bay hot-plug HDD cage 1 The system supports a redundant or non-redundant power supply module. 13 Internal components No.
If the system comes bundled with a single 610-w redundant power supply module, you have the option to purchase an extra power supply module to provide the system with a redundant power source. Component 1 Power supply module (600 or 610-watts) 1 2 Rear system fan 3 Mainboard, CPU and heat sink fan assembly 4 PCI bus slot 5 Four-bay hot-plug HDD cage 1 The system supports a redundant or non-redundant power supply module. 13 Internal components No.

Altos G530 User's Guide
Page 28
... of the J38 header. Signal name 2 SB5V 4 Fan fault LED* (no support) 6 Fan fault LED* (no . Signal name 1 ACPI LED gm 3 Key 5 ACPI LED amber 7 HDD LED 9 NMI button 11 ACPI switch 13 ACPI switch (GND) 15 Reset switch 17 Reset switch (GND) 19 Sleep switch* (no support) 21 Sleep switch...
... of the J38 header. Signal name 2 SB5V 4 Fan fault LED* (no support) 6 Fan fault LED* (no . Signal name 1 ACPI LED gm 3 Key 5 ACPI LED amber 7 HDD LED 9 NMI button 11 ACPI switch 13 ACPI switch (GND) 15 Reset switch 17 Reset switch (GND) 19 Sleep switch* (no support) 21 Sleep switch...

Altos G530 User's Guide
Page 29
SCSI backplane board layout Front Rear No. Code Description 1 SCSI HDD connectors 2 W83792D_ID1 792D_ID1 ADDR select jumper Jumper setting: Short 1-2 - 5EH (default) Short 2-3 - 5AH 3 3-pin fan connector 4 4-pin power cable connector 5 68-pin SCSI data cable connector 19 Backplane board layout The backplane board attached to the four-bay hot-plug HDD cage provides a convenient interface between the SCSI or SATA drives and the mainboard.
SCSI backplane board layout Front Rear No. Code Description 1 SCSI HDD connectors 2 W83792D_ID1 792D_ID1 ADDR select jumper Jumper setting: Short 1-2 - 5EH (default) Short 2-3 - 5AH 3 3-pin fan connector 4 4-pin power cable connector 5 68-pin SCSI data cable connector 19 Backplane board layout The backplane board attached to the four-bay hot-plug HDD cage provides a convenient interface between the SCSI or SATA drives and the mainboard.

Altos G530 User's Guide
Page 31
jumper Jumper setting: Short 1-2 - 1st BPB (backplane board) Short 2-3 - 2nd BPB ICMB (Intelligent Chassis Management Bus) connector Fan connectors Code 1 2 3 JP2 4 J1 5 JP1 6 FAN1 and FAN2 Description SATA HDD connectors SAF-TE heartbeat LED and Manufacturing function jumper Debug connector Backplane no. 21 SATA backplane board layout Front Rear No.
jumper Jumper setting: Short 1-2 - 1st BPB (backplane board) Short 2-3 - 2nd BPB ICMB (Intelligent Chassis Management Bus) connector Fan connectors Code 1 2 3 JP2 4 J1 5 JP1 6 FAN1 and FAN2 Description SATA HDD connectors SAF-TE heartbeat LED and Manufacturing function jumper Debug connector Backplane no. 21 SATA backplane board layout Front Rear No.

Altos G530 User's Guide
Page 49
39 Removing the HDD cage bay cover 1 Open the bezel door. 2 Push down the HDD cage bay cover (1). 3 Detach the HDD cage bay cover from the front bezel (2).
39 Removing the HDD cage bay cover 1 Open the bezel door. 2 Push down the HDD cage bay cover (1). 3 Detach the HDD cage bay cover from the front bezel (2).

Altos G530 User's Guide
Page 50
... four-bay HDD cage The Altos G530 has two HDD cage bays that accept the following HDD cages: • Hot-plug SCSI HDD cage • Easy-swap SCSI HDD cage • Hot-plug SATA HDD cage • Easy-swap SATA HDD cage The main difference between a hot-plug HDD cage and an easy-swap HDD cage is the...side of the SCSI channel or SATA connectors. Contact your local Acer representative or order directly from http://www.acer.com/. The SCSI/SATA RAID card should be Acer-qualified, compatible with only a single four-bay SCSI or SATA HDD cage leaving one bay empty. The system ships out with the...
... four-bay HDD cage The Altos G530 has two HDD cage bays that accept the following HDD cages: • Hot-plug SCSI HDD cage • Easy-swap SCSI HDD cage • Hot-plug SATA HDD cage • Easy-swap SATA HDD cage The main difference between a hot-plug HDD cage and an easy-swap HDD cage is the...side of the SCSI channel or SATA connectors. Contact your local Acer representative or order directly from http://www.acer.com/. The SCSI/SATA RAID card should be Acer-qualified, compatible with only a single four-bay SCSI or SATA HDD cage leaving one bay empty. The system ships out with the...

Altos G530 User's Guide
Page 51
41 To install the hot-plug SCSI HDD cage: 1 Observe the ESD precautions and pre-installation instructions described on page 35. 2 Remove the HDD cage bay cover. See page 39. 3 Remove the screw that secures the cover to the empty HDD bay (1), then detach the cover (2). 4 Install the hot-plug cage.
41 To install the hot-plug SCSI HDD cage: 1 Observe the ESD precautions and pre-installation instructions described on page 35. 2 Remove the HDD cage bay cover. See page 39. 3 Remove the screw that secures the cover to the empty HDD bay (1), then detach the cover (2). 4 Install the hot-plug cage.

Altos G530 User's Guide
Page 52
The cage is already installed in the top HDD bay, you must block the W83792D_ID1 jumper. 42 3 System upgrade (1) Slide the cage into the chassis with an audible click. (2) Locate and attach the following cables clamped on the side of the chassis. Set pins 2 and 3 to the chassis with the backplane board facing the rear of the chassis to their corresponding connectors on the backplane board: Important: If a four-bay hot-plug SCSI HDD cage is locked to short. (1) SCSI data cable
The cage is already installed in the top HDD bay, you must block the W83792D_ID1 jumper. 42 3 System upgrade (1) Slide the cage into the chassis with an audible click. (2) Locate and attach the following cables clamped on the side of the chassis. Set pins 2 and 3 to the chassis with the backplane board facing the rear of the chassis to their corresponding connectors on the backplane board: Important: If a four-bay hot-plug SCSI HDD cage is locked to short. (1) SCSI data cable

Altos G530 User's Guide
Page 53
For instructions, see "Installing an additional hard disk into the HDD cage carrier" on page 173. 43 (2) SCSI HDD power cables 5 Observe the post-installation instructions described on how to first remove all hard disks from their carriers. Important: When you are detaching the hot-plug HDD cage from the chassis, make sure to change the RAID configuration of your hard disk, go to "Appendix D: SCSI RAID configuration" on page 53. 6 Change the RAID configuration of your hard disk. For details on page 36.
For instructions, see "Installing an additional hard disk into the HDD cage carrier" on page 173. 43 (2) SCSI HDD power cables 5 Observe the post-installation instructions described on how to first remove all hard disks from their carriers. Important: When you are detaching the hot-plug HDD cage from the chassis, make sure to change the RAID configuration of your hard disk, go to "Appendix D: SCSI RAID configuration" on page 53. 6 Change the RAID configuration of your hard disk. For details on page 36.

Altos G530 User's Guide
Page 54
... with an audible click. (2) Locate and attach the following cables to their corresponding connectors on page 35. 2 Remove the HDD cage bay cover. The cage is an optional four-bay internal HDD enclosure without a SCSI backplane board. 1 Observe the ESD precautions and pre-installation instructions described on the SCSI hard drive and.... 3 Remove the screw that secures the cover to install a SCSI RAID card see page 70. (1) SCSI data cable For instructions on how to the empty HDD bay, then detach the cover. 4 Install the easy-swap cage. (1) Slide the cage into the chassis.
... with an audible click. (2) Locate and attach the following cables to their corresponding connectors on page 35. 2 Remove the HDD cage bay cover. The cage is an optional four-bay internal HDD enclosure without a SCSI backplane board. 1 Observe the ESD precautions and pre-installation instructions described on the SCSI hard drive and.... 3 Remove the screw that secures the cover to install a SCSI RAID card see page 70. (1) SCSI data cable For instructions on how to the empty HDD bay, then detach the cover. 4 Install the easy-swap cage. (1) Slide the cage into the chassis.

Altos G530 User's Guide
Page 55
45 (2) SCSI HDD power cables 5 Observe the post-installation instructions described on how to change the RAID configuration of your hard disk, go to the hard disks. 6 Change the RAID configuration of your hard disk. Important: When you are detaching the easy-swap cage from the chassis, make sure to first remove all cables attached to "Appendix D: SCSI RAID configuration" on page 173. For details on page 36.
45 (2) SCSI HDD power cables 5 Observe the post-installation instructions described on how to change the RAID configuration of your hard disk, go to the hard disks. 6 Change the RAID configuration of your hard disk. Important: When you are detaching the easy-swap cage from the chassis, make sure to first remove all cables attached to "Appendix D: SCSI RAID configuration" on page 173. For details on page 36.

Altos G530 User's Guide
Page 56
See page 39. 3 Remove the screw that secure the cover of the empty HDD bay, then detach the cover. 46 3 System upgrade To install the hot-plug SATA HDD cage: 1 Observe the ESD precautions and pre-installation instructions described on page 35. 2 Remove the HDD cage bay cover.
See page 39. 3 Remove the screw that secure the cover of the empty HDD bay, then detach the cover. 46 3 System upgrade To install the hot-plug SATA HDD cage: 1 Observe the ESD precautions and pre-installation instructions described on page 35. 2 Remove the HDD cage bay cover.

Altos G530 User's Guide
Page 57
...cables to its corresponding connectors on the SATA RAID backplane board, mainboard and adapter: Important: If a four-bay hot-plug SATA HDD cage is already installed in the top HDD bay, you must block the J1 jumper. Make sure the SATA data cables are keyed. Note: SATA connectors on the SATA ...RAID card. Set pins 2 and 3 to short. (1) Attach the SATA data cable to the SATA HDD connector on the backplane board (1), then connect the other end of the cable to the SATA connector on the controller are properly connected to their...
...cables to its corresponding connectors on the SATA RAID backplane board, mainboard and adapter: Important: If a four-bay hot-plug SATA HDD cage is already installed in the top HDD bay, you must block the J1 jumper. Make sure the SATA data cables are keyed. Note: SATA connectors on the SATA ...RAID card. Set pins 2 and 3 to short. (1) Attach the SATA data cable to the SATA HDD connector on the backplane board (1), then connect the other end of the cable to the SATA connector on the controller are properly connected to their...

Altos G530 User's Guide
Page 58
... disks from the chassis, make sure to the SATA power cable connector on page 36. For instructions, see "Installing an additional hard disk into the HDD cage carrier" on page 167. Important: When you are removing the hot-plug cage from their carriers. Note: The SATA RAID data cables must be...
... disks from the chassis, make sure to the SATA power cable connector on page 36. For instructions, see "Installing an additional hard disk into the HDD cage carrier" on page 167. Important: When you are removing the hot-plug cage from their carriers. Note: The SATA RAID data cables must be...

Altos G530 User's Guide
Page 59
See page 39. 3 Remove the screw that secures the cover to the empty HDD bay, then detach the cover. 4 Install the easy-swap cage. 49 To install the easy-swap SATA HDD cage: The easy-swap SATA HDD cage is an optional four-bay internal HDD enclosure without a SATA backplane board. 1 Observe the ESD precautions and pre-installation instructions described on page 35. 2 Remove the HDD cage bay cover.
See page 39. 3 Remove the screw that secures the cover to the empty HDD bay, then detach the cover. 4 Install the easy-swap cage. 49 To install the easy-swap SATA HDD cage: The easy-swap SATA HDD cage is an optional four-bay internal HDD enclosure without a SATA backplane board. 1 Observe the ESD precautions and pre-installation instructions described on page 35. 2 Remove the HDD cage bay cover.