

User Guide
Page 5
...it 's not properly installed and used to which the receiver is no guarantee that to meet the emission level limits. Move the monitor and the receiver further away from that interference will not occur in a particular installation. Consult your local dealer or an qualified technician...user must be led as a result if it . EMI Certification The Class B digital apparatus meets all requirements of the FCC Rules. Connect the monitor into an outlet on a circuit different from each other. ! Reorient or relocate the receiving antenna. ! Note: If necessary, shielded interface cables ...
...it 's not properly installed and used to which the receiver is no guarantee that to meet the emission level limits. Move the monitor and the receiver further away from that interference will not occur in a particular installation. Consult your local dealer or an qualified technician...user must be led as a result if it . EMI Certification The Class B digital apparatus meets all requirements of the FCC Rules. Connect the monitor into an outlet on a circuit different from each other. ! Reorient or relocate the receiving antenna. ! Note: If necessary, shielded interface cables ...
User Guide
Page 6
Contents Fisrt Setup 1 Front Panel Control 2 Installation 2 Using OSD Functions 3 Timing modes 4 Technical Information 5 Precautions 6 Cleaning the LCD monitor 6 Troubleshooting 7
Contents Fisrt Setup 1 Front Panel Control 2 Installation 2 Using OSD Functions 3 Timing modes 4 Technical Information 5 Precautions 6 Cleaning the LCD monitor 6 Troubleshooting 7

User Guide
Page 7
... computer are powered OFF. Connect power cord Connect the power cord to a properly grounded AC outlet, then to the monitor. 2. This monitor package comes with: # Video cable with 15 pin D-SUB connector. # Power cable. # User guidebook or CD-ROM (You're reading now) ...Quick Installation 1. Set the resolution. D-SUB Power 1 First Step Thank you for instructions. Power-ON computer and monitor Power-ON the computer, then Power-ON the monitor. 4. Windows users:Setting the Timing Mode (Resolution and Refresh Rate) Example: 800 x 600 @ 75 Hz Resolution Right-click ...
... computer are powered OFF. Connect power cord Connect the power cord to a properly grounded AC outlet, then to the monitor. 2. This monitor package comes with: # Video cable with 15 pin D-SUB connector. # Power cable. # User guidebook or CD-ROM (You're reading now) ...Quick Installation 1. Set the resolution. D-SUB Power 1 First Step Thank you for instructions. Power-ON computer and monitor Power-ON the computer, then Power-ON the monitor. 4. Windows users:Setting the Timing Mode (Resolution and Refresh Rate) Example: 800 x 600 @ 75 Hz Resolution Right-click ...

User Guide
Page 9
... current . Size: To adjust the horizontal size of the video. ) Fine Tune: To adjust the delay time . ) Sharpness: To select the picture sharpeness of the monitor. of display. Position: To adjust the horizontal and vertical position of OSD. Using the OSD Functions MAIN MENU (example) Function Description: Main Menu: Auto Adjust...
... current . Size: To adjust the horizontal size of the video. ) Fine Tune: To adjust the delay time . ) Sharpness: To select the picture sharpeness of the monitor. of display. Position: To adjust the horizontal and vertical position of OSD. Using the OSD Functions MAIN MENU (example) Function Description: Main Menu: Auto Adjust...

User Guide
Page 10
Hot Key functions: When no OSD appears, press: the " " button to turn the OSD on/off, the " " buttons for the monitor auto image adjust, the"6" button to adjust the contrast, the "5" button to adjust the brightness, or "6" + "5" for Memory Recall. Timing modes VESA VESA MAC VESA VESA VESA VESA VESA MAC VESA VESA VESA/MAC 720 x 400 @ 70HZ 640 x 480 @ 60HZ 640 x 480 @ 67HZ 640 x 480 @ 75HZ 800 x 600 @ 56HZ 800 x 600 @ 60HZ 800 x 600 @ 72HZ 800 x 600 @ 75HZ 832 x 624 @ 75HZ 1024 x 768 @ 60HZ 1024 x 768 @ 70HZ 1024 x 768 @ 75 Hz 4
Hot Key functions: When no OSD appears, press: the " " button to turn the OSD on/off, the " " buttons for the monitor auto image adjust, the"6" button to adjust the contrast, the "5" button to adjust the brightness, or "6" + "5" for Memory Recall. Timing modes VESA VESA MAC VESA VESA VESA VESA VESA MAC VESA VESA VESA/MAC 720 x 400 @ 70HZ 640 x 480 @ 60HZ 640 x 480 @ 67HZ 640 x 480 @ 75HZ 800 x 600 @ 56HZ 800 x 600 @ 60HZ 800 x 600 @ 72HZ 800 x 600 @ 75HZ 832 x 624 @ 75HZ 1024 x 768 @ 60HZ 1024 x 768 @ 70HZ 1024 x 768 @ 75 Hz 4

User Guide
Page 12
...you may suffer serious injury if you 're unsure of the power supply in your residence, consult your dealer or service center. * Keep the LCD monitor away from direct sunlight to face away from magnets, motors, transformers, speakers, and TV sets. * If smoke, abnormal noise, or strange odor is... present, immediately switch off and unplug the power cord on the back of the monitor. Cleaning the LCD monitor * Make sure the LCD monitor is clean and free of a non-ammonia, non-alcohol based glass cleaner onto a clean soft, lint-free cloth, then ...
...you may suffer serious injury if you 're unsure of the power supply in your residence, consult your dealer or service center. * Keep the LCD monitor away from direct sunlight to face away from magnets, motors, transformers, speakers, and TV sets. * If smoke, abnormal noise, or strange odor is... present, immediately switch off and unplug the power cord on the back of the monitor. Cleaning the LCD monitor * Make sure the LCD monitor is clean and free of a non-ammonia, non-alcohol based glass cleaner onto a clean soft, lint-free cloth, then ...
User Guide
Page 13
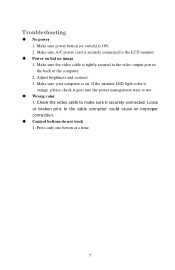
... of the computer. 2. Make sure the video cable is orange, please check it securely connected. Adjust brightness and contrast. 3. If the monitor LED light color is tightly secured to the LCD monitor. * Power on . Press only one botton at a time. 7 Troubleshooting * No power 1. Make sure your computer is ON. 2. Make sure power...
... of the computer. 2. Make sure the video cable is orange, please check it securely connected. Adjust brightness and contrast. 3. If the monitor LED light color is tightly secured to the LCD monitor. * Power on . Press only one botton at a time. 7 Troubleshooting * No power 1. Make sure your computer is ON. 2. Make sure power...


