
User Manual
Page 6
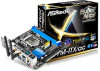
...-by-step installation guides. You may find the latest VGA cards and CPU support list on ASRock's website without notice. ASRock website http://www.asrock.com. 1.1 Package Contents • ASRock Z97M-ITX/ac Motherboard (Mini-ITX Form Factor) • ASRock Z97M-ITX/ac Quick Installation Guide • ASRock Z97M-ITX/ac Support CD • 2 x Serial ATA (SATA) Data Cables (Optional) • 1 x I/O Panel Shield • 1 x WiFi-802.11ac...
...-by-step installation guides. You may find the latest VGA cards and CPU support list on ASRock's website without notice. ASRock website http://www.asrock.com. 1.1 Package Contents • ASRock Z97M-ITX/ac Motherboard (Mini-ITX Form Factor) • ASRock Z97M-ITX/ac Quick Installation Guide • ASRock Z97M-ITX/ac Support CD • 2 x Serial ATA (SATA) Data Cables (Optional) • 1 x I/O Panel Shield • 1 x WiFi-802.11ac...

User Manual
Page 7
... InsiderTM, Intel® HD Graphics 4400/4600 • Pixel Shader 5.0, DirectX 11.1 • Max. 1.2 Specifications Platform CPU • Mini-ITX Form Factor • Solid Capacitor design • High Density Glass Fabric PCB • Supports 5th Generation Intel® CoreTM i7/i5/i3...8226; 4 Power Phase design • Supports Intel® Turbo Boost 2.0 Technology • Supports Intel® K-Series unlocked CPUs • Supports ASRock BCLK Full-range Overclocking Chipset • Intel® Z97 Memory • Dual Channel DDR3 Memory Technology • 2 x DDR3 DIMM Slots •...
... InsiderTM, Intel® HD Graphics 4400/4600 • Pixel Shader 5.0, DirectX 11.1 • Max. 1.2 Specifications Platform CPU • Mini-ITX Form Factor • Solid Capacitor design • High Density Glass Fabric PCB • Supports 5th Generation Intel® CoreTM i7/i5/i3...8226; 4 Power Phase design • Supports Intel® Turbo Boost 2.0 Technology • Supports Intel® K-Series unlocked CPUs • Supports ASRock BCLK Full-range Overclocking Chipset • Intel® Z97 Memory • Dual Channel DDR3 Memory Technology • 2 x DDR3 DIMM Slots •...

User Manual
Page 16
Use the screw to the WiFi card, aligning the screw hole on the bracket. Step 3 Insert the WiFi Module Card into the vertical mini PCI Express slot (MPCIE1). Prepare a Phillips #0 screwdriver. Step 4 Tighten the screw that come with the screw hole on the WiFi card with the package. Z97M-ITX/ac WiFi Module and WiFi Antennas Installation Guide Step 1 Prepare the WiFi Module, WiFi Module Bracket, and the two screws (M2*3) that holds the card in place. 11 English Step 2 Attach the WiFi Module Bracket to attach the bracket and the WiFi card, but do not tighten the screw.
Use the screw to the WiFi card, aligning the screw hole on the bracket. Step 3 Insert the WiFi Module Card into the vertical mini PCI Express slot (MPCIE1). Prepare a Phillips #0 screwdriver. Step 4 Tighten the screw that come with the screw hole on the WiFi card with the package. Z97M-ITX/ac WiFi Module and WiFi Antennas Installation Guide Step 1 Prepare the WiFi Module, WiFi Module Bracket, and the two screws (M2*3) that holds the card in place. 11 English Step 2 Attach the WiFi Module Bracket to attach the bracket and the WiFi card, but do not tighten the screw.

User Manual
Page 20
... a carpet. Pre-installation Precautions Take note of your motherboard directly on a grounded anti-static pad or in the bag that the motherboard fits into it. Z97M-ITX/ac Chapter 2 Installation This is a Mini-ITX form factor motherboard.
... a carpet. Pre-installation Precautions Take note of your motherboard directly on a grounded anti-static pad or in the bag that the motherboard fits into it. Z97M-ITX/ac Chapter 2 Installation This is a Mini-ITX form factor motherboard.

Quick Installation Guide
Page 7
... using. In case any modifications of this manual occur, the updated version will be available on ASRock's website as well. ASRock website http://www.asrock.com. 1.1 Package Contents • ASRock Z97M-ITX/ac Motherboard (Mini-ITX Form Factor) • ASRock Z97M-ITX/ac Quick Installation Guide • ASRock Z97M-ITX/ac Support CD • 2 x Serial ATA (SATA) Data Cables (Optional) • 1 x I/O Panel Shield • 1 x WiFi-802.11ac...
... using. In case any modifications of this manual occur, the updated version will be available on ASRock's website as well. ASRock website http://www.asrock.com. 1.1 Package Contents • ASRock Z97M-ITX/ac Motherboard (Mini-ITX Form Factor) • ASRock Z97M-ITX/ac Quick Installation Guide • ASRock Z97M-ITX/ac Support CD • 2 x Serial ATA (SATA) Data Cables (Optional) • 1 x I/O Panel Shield • 1 x WiFi-802.11ac...

Quick Installation Guide
Page 8
1.2 Specifications Platform CPU • Mini-ITX Form Factor • Solid Capacitor design &#...design • Supports Intel® Turbo Boost 2.0 Technology • Supports Intel® K-Series unlocked CPUs • Supports ASRock BCLK Full-range Overclocking Chipset • Intel® Z97 Memory • Dual Channel DDR3 Memory Technology • 2 .../ 1.2 Expansion Slot • 1 x PCI Express 3.0 x16 Slot (PCIE1: x16 mode) • 1 x Vertical Half Mini-PCI Express Slot: For WiFi + BT Module English Graphics • Intel® HD Graphics Built-in Visuals and the VGA outputs...
1.2 Specifications Platform CPU • Mini-ITX Form Factor • Solid Capacitor design &#...design • Supports Intel® Turbo Boost 2.0 Technology • Supports Intel® K-Series unlocked CPUs • Supports ASRock BCLK Full-range Overclocking Chipset • Intel® Z97 Memory • Dual Channel DDR3 Memory Technology • 2 .../ 1.2 Expansion Slot • 1 x PCI Express 3.0 x16 Slot (PCIE1: x16 mode) • 1 x Vertical Half Mini-PCI Express Slot: For WiFi + BT Module English Graphics • Intel® HD Graphics Built-in Visuals and the VGA outputs...

Quick Installation Guide
Page 13
Step 2 Attach the WiFi Module Bracket to attach the bracket and the WiFi card, but do not tighten the screw. Use the screw to the WiFi card, aligning the screw hole on the WiFi card with the package. Prepare a Phillips #0 screwdriver. Z97M-ITX/ac WiFi Module and WiFi Antennas Installation Guide Step 1 Prepare the WiFi Module, WiFi Module Bracket, and the two screws (M2*3) that holds the card in place. 11 English Step 3 Insert the WiFi Module Card into the vertical mini PCI Express slot (MPCIE1). Step 4 Tighten the screw that come with the screw hole on the bracket.
Step 2 Attach the WiFi Module Bracket to attach the bracket and the WiFi card, but do not tighten the screw. Use the screw to the WiFi card, aligning the screw hole on the WiFi card with the package. Prepare a Phillips #0 screwdriver. Z97M-ITX/ac WiFi Module and WiFi Antennas Installation Guide Step 1 Prepare the WiFi Module, WiFi Module Bracket, and the two screws (M2*3) that holds the card in place. 11 English Step 3 Insert the WiFi Module Card into the vertical mini PCI Express slot (MPCIE1). Step 4 Tighten the screw that come with the screw hole on the bracket.

Quick Installation Guide
Page 17
..., NEVER place your chassis to ensure that comes with the components. • When placing screws to secure the motherboard to do not overtighten the screws! Z97M-ITX/ac Chapter 2 Installation This is a Mini-ITX form factor motherboard. Failure to the chassis, please do so may damage the motherboard. 15 English
..., NEVER place your chassis to ensure that comes with the components. • When placing screws to secure the motherboard to do not overtighten the screws! Z97M-ITX/ac Chapter 2 Installation This is a Mini-ITX form factor motherboard. Failure to the chassis, please do so may damage the motherboard. 15 English

Quick Installation Guide
Page 23
Please read the documentation of the expansion card and make sure that the power supply is switched off or the power cord is used for PCI Express x16 lane width graphics cards. mini-PCIe slot: MPCIE1 (mini-PCIe slot) is unplugged. Before installing an expansion card, please make necessary hardware settings for WiFi module. 21 English PCIe slot: PCIE1 (PCIe 3.0 x16 slot) is 1 PCI Express slot and 1 mini-PCI Express slot on the motherboard. Z97M-ITX/ac 2.4 Expansion Slots (PCI Express Slots) There is used for the card before you start the installation.
Please read the documentation of the expansion card and make sure that the power supply is switched off or the power cord is used for PCI Express x16 lane width graphics cards. mini-PCIe slot: MPCIE1 (mini-PCIe slot) is unplugged. Before installing an expansion card, please make necessary hardware settings for WiFi module. 21 English PCIe slot: PCIE1 (PCIe 3.0 x16 slot) is 1 PCI Express slot and 1 mini-PCI Express slot on the motherboard. Z97M-ITX/ac 2.4 Expansion Slots (PCI Express Slots) There is used for the card before you start the installation.

