
Intel Smart Response Installation Guide
Page 1
... Technology Installation Guide This motherboard supports Intel Smart Response Technology. Boot system to build RAID 0 or RAID 1 in system at this point! 3. For all required drivers, including RST storage driver version 10.5 or later. 2. You can find the UI setup instruction and the step by double-clicking RST Storage icon in the near future. It is not necessary to desktop, open , click on the "Enable Acceleration" button on the GUI panel...
... Technology Installation Guide This motherboard supports Intel Smart Response Technology. Boot system to build RAID 0 or RAID 1 in system at this point! 3. For all required drivers, including RST storage driver version 10.5 or later. 2. You can find the UI setup instruction and the step by double-clicking RST Storage icon in the near future. It is not necessary to desktop, open , click on the "Enable Acceleration" button on the GUI panel...

Intel Rapid Storage Guide
Page 12
... (POST) memory test begins. 2. Use the up or down arrow keys to select the strip size and press Enter. 5. How to install an operating system onto a RAID volume (F6 install method) In order to install an operating system onto a RAID volume, the RAID option must be used to load the Intel® Rapid Storage Technology driver during POST, press Ctrl and i at the same time to enter the option ROM user interface. 2. Switch the SATA...
... (POST) memory test begins. 2. Use the up or down arrow keys to select the strip size and press Enter. 5. How to install an operating system onto a RAID volume (F6 install method) In order to install an operating system onto a RAID volume, the RAID option must be used to load the Intel® Rapid Storage Technology driver during POST, press Ctrl and i at the same time to enter the option ROM user interface. 2. Switch the SATA...
Intel Rapid Storage Guide
Page 13
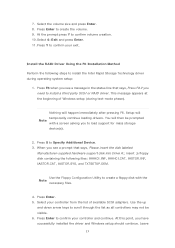
... pressing F6. 7. Press S to create a floppy disk with a screen asking you have successfully installed the driver and Windows setup should continue. When you need to scroll through the list as all controllers may not be prompted Note with the Note necessary files. 4. Use the Floppy Configuration Utility to Specify Additional Device. 3. Select the volume size and press Enter. 8. Press Enter to load support for mass storage device(s). 2. This message appears at the...
... pressing F6. 7. Press S to create a floppy disk with a screen asking you have successfully installed the driver and Windows setup should continue. When you need to scroll through the list as all controllers may not be prompted Note with the Note necessary files. 4. Use the Floppy Configuration Utility to Specify Additional Device. 3. Select the volume size and press Enter. 8. Press Enter to load support for mass storage device(s). 2. This message appears at the...
Intel Rapid Storage Guide
Page 16
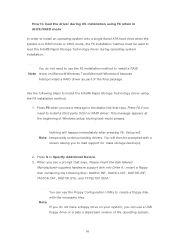
... Windows 8 because Intel provided a RAID driver as part of Windows setup (during operating system installation. Press S to install a RAID Note driver on your system, you can use the Floppy Configuration Utility to create a floppy disk with a screen asking you see a message in the status line that says, Please insert the disk labeled Manufacturer-supplied hardware support disk into Drive A:, insert a floppy disk containing the following steps to install the Intel® Rapid Storage Technology driver using F6 when in AHCI/RAID mode...
... Windows 8 because Intel provided a RAID driver as part of Windows setup (during operating system installation. Press S to install a RAID Note driver on your system, you can use the Floppy Configuration Utility to create a floppy disk with a screen asking you see a message in the status line that says, Please insert the disk labeled Manufacturer-supplied hardware support disk into Drive A:, insert a floppy disk containing the following steps to install the Intel® Rapid Storage Technology driver using F6 when in AHCI/RAID mode...
RAID Installation Guide
Page 7
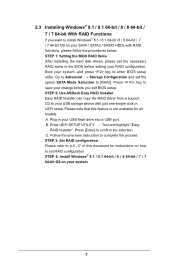
STEP 2: Use ASRock Easy RAID Installer Easy RAID Installer can copy the RAID driver from a support CD to set RAID configuration. STEP 4: Install Windows® 8.1 / 8.1 64-bit / 8 / 8 64-bit / 7 / 7 64-bit OS on your USB storage device with RAID functions, please follow the procedures below. 2.3 Installing Windows® 8.1 / 8.1 64-bit / 8 / 8 64-bit / 7 / 7 64-bit With RAID Functions If you exit BIOS setup. Boot your SATA / SATA2 / SATA3 HDDs with just one simple click in UEFI setup. Please note that this document for all models A. Enter UEFI SETUP UTILITY Tool and...
STEP 2: Use ASRock Easy RAID Installer Easy RAID Installer can copy the RAID driver from a support CD to set RAID configuration. STEP 4: Install Windows® 8.1 / 8.1 64-bit / 8 / 8 64-bit / 7 / 7 64-bit OS on your USB storage device with RAID functions, please follow the procedures below. 2.3 Installing Windows® 8.1 / 8.1 64-bit / 8 / 8 64-bit / 7 / 7 64-bit With RAID Functions If you exit BIOS setup. Boot your SATA / SATA2 / SATA3 HDDs with just one simple click in UEFI setup. Please note that this document for all models A. Enter UEFI SETUP UTILITY Tool and...
RAID Installation Guide
Page 18
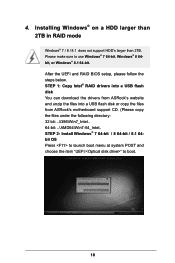
... item "UEFI:" to use Windows® 7 64-bit, Windows® 8 64bit, or Windows® 8.1 64-bit. Please make sure to boot. 18 STEP 1: Copy Intel® RAID drivers into a USB flash disk You can download the drivers from ASRock's website and unzip the files into a USB flash disk or copy the files from ASRock's motherboard support CD. (Please copy the files under the following directory: 32 bit: ..\i386\Win7_Intel.. 64-bit: ..\AMD64\Win7-64_Intel.. Installing Windows® on a HDD larger...
... item "UEFI:" to use Windows® 7 64-bit, Windows® 8 64bit, or Windows® 8.1 64-bit. Please make sure to boot. 18 STEP 1: Copy Intel® RAID drivers into a USB flash disk You can download the drivers from ASRock's website and unzip the files into a USB flash disk or copy the files from ASRock's motherboard support CD. (Please copy the files under the following directory: 32 bit: ..\i386\Win7_Intel.. 64-bit: ..\AMD64\Win7-64_Intel.. Installing Windows® on a HDD larger...

User Manual
Page 4
... 1.2 Specifications 2 1.3 Motherboard Layout 6 1.4 I/O Panel 8 1.5 WiFi-802.11ac Module and ASRock WiFi 2.4/5 GHz Antenna 10 Chapter 2 Installation 15 2.1 Installing the CPU 16 2.2 Installing the CPU Fan and Heatsink 19 2.3 Installing Memory Modules (DIMM) 20 2.4 Expansion Slots (PCI Express Slots) 22 2.5 Jumpers Setup 23 2.6 Onboard Headers and Connectors 24 Chapter 3 Software and Utilities Operation 28 3.1 Installing Drivers 28 3.2 A-Tuning 29 3.3 Intel® Rapid Start Technology 35 3.4 Intel® Smart Connect Technology 40 3.5 ASRock Cloud 45 3.6 ASRock...
... 1.2 Specifications 2 1.3 Motherboard Layout 6 1.4 I/O Panel 8 1.5 WiFi-802.11ac Module and ASRock WiFi 2.4/5 GHz Antenna 10 Chapter 2 Installation 15 2.1 Installing the CPU 16 2.2 Installing the CPU Fan and Heatsink 19 2.3 Installing Memory Modules (DIMM) 20 2.4 Expansion Slots (PCI Express Slots) 22 2.5 Jumpers Setup 23 2.6 Onboard Headers and Connectors 24 Chapter 3 Software and Utilities Operation 28 3.1 Installing Drivers 28 3.2 A-Tuning 29 3.3 Intel® Rapid Start Technology 35 3.4 Intel® Smart Connect Technology 40 3.5 ASRock Cloud 45 3.6 ASRock...

User Manual
Page 6
... excellent performance with robust design conforming to ASRock's commitment to change without further notice. Z97M-ITX/ac Chapter 1 Introduction Thank you for WiFi Module 1 English Chapter 4 contains the configuration guide of the software and utilities. ASRock website http://www.asrock.com. 1.1 Package Contents • ASRock Z97M-ITX/ac Motherboard (Mini-ITX Form Factor) • ASRock Z97M-ITX/ac Quick Installation Guide • ASRock Z97M-ITX/ac Support CD • 2 x Serial ATA (SATA) Data Cables (Optional) • 1 x I/O Panel Shield • 1 x WiFi-802.11ac Module...
... excellent performance with robust design conforming to ASRock's commitment to change without further notice. Z97M-ITX/ac Chapter 1 Introduction Thank you for WiFi Module 1 English Chapter 4 contains the configuration guide of the software and utilities. ASRock website http://www.asrock.com. 1.1 Package Contents • ASRock Z97M-ITX/ac Motherboard (Mini-ITX Form Factor) • ASRock Z97M-ITX/ac Quick Installation Guide • ASRock Z97M-ITX/ac Support CD • 2 x Serial ATA (SATA) Data Cables (Optional) • 1 x I/O Panel Shield • 1 x WiFi-802.11ac Module...

User Manual
Page 9
...USB 3.0 Ports (Supports ESD Protection (ASRock Full Spike Protection)) • 1 x RJ-45 LAN Port with LED (ACT/LINK LED and SPEED LED) • HD Audio Jacks: Rear Speaker / Central / Bass / Line in / Front Speaker / Microphone Storage • 5 x SATA3 6.0 Gb/s Connectors, support RAID (RAID 0, RAID 1, RAID 5, RAID 10, Intel Rapid Storage Technology 13 and Intel Smart Response Technology), NCQ, AHCI and Hot Plug Connector • 1 x Chassis Intrusion Header • 1 x TPM Header • 1 x CPU Fan Connector (4-pin) • 1 x Chassis Fan Connector (4-pin) • 1 x 24 pin ATX Power...
...USB 3.0 Ports (Supports ESD Protection (ASRock Full Spike Protection)) • 1 x RJ-45 LAN Port with LED (ACT/LINK LED and SPEED LED) • HD Audio Jacks: Rear Speaker / Central / Bass / Line in / Front Speaker / Microphone Storage • 5 x SATA3 6.0 Gb/s Connectors, support RAID (RAID 0, RAID 1, RAID 5, RAID 10, Intel Rapid Storage Technology 13 and Intel Smart Response Technology), NCQ, AHCI and Hot Plug Connector • 1 x Chassis Intrusion Header • 1 x TPM Header • 1 x CPU Fan Connector (4-pin) • 1 x Chassis Fan Connector (4-pin) • 1 x 24 pin ATX Power...

User Manual
Page 11
PS2 Keyboard /Mouse 1.3 Motherboard Layout 1 23 USB 2.0 T: USB1 B: USB2 CPU_FAN1 ATX12V1 1 4 5 6 CI1 CLRMOS1 DVI1 VGA1 1 AT X P W R 1 DDR3_B1 (64 bit, 240-pin module) Front USB 3.0 DDR3_A1 (64 bit, 240-pin module) USB 3.0 T: USB1 B: USB2 CMOS Battery CHA_FAN1 Z97M-ITX/ac USB 3.0 T: USB3 B: USB4 Top: RJ-45 TPMS1 Top: CTR BASS Center: REAR SPK HD_AUDIO1 1 1 AUDIO CODEC Top: LINE IN Center: FRONT Intel Z97 RoHS MPCIE1 64Mb BIOS PCI Express 3.0 PCIE1 SATA3_4 SATA3_0...
PS2 Keyboard /Mouse 1.3 Motherboard Layout 1 23 USB 2.0 T: USB1 B: USB2 CPU_FAN1 ATX12V1 1 4 5 6 CI1 CLRMOS1 DVI1 VGA1 1 AT X P W R 1 DDR3_B1 (64 bit, 240-pin module) Front USB 3.0 DDR3_A1 (64 bit, 240-pin module) USB 3.0 T: USB1 B: USB2 CMOS Battery CHA_FAN1 Z97M-ITX/ac USB 3.0 T: USB3 B: USB4 Top: RJ-45 TPMS1 Top: CTR BASS Center: REAR SPK HD_AUDIO1 1 1 AUDIO CODEC Top: LINE IN Center: FRONT Intel Z97 RoHS MPCIE1 64Mb BIOS PCI Express 3.0 PCIE1 SATA3_4 SATA3_0...

User Manual
Page 28
... to default setup, please turn off the computer and unplug the power cord from the power supply. Please be noted that the password, date, time, and user default profile will be detected. Z97M-ITX/ac 2.5 Jumpers Setup The illustration shows how jumpers are "Short" when a jumper cap is placed on the pins, the jumper is "Open". Please adjust the BIOS option "Clear Status" to clear the CMOS when you just finish updating the BIOS, you must boot...
... to default setup, please turn off the computer and unplug the power cord from the power supply. Please be noted that the password, date, time, and user default profile will be detected. Z97M-ITX/ac 2.5 Jumpers Setup The illustration shows how jumpers are "Short" when a jumper cap is placed on the pins, the jumper is "Open". Please adjust the BIOS option "Clear Status" to clear the CMOS when you just finish updating the BIOS, you must boot...

User Manual
Page 31
... connect a 3-Pin CPU fan, please connect it to the front panel audio header by the steps below: A. English 26 D. E. MIC_RET and OUT_RET are for the AC'97 audio panel. To use an AC'97 audio panel, please install it to OUT2_L. If you use a 20-pin ATX power supply, please plug it along Pin 1 and Pin 13. 1. Connect Audio_R (RIN) to OUT2_R and Audio_L (LIN) to Pin 1-3. 12 24 1 13 This motherboard provides a 24-pin ATX power connector. C. B. Chassis Fan Connector (4-pin CHA_FAN1) (see p.6, No. 3) CPU Fan Connector (4-pin...
... connect a 3-Pin CPU fan, please connect it to the front panel audio header by the steps below: A. English 26 D. E. MIC_RET and OUT_RET are for the AC'97 audio panel. To use an AC'97 audio panel, please install it to OUT2_L. If you use a 20-pin ATX power supply, please plug it along Pin 1 and Pin 13. 1. Connect Audio_R (RIN) to OUT2_R and Audio_L (LIN) to Pin 1-3. 12 24 1 13 This motherboard provides a 24-pin ATX power connector. C. B. Chassis Fan Connector (4-pin CHA_FAN1) (see p.6, No. 3) CPU Fan Connector (4-pin...

User Manual
Page 33
.... Chapter 3 Software and Utilities Operation 3.1 Installing Drivers The Support CD that comes with the motherboard contains necessary drivers and useful utilities that the motherboard supports. The CD automatically displays the Main Menu if "AUTORUN" is enabled in the Support CD to install it. If the Main Menu does not appear automatically, locate and double click on the file "ASRSETUP.EXE" in your CD-ROM drive. Running The Support CD To begin using the support CD, insert...
.... Chapter 3 Software and Utilities Operation 3.1 Installing Drivers The Support CD that comes with the motherboard contains necessary drivers and useful utilities that the motherboard supports. The CD automatically displays the Main Menu if "AUTORUN" is enabled in the Support CD to install it. If the Main Menu does not appear automatically, locate and double click on the file "ASRSETUP.EXE" in your CD-ROM drive. Running The Support CD To begin using the support CD, insert...

User Manual
Page 45
.... If Windows 8/7 is already installed under IDE mode, directly changing the SATA mode to AHCI may cause Windows 8/7 to AHCI. or 64-bit edition) • Set the SATA mode to crash while booting. Please backup any important data before operating to refresh email or social networking applications. Press Win + R simultaneously in Windows 8/7, type "Regedit" into HKEY_LOCAL_MACHINE\SYSTEM\CurrentControlSet\services\ msahci in AHCI mode, please follow the instructions below. 3.4 Intel® Smart Connect Technology Intel® Smart Connect Technology is...
.... If Windows 8/7 is already installed under IDE mode, directly changing the SATA mode to AHCI may cause Windows 8/7 to AHCI. or 64-bit edition) • Set the SATA mode to crash while booting. Please backup any important data before operating to refresh email or social networking applications. Press Win + R simultaneously in Windows 8/7, type "Regedit" into HKEY_LOCAL_MACHINE\SYSTEM\CurrentControlSet\services\ msahci in AHCI mode, please follow the instructions below. 3.4 Intel® Smart Connect Technology Intel® Smart Connect Technology is...
User Manual
Page 72
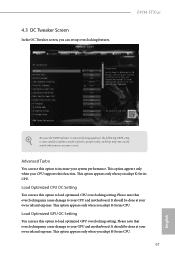
... damage to your own risk and expense. Load Optimized GPU OC Setting You can use this function. This option appears only when you see on your CPU and motherboard. 4.3 OC Tweaker Screen In the OC Tweaker screen, you can use this option to load optimized GPU overclocking setting. Z97M-ITX/ac Because the UEFI software is constantly being updated, the following UEFI setup screens and descriptions are for reference purpose only, and...
... damage to your own risk and expense. Load Optimized GPU OC Setting You can use this function. This option appears only when you see on your CPU and motherboard. 4.3 OC Tweaker Screen In the OC Tweaker screen, you can use this option to load optimized GPU overclocking setting. Z97M-ITX/ac Because the UEFI software is constantly being updated, the following UEFI setup screens and descriptions are for reference purpose only, and...

User Manual
Page 83
...-Monitor Select disable to disable the integrated graphics when an external graphics card is idle for PCIE1. 4.4.2 Chipset Configuration Primary Graphics Adapter Select a primary VGA. PCIE1 Link Speed Select the link speed for lower power consumption. Render Standby Power down the render unit when the GPU is installed. Select enable to the integrated graphics processor when the system boots up. Share Memory Configure the size of memory that is installed. 78 English Set to Auto to enable onboard...
...-Monitor Select disable to disable the integrated graphics when an external graphics card is idle for PCIE1. 4.4.2 Chipset Configuration Primary Graphics Adapter Select a primary VGA. PCIE1 Link Speed Select the link speed for lower power consumption. Render Standby Power down the render unit when the GPU is installed. Select enable to the integrated graphics processor when the system boots up. Share Memory Configure the size of memory that is installed. 78 English Set to Auto to enable onboard...

User Manual
Page 84
... the system is on AC/Power Loss Select the power state after a power failure. Onboard LAN Enable or disable the onboard network interface controller. It will be switched off . If [Power Off] is selected, the system will remain off the Power and Keyboard LEDs when the system enters into Standby/Hibernation mode. Z97M-ITX/ac Front Panel Enable/disable front panel HD audio. If [Power On] is selected, the power will start to music through the computer's speakers even when the...
... the system is on AC/Power Loss Select the power state after a power failure. Onboard LAN Enable or disable the onboard network interface controller. It will be switched off . If [Power Off] is selected, the system will remain off the Power and Keyboard LEDs when the system enters into Standby/Hibernation mode. Z97M-ITX/ac Front Panel Enable/disable front panel HD audio. If [Power On] is selected, the power will start to music through the computer's speakers even when the...

User Manual
Page 92
...Must install driver to keep the USB 3.0 driver enabled after entering the OS (USB 3.0 is enabled in BIOS). Set [Smart Auto] to use USB devices under the UEFI setup and Windows/Linux operating systems only. 87 English Legacy USB 3.0 Support Enable or disable Legacy OS Support for USB 2.0 devices. Select UEFI Setup Only to disable legacy USB support. Intel USB 3.0 Mode Select Intel® USB 3.0 controller mode. Select UEFI Setup Only to disable the USB 3.0 ports. 4.4.8 USB Configuration Z97M-ITX/ac USB Controller Enable or disable all the USB ports. Legacy USB Support Enable...
...Must install driver to keep the USB 3.0 driver enabled after entering the OS (USB 3.0 is enabled in BIOS). Set [Smart Auto] to use USB devices under the UEFI setup and Windows/Linux operating systems only. 87 English Legacy USB 3.0 Support Enable or disable Legacy OS Support for USB 2.0 devices. Select UEFI Setup Only to disable legacy USB support. Intel USB 3.0 Mode Select Intel® USB 3.0 controller mode. Select UEFI Setup Only to disable the USB 3.0 ports. 4.4.8 USB Configuration Z97M-ITX/ac USB Controller Enable or disable all the USB ports. Legacy USB Support Enable...
User Manual
Page 96
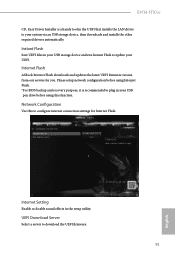
...Internet Flash ASRock Internet Flash downloads and updates the latest UEFI firmware version from our servers for Internet Flash. Z97M-ITX/ac CD, Easy Driver Installer is recommended to plug in your USB pen drive before using this to update your USB storage device and run Instant Flash to configure internet connection settings for you. UEFI Download Server Select a server to your system via an USB storage device, then downloads and installs the other required drivers automatically. Internet Setting Enable or disable sound effects in your UEFI. Please setup network configuration...
...Internet Flash ASRock Internet Flash downloads and updates the latest UEFI firmware version from our servers for Internet Flash. Z97M-ITX/ac CD, Easy Driver Installer is recommended to plug in your USB pen drive before using this to update your USB storage device and run Instant Flash to configure internet connection settings for you. UEFI Download Server Select a server to your system via an USB storage device, then downloads and installs the other required drivers automatically. Internet Setting Enable or disable sound effects in your UEFI. Please setup network configuration...

Quick Installation Guide
Page 10
...USB 3.0 Ports (Supports ESD Protection (ASRock Full Spike Protection)) • 1 x RJ-45 LAN Port with LED (ACT/LINK LED and SPEED LED) • HD Audio Jacks: Rear Speaker / Central / Bass / Line in / Front Speaker / Microphone Storage • 5 x SATA3 6.0 Gb/s Connectors, support RAID (RAID 0, RAID 1, RAID 5, RAID 10, Intel Rapid Storage Technology 13 and Intel Smart Response Technology), NCQ, AHCI and Hot Plug Connector • 1 x Chassis Intrusion Header • 1 x TPM Header • 1 x CPU Fan Connector (4-pin) • 1 x Chassis Fan Connector (4-pin) • 1 x 24 pin ATX Power...
...USB 3.0 Ports (Supports ESD Protection (ASRock Full Spike Protection)) • 1 x RJ-45 LAN Port with LED (ACT/LINK LED and SPEED LED) • HD Audio Jacks: Rear Speaker / Central / Bass / Line in / Front Speaker / Microphone Storage • 5 x SATA3 6.0 Gb/s Connectors, support RAID (RAID 0, RAID 1, RAID 5, RAID 10, Intel Rapid Storage Technology 13 and Intel Smart Response Technology), NCQ, AHCI and Hot Plug Connector • 1 x Chassis Intrusion Header • 1 x TPM Header • 1 x CPU Fan Connector (4-pin) • 1 x Chassis Fan Connector (4-pin) • 1 x 24 pin ATX Power...


