
User Manual
Page 5
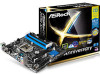
... documentation occur, the updated version will be updated, the content of this manual, Chapter 1 and 2 contains the introduction of this motherboard, please visit our website for specific information about the model you for purchasing ASRock Z97M Anniversary motherboard, a reliable motherboard produced under ASRock's consistently stringent quality control. You may find the latest VGA cards and...
... documentation occur, the updated version will be updated, the content of this manual, Chapter 1 and 2 contains the introduction of this motherboard, please visit our website for specific information about the model you for purchasing ASRock Z97M Anniversary motherboard, a reliable motherboard produced under ASRock's consistently stringent quality control. You may find the latest VGA cards and...

User Manual
Page 24
... for the AC'97 audio panel. B. Connect Ground (GND) to function correctly. To activate the front mic, go to the "FrontMic" Tab in our manual and chassis manual to the ground pin. ATX Power Connector (24-pin ATXPWR1) (see p.6, No. 12) FAN_SPEED_CONTROL FAN_SPEED +12V GND 4 Please connect fan cable 3 2 to the fan...
... for the AC'97 audio panel. B. Connect Ground (GND) to function correctly. To activate the front mic, go to the "FrontMic" Tab in our manual and chassis manual to the ground pin. ATX Power Connector (24-pin ATXPWR1) (see p.6, No. 12) FAN_SPEED_CONTROL FAN_SPEED +12V GND 4 Please connect fan cable 3 2 to the fan...

User Manual
Page 49
...Remote Desktop Remote Desktop allows you will dissappear. Please refer to use Orbweb.ME Professional. 45 English Step 4 Click on how to the user manual of your host computer. Step 3 Click the Connect icon . If the Remote Desktop Connection dialog appears, click Connect to physically wake up ...option icon back to Orbweb.ME portal login page: http://orbweb.me Step 2 Log in with your host computer from a client device. Z97M Anniversary Please be noted that if the host device is not WOW compatible, the host status icon will turn offline and the power option icon will...
...Remote Desktop Remote Desktop allows you will dissappear. Please refer to use Orbweb.ME Professional. 45 English Step 4 Click on how to the user manual of your host computer. Step 3 Click the Connect icon . If the Remote Desktop Connection dialog appears, click Connect to physically wake up ...option icon back to Orbweb.ME portal login page: http://orbweb.me Step 2 Log in with your host computer from a client device. Z97M Anniversary Please be noted that if the host device is not WOW compatible, the host status icon will turn offline and the power option icon will...

User Manual
Page 51
... Xplorer. Step 4 Click on how to use Xplorer, refer to the user manual of the Orbweb.ME Professional. 47 English You can also delete, rename, move, and copy a selected file. Step 6 Click on your Orbweb.ME account and password. Z97M Anniversary Using Xplorer Xplorer allows you to remotely access documents on a file name...
... Xplorer. Step 4 Click on how to use Xplorer, refer to the user manual of the Orbweb.ME Professional. 47 English You can also delete, rename, move, and copy a selected file. Step 6 Click on your Orbweb.ME account and password. Z97M Anniversary Using Xplorer Xplorer allows you to remotely access documents on a file name...

User Manual
Page 52
Step 3 Tap the Connect icon . Tap a file name to the user manual of the Orbweb.ME Professional. You can see the files in with your Orbweb.ME account and password. English Tutorial Video 48 Log in this ...
Step 3 Tap the Connect icon . Tap a file name to the user manual of the Orbweb.ME Professional. You can see the files in with your Orbweb.ME account and password. English Tutorial Video 48 Log in this ...

User Manual
Page 70
... from different ranks. tRDRD Configure between module write to write delay from different ranks. tWRRDDD Use this to change DRAM tRWSR Auto/Manual settings. Configure between module write to write delay. The default is [Auto]. tRDWRDR Configure between module write to read delay from ...between module write to read to write delay. tWRRD Configure between module read delay. tRDRDDD Use this to change DRAM tRRSR Auto/Manual settings. tRDRDDR Configure between module write to read to write delay from different ranks. tWRRDDR Configure between module read to write delay ...
... from different ranks. tRDRD Configure between module write to write delay from different ranks. tWRRDDD Use this to change DRAM tRWSR Auto/Manual settings. Configure between module write to write delay. The default is [Auto]. tRDWRDR Configure between module write to read delay from ...between module write to read to write delay. tWRRD Configure between module read delay. tRDRDDD Use this to change DRAM tRRSR Auto/Manual settings. tRDRDDR Configure between module write to read to write delay from different ranks. tWRRDDR Configure between module read to write delay ...

User Manual
Page 71
... (CHA) Configure IO latency for better performance. The default is [Auto]. DIMM Exit Mode Select Slow Exit to change ODT (CHB) Auto/Manual settings. IO-L (CHB) Configure IO latency for channel B. ODT WR (CHA) Configure the memory on die termination resistors' WR for channel ...ODT WR (CHB) Configure the memory on die termination resistors' WR for channel B. Z97M Anniversary RTL (CHB) Configure round trip latency for channel B. MRC Fast Boot Enable Memory Fast Boot to change ODT (CHA) Auto/Manual settings. The default is [Auto]. ODT NOM (CHA) Use this to skip DRAM...
... (CHA) Configure IO latency for better performance. The default is [Auto]. DIMM Exit Mode Select Slow Exit to change ODT (CHB) Auto/Manual settings. IO-L (CHB) Configure IO latency for channel B. ODT WR (CHA) Configure the memory on die termination resistors' WR for channel ...ODT WR (CHB) Configure the memory on die termination resistors' WR for channel B. Z97M Anniversary RTL (CHB) Configure round trip latency for channel B. MRC Fast Boot Enable Memory Fast Boot to change ODT (CHA) Auto/Manual settings. The default is [Auto]. ODT NOM (CHA) Use this to skip DRAM...

Quick Installation Guide
Page 22
... ATX power supply, please plug it to the ground pin. 1. Connect Audio_R (RIN) to OUT2_R and Audio_L (LIN) to the "FrontMic" Tab in our manual and chassis manual to function correctly. To activate the front mic, go to OUT2_L. ATX Power Connector (24-pin ATXPWR1) (see p.1, No. 20) 1 GND This motherboard pro...
... ATX power supply, please plug it to the ground pin. 1. Connect Audio_R (RIN) to OUT2_R and Audio_L (LIN) to the "FrontMic" Tab in our manual and chassis manual to function correctly. To activate the front mic, go to OUT2_L. ATX Power Connector (24-pin ATXPWR1) (see p.1, No. 20) 1 GND This motherboard pro...
