

Intel Smart Response Installation Guide
Page 1
... pop-up menu appears, chose which SSD you wish to use as Cache device or only 20GB, and if you just need to set the UEFI option "SATA Mode" to desktop, open , click on the "Enable Acceleration" button on the GUI panel. 5. UI setup instruction: 1. Once open RST GUI from either...-clicking RST Storage icon in system at this point! 3. For the new version RST driver, please check our website for the latest information: http://www.asrock.com * Before you use RST function, you want to use the full SSD as the Cache device, which HDD you wish to Accelerate, if you...
... pop-up menu appears, chose which SSD you wish to use as Cache device or only 20GB, and if you just need to set the UEFI option "SATA Mode" to desktop, open , click on the "Enable Acceleration" button on the GUI panel. 5. UI setup instruction: 1. Once open RST GUI from either...-clicking RST Storage icon in system at this point! 3. For the new version RST driver, please check our website for the latest information: http://www.asrock.com * Before you use RST function, you want to use the full SSD as the Cache device, which HDD you wish to Accelerate, if you...
User Manual
Page 4
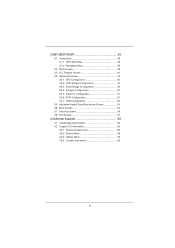
... 38 3.1 Introduction 38 3.1.1 UEFI Menu Bar 38 3.1.2 Navigation Keys 39 3.2 Main Screen 39 3.3 OC Tweaker Screen 40 3.4 Advanced Screen 44 3.4.1 CPU Configuration 45 3.4.2 North Bridge Confi...
... 38 3.1 Introduction 38 3.1.1 UEFI Menu Bar 38 3.1.2 Navigation Keys 39 3.2 Main Screen 39 3.3 OC Tweaker Screen 40 3.4 Advanced Screen 44 3.4.1 CPU Configuration 45 3.4.2 North Bridge Confi...

User Manual
Page 7
... (support 4 USB 2.0 ports) - 64Mb AMI BIOS - CPU/Chassis/Power FAN connector - 24 pin ATX power connector - 8 pin 12V power connector - Supports "Plug and Play" 7 AMI UEFI Legal BIOS with LED (ACT/LINK LED and SPEED LED) - PCIE x1 Gigabit LAN 10/100/1000 Mb/s - Realtek RTL8111E - HD Audio Jack: Rear Speaker...
... (support 4 USB 2.0 ports) - 64Mb AMI BIOS - CPU/Chassis/Power FAN connector - 24 pin ATX power connector - 8 pin 12V power connector - Supports "Plug and Play" 7 AMI UEFI Legal BIOS with LED (ACT/LINK LED and SPEED LED) - PCIE x1 Gigabit LAN 10/100/1000 Mb/s - Realtek RTL8111E - HD Audio Jack: Rear Speaker...

User Manual
Page 23
... to be designated as appropriate for the second monitor. Right-click the display icon in the Display Properties dialog that you do not adjust the UEFI setup, the default value of surround display feature. Select the display icon identified by the number one monitor will always be Primary, and... PCIE1 slot. 3. Press or to apply these new values. Click the "Identify" button to set up a multi-monitor display. B. C. D. Click "Apply" or "OK" to enter UEFI setup.
... to be designated as appropriate for the second monitor. Right-click the display icon in the Display Properties dialog that you do not adjust the UEFI setup, the default value of surround display feature. Select the display icon identified by the number one monitor will always be Primary, and... PCIE1 slot. 3. Press or to apply these new values. Click the "Identify" button to set up a multi-monitor display. B. C. D. Click "Apply" or "OK" to enter UEFI setup.

User Manual
Page 36
... to SATA Hard Disks Installation and RAID Configuration", which is located in Windows® environment, please install "SATAII driver" from up UEFI. STEP 1: Set up to bottom side to SATA Hard Disks Installation and RAID Configuration", which is not supported under Windows® ...CD for RAID configuration. Therefore, the drivers you install can be auto-detected and listed on your system as well. 36 Enter UEFI SETUP UTILITY Advanced screen SATA Configuration. STEP 2: Use "RAID Installation Guide" to manage RAID functions, you install. B. Before you...
... to SATA Hard Disks Installation and RAID Configuration", which is located in Windows® environment, please install "SATAII driver" from up UEFI. STEP 1: Set up to bottom side to SATA Hard Disks Installation and RAID Configuration", which is not supported under Windows® ...CD for RAID configuration. Therefore, the drivers you install can be auto-detected and listed on your system as well. 36 Enter UEFI SETUP UTILITY Advanced screen SATA Configuration. STEP 2: Use "RAID Installation Guide" to manage RAID functions, you install. B. Before you...

User Manual
Page 37
...SATA3 HDDs without RAID functions, please follow below steps. Using SATA / SATAII / SATA3 HDDs with NCQ function STEP 1: Set up UEFI. A. Using SATA / SATAII / STA3 HDDs without NCQ function STEP 1: Set up UEFI. A. Set the option "SATA Mode" to [IDE]. Set the option "SATA Mode" to [IDE]. B. B. A. Enter... UTILITY Advanced screen SATA Configuration. Using SATA / SATAII / SATA3 HDDs without NCQ function STEP 1: Set up UEFI. Enter UEFI SETUP UTILITY Advanced screen SATA Configuration. AHCI mode is not supported under Windows® XP / XP 64-bit OS. STEP 2: ...
...SATA3 HDDs without RAID functions, please follow below steps. Using SATA / SATAII / SATA3 HDDs with NCQ function STEP 1: Set up UEFI. A. Using SATA / SATAII / STA3 HDDs without NCQ function STEP 1: Set up UEFI. A. Set the option "SATA Mode" to [IDE]. Set the option "SATA Mode" to [IDE]. B. B. A. Enter... UTILITY Advanced screen SATA Configuration. Using SATA / SATAII / SATA3 HDDs without NCQ function STEP 1: Set up UEFI. Enter UEFI SETUP UTILITY Advanced screen SATA Configuration. AHCI mode is not supported under Windows® XP / XP 64-bit OS. STEP 2: ...
User Manual
Page 38
... may also restart by pressing the reset button on the menu bar, and then press to get into the sub screen. Because the UEFI software is constantly being updated, the following selections: Main To set up the system time/date information OC Tweaker To set up overclocking features... Advanced To set up the advanced UEFI features H/W Monitor To display current hardware status Boot To set up the default system device to locate and load the Operating System Security To...
... may also restart by pressing the reset button on the menu bar, and then press to get into the sub screen. Because the UEFI software is constantly being updated, the following selections: Main To set up the system time/date information OC Tweaker To set up overclocking features... Advanced To set up the advanced UEFI features H/W Monitor To display current hardware status Boot To set up the default system device to locate and load the Operating System Security To...

User Manual
Page 39
... up the selected screen To display the General Help Screen To load optimal default values for all the settings To save changes and exit the UEFI SETUP UTILITY To jump to select items + / - 3.1.2 Navigation Keys Please check the following table for the selected items To bring up or down ...to the Exit Screen or exit the current screen 3.2 Main Screen When you enter the UEFI SETUP UTILITY, the Main screen will appear and display the system overview. 39 To change option for the function description of each navigation key....
... up the selected screen To display the General Help Screen To load optimal default values for all the settings To save changes and exit the UEFI SETUP UTILITY To jump to select items + / - 3.1.2 Navigation Keys Please check the following table for the selected items To bring up or down ...to the Exit Screen or exit the current screen 3.2 Main Screen When you enter the UEFI SETUP UTILITY, the Main screen will appear and display the system overview. 39 To change option for the function description of each navigation key....

User Manual
Page 44
...figuration, ACPI Configuration and USB Configuration. 3.4 Advanced Screen In this section, you execute ASRock Instant Flash utility, the utility will show the UEFI files and their respective information. Select the proper UEFI file to malfunction. This convenient UEFI update tool allows you can update your system after...
...figuration, ACPI Configuration and USB Configuration. 3.4 Advanced Screen In this section, you execute ASRock Instant Flash utility, the utility will show the UEFI files and their respective information. Select the proper UEFI file to malfunction. This convenient UEFI update tool allows you can update your system after...

User Manual
Page 53
...devices. The default value is [Enabled]. 53 USB devices are not allowed to use under UEFI setup and Windows / Linux OS. USB devices are allowed to use only under legacy OS and UEFI setup when [Disabled] is recommended to select [Disabled] to enable or disable legacy support... USB Support Use this option to enable or disable the use of USB 2.0 controller. Legacy USB 3.0 Support Use this option to enter OS. [UEFI Setup Only] - If you have USB compatibility issue, it is selected. 3.4.7 USB Configuration USB 2.0 Controller Use this item to below descriptions for the...
...devices. The default value is [Enabled]. 53 USB devices are not allowed to use under UEFI setup and Windows / Linux OS. USB devices are allowed to use only under legacy OS and UEFI setup when [Disabled] is recommended to select [Disabled] to enable or disable legacy support... USB Support Use this option to enable or disable the use of USB 2.0 controller. Legacy USB 3.0 Support Use this option to enter OS. [UEFI Setup Only] - If you have USB compatibility issue, it is selected. 3.4.7 USB Configuration USB 2.0 Controller Use this item to below descriptions for the...

User Manual
Page 57
... When you select this option, it will pop-out the following message, "Discard changes?" Select [OK] to save the changes and exit the UEFI SETUP UTILITY. Discard Changes When you select this option, it will pop-out the following message, "Discard changes and exit setup?" Load... UEFI Defaults Load UEFI default values for this option, it will pop-out the following message, "Save configuration changes and exit setup?" Select [OK] to Launch...
... When you select this option, it will pop-out the following message, "Discard changes?" Select [OK] to save the changes and exit the UEFI SETUP UTILITY. Discard Changes When you select this option, it will pop-out the following message, "Discard changes and exit setup?" Load... UEFI Defaults Load UEFI default values for this option, it will pop-out the following message, "Save configuration changes and exit setup?" Select [OK] to Launch...

User Manual
Page 59
...drive.) You can also press to boot. 4. Press or at system POST and choose the item "UEFI:xxx" to launch boot menu at system POST. Start Windows® installation. 5. Choose the item "UEFI:xxx" to use Windows® VistaTM 64-bit (with SP1 or above) or Windows® ...installed on a HDD Larger Than 2TB This motherboard is the device which contains your Windows® installation files. Please make sure to boot in UEFI Setup Utility > Advanced > Storage Configuration > SATA Mode. 3. Please follow below procedure to be formatted by GPT (GUID Partition Table). ...
...drive.) You can also press to boot. 4. Press or at system POST and choose the item "UEFI:xxx" to launch boot menu at system POST. Start Windows® installation. 5. Choose the item "UEFI:xxx" to use Windows® VistaTM 64-bit (with SP1 or above) or Windows® ...installed on a HDD Larger Than 2TB This motherboard is the device which contains your Windows® installation files. Please make sure to boot in UEFI Setup Utility > Advanced > Storage Configuration > SATA Mode. 3. Please follow below procedure to be formatted by GPT (GUID Partition Table). ...

User Manual
Page 60
For Windows® XP / XP 64-bit / VistaTM / VistaTM 64-bit users, if you plan to install the PCI Express graphics card for the latest information: http://www.asrock.com 60 Intel® will update the new version Rapid Storage Technology driver in advance. 2. For the new version Rapid Storage Technology driver, please check our website for video output, please set the UEFI option "IGD Multi-Monitor" to [Disabled] to disable the onboard VGA in the near future. Note 1.
For Windows® XP / XP 64-bit / VistaTM / VistaTM 64-bit users, if you plan to install the PCI Express graphics card for the latest information: http://www.asrock.com 60 Intel® will update the new version Rapid Storage Technology driver in advance. 2. For the new version Rapid Storage Technology driver, please check our website for video output, please set the UEFI option "IGD Multi-Monitor" to [Disabled] to disable the onboard VGA in the near future. Note 1.

Quick Installation Guide
Page 7
... functions - 2 x SATA3 6.0Gb/s connectors - 1 x IR header - 1 x CIR header - 1 x COM port header - 1 x HDMI_SPDIF header - 1 x Power LED header - Supports "Plug and Play" 7 ASRock Z68 Pro3 Motherboard English Front panel audio connector - 2 x USB 2.0 headers (support 4 USB 2.0 ports) - 64Mb AMI BIOS - Supports Energy Efficient Ethernet 802.3az I /O SATA3 USB3.0 Connector... BIOS Feature - PCIE x1 Gigabit LAN 10/100/1000 Mb/s - Supports LAN Cable Detection - AMI UEFI Legal BIOS with LED (ACT/LINK LED and SPEED LED) - Realtek RTL8111E -
... functions - 2 x SATA3 6.0Gb/s connectors - 1 x IR header - 1 x CIR header - 1 x COM port header - 1 x HDMI_SPDIF header - 1 x Power LED header - Supports "Plug and Play" 7 ASRock Z68 Pro3 Motherboard English Front panel audio connector - 2 x USB 2.0 headers (support 4 USB 2.0 ports) - 64Mb AMI BIOS - Supports Energy Efficient Ethernet 802.3az I /O SATA3 USB3.0 Connector... BIOS Feature - PCIE x1 Gigabit LAN 10/100/1000 Mb/s - Supports LAN Cable Detection - AMI UEFI Legal BIOS with LED (ACT/LINK LED and SPEED LED) - Realtek RTL8111E -

Quick Installation Guide
Page 29
.... A. Set the option "SATA Mode" to [IDE]. Therefore, the drivers you install can be auto-detected and listed on your system. 29 ASRock Z68 Pro3 Motherboard English B. AHCI mode is not supported under Windows® XP / XP 64-bit OS. Using SATA / SATAII / SATA3 HDDs without RAID...VistaTM / VistaTM 64-bit / XP / XP 64bit OS on your SATA / SATAII / SATA3 HDDs without RAID functions, please follow the order from up UEFI. 2.9 Driver Installation Guide To install the drivers to your system, please insert the support CD to your SATA / SATAII / SATA3 HDDs without NCQ function STEP...
.... A. Set the option "SATA Mode" to [IDE]. Therefore, the drivers you install can be auto-detected and listed on your system. 29 ASRock Z68 Pro3 Motherboard English B. AHCI mode is not supported under Windows® XP / XP 64-bit OS. Using SATA / SATAII / SATA3 HDDs without RAID...VistaTM / VistaTM 64-bit / XP / XP 64bit OS on your SATA / SATAII / SATA3 HDDs without RAID functions, please follow the order from up UEFI. 2.9 Driver Installation Guide To install the drivers to your system, please insert the support CD to your SATA / SATAII / SATA3 HDDs without NCQ function STEP...

Quick Installation Guide
Page 30
... UTILITY Advanced screen SATA Configuration. Enter UEFI SETUP UTILITY Advanced screen SATA Configuration. B. A. STEP 2: Install Windows® 7 / 7 64-bit / VistaTM / VistaTM 64-bit OS on your system. 30 ASRock Z68 Pro3 Motherboard English B. Using SATA / SATAII / STA3 HDDs without RAID functions, please..."SATA Mode" to [IDE]. Set the option "SATA Mode" to [AHCI]. Using SATA / SATAII / SATA3 HDDs with NCQ function STEP 1: Set up UEFI. 2.11.2 Installing Windows® 7 / 7 64-bit / VistaTM / VistaTM 64-bit Without RAID Functions If you want to install Windows® 7...
... UTILITY Advanced screen SATA Configuration. Enter UEFI SETUP UTILITY Advanced screen SATA Configuration. B. A. STEP 2: Install Windows® 7 / 7 64-bit / VistaTM / VistaTM 64-bit OS on your system. 30 ASRock Z68 Pro3 Motherboard English B. Using SATA / SATAII / STA3 HDDs without RAID functions, please..."SATA Mode" to [IDE]. Set the option "SATA Mode" to [AHCI]. Using SATA / SATAII / SATA3 HDDs with NCQ function STEP 1: Set up UEFI. 2.11.2 Installing Windows® 7 / 7 64-bit / VistaTM / VistaTM 64-bit Without RAID Functions If you want to install Windows® 7...

Quick Installation Guide
Page 171
...; 의 SATA2 3.0Gb/s RAID (RAID 0, RAID 1, RAID 10, RAID 5, Intel Rapid Storage 및 Intel Smart Response NCQ, AHCI 2 개 의 SATA3 6.0Gb/s 1 1 개 - GUI AMI UEFI 적합형 BIOS ACPI 1.1 SMBIOS 2.3.1 지원 171 ASRock Z68 Pro3 Motherboard 한 국 어
...; 의 SATA2 3.0Gb/s RAID (RAID 0, RAID 1, RAID 10, RAID 5, Intel Rapid Storage 및 Intel Smart Response NCQ, AHCI 2 개 의 SATA3 6.0Gb/s 1 1 개 - GUI AMI UEFI 적합형 BIOS ACPI 1.1 SMBIOS 2.3.1 지원 171 ASRock Z68 Pro3 Motherboard 한 국 어

Quick Installation Guide
Page 187
UEFI SETUP UTILITY (UEFI Advanced screen ( 고급화 면 ) → SATA Configuration B. "SATA Mode"을 [IDE 2 Windows® XP / XP 64 비트 OS 187 ASRock Z68 Pro3 Motherboard 한국어 2.7 CD CD 2.8 RAID Windows® 7 / 7 64 비트 / VistaTM / VistaTM 64 RAID SATA / SATAII / SATA3 HDD 에 Windows® 7 / 7 64- 비&#...; RAID Windows® XP / XP 64 AHCI 모드는 Windows® XP / XP 64 비트 OS NCQ SATA / SATAII / SATA3 HDD 단계 1: UEFI A.
UEFI SETUP UTILITY (UEFI Advanced screen ( 고급화 면 ) → SATA Configuration B. "SATA Mode"을 [IDE 2 Windows® XP / XP 64 비트 OS 187 ASRock Z68 Pro3 Motherboard 한국어 2.7 CD CD 2.8 RAID Windows® 7 / 7 64 비트 / VistaTM / VistaTM 64 RAID SATA / SATAII / SATA3 HDD 에 Windows® 7 / 7 64- 비&#...; RAID Windows® XP / XP 64 AHCI 모드는 Windows® XP / XP 64 비트 OS NCQ SATA / SATAII / SATA3 HDD 단계 1: UEFI A.

Quick Installation Guide
Page 188
...; / VistaTM / VistaTM 64 비트 OS 니다 . 188 ASRock Z68 Pro3 Motherboard 한 국 어 2.9.2 RAID Windows® 7 / 7 64 비트 / VistaTM / VistaTM 64 비트 설치 SATA / SATAII / SATA3 HDD 에 RAID Windows® 7 / 7 64 비트 / VistaTM / VistaTM 64 NCQ SATA / SATAII / SATA3 HDD 1: UEFI A. NCQ SATA / SATAII / SATA3 HDD...
...; / VistaTM / VistaTM 64 비트 OS 니다 . 188 ASRock Z68 Pro3 Motherboard 한 국 어 2.9.2 RAID Windows® 7 / 7 64 비트 / VistaTM / VistaTM 64 비트 설치 SATA / SATAII / SATA3 HDD 에 RAID Windows® 7 / 7 64 비트 / VistaTM / VistaTM 64 NCQ SATA / SATAII / SATA3 HDD 1: UEFI A. NCQ SATA / SATAII / SATA3 HDD...

Quick Installation Guide
Page 209
UEFI SATA B. 「SATA Mode」を [IDE 2 Windows® XP / XP 64- ビット OS 209 ASRock Z68 Pro3 Motherboard 日本語 2.7 CD CD 2.8 RAID Windows® 7 / 7 64-bit / VistaTM / VistaTM 64-bit RAID SATA / SATAII / SATA3 HDD に Windows® 7 / 7 64 VistaTM / ...; Windows® XP / XP 64-bit ビット OS Windows® XP / XP 64-bit OS では AHCI NCQ SATA / SATAII / SATA3 HDD 1 UEFI。 A.
UEFI SATA B. 「SATA Mode」を [IDE 2 Windows® XP / XP 64- ビット OS 209 ASRock Z68 Pro3 Motherboard 日本語 2.7 CD CD 2.8 RAID Windows® 7 / 7 64-bit / VistaTM / VistaTM 64-bit RAID SATA / SATAII / SATA3 HDD に Windows® 7 / 7 64 VistaTM / ...; Windows® XP / XP 64-bit ビット OS Windows® XP / XP 64-bit OS では AHCI NCQ SATA / SATAII / SATA3 HDD 1 UEFI。 A.


