User Manual
Page 5
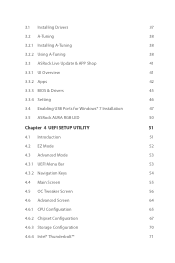
3.1 Installing Drivers 37 3.2 A-Tuning 38 3.2.1 Installing A-Tuning 38 3.2.2 Using A-Tuning 38 3.3 ASRock Live Update & APP Shop 41 3.3.1 UI Overview 41 3.3.2 Apps 42 3.3.3 BIOS & Drivers 45 3.3.4 Setting 46 3.4 Enabling USB Ports for Windows® 7 Installation 47 3.5 ASRock AURA RGB LED 50 Chapter 4 UEFI SETUP UTILITY 51 4.1 Introduction 51 4.2 EZ Mode 52 4.3 Advanced Mode 53 4.3.1 UEFI Menu...
3.1 Installing Drivers 37 3.2 A-Tuning 38 3.2.1 Installing A-Tuning 38 3.2.2 Using A-Tuning 38 3.3 ASRock Live Update & APP Shop 41 3.3.1 UI Overview 41 3.3.2 Apps 42 3.3.3 BIOS & Drivers 45 3.3.4 Setting 46 3.4 Enabling USB Ports for Windows® 7 Installation 47 3.5 ASRock AURA RGB LED 50 Chapter 4 UEFI SETUP UTILITY 51 4.1 Introduction 51 4.2 EZ Mode 52 4.3 Advanced Mode 53 4.3.1 UEFI Menu...

User Manual
Page 7
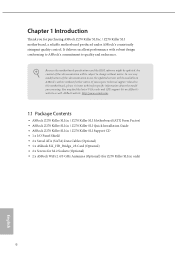
... • ASRock Z270 Killer SLI/ac / Z270 Killer SLI Motherboard (ATX Form Factor) • ASRock Z270 Killer SLI/ac / Z270 Killer SLI Quick Installation Guide • ASRock Z270 Killer SLI/ac / Z270 Killer SLI Support CD • 1 x I/O Panel Shield • 2 x Serial ATA (SATA) Data Cables (Optional) • 1 x ASRock SLI_HB_Bridge_2S Card (Optional) • 2 x Screws for M.2 Sockets (Optional) • 2 x ASRock WiFi 2.4/5 GHz Antennas (Optional) (for Z270 Killer SLI/ac only) 1 English Because the motherboard specifications and the BIOS software might be updated, the content...
... • ASRock Z270 Killer SLI/ac / Z270 Killer SLI Motherboard (ATX Form Factor) • ASRock Z270 Killer SLI/ac / Z270 Killer SLI Quick Installation Guide • ASRock Z270 Killer SLI/ac / Z270 Killer SLI Support CD • 1 x I/O Panel Shield • 2 x Serial ATA (SATA) Data Cables (Optional) • 1 x ASRock SLI_HB_Bridge_2S Card (Optional) • 2 x Screws for M.2 Sockets (Optional) • 2 x ASRock WiFi 2.4/5 GHz Antennas (Optional) (for Z270 Killer SLI/ac only) 1 English Because the motherboard specifications and the BIOS software might be updated, the content...
User Manual
Page 12
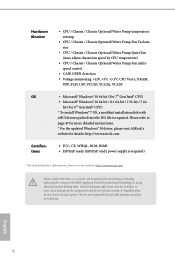
...may affect your system's stability, or even cause damage to page 47 for more detailed instructions. * For the updated Windows® 10 driver, please visit ASRock's website for possible damage caused by CPU temperature) • CPU / Chassis / Chassis Optional/Water Pump Fan ... Intel® CPU) * To install Windows® 7 OS, a modified installation disk with overclocking, including adjusting the setting in the BIOS, applying Untied Overclocking Technology, or using third-party overclocking tools. English 6 Please refer to the components and devices of your own risk and expense...
...may affect your system's stability, or even cause damage to page 47 for more detailed instructions. * For the updated Windows® 10 driver, please visit ASRock's website for possible damage caused by CPU temperature) • CPU / Chassis / Chassis Optional/Water Pump Fan ... Intel® CPU) * To install Windows® 7 OS, a modified installation disk with overclocking, including adjusting the setting in the BIOS, applying Untied Overclocking Technology, or using third-party overclocking tools. English 6 Please refer to the components and devices of your own risk and expense...

User Manual
Page 28
If no jumper cap is placed on CLRMOS1 for 15 seconds, use a jumper cap to clear the CMOS when you just finish updating the BIOS, you must boot up the system first, and then shut it down before you to default setup, please turn off the computer and unplug the ... cap is placed on the pins, the jumper is "Short". To clear and reset the system parameters to clear the data in CMOS. If you update the BIOS. However, please do the clear-CMOS action.
If no jumper cap is placed on CLRMOS1 for 15 seconds, use a jumper cap to clear the CMOS when you just finish updating the BIOS, you must boot up the system first, and then shut it down before you to default setup, please turn off the computer and unplug the ... cap is placed on the pins, the jumper is "Short". To clear and reset the system parameters to clear the data in CMOS. If you update the BIOS. However, please do the clear-CMOS action.
User Manual
Page 51
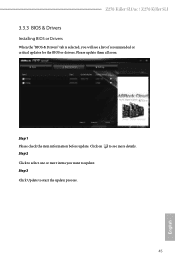
Step 3 Click Update to see a list of recommended or critical updates for the BIOS or drivers. Click on Step 2 to start the update process. 45 English Click to select one or more items you will see more details. Z270 Killer SLI/ac / Z270 Killer SLI 3.3.3 BIOS & Drivers Installing BIOS or Drivers When the "BIOS & Drivers" tab is selected, you want to update. Step 1 Please check the item information before update. Please update them all soon.
Step 3 Click Update to see a list of recommended or critical updates for the BIOS or drivers. Click on Step 2 to start the update process. 45 English Click to select one or more items you will see more details. Z270 Killer SLI/ac / Z270 Killer SLI 3.3.3 BIOS & Drivers Installing BIOS or Drivers When the "BIOS & Drivers" tab is selected, you want to update. Step 1 Please check the item information before update. Please update them all soon.

User Manual
Page 84
... (Auto IP), Auto ASRock Internet Flash downloads and updates the latest UEFI firmware version from our servers for the Boot Manager. Boot Manager Timeout Enable/disable the Boot Manager Timeout. Internet Flash - Instant Flash Save UEFI files in your UEFI. Please setup network configuration before using Internet Flash. *For BIOS backup and recovery... of seconds to wait for you. Boot Manager Boot Manager is recommended to plug in your USB storage device and run Instant Flash to update your USB pen drive before using this tool. Boot Manager Enable/disable the Boot Manager.
... (Auto IP), Auto ASRock Internet Flash downloads and updates the latest UEFI firmware version from our servers for the Boot Manager. Boot Manager Timeout Enable/disable the Boot Manager Timeout. Internet Flash - Instant Flash Save UEFI files in your UEFI. Please setup network configuration before using Internet Flash. *For BIOS backup and recovery... of seconds to wait for you. Boot Manager Boot Manager is recommended to plug in your USB storage device and run Instant Flash to update your USB pen drive before using this tool. Boot Manager Enable/disable the Boot Manager.
Quick Installation Guide
Page 8
... motherboard specifications and the BIOS software might be updated, the content of this documentation occur, the updated version will be available on ASRock's website as well. If you for purchasing ASRock Z270 Killer SLI/ac / Z270 Killer SLI motherboard, a reliable motherboard produced under ASRock's consistently stringent quality control. In case any modifications of this motherboard, please visit our website for Z270 Killer SLI/ac only) 6 English You...
... motherboard specifications and the BIOS software might be updated, the content of this documentation occur, the updated version will be available on ASRock's website as well. If you for purchasing ASRock Z270 Killer SLI/ac / Z270 Killer SLI motherboard, a reliable motherboard produced under ASRock's consistently stringent quality control. In case any modifications of this motherboard, please visit our website for Z270 Killer SLI/ac only) 6 English You...
Quick Installation Guide
Page 13
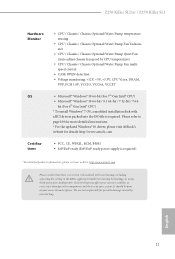
... or even cause damage to page 169 for more detailed instructions. * For the updated Windows® 10 driver, please visit ASRock's website for possible damage caused by CPU temperature) • CPU / Chassis ...is required) * For detailed product information, please visit our website: http://www.asrock.com Please realize that there is required. Z270 Killer SLI/ac / Z270 Killer SLI Hardware Monitor OS Certifications • CPU / Chassis / Chassis Optional/Water Pump ... the setting in the BIOS, applying Untied Overclocking Technology, or using third-party overclocking tools. English 11
... or even cause damage to page 169 for more detailed instructions. * For the updated Windows® 10 driver, please visit ASRock's website for possible damage caused by CPU temperature) • CPU / Chassis ...is required) * For detailed product information, please visit our website: http://www.asrock.com Please realize that there is required. Z270 Killer SLI/ac / Z270 Killer SLI Hardware Monitor OS Certifications • CPU / Chassis / Chassis Optional/Water Pump ... the setting in the BIOS, applying Untied Overclocking Technology, or using third-party overclocking tools. English 11

Quick Installation Guide
Page 24
Clear CMOS Jumper (CLRMOS1) (see p.1, No. 19) Default Clear CMOS CLRMOS1 allows you update the BIOS. The illustration shows a 3-pin jumper whose pin1 and pin2 are setup. However, please do the clear-CMOS action. If no jumper cap is placed on ... cap to short pin2 and pin3 on the pins, the jumper is "Short". If you need to clear the CMOS when you just finish updating the BIOS, you must boot up the system first, and then shut it down before you do not clear the CMOS right after you to default setup...
Clear CMOS Jumper (CLRMOS1) (see p.1, No. 19) Default Clear CMOS CLRMOS1 allows you update the BIOS. The illustration shows a 3-pin jumper whose pin1 and pin2 are setup. However, please do the clear-CMOS action. If no jumper cap is placed on ... cap to short pin2 and pin3 on the pins, the jumper is "Short". If you need to clear the CMOS when you just finish updating the BIOS, you must boot up the system first, and then shut it down before you do not clear the CMOS right after you to default setup...


