Quick Installation Guide
Page 8
... and the BIOS software might be updated, the content of this documentation occur, the updated version will be subject to this documentation will be available on ASRock's website as well. It delivers excellent performance with robust design conforming to ASRock's commitment to DisplayPort Cable (Optional) • 2 x Screws for M.2 Socket (Optional) • 2 x Standoffs for purchasing ASRock X570 Creator motherboard...
... and the BIOS software might be updated, the content of this documentation occur, the updated version will be subject to this documentation will be available on ASRock's website as well. It delivers excellent performance with robust design conforming to ASRock's commitment to DisplayPort Cable (Optional) • 2 x Screws for M.2 Socket (Optional) • 2 x Standoffs for purchasing ASRock X570 Creator motherboard...

Quick Installation Guide
Page 34
X570 Creator 2.5 Jumpers Setup The illustration shows how jumpers are setup. Clear CMOS Jumper (CLRCMOS1) (see p.1, No. 22) 2-pin Jumper Short: Clear CMOS Open: Default CLRCMOS1 allows .... When the jumper cap is placed on the pins, the jumper is "Short". If you need to clear the CMOS when you just finish updating the BIOS, you must boot up the system first, and then shut it down before you to clear the data in CMOS includes system setup information such...
X570 Creator 2.5 Jumpers Setup The illustration shows how jumpers are setup. Clear CMOS Jumper (CLRCMOS1) (see p.1, No. 22) 2-pin Jumper Short: Clear CMOS Open: Default CLRCMOS1 allows .... When the jumper cap is placed on the pins, the jumper is "Short". If you need to clear the CMOS when you just finish updating the BIOS, you must boot up the system first, and then shut it down before you to clear the data in CMOS includes system setup information such...

Quick Installation Guide
Page 42
X570 Creator BIOS Flashback Button (BIOS_FB1) (see p.3, No. 19) BIOS Flashback Button allows users to blink. 8. Rename the file to "creative.rom" and save it to the USB BIOS Flashback port. Then plug your USB flash drive. Then the LED starts to flash the BIOS. English USB BIOS... Flashback port 39 Plug the 24 pin power connector to update BIOS without powering on the system, even without CPU. Wait until the LED stops blinking, indicating that BIOS.... Extract BIOS file from ASRock's website : http://www.asrock.com. 2. ASRock BIOS Flashback feature...
X570 Creator BIOS Flashback Button (BIOS_FB1) (see p.3, No. 19) BIOS Flashback Button allows users to blink. 8. Rename the file to "creative.rom" and save it to the USB BIOS Flashback port. Then plug your USB flash drive. Then the LED starts to flash the BIOS. English USB BIOS... Flashback port 39 Plug the 24 pin power connector to update BIOS without powering on the system, even without CPU. Wait until the LED stops blinking, indicating that BIOS.... Extract BIOS file from ASRock's website : http://www.asrock.com. 2. ASRock BIOS Flashback feature...

User Manual
Page 6
...) 59 Chapter 3 Software and Utilities Operation 62 3.1 Installing Drivers 62 3.2 A-Tuning 63 3.2.1 Installing A-Tuning 63 3.2.2 Using A-Tuning 63 3.3 ASRock Live Update & APP Shop 66 3.3.1 UI Overview 66 3.3.2 Apps 67 3.3.3 BIOS & Drivers 70 3.3.4 Setting 71 3.4 ASRock Polychrome SYNC 72 Chapter 4 UEFI SETUP UTILITY 75 4.1 Introduction 75 4.1.1 UEFI Menu Bar 75 4.1.2 Navigation Keys 76 4.2 Main Screen...
...) 59 Chapter 3 Software and Utilities Operation 62 3.1 Installing Drivers 62 3.2 A-Tuning 63 3.2.1 Installing A-Tuning 63 3.2.2 Using A-Tuning 63 3.3 ASRock Live Update & APP Shop 66 3.3.1 UI Overview 66 3.3.2 Apps 67 3.3.3 BIOS & Drivers 70 3.3.4 Setting 71 3.4 ASRock Polychrome SYNC 72 Chapter 4 UEFI SETUP UTILITY 75 4.1 Introduction 75 4.1.1 UEFI Menu Bar 75 4.1.2 Navigation Keys 76 4.2 Main Screen...
User Manual
Page 8
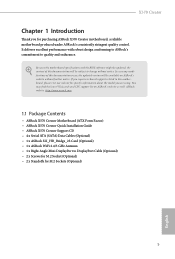
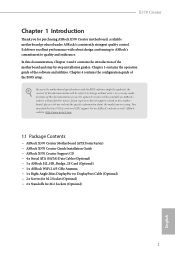
...modifications of the BIOS setup. It delivers excellent performance with robust design conforming to ASRock's commitment to DisplayPort Cable (Optional) • 2 x Screws for M.2 Socket (Optional) • 2 x Standoffs for purchasing ASRock X570 Creator motherboard, a reliable motherboard produced under ASRock's consistently stringent ...cards and CPU support list on ASRock's website without notice. Because the motherboard specifications and the BIOS software might be subject to this documentation occur, the updated version will be updated, the content of this documentation, ...
...modifications of the BIOS setup. It delivers excellent performance with robust design conforming to ASRock's commitment to DisplayPort Cable (Optional) • 2 x Screws for M.2 Socket (Optional) • 2 x Standoffs for purchasing ASRock X570 Creator motherboard, a reliable motherboard produced under ASRock's consistently stringent ...cards and CPU support list on ASRock's website without notice. Because the motherboard specifications and the BIOS software might be subject to this documentation occur, the updated version will be updated, the content of this documentation, ...

User Manual
Page 40
If you need to clear the CMOS when you just finish updating the BIOS, you must boot up the system first, and then shut it down before you to clear the data in CMOS includes system setup information such ...: Clear CMOS Open: Default CLRCMOS1 allows you do the clear-CMOS action. Please remember to short the pins on the pins, the jumper is "Short". X570 Creator 2.6 Jumpers Setup The illustration shows how jumpers are setup. If no jumper cap is placed on CLRCMOS1 for 3 seconds. To clear and reset the system...
If you need to clear the CMOS when you just finish updating the BIOS, you must boot up the system first, and then shut it down before you to clear the data in CMOS includes system setup information such ...: Clear CMOS Open: Default CLRCMOS1 allows you do the clear-CMOS action. Please remember to short the pins on the pins, the jumper is "Short". X570 Creator 2.6 Jumpers Setup The illustration shows how jumpers are setup. If no jumper cap is placed on CLRCMOS1 for 3 seconds. To clear and reset the system...

User Manual
Page 49
... is not operating properly. Download the latest BIOS file from the zip file. 4. Extract BIOS file from ASRock's website : http://www.asrock.com. 2. Then the LED starts to flash the BIOS. Please make sure that the BIOS Flashback is no need to update BIOS without powering on the system. 6. English USB BIOS Flashback port 42 Wait until the LED...
... is not operating properly. Download the latest BIOS file from the zip file. 4. Extract BIOS file from ASRock's website : http://www.asrock.com. 2. Then the LED starts to flash the BIOS. Please make sure that the BIOS Flashback is no need to update BIOS without powering on the system. 6. English USB BIOS Flashback port 42 Wait until the LED...

User Manual
Page 77
Click to select one or more details. Step 1 Please check the item information before update. 3.3.3 BIOS & Drivers Installing BIOS or Drivers When the "BIOS & Drivers" tab is selected, you want to update. Please update them all soon. Click on Step 2 to start the update process. 70 English Step 3 Click Update to see more items you will see a list of recommended or critical updates for the BIOS or drivers.
Click to select one or more details. Step 1 Please check the item information before update. 3.3.3 BIOS & Drivers Installing BIOS or Drivers When the "BIOS & Drivers" tab is selected, you want to update. Please update them all soon. Click on Step 2 to start the update process. 70 English Step 3 Click Update to see more items you will see a list of recommended or critical updates for the BIOS or drivers.


