RAID Installation Guide
Page 1
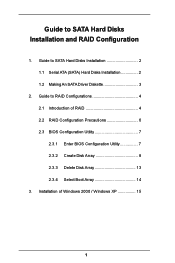
Installation of RAID 4 2.2 RAID Configuration Precautions 6 2.3 BIOS Configuration Utility 7 2.3.1 Enter BIOS Configuration Utility 7 2.3.2 Create Disk Array 8 2.3.3 Delete Disk Array 13 2.3.4 Select Boot Array 14 3. Guide to RAID Configurations 4 2.1 Introduction of Windows 2000 / Windows XP 15 1 Guide to SATA Hard Disks Installation 2 1.1 Serial ATA (SATA) Hard Disks Installation 2 1.2 Making An SATA Driver Diskette 3 2. Guide to SATA Hard Disks Installation and RAID Configuration 1.
Installation of RAID 4 2.2 RAID Configuration Precautions 6 2.3 BIOS Configuration Utility 7 2.3.1 Enter BIOS Configuration Utility 7 2.3.2 Create Disk Array 8 2.3.3 Delete Disk Array 13 2.3.4 Select Boot Array 14 3. Guide to RAID Configurations 4 2.1 Introduction of Windows 2000 / Windows XP 15 1 Guide to SATA Hard Disks Installation 2 1.1 Serial ATA (SATA) Hard Disks Installation 2 1.2 Making An SATA Driver Diskette 3 2. Guide to SATA Hard Disks Installation and RAID Configuration 1.

RAID Installation Guide
Page 3
... key, and then a window for boot devices selection appears. STEP 5: The system will need to make an SATA driver diskette before you install the OS. STEP 1: Insert the ASRock Support CD into your optical drive to boot your system. (Do NOT insert any floppy diskette into the floppy drive.... diskette will see the message on your SATA HDDs, you will start the OS installation. WARNING! 1.2 Making An SATA Driver Diskette If you want to generate Serial ATA driver diskette [YN]?", press . You may start to install Windows 2000 / Windows XP on your system directly without setting the...
... key, and then a window for boot devices selection appears. STEP 5: The system will need to make an SATA driver diskette before you install the OS. STEP 1: Insert the ASRock Support CD into your optical drive to boot your system. (Do NOT insert any floppy diskette into the floppy drive.... diskette will see the message on your SATA HDDs, you will start the OS installation. WARNING! 1.2 Making An SATA Driver Diskette If you want to generate Serial ATA driver diskette [YN]?", press . You may start to install Windows 2000 / Windows XP on your system directly without setting the...

RAID Installation Guide
Page 15
At this moment, please press key and the following information will see the message at the bottom of Windows 2000 or Windows XP, please insert Windows 2000 or Windows XP CD into the optical drive. Installation of Windows 2000 / Windows XP For the installation of the screen, "Press F6 if you need to install a third party SCSI or RAID driver...." Then remove the floppy diskette, and reboot the system. At the very beginning, you will ap p ea r. 15 3.
At this moment, please press key and the following information will see the message at the bottom of Windows 2000 or Windows XP, please insert Windows 2000 or Windows XP CD into the optical drive. Installation of Windows 2000 / Windows XP For the installation of the screen, "Press F6 if you need to install a third party SCSI or RAID driver...." Then remove the floppy diskette, and reboot the system. At the very beginning, you will ap p ea r. 15 3.
RAID Installation Guide
Page 16
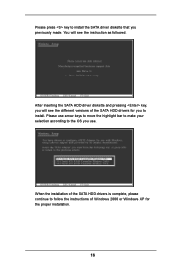
When the installation of the SATA HDD drivers is complete, please continue to follow the instructions of the SATA HDD drivers for the proper installation. 16 Please use . After inserting the SATA HDD driver diskette and pressing key, you will see the different versions of Windows 2000 or Windows XP for you use arrow keys to move the highlight bar to make your selection according to the OS you to install the SATA driver diskette that you previously made. You will see the instruction as followed. Please press key to install.
When the installation of the SATA HDD drivers is complete, please continue to follow the instructions of the SATA HDD drivers for the proper installation. 16 Please use . After inserting the SATA HDD driver diskette and pressing key, you will see the different versions of Windows 2000 or Windows XP for you use arrow keys to move the highlight bar to make your selection according to the OS you to install the SATA driver diskette that you previously made. You will see the instruction as followed. Please press key to install.
User Manual
Page 3
... 32 3.5.1 Boot Settings Configuration 33 3.5.2 Boot Device Priority 33 3.6 Security Screen 34 3.7 Exit Screen 35 3 Contents 1. Introduction 5 1.1 Package Contents 5 1.2 Specifications 6 1.3 Motherboard Layout 8 1.4 ASRock I/O Plus 9 TM 2. Installation 10 Pre-installation Precautions 10 2.1 CPU Installation 11 2.2 Installation of CPU Fan and Heatsink 11 2.3 Installation of Memory Modules (DIMM 12 2.4 Expansion... Connectors 16 2.7 Serial ATA (SATA) Hard Disks Installation 19 2.8 Hot Plug and Hot Swap Functions for SATA HDDs ....... 19 2.9 Making An SATA Driver Diskette 20 3.
... 32 3.5.1 Boot Settings Configuration 33 3.5.2 Boot Device Priority 33 3.6 Security Screen 34 3.7 Exit Screen 35 3 Contents 1. Introduction 5 1.1 Package Contents 5 1.2 Specifications 6 1.3 Motherboard Layout 8 1.4 ASRock I/O Plus 9 TM 2. Installation 10 Pre-installation Precautions 10 2.1 CPU Installation 11 2.2 Installation of CPU Fan and Heatsink 11 2.3 Installation of Memory Modules (DIMM 12 2.4 Expansion... Connectors 16 2.7 Serial ATA (SATA) Hard Disks Installation 19 2.8 Hot Plug and Hot Swap Functions for SATA HDDs ....... 19 2.9 Making An SATA Driver Diskette 20 3.
User Manual
Page 4
4. Software Support 36 4.1 Install Operating System 36 4.2 Support CD Information 36 4.2.1 Running Support CD 36 4.2.2 Drivers Menu 36 4.2.3 Utilities Menu 36 4.2.4 Contact Information 36 4
4. Software Support 36 4.1 Install Operating System 36 4.2 Support CD Information 36 4.2.1 Running Support CD 36 4.2.2 Drivers Menu 36 4.2.3 Utilities Menu 36 4.2.4 Contact Information 36 4
User Manual
Page 20
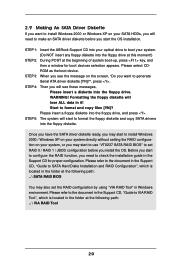
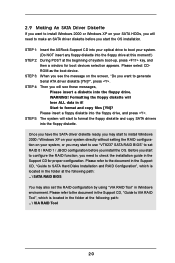
...to the document in the folder at the following path: .. \ SATA RAID BIOS You may start the OS installation. Once you have the SATA driver diskette ready, you may start to boot your system. (Do NOT insert any floppy diskette into the floppy diskette. Please select CDROM as the ...", which is located in the folder at the beginning of system boot-up, press key, and then a window for proper configuration. STEP 1: Insert the ASRock Support CD into your system, or you may also set RAID 0 / RAID 1 / JBOD configuration before you install the OS. Before you start to ...
...to the document in the folder at the following path: .. \ SATA RAID BIOS You may start the OS installation. Once you have the SATA driver diskette ready, you may start to boot your system. (Do NOT insert any floppy diskette into the floppy diskette. Please select CDROM as the ...", which is located in the folder at the beginning of system boot-up, press key, and then a window for proper configuration. STEP 1: Insert the ASRock Support CD into your system, or you may also set RAID 0 / RAID 1 / JBOD configuration before you install the OS. Before you start to ...
User Manual
Page 36
... setup procedures in this chapter for further information. 36 or you need to contact ASRock or want to display the menus. 4.2.2 Drivers Menu The Drivers Menu shows the available devices drivers if the system detects installed devices. The CD automatically displays the Main Menu if ...CD Information The Support CD that came with the motherboard contains necessary drivers and useful utilities that the motherboard supports. Refer to visit ASRock's website at http://www.asrock.com; Please install the necessary drivers to activate the devices. 4.2.3 Utilities Menu The Utilities Menu shows the...
... setup procedures in this chapter for further information. 36 or you need to contact ASRock or want to display the menus. 4.2.2 Drivers Menu The Drivers Menu shows the available devices drivers if the system detects installed devices. The CD automatically displays the Main Menu if ...CD Information The Support CD that came with the motherboard contains necessary drivers and useful utilities that the motherboard supports. Refer to visit ASRock's website at http://www.asrock.com; Please install the necessary drivers to activate the devices. 4.2.3 Utilities Menu The Utilities Menu shows the...
Quick Installation Guide
Page 16
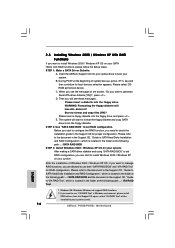
... a floppy diskette into your optical drive to boot your system. After making a SATA driver diskette and using "SATA RAID BIOS" to set RAID configuration. A. Please select CDROM as well. 16 ASRock P4V88/P4V88+ Motherboard English STEP 2: Use "SATA RAID BIOS" to set RAID configuration, you can...is located in the Support CD for RAID configuration. C. Before you start to format the floppy diskette and copy SATA drivers into the floppy drive. Insert the ASRock Support CD into the floppy drive, and press . D. Start to format and copy files [YN]? B. E. STEP 1:...
... a floppy diskette into your optical drive to boot your system. After making a SATA driver diskette and using "SATA RAID BIOS" to set RAID configuration. A. Please select CDROM as well. 16 ASRock P4V88/P4V88+ Motherboard English STEP 2: Use "SATA RAID BIOS" to set RAID configuration, you can...is located in the Support CD for RAID configuration. C. Before you start to format the floppy diskette and copy SATA drivers into the floppy drive. Insert the ASRock Support CD into the floppy drive, and press . D. Start to format and copy files [YN]? B. E. STEP 1:...
Quick Installation Guide
Page 17
...] to [non-RAID]. B. STEP 2: Install Windows 2000 / XP OS on your system. After setting up RAID functions, there is no need to make a SATA driver diskette. 17 ASRock P4V88/P4V88+ Motherboard English STEP 1: Set Up BIOS. STEP 1: Install Windows 98 / ME OS on your system. You can start to install Windows 98 / ME on...
...] to [non-RAID]. B. STEP 2: Install Windows 2000 / XP OS on your system. After setting up RAID functions, there is no need to make a SATA driver diskette. 17 ASRock P4V88/P4V88+ Motherboard English STEP 1: Set Up BIOS. STEP 1: Install Windows 98 / ME OS on your system. You can start to install Windows 98 / ME on...
Quick Installation Guide
Page 18
...: 98 SE/ ME / 2000 / XP. To begin using the Support CD, insert the CD into your computer. otherwise, POST continues with the motherboard contains necessary drivers and useful utilities that came with its various sub-menus and to enter BIOS Setup utility; The BIOS Setup program is designed to the User..., locate and double-click on the file "ASSETUP.EXE" from the BIN folder in the Support CD. 4. When you wish to display the menus. 18 ASRock P4V88/P4V88+ Motherboard English 3. BIOS Information The Flash Memory on the system chassis.
...: 98 SE/ ME / 2000 / XP. To begin using the Support CD, insert the CD into your computer. otherwise, POST continues with the motherboard contains necessary drivers and useful utilities that came with its various sub-menus and to enter BIOS Setup utility; The BIOS Setup program is designed to the User..., locate and double-click on the file "ASSETUP.EXE" from the BIN folder in the Support CD. 4. When you wish to display the menus. 18 ASRock P4V88/P4V88+ Motherboard English 3. BIOS Information The Flash Memory on the system chassis.
User Manual
Page 3
...Screen 32 3.5.1 Boot Settings Configuration 33 3.5.2 Boot Device Priority 33 3.6 Security Screen 34 3.7 Exit Screen 35 3 Introduction 5 1.1 Package Contents 5 1.2 Specifications 6 1.3 Motherboard Layout 8 1.4 ASRock I/O Plus 9 TM 2. Installation 10 Pre-installation Precautions 10 2.1 CPU Installation 11 2.2 Installation of CPU Fan and Heatsink 11 2.3 Installation of Memory Modules (DIMM 12 2.4 Expansion... 16 2.7 Serial ATA (SATA) Hard Disks Installation 19 2.8 Hot Plug and Hot Swap Functions for SATA HDDs ....... 19 2.9 Making An SATA Driver Diskette 20 3. Contents 1.
...Screen 32 3.5.1 Boot Settings Configuration 33 3.5.2 Boot Device Priority 33 3.6 Security Screen 34 3.7 Exit Screen 35 3 Introduction 5 1.1 Package Contents 5 1.2 Specifications 6 1.3 Motherboard Layout 8 1.4 ASRock I/O Plus 9 TM 2. Installation 10 Pre-installation Precautions 10 2.1 CPU Installation 11 2.2 Installation of CPU Fan and Heatsink 11 2.3 Installation of Memory Modules (DIMM 12 2.4 Expansion... 16 2.7 Serial ATA (SATA) Hard Disks Installation 19 2.8 Hot Plug and Hot Swap Functions for SATA HDDs ....... 19 2.9 Making An SATA Driver Diskette 20 3. Contents 1.
User Manual
Page 4
4. Software Support 36 4.1 Install Operating System 36 4.2 Support CD Information 36 4.2.1 Running Support CD 36 4.2.2 Drivers Menu 36 4.2.3 Utilities Menu 36 4.2.4 ASRock "PC-DIY Live Demo" Program 36 4.2.5 Contact Information 36 4
4. Software Support 36 4.1 Install Operating System 36 4.2 Support CD Information 36 4.2.1 Running Support CD 36 4.2.2 Drivers Menu 36 4.2.3 Utilities Menu 36 4.2.4 ASRock "PC-DIY Live Demo" Program 36 4.2.5 Contact Information 36 4
User Manual
Page 20
STEP 1: Insert the ASRock Support CD into your optical drive to boot your system. (Do NOT insert any floppy diskette into the floppy drive. WARNING! Before you start to configure the RAID function, you need to make an SATA driver diskette before you start to format and copy files [YN]? STEP 3: ...the document in the Support CD, "Guide to set the RAID configuration by using "VIA RAID Tool" in it! Once you have the SATA driver diskette ready, you may start to install Windows 2000 / Windows XP on your system directly without setting the RAID configuration on your system, or ...
STEP 1: Insert the ASRock Support CD into your optical drive to boot your system. (Do NOT insert any floppy diskette into the floppy drive. WARNING! Before you start to configure the RAID function, you need to make an SATA driver diskette before you start to format and copy files [YN]? STEP 3: ...the document in the Support CD, "Guide to set the RAID configuration by using "VIA RAID Tool" in it! Once you have the SATA driver diskette ready, you may start to install Windows 2000 / Windows XP on your system directly without setting the RAID configuration on your system, or ...
User Manual
Page 36
... file through the following path: ..\ MPEGAV \ AVSEQ01.DAT To see this chapter for more about ASRock, welcome to display the menus. 4.2.2 Drivers Menu The Drivers Menu shows the available devices drivers if the system detects installed devices. Click on the file "ASSETUP.EXE" from the BIN folder in... the Support CD to visit ASRock's website at http://www.asrock.com; or you need to contact ASRock or want to know...
... file through the following path: ..\ MPEGAV \ AVSEQ01.DAT To see this chapter for more about ASRock, welcome to display the menus. 4.2.2 Drivers Menu The Drivers Menu shows the available devices drivers if the system detects installed devices. Click on the file "ASSETUP.EXE" from the BIN folder in... the Support CD to visit ASRock's website at http://www.asrock.com; or you need to contact ASRock or want to know...


