User Manual
Page 3
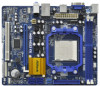
Introduction 5 1.1 Package Contents 5 1.2 Specifications 6 1.3 Motherboard Layout (N68-VGS3 FX / N68-VS3 FX 11 1.4 I/O Panel (N68-VGS3 FX 12 1.5 I/O Panel (N68-VS3 FX 13 2 . Contents 1 . BIOS SETUP UTILITY 30 3.1 Introduction 30 3.1.1 BIOS Menu Bar 30 3.1.2 Navigation Keys 31 3.2 Main Screen 31 3.3 OC Tweaker... Hot Plug and Hot Swap Functions for SATA / SATAII HDDs .... 25 2.11 SATA / SATAII HDD Hot Plug Feature and Operation Guide ..... 26 2.12 Driver Installation Guide 28 2.13 Installing Windows® 7 / 7 64-bit / VistaTM / VistaTM 64-bit / XP / XP 64-bit Without RAID Functions...
Introduction 5 1.1 Package Contents 5 1.2 Specifications 6 1.3 Motherboard Layout (N68-VGS3 FX / N68-VS3 FX 11 1.4 I/O Panel (N68-VGS3 FX 12 1.5 I/O Panel (N68-VS3 FX 13 2 . Contents 1 . BIOS SETUP UTILITY 30 3.1 Introduction 30 3.1.1 BIOS Menu Bar 30 3.1.2 Navigation Keys 31 3.2 Main Screen 31 3.3 OC Tweaker... Hot Plug and Hot Swap Functions for SATA / SATAII HDDs .... 25 2.11 SATA / SATAII HDD Hot Plug Feature and Operation Guide ..... 26 2.12 Driver Installation Guide 28 2.13 Installing Windows® 7 / 7 64-bit / VistaTM / VistaTM 64-bit / XP / XP 64-bit Without RAID Functions...
User Manual
Page 4
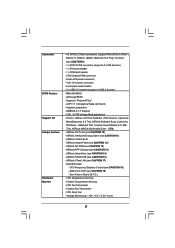
Software Support 50 4.1 Install Operating System 50 4.2 Support CD Information 50 4.2.1 Running Support CD 50 4.2.2 Drivers Menu 50 4.2.3 Utilities Menu 50 4.2.4 Contact Information 50 4 3.4.7 USB Configuration 45 3.5 Hardware Health Event Monitoring Screen 46 3.6 Boot Screen 47 3.6.1 Boot Settings Configuration 47 3.7 Security Screen 48 3.8 Exit Screen 49 4 .
Software Support 50 4.1 Install Operating System 50 4.2 Support CD Information 50 4.2.1 Running Support CD 50 4.2.2 Drivers Menu 50 4.2.3 Utilities Menu 50 4.2.4 Contact Information 50 4 3.4.7 USB Configuration 45 3.5 Hardware Health Event Monitoring Screen 46 3.6 Boot Screen 47 3.6.1 Boot Settings Configuration 47 3.7 Security Screen 48 3.8 Exit Screen 49 4 .
User Manual
Page 7
... 1.1 Compliance Wake Up Events - SMBIOS 2.3.1 Support - CPU, VCCM Voltage Multi-adjustment - ASRock OC DNA (see CAUTION 19) - ASRock APP Charger (see CAUTION 16) - ASRock XFast USB (see CAUTION 14) - Hybrid Booster: - CPU Fan Tachometer - CPU Quiet ...(support 4 USB 2.0 ports) - 8Mb AMI BIOS - Drivers, Utilities, AntiVirus Software (Trial Version), CyberLink MediaEspresso 6.5 Trial, ASRock Software Suite (CyberLink DVD Suite - OEM and Trial; Creative Sound Blaster X-Fi MB Trial; ASRock MAGIX Multimedia Suite - OEM) - ASRock Instant Flash (see CAUTION 9) - 1 x ATA133 IDE ...
... 1.1 Compliance Wake Up Events - SMBIOS 2.3.1 Support - CPU, VCCM Voltage Multi-adjustment - ASRock OC DNA (see CAUTION 19) - ASRock APP Charger (see CAUTION 16) - ASRock XFast USB (see CAUTION 14) - Hybrid Booster: - CPU Fan Tachometer - CPU Quiet ...(support 4 USB 2.0 ports) - 8Mb AMI BIOS - Drivers, Utilities, AntiVirus Software (Trial Version), CyberLink MediaEspresso 6.5 Trial, ASRock Software Suite (CyberLink DVD Suite - OEM and Trial; Creative Sound Blaster X-Fi MB Trial; ASRock MAGIX Multimedia Suite - OEM) - ASRock Instant Flash (see CAUTION 9) - 1 x ATA133 IDE ...
User Manual
Page 10
.... With APP Charger driver installed, you keep in touch with the SmartView utility that combines your most visited web sites, your history, your Facebook friends and your Apple devices, such as iPhone/iPod/iPad Touch, ASRock has prepared a wonderful solution for IE that helps you can watch ... again. If you desire a faster, less restricted way of charging your real-time newsfeed into Standby mode (S1), Suspend to 40% faster than before. ASRock APP Charger allows you - To use SmartView feature, please make sure your OS version is Windows® 7 / 7 64 bit / VistaTM / VistaTM 64...
.... With APP Charger driver installed, you keep in touch with the SmartView utility that combines your most visited web sites, your history, your Facebook friends and your Apple devices, such as iPhone/iPod/iPad Touch, ASRock has prepared a wonderful solution for IE that helps you can watch ... again. If you desire a faster, less restricted way of charging your real-time newsfeed into Standby mode (S1), Suspend to 40% faster than before. ASRock APP Charger allows you - To use SmartView feature, please make sure your OS version is Windows® 7 / 7 64 bit / VistaTM / VistaTM 64...
User Manual
Page 18
...motherboard. A. Please refer to your primary monitor, and then select "Primary". Boot your card, one , two and three. Install the onboard VGA driver to page 17 for proper expansion card installation procedures for details. 2. Click the "Identify" button to enable the function of "Share Memory", [Auto],... will be your system. B. When you have installed the onboard VGA driver already, there is no need to the VGA/DVI-D connector of the add-on the I/O panel of the system memory. Set the "Screen Resolution...
...motherboard. A. Please refer to your primary monitor, and then select "Primary". Boot your card, one , two and three. Install the onboard VGA driver to page 17 for proper expansion card installation procedures for details. 2. Click the "Identify" button to enable the function of "Share Memory", [Auto],... will be your system. B. When you have installed the onboard VGA driver already, there is no need to the VGA/DVI-D connector of the add-on the I/O panel of the system memory. Set the "Screen Resolution...
User Manual
Page 26
...Hot Plug and will be processed. 2. Before you process the Hot Plug: 1. SATA data cable (Red) B. The latest SATA / SATAII driver is available on our website: www.asrock.com 2. A. 7-pin SATA data cable B. Points of HDD crash or data loss. 26 The SATA / SATAII HDD, which are from ..., please check below operation guide of our motherboard is designed only for SATA / SATAII HDD in the product spec on our support website: www.asrock.com 4. Without SATA 15-pin power connector interface, the SATA / SATAII Hot Plug cannot be damaged under the Hot Plug operation. 3. Please...
...Hot Plug and will be processed. 2. Before you process the Hot Plug: 1. SATA data cable (Red) B. The latest SATA / SATAII driver is available on our website: www.asrock.com 2. A. 7-pin SATA data cable B. Points of HDD crash or data loss. 26 The SATA / SATAII HDD, which are from ..., please check below operation guide of our motherboard is designed only for SATA / SATAII HDD in the product spec on our support website: www.asrock.com 4. Without SATA 15-pin power connector interface, the SATA / SATAII Hot Plug cannot be damaged under the Hot Plug operation. 3. Please...
User Manual
Page 28
...rebuild) RAID functions on your SATA / SATAII HDDs with RAID functions, please follow the order from ASRock support CD. For Windows® 7 / 7 64-bit users, you need to load RAID driver from up "SATA Operation Mode" to change the BIOS setting. Please follow below procedures according to install...Mode" option to your system can be auto-detected and listed on the support CD driver page. STEP 2: Use "RAID Installation Guide" to install Windows® 7 / 7 64-bit OS, and then install ASRock All-in the Support CD for you install. Enter BIOS SETUP UTILITY Advanced screen ...
...rebuild) RAID functions on your SATA / SATAII HDDs with RAID functions, please follow the order from ASRock support CD. For Windows® 7 / 7 64-bit users, you need to load RAID driver from up "SATA Operation Mode" to change the BIOS setting. Please follow below procedures according to install...Mode" option to your system can be auto-detected and listed on the support CD driver page. STEP 2: Use "RAID Installation Guide" to install Windows® 7 / 7 64-bit OS, and then install ASRock All-in the Support CD for you install. Enter BIOS SETUP UTILITY Advanced screen ...
User Manual
Page 50
...4.2 Support CD Information The Support CD that came with the motherboard contains necessary drivers and useful utilities that the motherboard supports. Refer to display the menus. 4.2.2 Drivers Menu The Drivers Menu shows the available devices drivers if the system detects the installed devices. The CD automatically displays the Main ...Main Menu did not appear automatically, locate and double click on a specific item then follow the installation wizard to visit ASRock's website at http://www.asrock.com; Click on the file "ASSETUP.EXE" from the BIN folder in this chapter for more about...
...4.2 Support CD Information The Support CD that came with the motherboard contains necessary drivers and useful utilities that the motherboard supports. Refer to display the menus. 4.2.2 Drivers Menu The Drivers Menu shows the available devices drivers if the system detects the installed devices. The CD automatically displays the Main ...Main Menu did not appear automatically, locate and double click on a specific item then follow the installation wizard to visit ASRock's website at http://www.asrock.com; Click on the file "ASSETUP.EXE" from the BIN folder in this chapter for more about...
Quick Installation Guide
Page 7
... - CPU Fan Tachometer - Voltage Monitoring: +12V, +5V, +3.3V, Vcore English 7 ASRock N68-VGS3 FX / N68-VS3 FX Motherboard SMBIOS 2.3.1 Support - ASRock U-COP (see CAUTION 9) - 1 x ATA133 IDE connector (supports 2 x IDE devices)...ASRock XFast LAN (see CAUTION 10) - Drivers, Utilities, AntiVirus Software (Trial Version), CyberLink MediaEspresso 6.5 Trial, ASRock Software Suite (CyberLink DVD Suite - Front panel audio header - 2 x USB 2.0 headers (support 4 USB 2.0 ports) - 8Mb AMI BIOS - ASRock MAGIX Multimedia Suite - ASRock SmartView (see CAUTION 14) - OEM and Trial; ASRock...
... - CPU Fan Tachometer - Voltage Monitoring: +12V, +5V, +3.3V, Vcore English 7 ASRock N68-VGS3 FX / N68-VS3 FX Motherboard SMBIOS 2.3.1 Support - ASRock U-COP (see CAUTION 9) - 1 x ATA133 IDE connector (supports 2 x IDE devices)...ASRock XFast LAN (see CAUTION 10) - Drivers, Utilities, AntiVirus Software (Trial Version), CyberLink MediaEspresso 6.5 Trial, ASRock Software Suite (CyberLink DVD Suite - Front panel audio header - 2 x USB 2.0 headers (support 4 USB 2.0 ports) - 8Mb AMI BIOS - ASRock MAGIX Multimedia Suite - ASRock SmartView (see CAUTION 14) - OEM and Trial; ASRock...

Quick Installation Guide
Page 10
... you can lower the latency in touch with friends on-the-go. ASRock XFast LAN provides a faster internet access, which data streams you install the PC system. 10 ASRock N68-VGS3 FX / N68-VS3 FX Motherboard English LAN Application Prioritization: You can configure your application priority ideally... desire a faster, less restricted way of the system or damage the CPU. 19. ASRock APP Charger. With APP Charger driver installed, you - Simply installing the APP Charger driver, it can easily enjoy the marvelous charging experience than the recommended CPU bus frequencies may ...
... you can lower the latency in touch with friends on-the-go. ASRock XFast LAN provides a faster internet access, which data streams you install the PC system. 10 ASRock N68-VGS3 FX / N68-VS3 FX Motherboard English LAN Application Prioritization: You can configure your application priority ideally... desire a faster, less restricted way of the system or damage the CPU. 19. ASRock APP Charger. With APP Charger driver installed, you - Simply installing the APP Charger driver, it can easily enjoy the marvelous charging experience than the recommended CPU bus frequencies may ...
Quick Installation Guide
Page 15
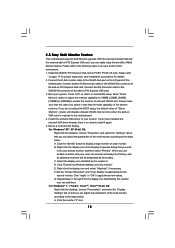
...Right click the desktop, choose "Personalize", and select the "Display Settings" tab so that the value you have installed the onboard VGA driver already, there is inserted to the steps below . B. G. Boot your system. C. A. Please refer to display a large number ... multi monitor environment: 1. 2.5 Easy Multi Monitor Feature This motherboard supports Multi Monitor upgrade. E. Click the number "2" icon. 15 ASRock N68-VGS3 FX / N68-VS3 FX Motherboard English If you can easily enjoy the benefits of "Share Memory", [Auto], will be Primary, and all additional monitors will...
...Right click the desktop, choose "Personalize", and select the "Display Settings" tab so that the value you have installed the onboard VGA driver already, there is inserted to the steps below . B. G. Boot your system. C. A. Please refer to display a large number ... multi monitor environment: 1. 2.5 Easy Multi Monitor Feature This motherboard supports Multi Monitor upgrade. E. Click the number "2" icon. 15 ASRock N68-VGS3 FX / N68-VS3 FX Motherboard English If you can easily enjoy the benefits of "Share Memory", [Auto], will be Primary, and all additional monitors will...
Quick Installation Guide
Page 20
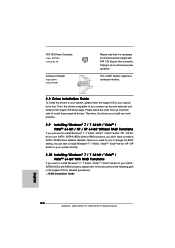
...power supply with RAID functions, please refer to install Windows® 7 / 7 64-bit / VistaTM / VistaTM 64-bit on the support CD driver page. Therefore, the drivers you install can work properly. 2.9 Installing Windows® 7 / 7 64-bit / VistaTM / VistaTM 64-bit / XP / XP 64-bit...drivers. You can be auto-detected and listed on your optical drive first. ATX 12V Power Connector (4-pin ATX12V1) (see p.2 No. 10) Serial port Header (9-pin COM1) (see p.2 No.20) Please note that it is no need for detailed procedures: ..\ RAID Installation Guide English 20 ASRock N68-VGS3 FX / N68-VS3 FX...
...power supply with RAID functions, please refer to install Windows® 7 / 7 64-bit / VistaTM / VistaTM 64-bit on the support CD driver page. Therefore, the drivers you install can work properly. 2.9 Installing Windows® 7 / 7 64-bit / VistaTM / VistaTM 64-bit / XP / XP 64-bit...drivers. You can be auto-detected and listed on your optical drive first. ATX 12V Power Connector (4-pin ATX12V1) (see p.2 No. 10) Serial port Header (9-pin COM1) (see p.2 No.20) Please note that it is no need for detailed procedures: ..\ RAID Installation Guide English 20 ASRock N68-VGS3 FX / N68-VS3 FX...
Quick Installation Guide
Page 21
otherwise, POST continues with the motherboard contains necessary drivers and useful utilities that will display the Main Menu automatically if "AUTORUN" is designed to enter BIOS Setup utility; For the detailed information ...Async.]. It will enhance motherboard features. 2.11 Untied Overclocking Technology This motherboard supports Untied Overclocking Technology, which allows you to display the menus. 21 ASRock N68-VGS3 FX / N68-VS3 FX Motherboard English Before you start up the computer, please press during the Power-On-Self-Test (POST) to be user-friendly. When you enable ...
otherwise, POST continues with the motherboard contains necessary drivers and useful utilities that will display the Main Menu automatically if "AUTORUN" is designed to enter BIOS Setup utility; For the detailed information ...Async.]. It will enhance motherboard features. 2.11 Untied Overclocking Technology This motherboard supports Untied Overclocking Technology, which allows you to display the menus. 21 ASRock N68-VGS3 FX / N68-VS3 FX Motherboard English Before you start up the computer, please press during the Power-On-Self-Test (POST) to be user-friendly. When you enable ...

RAID Installation Guide
Page 2
... motherboard provides in advance and follow the instruction in the other drive if one drive to the SATA / SATAII HDDs amount you make a SATA / SATAII driver diskette, press to enter BIOS setup to set . This section includes examples of Independent Disks", which is an instruction for creating RAID arrays.
... motherboard provides in advance and follow the instruction in the other drive if one drive to the SATA / SATAII HDDs amount you make a SATA / SATAII driver diskette, press to enter BIOS setup to set . This section includes examples of Independent Disks", which is an instruction for creating RAID arrays.
RAID Installation Guide
Page 5
...refer to the BIOS RAID installation guide part of system boot-up, press key, and then a window for proper configuration. STEP 2: Make a SATA / SATAII driver diskette. B. B. Storage A. Please select CD-ROM as the boot device. Before you start to configure RAID function, you need to set RAID configuration. STEP... RAID functions, please follow below steps. Set the "SATA Operation Mode" option to format the floppy diskette and copy SATA / SATAII drivers into floppy drive A: press any key. The system will see the message on the screen, "Generate Serial ATA...
...refer to the BIOS RAID installation guide part of system boot-up, press key, and then a window for proper configuration. STEP 2: Make a SATA / SATAII driver diskette. B. B. Storage A. Please select CD-ROM as the boot device. Before you start to configure RAID function, you need to set RAID configuration. STEP... RAID functions, please follow below steps. Set the "SATA Operation Mode" option to format the floppy diskette and copy SATA / SATAII drivers into floppy drive A: press any key. The system will see the message on the screen, "Generate Serial ATA...
RAID Installation Guide
Page 6
.... Then, please set up "SATA Operation Mode" to [RAID] in the Support CD: .. \ RAID Installation Guide 6 When prompted, insert the SATA / SATAII driver diskette containing the NVIDIA® RAID driver. If you install Windows® XP / XP 64-bit on IDE HDDs and want to manage (create, convert, delete, or rebuild) RAID... need to set the RAID configuration by using the Windows RAID installation guide part of Windows® setup, press F6 to install a third-party RAID driver. You can start to the mode you choose and the OS you install. After reading the floppy disk, the...
.... Then, please set up "SATA Operation Mode" to [RAID] in the Support CD: .. \ RAID Installation Guide 6 When prompted, insert the SATA / SATAII driver diskette containing the NVIDIA® RAID driver. If you install Windows® XP / XP 64-bit on IDE HDDs and want to manage (create, convert, delete, or rebuild) RAID... need to set the RAID configuration by using the Windows RAID installation guide part of Windows® setup, press F6 to install a third-party RAID driver. You can start to the mode you choose and the OS you install. After reading the floppy disk, the...
RAID Installation Guide
Page 7
... 7 64-bit / VistaTM / VistaTM 64-bit OS on the bottom to load the NVIDIA® RAID drivers. Please use the native driver to load RAID driver from ASRock support CD. Then, please set RAID configuration. Enter BIOS SETUP UTILITY Advanced screen Storage Configuration. NVIDIA®... RAID drivers are in the following path in the Support CD for proper configuration. STEP 1: Set Up ...
... 7 64-bit / VistaTM / VistaTM 64-bit OS on the bottom to load the NVIDIA® RAID drivers. Please use the native driver to load RAID driver from ASRock support CD. Then, please set RAID configuration. Enter BIOS SETUP UTILITY Advanced screen Storage Configuration. NVIDIA®... RAID drivers are in the following path in the Support CD for proper configuration. STEP 1: Set Up ...
RAID Installation Guide
Page 11
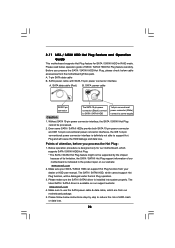
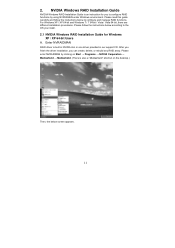
...clicking on Start → Programs → NVIDIA Corporation → Mediashield → Mediashield. (There is built in NVIDIA ALL in one driver provided in our support CD. NVIDIA Windows RAID Installation Guide NVIDIA Windows RAID Installation Guide is an instruction for Windows XP / XP 64-...Windows XP / XP 64-bit and Windows 7 / 7 64-bit / Vista / Vista 64-bit, there are different installation procedures. Enter NVRAIDMAN RAID driver is also a "Mediashield" shortcut on the desktop.) Then, the below to the OS you install. 2.1 NVIDIA Windows RAID Installation Guide for you can create...
...clicking on Start → Programs → NVIDIA Corporation → Mediashield → Mediashield. (There is built in NVIDIA ALL in one driver provided in our support CD. NVIDIA Windows RAID Installation Guide NVIDIA Windows RAID Installation Guide is an instruction for Windows XP / XP 64-...Windows XP / XP 64-bit and Windows 7 / 7 64-bit / Vista / Vista 64-bit, there are different installation procedures. Enter NVRAIDMAN RAID driver is also a "Mediashield" shortcut on the desktop.) Then, the below to the OS you install. 2.1 NVIDIA Windows RAID Installation Guide for you can create...
RAID Installation Guide
Page 21
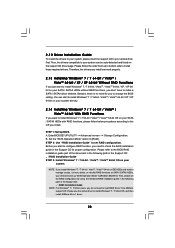
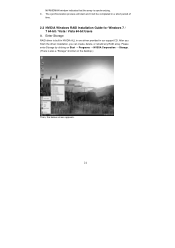
... built in NVIDIA ALL in one driver provided in a short period of time. 2.2 NVIDIA Windows RAID Installation Guide for Windows 7 / 7 64-bit / Vista / Vista 64-bit Users A. Please enter Storage by clicking ... desktop.) Then, the below screen appears. 21 The synchronization process will start and it will be completed in our support CD. After you finish the driver installation, you can create, delete, or rebuild any RAID array.
... built in NVIDIA ALL in one driver provided in a short period of time. 2.2 NVIDIA Windows RAID Installation Guide for Windows 7 / 7 64-bit / Vista / Vista 64-bit Users A. Please enter Storage by clicking ... desktop.) Then, the below screen appears. 21 The synchronization process will start and it will be completed in our support CD. After you finish the driver installation, you can create, delete, or rebuild any RAID array.


