RAID Installation Guide
Page 1
AMD BIOS RAID Installation Guide 2 1.1 Introduction to RAIDXpert from the Internet 17 2.9 Running RAIDXpert without Network Connection 17 1 AMD RAID Installation Guide 1. AMD Windows RAID Installation Guide ...
AMD BIOS RAID Installation Guide 2 1.1 Introduction to RAIDXpert from the Internet 17 2.9 Running RAIDXpert without Network Connection 17 1 AMD RAID Installation Guide 1. AMD Windows RAID Installation Guide ...

RAID Installation Guide
Page 2
... multiple drives and duplicated on another set of data from one logical unit. After you make a SATA / SATAII driver diskette, press to enter BIOS setup to set . WARNING!! RAID 1 (Data Mirroring) RAID 1 is called data mirroring that optimizes two identical hard disk drives to the next...is a method combining two or more physical drives working independently. RAID 10 (Stripe Mirroring) RAID 0 drives can start to use the onboard FastBuild BIOS utility to configure RAID. 1.1 Introduction to RAID The term "RAID" stands for "Redundant Array of the data in a RAID 10 solution for improved...
... multiple drives and duplicated on another set of data from one logical unit. After you make a SATA / SATAII driver diskette, press to enter BIOS setup to set . WARNING!! RAID 1 (Data Mirroring) RAID 1 is called data mirroring that optimizes two identical hard disk drives to the next...is a method combining two or more physical drives working independently. RAID 10 (Stripe Mirroring) RAID 0 drives can start to use the onboard FastBuild BIOS utility to configure RAID. 1.1 Introduction to RAID The term "RAID" stands for "Redundant Array of the data in a RAID 10 solution for improved...

RAID Installation Guide
Page 4
... document for proper configuration. After making a SATA / SATAII driver diskette and set up "SATA Operation Mode" to [RAID] first. Insert the ASRock Support CD into floppy drive A: press any key. E. During POST at the beginning of Windows setup, press F6 to [RAID]. Please refer ...the RAID configuration by using the Windows RAID installation guide in this RAID installation guide for details. 4 At the beginning of system boot-up BIOS. Set the "SATA Operation Mode" option to install a third-party RAID driver. A. When you see these messages, Please insert a ...
... document for proper configuration. After making a SATA / SATAII driver diskette and set up "SATA Operation Mode" to [RAID] first. Insert the ASRock Support CD into floppy drive A: press any key. E. During POST at the beginning of Windows setup, press F6 to [RAID]. Please refer ...the RAID configuration by using the Windows RAID installation guide in this RAID installation guide for details. 4 At the beginning of system boot-up BIOS. Set the "SATA Operation Mode" option to install a third-party RAID driver. A. When you see these messages, Please insert a ...

RAID Installation Guide
Page 5
... time you still need to check this RAID installation guide for proper configuration. Set the "SATA Operation Mode" option to the BIOS RAID installation guide part in BIOS. 1.4 Create Disk Array Power on your optical drive, and click the "Load Driver" button on the left on your system...install Windows 7 / 7 64-bit / Vista / Vista 64-bit OS on the bottom to load the AMD RAID drivers. page, please insert the ASRock Support CD into the optical drive again to set RAID configuration. STEP 2: Use "RAID Installation Guide" to continue the installation. When you see "Where ...
... time you still need to check this RAID installation guide for proper configuration. Set the "SATA Operation Mode" option to the BIOS RAID installation guide part in BIOS. 1.4 Create Disk Array Power on your optical drive, and click the "Load Driver" button on the left on your system...install Windows 7 / 7 64-bit / Vista / Vista 64-bit OS on the bottom to load the AMD RAID drivers. page, please insert the ASRock Support CD into the optical drive again to set RAID configuration. STEP 2: Use "RAID Installation Guide" to continue the installation. When you see "Where ...

User Manual
Page 4
... 54 3.1 Introduction 54 3.1.1 BIOS Menu Bar 54 3.1.2 Navigation Keys 55 3.2 Main Screen 55 3.3 Smart Screen 56 3.4 Advanced Screen 58 3.4.1 CPU Configuration 59 3.4.2 Memory Configuration 61 3.4.3 Chipset Configuration 65 3.4.4 ACPI ...
... 54 3.1 Introduction 54 3.1.1 BIOS Menu Bar 54 3.1.2 Navigation Keys 55 3.2 Main Screen 55 3.3 Smart Screen 56 3.4 Advanced Screen 58 3.4.1 CPU Configuration 59 3.4.2 Memory Configuration 61 3.4.3 Chipset Configuration 65 3.4.4 ACPI ...

User Manual
Page 5
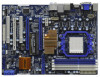
...Contents ASRock M3A790GXH/USB3 Motherboard (ATX Form Factor: 12.0-in x 8.8-in, 30.5 cm x 22.4 cm) ASRock M3A790GXH/USB3 Quick Installation Guide ASRock M3A790GXH/USB3 Support CD 1 x Ultra ATA 66/100/133 IDE Ribbon Cable (80-conductor) 1 x Ribbon Cable for purchasing ASRock M3A790GXH/USB3 motherboard, a reliable motherboard produced under ASRock's ... any modifications of this manual occur, the updated version will be available on ASRock website as well. Because the motherboard specifications and the BIOS software might be updated, the content of this manual will be subject to ...
...Contents ASRock M3A790GXH/USB3 Motherboard (ATX Form Factor: 12.0-in x 8.8-in, 30.5 cm x 22.4 cm) ASRock M3A790GXH/USB3 Quick Installation Guide ASRock M3A790GXH/USB3 Support CD 1 x Ultra ATA 66/100/133 IDE Ribbon Cable (80-conductor) 1 x Ribbon Cable for purchasing ASRock M3A790GXH/USB3 motherboard, a reliable motherboard produced under ASRock's ... any modifications of this manual occur, the updated version will be available on ASRock website as well. Because the motherboard specifications and the BIOS software might be updated, the content of this manual will be subject to ...

User Manual
Page 7
SLI/XFIRE power connector - DTS (Digital Theater Systems) support (see CAUTION 11) - 8Mb AMI BIOS - Supports Wake-On-LAN I /O Connector BIOS Feature - Realtek RTL8111DL - CD in /Front Speaker/Microphone (see CAUTION 8) - 6 x Serial ATAII 3.0Gb/s connectors, support RAID (RAID 0, RAID 1,...header - Supports Full HD 1080p Blu-ray (BD) / HD-DVD playback - 7.1 CH HD Audio with LED (ACT/LINK LED and SPEED LED) - AMI Legal BIOS 7 DAC with 1 SATAII connector) (see CAUTION 9) - 1 x eSATAII 3.0Gb/s connector (shared with 110dB dynamic range (ALC890 Audio Codec) - Premium Blu-ray audio...
SLI/XFIRE power connector - DTS (Digital Theater Systems) support (see CAUTION 11) - 8Mb AMI BIOS - Supports Wake-On-LAN I /O Connector BIOS Feature - Realtek RTL8111DL - CD in /Front Speaker/Microphone (see CAUTION 8) - 6 x Serial ATAII 3.0Gb/s connectors, support RAID (RAID 0, RAID 1,...header - Supports Full HD 1080p Blu-ray (BD) / HD-DVD playback - 7.1 CH HD Audio with LED (ACT/LINK LED and SPEED LED) - AMI Legal BIOS 7 DAC with 1 SATAII connector) (see CAUTION 9) - 1 x eSATAII 3.0Gb/s connector (shared with 110dB dynamic range (ALC890 Audio Codec) - Premium Blu-ray audio...

User Manual
Page 8
...* For detailed product information, please visit our website: http://www.asrock.com WARNING Please realize that there is a certain risk involved with overclocking, including adjusting the setting in the BIOS, applying Untied Overclocking Technology, or using the thirdparty overclocking tools. ... CPU Temperature Sensing Monitor - CPU Quiet Fan - EuP Ready (EuP ready power supply is required) (see CAUTION 14) - Supports Smart BIOS Support CD - OEM and Trial; Intelligent Energy Saver (see CAUTION 16) - Instant Boot - CPU/Chassis/NB/Power Fan Tachometer - Microsoft&#...
...* For detailed product information, please visit our website: http://www.asrock.com WARNING Please realize that there is a certain risk involved with overclocking, including adjusting the setting in the BIOS, applying Untied Overclocking Technology, or using the thirdparty overclocking tools. ... CPU Temperature Sensing Monitor - CPU Quiet Fan - EuP Ready (EuP ready power supply is required) (see CAUTION 14) - Supports Smart BIOS Support CD - OEM and Trial; Intelligent Energy Saver (see CAUTION 16) - Instant Boot - CPU/Chassis/NB/Power Fan Tachometer - Microsoft&#...

User Manual
Page 10
... for Energy Using Product, was a provision regulated by ASRock, provides a convenient way for more details. 10 Please visit our website for the completed system. It helps you can press key during the POST or press key to BIOS setup menu to save your BIOS only in Flash ROM. Although this tool and save...
... for Energy Using Product, was a provision regulated by ASRock, provides a convenient way for more details. 10 Please visit our website for the completed system. It helps you can press key during the POST or press key to BIOS setup menu to save your BIOS only in Flash ROM. Although this tool and save...

User Manual
Page 12
...SPK FRONT Bottom: CTR BASS MIC IN AMD Top: LINE IN Center: Bottom: 790GX NB_FAN1 41 PWR_FAN1 Chipset PCIE1 LAN PHY 40 M3A790GXH/USB3 39 PCIE2 IDE1 CrossFireX Hybrid CrossFire 38 37 36 35 34 Super I/O AUDIO CODEC HDMI_SPDIF1 1 CD1 HD_AUDIO1 1 PCIE3 PCI1 PCI Express ...2.0 PCIE4 EuP Ready COM1 1 PCI2 FLOPPY1 CMOS BATTERY AMD SB750 Chipset 1394a USB6_7 1 CHA_FAN1 USB8_9 1 SATAII_1_2 SATAII_3_4 VIA VT6803S RoHS 8Mb BIOS FRONT_1394 1 USB10_11 1 CLRCMOS1 1 IR1 1 SATAII_6 PANEL 1 PLED PWRBTN 1 HDLED RESET SATAII_5 1 SPEAKER1 33 32 31 30 29 28 27 ...
...SPK FRONT Bottom: CTR BASS MIC IN AMD Top: LINE IN Center: Bottom: 790GX NB_FAN1 41 PWR_FAN1 Chipset PCIE1 LAN PHY 40 M3A790GXH/USB3 39 PCIE2 IDE1 CrossFireX Hybrid CrossFire 38 37 36 35 34 Super I/O AUDIO CODEC HDMI_SPDIF1 1 CD1 HD_AUDIO1 1 PCIE3 PCI1 PCI Express ...2.0 PCIE4 EuP Ready COM1 1 PCI2 FLOPPY1 CMOS BATTERY AMD SB750 Chipset 1394a USB6_7 1 CHA_FAN1 USB8_9 1 SATAII_1_2 SATAII_3_4 VIA VT6803S RoHS 8Mb BIOS FRONT_1394 1 USB10_11 1 CLRCMOS1 1 IR1 1 SATAII_6 PANEL 1 PLED PWRBTN 1 HDLED RESET SATAII_5 1 SPEAKER1 33 32 31 30 29 28 27 ...

User Manual
Page 21
... support (DVI-D, D-Sub and HDMI) and external add-on PCIE2, PCIE3 and PCIE4 slots. Then connect other monitor cables to enable the function of ASRock SLI/XFire Switch Card. 2. B. Enter "Share Memory" option to adjust the memory capability to [32MB], [64MB], [128MB] [256MB] or [512MB...PCIE4 slots. 4. Install the ATITM PCI Express VGA cards on PCI Express VGA cards, you do not adjust the BIOS setup, the default value of the multi-monitor according to enter BIOS setup. Set up a surround display environment: 1. F. E. If you can adjust the parameters of "Share Memory",...
... support (DVI-D, D-Sub and HDMI) and external add-on PCIE2, PCIE3 and PCIE4 slots. Then connect other monitor cables to enable the function of ASRock SLI/XFire Switch Card. 2. B. Enter "Share Memory" option to adjust the memory capability to [32MB], [64MB], [128MB] [256MB] or [512MB...PCIE4 slots. 4. Install the ATITM PCI Express VGA cards on PCI Express VGA cards, you do not adjust the BIOS setup, the default value of the multi-monitor according to enter BIOS setup. Set up a surround display environment: 1. F. E. If you can adjust the parameters of "Share Memory",...

User Manual
Page 30
...option "Surround View" to section "Expansion Slots". In the future, ATITM Hybrid CrossFireXTM may be supported with Windows® XP OS. Keep ASRock SLI/XFire Switch Card at the default mode (x16). Boot your system. Boot into OS. Please remove the ATITM driver if you will ...motherboard based on PCIE2 slot. For the future update of Hybrid CrossFireXTM Step 1. Install one compatible PCI Express graphics card to enter BIOS setup. Restart your system for further information. Install the onboard VGA driver from our support CD to the correspondent connector on the ...
...option "Surround View" to section "Expansion Slots". In the future, ATITM Hybrid CrossFireXTM may be supported with Windows® XP OS. Keep ASRock SLI/XFire Switch Card at the default mode (x16). Boot your system. Boot into OS. Please remove the ATITM driver if you will ...motherboard based on PCIE2 slot. For the future update of Hybrid CrossFireXTM Step 1. Install one compatible PCI Express graphics card to enter BIOS setup. Restart your system for further information. Install the onboard VGA driver from our support CD to the correspondent connector on the ...

User Manual
Page 32
... cap is placed on pins, the jumper is placed on pins, the jumper is "Short". Note: To select +5VSB, it down before you update the BIOS. The data in CMOS. The illustration shows a 3-pin jumper whose pin1 and pin2 are setup. After waiting for PS/2 or USB wake up the system... to enable (see p.12, No. 25) 1_2 2_3 Default Clear CMOS Note: CLRCMOS1 allows you to clear the CMOS when you just finish updating the BIOS, you must boot up events. 2.8 Jumpers Setup The illustration shows how jumpers are "Short" when jumper cap is "Open". However, please do not clear the...
... cap is placed on pins, the jumper is placed on pins, the jumper is "Short". Note: To select +5VSB, it down before you update the BIOS. The data in CMOS. The illustration shows a 3-pin jumper whose pin1 and pin2 are setup. After waiting for PS/2 or USB wake up the system... to enable (see p.12, No. 25) 1_2 2_3 Default Clear CMOS Note: CLRCMOS1 allows you to clear the CMOS when you just finish updating the BIOS, you must boot up events. 2.8 Jumpers Setup The illustration shows how jumpers are "Short" when jumper cap is "Open". However, please do not clear the...

User Manual
Page 35
If you want to enter Realtek HD Audio Manager. B. Connect Audio_R (RIN) to OUT2_R and Audio_L (LIN) to Ground (GND). D. Enter BIOS Setup Utility. To activate the front mic. High Definition Audio supports Jack Sensing, but the panel wire on the lower right hand taskbar to hear ...
If you want to enter Realtek HD Audio Manager. B. Connect Audio_R (RIN) to OUT2_R and Audio_L (LIN) to Ground (GND). D. Enter BIOS Setup Utility. To activate the front mic. High Definition Audio supports Jack Sensing, but the panel wire on the lower right hand taskbar to hear ...

User Manual
Page 41
... equipped with eSATAII devices. If you still want to use the eSATAII HDD as a removable data disk, please set "SATA Operation Mode" option in BIOS setup to AHCI or RAID mode, Hot Plug function is power-off. 3. eSATAII allows you to enjoy the SATAII function provided by the I/O of ...mode. 41 eSATAII is not supported with Hot Plug capability that eSATAII HDD should have. 5. NOTE: 1. Therefore, you set "SATA Operation Mode" option in BIOS setup to RAID mode. 4. If you can insert or remove your eSATAII devices to the eSATAII ports while the system is eSATAII? otherwise, it may...
... equipped with eSATAII devices. If you still want to use the eSATAII HDD as a removable data disk, please set "SATA Operation Mode" option in BIOS setup to AHCI or RAID mode, Hot Plug function is power-off. 3. eSATAII allows you to enjoy the SATAII function provided by the I/O of ...mode. 41 eSATAII is not supported with Hot Plug capability that eSATAII HDD should have. 5. NOTE: 1. Therefore, you set "SATA Operation Mode" option in BIOS setup to RAID mode. 4. If you can insert or remove your eSATAII devices to the eSATAII ports while the system is eSATAII? otherwise, it may...

User Manual
Page 47
... installation guide part of 2 or more SATA / SATAII HDDs with RAID functions, please follow below steps. Insert the ASRock Support CD into the floppy diskette. Enter BIOS SETUP UTILITY Advanced screen Storage Configuration. C. D. STEP 2: Make a SATA / SATAII Driver Diskette. During POST at the beginning... press any key to check the RAID installation guide in the Support CD: .. \ RAID Installation Guide 47 STEP 1: Set up BIOS. Set the "SATA Operation Mode" option to set RAID configuration. B. When you need to start to format the floppy diskette and...
... installation guide part of 2 or more SATA / SATAII HDDs with RAID functions, please follow below steps. Insert the ASRock Support CD into the floppy diskette. Enter BIOS SETUP UTILITY Advanced screen Storage Configuration. C. D. STEP 2: Make a SATA / SATAII Driver Diskette. During POST at the beginning... press any key to check the RAID installation guide in the Support CD: .. \ RAID Installation Guide 47 STEP 1: Set up BIOS. Set the "SATA Operation Mode" option to set RAID configuration. B. When you need to start to format the floppy diskette and...

User Manual
Page 48
...-bit optical disk into your optical drive, and click the "Load Driver" button on the left on your system. page, please insert the ASRock Support CD into the optical drive to load the AMD RAID drivers. Set the "SATA Operation Mode" option to set RAID configuration. If you... install Windows® XP / XP 64-bit on your system. B. Then, please set up BIOS. A. Enter BIOS SETUP UTILITY Advanced screen Storage Configuration. STEP 4: Install Windows® XP / XP 64-bit OS on SATA / SATAII HDDs, you install. (Select ...
...-bit optical disk into your optical drive, and click the "Load Driver" button on the left on your system. page, please insert the ASRock Support CD into the optical drive to load the AMD RAID drivers. Set the "SATA Operation Mode" option to set RAID configuration. If you... install Windows® XP / XP 64-bit on your system. B. Then, please set up BIOS. A. Enter BIOS SETUP UTILITY Advanced screen Storage Configuration. STEP 4: Install Windows® XP / XP 64-bit OS on SATA / SATAII HDDs, you install. (Select ...

User Manual
Page 49
...XP 64-bit Without RAID Functions If you install Windows® 7 / 7 64-bit / VistaTM / VistaTM 64-bit on IDE HDDs and want to [IDE] in BIOS first. A. B. STEP 4: Install Windows® XP / XP 64-bit OS on page 47. When prompted, insert the SATA / SATAII driver diskette containing the AMD AHCI..., delete, or rebuild) RAID functions on your system. Using SATA / SATAII HDDs and eSATAII devices with NCQ and Hot Plug functions STEP 1: Set Up BIOS. At the beginning of Windows® setup, press F6 to the OS you still need to set up "SATA Operation Mode" to install Windows®...
...XP 64-bit Without RAID Functions If you install Windows® 7 / 7 64-bit / VistaTM / VistaTM 64-bit on IDE HDDs and want to [IDE] in BIOS first. A. B. STEP 4: Install Windows® XP / XP 64-bit OS on page 47. When prompted, insert the SATA / SATAII driver diskette containing the AMD AHCI..., delete, or rebuild) RAID functions on your system. Using SATA / SATAII HDDs and eSATAII devices with NCQ and Hot Plug functions STEP 1: Set Up BIOS. At the beginning of Windows® setup, press F6 to the OS you still need to set up "SATA Operation Mode" to install Windows®...

User Manual
Page 50
.../ VistaTM 64-bit on your system. 50 Using SATA / SATAII HDDs and eSATAII devices without NCQ and Hot Plug functions STEP 1: Set up BIOS. B. Enter BIOS SETUP UTILITY Advanced screen Storage Configuration. STEP 2: Install Windows® 7 / 7 64-bit / VistaTM / VistaTM 64-bit OS on your system.... A. page, please insert the ASRock Support CD into your optical drive, and click the "Load Driver" button on the left on your SATA...
.../ VistaTM 64-bit on your system. 50 Using SATA / SATAII HDDs and eSATAII devices without NCQ and Hot Plug functions STEP 1: Set up BIOS. B. Enter BIOS SETUP UTILITY Advanced screen Storage Configuration. STEP 2: Install Windows® 7 / 7 64-bit / VistaTM / VistaTM 64-bit OS on your system.... A. page, please insert the ASRock Support CD into your optical drive, and click the "Load Driver" button on the left on your SATA...

User Manual
Page 53
... better margin due to the warning on page 8 for the possible overclocking risk before you enable Untied Overclocking function, please enter "Overclock Mode" option of BIOS setup to set the selection from [Auto] to [CPU, PCIE, Async.].
... better margin due to the warning on page 8 for the possible overclocking risk before you enable Untied Overclocking function, please enter "Overclock Mode" option of BIOS setup to set the selection from [Auto] to [CPU, PCIE, Async.].


