
Intel Rapid Storage Guide
Page 12
... in the system BIOS, a RAID volume must be created, and the F6 installation method must be used to load the Intel® Rapid Storage Technology driver during POST, press Ctrl and i at the same time to enter the option ROM user interface. 2. Click the Storage Configuration menu. 4. Select the appropriate number...
... in the system BIOS, a RAID volume must be created, and the F6 installation method must be used to load the Intel® Rapid Storage Technology driver during POST, press Ctrl and i at the same time to enter the option ROM user interface. 2. Click the Storage Configuration menu. 4. Select the appropriate number...

Intel Rapid Storage Guide
Page 13
...Press Enter to confirm volume creation. 10. Setup will happen immediately after pressing F6. When you have successfully installed the driver and Windows setup should continue. Press Y to create a floppy disk with a screen asking you need to install the Intel Rapid Storage Technology...Use the Floppy Configuration Utility to confirm your controller from the list of Windows XP* setup (during operating system setup: 1. Install the RAID Driver Using the F6 Installation Method Perform the following files: IAAHCI.INF, IAAHCI.CAT, IASTOR.INF, IASTOR.CAT, IASTOR.SYS, and TXTSETUP.OEM....
...Press Enter to confirm volume creation. 10. Setup will happen immediately after pressing F6. When you have successfully installed the driver and Windows setup should continue. Press Y to create a floppy disk with a screen asking you need to install the Intel Rapid Storage Technology...Use the Floppy Configuration Utility to confirm your controller from the list of Windows XP* setup (during operating system setup: 1. Install the RAID Driver Using the F6 Installation Method Perform the following files: IAAHCI.INF, IAAHCI.CAT, IASTOR.INF, IASTOR.CAT, IASTOR.SYS, and TXTSETUP.OEM....

Intel Rapid Storage Guide
Page 16
... labeled Manufacturer-supplied hardware support disk into Drive A:, insert a floppy disk containing the following steps to install the Intel® Rapid Storage Technology driver using F6 when in AHCI/RAID mode In order to install an operating system onto a single Serial ATA hard drive when the system is in... mode, the F6 installation method must be prompted with the necessary files. Note If you do not need to install a third party SCSI or RAID driver. Press F6 when you see a prompt that says, Press F6 if you can use a USB floppy drive or create a slipstream version of Windows ...
... labeled Manufacturer-supplied hardware support disk into Drive A:, insert a floppy disk containing the following steps to install the Intel® Rapid Storage Technology driver using F6 when in AHCI/RAID mode In order to install an operating system onto a single Serial ATA hard drive when the system is in... mode, the F6 installation method must be prompted with the necessary files. Note If you do not need to install a third party SCSI or RAID driver. Press F6 when you see a prompt that says, Press F6 if you can use a USB floppy drive or create a slipstream version of Windows ...

Intel Rapid Storage Guide
Page 17
... interface Note within Windows. 17 4. Windows setup will need to run Setup.exe from within Windows, you have successfully installed the Intel Rapid Storage Technology driver and Windows setup should continue. Select your controller and continue. At this point, you will need to copy the files again from the list of...
... interface Note within Windows. 17 4. Windows setup will need to run Setup.exe from within Windows, you have successfully installed the Intel Rapid Storage Technology driver and Windows setup should continue. Select your controller and continue. At this point, you will need to copy the files again from the list of...

Intel Rapid Storage Guide
Page 18
...the system contain a 32-bit or 64-bit processor? o If the system has a 32-bit processor, the files will be located in the Drivers folder after extraction. 2. o If the system has a 64-bit processor, the files will be located in the Microsoft document Deployment Guide Automating ...Windows NT* Setup. To extract these files, run the executable (e.g. Perform the following steps in order to install the RAID or AHCI driver, as described in the Advanced Installation Instructions section of installation is used for Intel® Matrix Storage Manager version 8.8) with the following command...
...the system contain a 32-bit or 64-bit processor? o If the system has a 32-bit processor, the files will be located in the Drivers folder after extraction. 2. o If the system has a 64-bit processor, the files will be located in the Microsoft document Deployment Guide Automating ...Windows NT* Setup. To extract these files, run the executable (e.g. Perform the following steps in order to install the RAID or AHCI driver, as described in the Advanced Installation Instructions section of installation is used for Intel® Matrix Storage Manager version 8.8) with the following command...
User Manual
Page 3
...20 2.6 Expansion Slots (PCI Express Slots 22 2.7 CrossFireXTM and Quad CrossFireXTM Operation Guide 23 2.8 Dual Monitor and Surround Display Features 27 2.9 ASRock Smart Remote Installation Guide 30 2.10 Jumpers Setup 31 2.11 Onboard Headers and Connectors 32 2.12 Serial ATA (SATA) / Serial ATA2 (... 2.15 Hot Plug and Hot Swap Functions for SATA3 HDDs ..... 39 2.16 SATA / SATA2 / SATA3 HDD Hot Plug Feature and Operation Guide 40 2.17 Driver Installation Guide 42 2.18 Installing Windows® 7 / 7 64-bit / VistaTM / VistaTM 64-bit With RAID Functions 42 2.19 Installing Windows® 7...
...20 2.6 Expansion Slots (PCI Express Slots 22 2.7 CrossFireXTM and Quad CrossFireXTM Operation Guide 23 2.8 Dual Monitor and Surround Display Features 27 2.9 ASRock Smart Remote Installation Guide 30 2.10 Jumpers Setup 31 2.11 Onboard Headers and Connectors 32 2.12 Serial ATA (SATA) / Serial ATA2 (... 2.15 Hot Plug and Hot Swap Functions for SATA3 HDDs ..... 39 2.16 SATA / SATA2 / SATA3 HDD Hot Plug Feature and Operation Guide 40 2.17 Driver Installation Guide 42 2.18 Installing Windows® 7 / 7 64-bit / VistaTM / VistaTM 64-bit With RAID Functions 42 2.19 Installing Windows® 7...

User Manual
Page 4
... 58 3.6 Boot Screen 63 3.7 Security Screen 64 3.8 Exit Screen 65 4 Software Support 66 4.1 Install Operating System 66 4.2 Support CD Information 66 4.2.1 Running Support CD 66 4.2.2 Drivers Menu 66 4.2.3 Utilities Menu 66 4.2.4 Contact Information 66 4
... 58 3.6 Boot Screen 63 3.7 Security Screen 64 3.8 Exit Screen 65 4 Software Support 66 4.1 Install Operating System 66 4.2 Support CD Information 66 4.2.1 Running Support CD 66 4.2.2 Drivers Menu 66 4.2.3 Utilities Menu 66 4.2.4 Contact Information 66 4

User Manual
Page 8
... jumperfree - CPU Core, IGPU, DRAM, 1.8V PLL, VTT, VCCSA Voltage Multi-adjustment - ASRock APP Charger (see CAUTION 14) 8 ASRock SmartView (see CAUTION 10) - OEM - ASRock Instant Flash (see CAUTION 12) - ASRock XFast USB (see CAUTION 9) - Front panel audio connector - 3 x USB 2.0 headers (...Chassis/Power FAN connector - 24 pin ATX power connector - 8 pin 12V power connector - Drivers, Utilities, AntiVirus Software (Trial Version), CyberLink MediaEspresso 6.5 Trial, ASRock MAGIX Multimedia Suite - Supports "Plug and Play" - USB3.0 Connector BIOS Feature Support CD ...
... jumperfree - CPU Core, IGPU, DRAM, 1.8V PLL, VTT, VCCSA Voltage Multi-adjustment - ASRock APP Charger (see CAUTION 14) 8 ASRock SmartView (see CAUTION 10) - OEM - ASRock Instant Flash (see CAUTION 12) - ASRock XFast USB (see CAUTION 9) - Front panel audio connector - 3 x USB 2.0 headers (...Chassis/Power FAN connector - 24 pin ATX power connector - 8 pin 12V power connector - Drivers, Utilities, AntiVirus Software (Trial Version), CyberLink MediaEspresso 6.5 Trial, ASRock MAGIX Multimedia Suite - Supports "Plug and Play" - USB3.0 Connector BIOS Feature Support CD ...
User Manual
Page 11
... lower the latency in Flash ROM. Simply install the APP Charger driver, it can press the key during the POST or the key to enter into Standby mode (S1), Suspend to 40% faster than ever. ASRock APP Charger allows you to quickly charge many Apple devices simultaneously and... in a few clicks without entering operating systems first like MS-DOS or Windows®. With APP Charger driver installed, you can easily enjoy the marvelous charging experience. ASRock Instant Flash is a new function that it also boosts the speed of previously visited websites, making web surfi...
... lower the latency in Flash ROM. Simply install the APP Charger driver, it can press the key during the POST or the key to enter into Standby mode (S1), Suspend to 40% faster than ever. ASRock APP Charger allows you to quickly charge many Apple devices simultaneously and... in a few clicks without entering operating systems first like MS-DOS or Windows®. With APP Charger driver installed, you can easily enjoy the marvelous charging experience. ASRock Instant Flash is a new function that it also boosts the speed of previously visited websites, making web surfi...

User Manual
Page 23
... co-processor graphics card, must be installed correctly to enable CrossFireXTM feature. For other Radeon graphics card to AMD graphics card manuals for AMD CrossFireXTM driver updates. 1. Currently CrossFireXTM is supported by Windows® XP with intelligent software design and an innovative interconnect mechanism, CrossFireXTM enables the highest possible level of...
... co-processor graphics card, must be installed correctly to enable CrossFireXTM feature. For other Radeon graphics card to AMD graphics card manuals for AMD CrossFireXTM driver updates. 1. Currently CrossFireXTM is supported by Windows® XP with intelligent software design and an innovative interconnect mechanism, CrossFireXTM enables the highest possible level of...

User Manual
Page 25
... find "AMD Catalyst Control Center" on your computer and boot into OS. Double-click "ATI Catalyst Control Center". 2.7.2 Driver Installation and Setup Step 1. The Catalyst Uninstaller is no need to downloading and installing the CATALYST Control Center. Please check AMD's ... Please check Microsoft's website for details. Restart your system. We recommend using this utility to your computer. Install the required drivers to uninstall any VGA drivers installed in your Windows® taskbar. For Windows® XP OS: A. Select "2 GPUs" and click "Apply". 25 ...
... find "AMD Catalyst Control Center" on your computer and boot into OS. Double-click "ATI Catalyst Control Center". 2.7.2 Driver Installation and Setup Step 1. The Catalyst Uninstaller is no need to downloading and installing the CATALYST Control Center. Please check AMD's ... Please check Microsoft's website for details. Restart your system. We recommend using this utility to your computer. Install the required drivers to uninstall any VGA drivers installed in your Windows® taskbar. For Windows® XP OS: A. Select "2 GPUs" and click "Apply". 25 ...

User Manual
Page 27
... monitor feature, please follow the steps below: 1. With the internal VGA output support (DVI-D, D-Sub and HDMI), you have already installed the onboard VGA driver from our support CD to the HDMI port on VGA cards to support dual VGA output so that DVI-D, D-sub and HDMI can only choose...-on the I /O panel and connect a HDMI monitor cable to your system and restart your system, you haven't installed the onboard VGA driver yet, please install the onboard VGA driver from our support CD to your computer. If you can easily enjoy the benefits of dual monitor function after your...
... monitor feature, please follow the steps below: 1. With the internal VGA output support (DVI-D, D-Sub and HDMI), you have already installed the onboard VGA driver from our support CD to the HDMI port on VGA cards to support dual VGA output so that DVI-D, D-sub and HDMI can only choose...-on the I /O panel and connect a HDMI monitor cable to your system and restart your system, you haven't installed the onboard VGA driver yet, please install the onboard VGA driver from our support CD to your computer. If you can easily enjoy the benefits of dual monitor function after your...
User Manual
Page 28
... not adjust the UEFI setup, the default value of D-sub. E. Please refer to the following steps to the HDMI port on PCI Express VGA card driver to this monitor". Connect a DVI-D monitor cable to the DVI-D port on the I /O panel and connect a HDMI monitor cable to set up a ... multiple monitors with your primary monitor, and then select "Primary". A. Right-click the display icon in the Display Properties dialog that you have installed the drivers already, there is less than the total capability of the add-on PCI Express VGA cards on the I /O panel, connect a D-Sub monitor cable...
... not adjust the UEFI setup, the default value of D-sub. E. Please refer to the following steps to the HDMI port on PCI Express VGA card driver to this monitor". Connect a DVI-D monitor cable to the DVI-D port on the I /O panel and connect a HDMI monitor cable to set up a ... multiple monitors with your primary monitor, and then select "Primary". A. Right-click the display icon in the Display Properties dialog that you have installed the drivers already, there is less than the total capability of the add-on PCI Express VGA cards on the I /O panel, connect a D-Sub monitor cable...

User Manual
Page 40
... 40 Before you process the Hot Plug: 1. SATA power cable with SATA 15-pin power connector interface A. Please make sure the SATA / SATA2 / SATA3 driver is definitely not able to reduce the risk of Hot Plug feature carefully. The latest SATA / SATA2 / SATA3... feature might not be processed. 2. Below operation procedure is designed only for SATA / SATA2 / SATA3 HDD in the product spec on our support website: www.asrock.com 4. Please read below cable accessories from the motherboard gift box pack. The SATA / SATA2 / SATA3 HDD, which are from your SATA / SATA2 / ...
... 40 Before you process the Hot Plug: 1. SATA power cable with SATA 15-pin power connector interface A. Please make sure the SATA / SATA2 / SATA3 driver is definitely not able to reduce the risk of Hot Plug feature carefully. The latest SATA / SATA2 / SATA3... feature might not be processed. 2. Below operation procedure is designed only for SATA / SATA2 / SATA3 HDD in the product spec on our support website: www.asrock.com 4. Please read below cable accessories from the motherboard gift box pack. The SATA / SATA2 / SATA3 HDD, which are from your SATA / SATA2 / ...
User Manual
Page 42
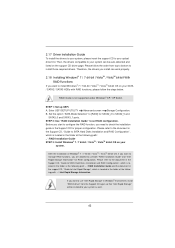
... functions, please follow the order from the Support CD again so that "Intel Rapid Storage" will be auto-detected and listed on the support CD driver page. STEP 2: Use "RAID Installation Guide" to SATA2_5 and SATA3_0 and SATA3_1 ports. After the installation of Windows® 7 / 7 64-bit / ... Information" for proper configuration. Set the option "SATA Mode Selection" to [RAID] for SATA2_2 to set RAID configuration. Then, the drivers compatible to your system can work properly. 2.18 Installing Windows® 7 / 7 64-bit / VistaTM / VistaTM 64-bit With RAID Functions If you...
... functions, please follow the order from the Support CD again so that "Intel Rapid Storage" will be auto-detected and listed on the support CD driver page. STEP 2: Use "RAID Installation Guide" to SATA2_5 and SATA3_0 and SATA3_1 ports. After the installation of Windows® 7 / 7 64-bit / ... Information" for proper configuration. Set the option "SATA Mode Selection" to [RAID] for SATA2_2 to set RAID configuration. Then, the drivers compatible to your system can work properly. 2.18 Installing Windows® 7 / 7 64-bit / VistaTM / VistaTM 64-bit With RAID Functions If you...

User Manual
Page 66
...® Windows® operating systems: 7 / 7 64-bit / VistaTM / VistaTM 64-bit / XP / XP 64-bit. Please install the necessary drivers to visit ASRock's website at http://www.asrock.com; Click on the file "ASSETUP.EXE" from the BIN folder in this chapter for more about...may contact your dealer for further information. 66 Refer to display the menu. 4.2.2 Drivers Menu The Drivers Menu shows the available device's drivers if the system detects installed devices. or you need to contact ASRock or want to know more information. 4.2 Support CD Information The Support CD that came...
...® Windows® operating systems: 7 / 7 64-bit / VistaTM / VistaTM 64-bit / XP / XP 64-bit. Please install the necessary drivers to visit ASRock's website at http://www.asrock.com; Click on the file "ASSETUP.EXE" from the BIN folder in this chapter for more about...may contact your dealer for further information. 66 Refer to display the menu. 4.2.2 Drivers Menu The Drivers Menu shows the available device's drivers if the system detects installed devices. or you need to contact ASRock or want to know more information. 4.2 Support CD Information The Support CD that came...

User Manual
Page 68
..." to be installed on a large size HDD (>2TB). Installing OS on a HDD Larger Than 2TB in the first step. 68 You can download the driver from ASRock motherboard support CD. (please copy the files under following directory: 32 bit: ..\i386\Win7_Vista_Intel_v11.0.0.1032 64-bit: ..\AMD64\Win7-64_Vista64_Intel_v11.0.0.1032 3. Please refer...
..." to be installed on a large size HDD (>2TB). Installing OS on a HDD Larger Than 2TB in the first step. 68 You can download the driver from ASRock motherboard support CD. (please copy the files under following directory: 32 bit: ..\i386\Win7_Vista_Intel_v11.0.0.1032 64-bit: ..\AMD64\Win7-64_Vista64_Intel_v11.0.0.1032 3. Please refer...

User Manual
Page 69
Follow Windows® Installation Guide to boot into Windows® or install driver/utilities. Disable System Restore. Then press "Enter". Then Press "Ok". 69 Disk volume > 2TB), it may take more time to install OS. F. Continue to fix ...
Follow Windows® Installation Guide to boot into Windows® or install driver/utilities. Disable System Restore. Then press "Enter". Then Press "Ok". 69 Disk volume > 2TB), it may take more time to install OS. F. Continue to fix ...

User Manual
Page 71
C. After reboot, please start to reboot.) D. Reboot your system. (It may take about 5 minutes to install motherboard drivers and utilities. 6. Windows® 7 64-bit: A. Please request the hotfix KB2505454 through this hotfix then reboot by itself. After installing Windows® 7 64-...; will install this link: http://support.microsoft.com/kb/2505454/ B. D. Finish. 71 E. Please start to "Disable" then Click "OK". c. Set "Startup type" to install motherboard drivers and utilities.
C. After reboot, please start to reboot.) D. Reboot your system. (It may take about 5 minutes to install motherboard drivers and utilities. 6. Windows® 7 64-bit: A. Please request the hotfix KB2505454 through this hotfix then reboot by itself. After installing Windows® 7 64-...; will install this link: http://support.microsoft.com/kb/2505454/ B. D. Finish. 71 E. Please start to "Disable" then Click "OK". c. Set "Startup type" to install motherboard drivers and utilities.

Quick Installation Guide
Page 8
... HDMI_SPDIF header - 1 x Power LED header - Drivers, Utilities, AntiVirus Software (Trial Version), CyberLink MediaEspresso 6.5 Trial, ASRock MAGIX Multimedia Suite - ASRock SmartView (see CAUTION 11) - ACPI 1.1 Compliance Wake Up Events - ASRock APP Charger (see CAUTION 12) - Supports jumperfree ...ASRock Extreme Tuning Utility (AXTU) (see CAUTION 10) - OEM - ASRock Instant Boot - Supports "Plug and Play" - SMBIOS 2.3.1 Support - ASRock Instant Flash (see CAUTION 9) - ASRock XFast LAN (see CAUTION 13) - ASRock XFast USB (see CAUTION 14) English 8 ASRock H77 Pro4...
... HDMI_SPDIF header - 1 x Power LED header - Drivers, Utilities, AntiVirus Software (Trial Version), CyberLink MediaEspresso 6.5 Trial, ASRock MAGIX Multimedia Suite - ASRock SmartView (see CAUTION 11) - ACPI 1.1 Compliance Wake Up Events - ASRock APP Charger (see CAUTION 12) - Supports jumperfree ...ASRock Extreme Tuning Utility (AXTU) (see CAUTION 10) - OEM - ASRock Instant Boot - Supports "Plug and Play" - SMBIOS 2.3.1 Support - ASRock Instant Flash (see CAUTION 9) - ASRock XFast LAN (see CAUTION 13) - ASRock XFast USB (see CAUTION 14) English 8 ASRock H77 Pro4...


