User Manual
Page 4
3 UEFI SETUP UTILITY 33 3.1 Introduction 33 3.1.1 UEFI Menu Bar 33 3.1.2 Navigation Keys 34 3.2 Main Screen 34 3.3 OC Tweaker Screen 35 3.4 Advanced Screen 40 3.4.1 CPU Configuration 41 3.4.2 North Bridge Configuration 42 3.4.3 South Bridge Configuration ...
3 UEFI SETUP UTILITY 33 3.1 Introduction 33 3.1.1 UEFI Menu Bar 33 3.1.2 Navigation Keys 34 3.2 Main Screen 34 3.3 OC Tweaker Screen 35 3.4 Advanced Screen 40 3.4.1 CPU Configuration 41 3.4.2 North Bridge Configuration 42 3.4.3 South Bridge Configuration ...
User Manual
Page 22
..., as well as well. Due to the increase in manufacturers employing HDCP in their equipment, it is supported on this motherboard, you purchase is my main monitor" and "Extend the desktop onto this monitor". C. Use Surround Display. Therefore, you would like to save your monitors that you can adjust the parameters...
..., as well as well. Due to the increase in manufacturers employing HDCP in their equipment, it is supported on this motherboard, you purchase is my main monitor" and "Extend the desktop onto this monitor". C. Use Surround Display. Therefore, you would like to save your monitors that you can adjust the parameters...

User Manual
Page 26
... provides 4-Pin CPU fan (Quiet Fan) support, the 3-Pin CPU fan still can work successfully even without the fan speed control function. A front panel module mainly consists of power switch, reset switch, power LED, hard drive activity LED, speaker and etc. If you plan to connect the 3-Pin CPU fan to...
... provides 4-Pin CPU fan (Quiet Fan) support, the 3-Pin CPU fan still can work successfully even without the fan speed control function. A front panel module mainly consists of power switch, reset switch, power LED, hard drive activity LED, speaker and etc. If you plan to connect the 3-Pin CPU fan to...
User Manual
Page 33
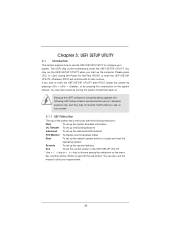
... the system by pressing + + , or by turning the system off and then back on. Because the UEFI software is constantly being updated, the following selections: Main To set up the system time/date information OC Tweaker To set up overclocking features Advanced To set up the advanced UEFI features H/W Monitor To...
... the system by pressing + + , or by turning the system off and then back on. Because the UEFI software is constantly being updated, the following selections: Main To set up the system time/date information OC Tweaker To set up overclocking features Advanced To set up the advanced UEFI features H/W Monitor To...

User Manual
Page 34
... the selected items Switch to next function To bring up or down to the Exit Screen or exit the current screen 3.2 Main Screen When you enter the UEFI SETUP UTILITY, the Main screen will appear and display the system overview. 34 3.1.2 Navigation Keys Please check the following table for all the settings...
... the selected items Switch to next function To bring up or down to the Exit Screen or exit the current screen 3.2 Main Screen When you enter the UEFI SETUP UTILITY, the Main screen will appear and display the system overview. 34 3.1.2 Navigation Keys Please check the following table for all the settings...

User Manual
Page 54
...EXE" from the BIN folder in this chapter for general reference only. The CD automatically displays the Main Menu if "AUTORUN" is enabled in your dealer for more about ASRock, welcome to activate the devices. 4.2.3 Utilities Menu The Utilities Menu shows the applications software that enhance... the motherboard contains necessary drivers and useful utilities that the motherboard supports. Please install the necessary drivers to visit ASRock's website at http://www.asrock.com; Because motherboard settings and hardware options vary, use the setup procedures in the Support CD to your OS...
...EXE" from the BIN folder in this chapter for general reference only. The CD automatically displays the Main Menu if "AUTORUN" is enabled in your dealer for more about ASRock, welcome to activate the devices. 4.2.3 Utilities Menu The Utilities Menu shows the applications software that enhance... the motherboard contains necessary drivers and useful utilities that the motherboard supports. Please install the necessary drivers to visit ASRock's website at http://www.asrock.com; Because motherboard settings and hardware options vary, use the setup procedures in the Support CD to your OS...

Quick Installation Guide
Page 18
...the parameters of intercepting digital data midstream between the video source, or transmitter - In other words, HDCP specification is my main monitor" and "Extend the desktop onto this motherboard. Click "OK" to save your monitors that the HDTV or LCD monitor you...Intel® for the display icon identified by the number three and four. 6. HDCP Function HDCP function is compatible. 18 ASRock H71M-DGS Motherboard English Repeat steps A through C for protecting digital entertainment content that supports HDCP function as a monitor, television or projector. Click and...
...the parameters of intercepting digital data midstream between the video source, or transmitter - In other words, HDCP specification is my main monitor" and "Extend the desktop onto this motherboard. Click "OK" to save your monitors that the HDTV or LCD monitor you...Intel® for the display icon identified by the number three and four. 6. HDCP Function HDCP function is compatible. 18 ASRock H71M-DGS Motherboard English Repeat steps A through C for protecting digital entertainment content that supports HDCP function as a monitor, television or projector. Click and...

Quick Installation Guide
Page 22
... Please connect the fan cables to the fan connectors and match the black wire to the ground pin. Though this header. A front panel module mainly consists of power switch, reset switch, power LED, hard drive activity LED, speaker and etc. Chassis and Power Fan Connectors (4-pin CHA_FAN1) (see... connect an ATX power supply to this motherboard, please connect it to the CPU fan connector on this connector. 1 13 English 22 ASRock H71M-DGS Motherboard When connecting your chassis front panel module to the hard drive activity LED on when the hard drive is reading or writing data...
... Please connect the fan cables to the fan connectors and match the black wire to the ground pin. Though this header. A front panel module mainly consists of power switch, reset switch, power LED, hard drive activity LED, speaker and etc. Chassis and Power Fan Connectors (4-pin CHA_FAN1) (see... connect an ATX power supply to this motherboard, please connect it to the CPU fan connector on this connector. 1 13 English 22 ASRock H71M-DGS Motherboard When connecting your chassis front panel module to the hard drive activity LED on when the hard drive is reading or writing data...
Quick Installation Guide
Page 25
... Support CD that came with the motherboard contains necessary drivers and useful utilities that will display the Main Menu automatically if "AUTORUN" is designed to be user-friendly. If the Main Menu does not appear automatically, locate and double-click on your CD-ROM drive. For the ...detailed information about BIOS Setup, please refer to the User Manual (PDF file) contained in the Support CD to display the menus. 25 ASRock H71M-DGS Motherboard English A. STEP...
... Support CD that came with the motherboard contains necessary drivers and useful utilities that will display the Main Menu automatically if "AUTORUN" is designed to be user-friendly. If the Main Menu does not appear automatically, locate and double-click on your CD-ROM drive. For the ...detailed information about BIOS Setup, please refer to the User Manual (PDF file) contained in the Support CD to display the menus. 25 ASRock H71M-DGS Motherboard English A. STEP...