

User Manual
Page 2
...motherboard contains Perchlorate, a toxic substance controlled in the documentation or product. CALIFORNIA, USA ONLY he Lithium battery adopted on this documentation are used only for backup purpose, without intent to the contents of this device must accept any means, except duplication of documentation by ASRock... names appearing in any form or by any interference received, including interference that may appear in advance. ASRock assumes no event shall ASRock, its directors, oicers, employees, or agents be reproduced, transcribed, transmitted, or translated in any language...
...motherboard contains Perchlorate, a toxic substance controlled in the documentation or product. CALIFORNIA, USA ONLY he Lithium battery adopted on this documentation are used only for backup purpose, without intent to the contents of this device must accept any means, except duplication of documentation by ASRock... names appearing in any form or by any interference received, including interference that may appear in advance. ASRock assumes no event shall ASRock, its directors, oicers, employees, or agents be reproduced, transcribed, transmitted, or translated in any language...

User Manual
Page 6
Contents Chapter 1 Introduction 1 1.1 Package Contents 1 1.2 Speciications 2 1.3 Motherboard Layout 7 1.4 I/O Panel 10 1.5 WiFi-802.11ac Module and ASRock WiFi 2.4/5 GHz Antenna 12 Chapter 2 Installation 13 2.1 Installing the CPU 14 2.2 Installing the CPU Fan and Heatsink 17 2.3 Installing Memory ...Smart Switch 25 2.7 M.2_SSD (NGFF) Module Installation Guide 26 Chapter 3 Software and Utilities Operation 29 3.1 Installing Drivers 29 3.2 F-Stream 30 3.3 ASRock Live Update & APP Shop 34 3.3.1 UI Overview 34 3.3.2 Apps 35 3.3.3 BIOS & Drivers 38 3.3.4 Setting 39
Contents Chapter 1 Introduction 1 1.1 Package Contents 1 1.2 Speciications 2 1.3 Motherboard Layout 7 1.4 I/O Panel 10 1.5 WiFi-802.11ac Module and ASRock WiFi 2.4/5 GHz Antenna 12 Chapter 2 Installation 13 2.1 Installing the CPU 14 2.2 Installing the CPU Fan and Heatsink 17 2.3 Installing Memory ...Smart Switch 25 2.7 M.2_SSD (NGFF) Module Installation Guide 26 Chapter 3 Software and Utilities Operation 29 3.1 Installing Drivers 29 3.2 F-Stream 30 3.3 ASRock Live Update & APP Shop 34 3.3.1 UI Overview 34 3.3.2 Apps 35 3.3.3 BIOS & Drivers 38 3.3.4 Setting 39
User Manual
Page 8
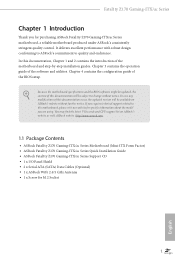
... ASRock's website without notice. ASRock website http://www.asrock.com. 1.1 Package Contents • ASRock Fatal1ty Z170 Gaming-ITX/ac Series Motherboard (Mini-ITX Form Factor) • ASRock Fatal1ty Z170 Gaming-ITX/ac Series Quick Installation Guide • ASRock Fatal1ty Z170 Gaming-ITX/ac Series Support CD • 1 x I/O Panel Shield • 2 x Serial ATA (SATA) Data Cables (Optional) • 1 x ASRock WiFi 2.4/5 GHz Antenna • 1 x Screw for speciic information about the model you for purchasing ASRock Fatal1ty Z170 Gaming-ITX/ac Series motherboard, a reliable motherboard...
... ASRock's website without notice. ASRock website http://www.asrock.com. 1.1 Package Contents • ASRock Fatal1ty Z170 Gaming-ITX/ac Series Motherboard (Mini-ITX Form Factor) • ASRock Fatal1ty Z170 Gaming-ITX/ac Series Quick Installation Guide • ASRock Fatal1ty Z170 Gaming-ITX/ac Series Support CD • 1 x I/O Panel Shield • 2 x Serial ATA (SATA) Data Cables (Optional) • 1 x ASRock WiFi 2.4/5 GHz Antenna • 1 x Screw for speciic information about the model you for purchasing ASRock Fatal1ty Z170 Gaming-ITX/ac Series motherboard, a reliable motherboard...

User Manual
Page 14
1.3 Motherboard Layout Fatal1ty Z170 Gaming-ITX/ac Series PS2 Keyboard /Mouse USB 3.0 T: USB1 B: USB2 ATX12V1 CPU_FAN1 CHA_FAN1 CHA_FAN2 USB1_2 1 HDMI2 AT X P W R 1 DDR4_A1 (64 bit, 288-pin module) DDR4_B1 (64 bit, 288-pin ...x4 USB 3.0 T: USB3 B: USB4 CLRC BTN1 USB 3.1 T: USB31_TA_1 B: USB31_TC_1 USB 3.0 T: USB7 B: USB8 Top: RJ-45 HD_AUDIO1 1 Top: LINE IN Center: FRONT Bottom: MIC IN Intel Z170 SATA3_3 SATA3_2 WiFi-802.11ac Module SATA3_5 SATA3_4 MPCIE1 128Mb BIOS PCIE1 Z170 Gaming-ITX/ac CI1 1 SPEAKER1 1 1 PANEL1 SATA3_0_1 USB3_5_6 PLED PWRBTN HDLED RESET English 7
1.3 Motherboard Layout Fatal1ty Z170 Gaming-ITX/ac Series PS2 Keyboard /Mouse USB 3.0 T: USB1 B: USB2 ATX12V1 CPU_FAN1 CHA_FAN1 CHA_FAN2 USB1_2 1 HDMI2 AT X P W R 1 DDR4_A1 (64 bit, 288-pin module) DDR4_B1 (64 bit, 288-pin ...x4 USB 3.0 T: USB3 B: USB4 CLRC BTN1 USB 3.1 T: USB31_TA_1 B: USB31_TC_1 USB 3.0 T: USB7 B: USB8 Top: RJ-45 HD_AUDIO1 1 Top: LINE IN Center: FRONT Bottom: MIC IN Intel Z170 SATA3_3 SATA3_2 WiFi-802.11ac Module SATA3_5 SATA3_4 MPCIE1 128Mb BIOS PCIE1 Z170 Gaming-ITX/ac CI1 1 SPEAKER1 1 1 PANEL1 SATA3_0_1 USB3_5_6 PLED PWRBTN HDLED RESET English 7

User Manual
Page 19
... wireless local area network (WLAN) adapter to the environment. Antenna Ports ASRock WiFi 2.4/5 GHz Antenna WiFi + BT Module English 12 1.5 WiFi-802.11ac Module and ASRock WiFi 2.4/5 GHz Antenna WiFi-802.11ac + BT Module his motherboard comes with an exclusive WiFi 802.11 a/b/g/n/ac + BT v4.0 module that adds a whole new class of functionality...
... wireless local area network (WLAN) adapter to the environment. Antenna Ports ASRock WiFi 2.4/5 GHz Antenna WiFi + BT Module English 12 1.5 WiFi-802.11ac Module and ASRock WiFi 2.4/5 GHz Antenna WiFi-802.11ac + BT Module his motherboard comes with an exclusive WiFi 802.11 a/b/g/n/ac + BT v4.0 module that adds a whole new class of functionality...
User Manual
Page 20
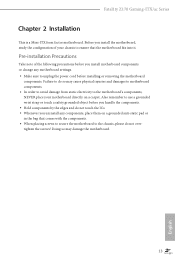
...do not overtighten the screws! Also remember to the motherboard's components, NEVER place your chassis to ensure that comes with the components. • When placing screws to secure the motherboard to unplug the power cord before you handle the ...motherboard components. • In order to avoid damage from static electricity to use a grounded wrist strap or touch a safety grounded object before installing or removing the motherboard components. Fatal1ty Z170 Gaming-ITX/ac Series Chapter 2 Installation his is a Mini-ITX form factor motherboard. Before you install motherboard...
...do not overtighten the screws! Also remember to the motherboard's components, NEVER place your chassis to ensure that comes with the components. • When placing screws to secure the motherboard to unplug the power cord before you handle the ...motherboard components. • In order to avoid damage from static electricity to use a grounded wrist strap or touch a safety grounded object before installing or removing the motherboard components. Fatal1ty Z170 Gaming-ITX/ac Series Chapter 2 Installation his is a Mini-ITX form factor motherboard. Before you install motherboard...

User Manual
Page 23
Please save and replace the cover if the processor is removed. he cover must be placed if you wish to return the motherboard for ater service. 16 English
Please save and replace the cover if the processor is removed. he cover must be placed if you wish to return the motherboard for ater service. 16 English

User Manual
Page 25
2.3 Installing Memory Modules (DIMM) his motherboard provides two 288-pin DDR4 (Double Data Rate 4) DIMM slots, and supports Dual Channel Memory Technology. 1. For dual channel coniguration, you force the DIMM into a ... English It is unable to install identical (the same brand, speed, size and chip-type) DDR4 DIMM pairs. 2. It will cause permanent damage to the motherboard and the DIMM if you always need to activate Dual Channel Memory Technology with only one correct orientation. otherwise, this...
2.3 Installing Memory Modules (DIMM) his motherboard provides two 288-pin DDR4 (Double Data Rate 4) DIMM slots, and supports Dual Channel Memory Technology. 1. For dual channel coniguration, you force the DIMM into a ... English It is unable to install identical (the same brand, speed, size and chip-type) DDR4 DIMM pairs. 2. It will cause permanent damage to the motherboard and the DIMM if you always need to activate Dual Channel Memory Technology with only one correct orientation. otherwise, this...

User Manual
Page 27
PCIe slot: PCIE1 (PCIe 3.0 x16 slot) is used for the card before you start the installation. Before installing an expansion card, please make necessary hardware settings for PCI Express x16 lane width graphics cards. mini-PCIe slot: MPCIE1 (mini-PCIe slot) is used for WiFi module. 20 English Please read the documentation of the expansion card and make sure that the power supply is switched of or the power cord is 1 PCI Express slot and 1 mini-PCI Express slot on the motherboard. 2.4 Expansion Slots (PCI Express Slots) here is unplugged.
PCIe slot: PCIE1 (PCIe 3.0 x16 slot) is used for the card before you start the installation. Before installing an expansion card, please make necessary hardware settings for PCI Express x16 lane width graphics cards. mini-PCIe slot: MPCIE1 (mini-PCIe slot) is used for WiFi module. 20 English Please read the documentation of the expansion card and make sure that the power supply is switched of or the power cord is 1 PCI Express slot and 1 mini-PCI Express slot on the motherboard. 2.4 Expansion Slots (PCI Express Slots) here is unplugged.

User Manual
Page 28
...): Connect to the motherboard. HDLED (Hard Drive Activity LED): Connect to the power switch on the chassis front panel. PWRBTN (Power Switch): Connect to the hard drive activity LED on the chassis to turn of power switch, reset switch, power LED, hard drive activity LED, speaker and etc. Fatal1ty Z170 Gaming-ITX/ac Series 2.5 Onboard Headers...
...): Connect to the motherboard. HDLED (Hard Drive Activity LED): Connect to the power switch on the chassis front panel. PWRBTN (Power Switch): Connect to the hard drive activity LED on the chassis to turn of power switch, reset switch, power LED, hard drive activity LED, speaker and etc. Fatal1ty Z170 Gaming-ITX/ac Series 2.5 Onboard Headers...

User Manual
Page 29
... internal storage devices with up to these connectors. Each USB 2.0 header can support two ports. If the Ultra M.2 Socket (M2_1) is one header on this motherboard.
... internal storage devices with up to these connectors. Each USB 2.0 header can support two ports. If the Ultra M.2 Socket (M2_1) is one header on this motherboard.

User Manual
Page 30
Fatal1ty Z170 Gaming-ITX/ac Series USB 3.0 Header (19-pin USB3_5_6) (see p.7, No. 8) Vbus IntA_PA_SSRXIntA_PA_SSRX+ GND IntA_PA_SSTXIntA_PA_SSTX+ GND IntA_PA_DIntA_PA_D+ Vbus IntA_PB_SSRXIntA_PB_SSRX+ GND IntA_PB_SSTXIntA_PB_SSTX+ GND IntA_PB_DIntA_PB_D+ Dummy 1 Besides six USB ...connect them for the HD audio panel only. Each USB 3.0 header can support two ports. C. You don't need to this motherboard. MIC_RET and OUT_RET are for the AC'97 audio panel. High Deinition Audio supports Jack Sensing, but the panel wire on this header. Front Panel Audio Header (9-pin HD_AUDIO1...
Fatal1ty Z170 Gaming-ITX/ac Series USB 3.0 Header (19-pin USB3_5_6) (see p.7, No. 8) Vbus IntA_PA_SSRXIntA_PA_SSRX+ GND IntA_PA_SSTXIntA_PA_SSTX+ GND IntA_PA_DIntA_PA_D+ Vbus IntA_PB_SSRXIntA_PB_SSRX+ GND IntA_PB_SSTXIntA_PB_SSTX+ GND IntA_PB_DIntA_PB_D+ Dummy 1 Besides six USB ...connect them for the HD audio panel only. Each USB 3.0 header can support two ports. C. You don't need to this motherboard. MIC_RET and OUT_RET are for the AC'97 audio panel. High Deinition Audio supports Jack Sensing, but the panel wire on this header. Front Panel Audio Header (9-pin HD_AUDIO1...

User Manual
Page 31
... detection design. ATX 12V Power Connector (8-pin ATX12V1) (see p.7, No. 7) 12 24 1 13 his motherboard provides a 24-pin ATX power connector. Chassis Intrusion Header (2-pin CI1) (see p.7, No. 2) FAN_SPEED_CONTROL FAN_SPEED FAN_VOLTAGE GND 4 his motherboard pro3 vides a 4-Pin CPU fan 2 1 (Quiet Fan) connector. If you plan to connect a 3-... use a 20-pin ATX power supply, please plug it to Pin 1-3. CPU Fan Connector (4-pin CPU_FAN1) (see p.7, No. 10) GND Signal his motherboard 1 supports CASE OPEN detection feature that detects if the chassis cove has been removed.
... detection design. ATX 12V Power Connector (8-pin ATX12V1) (see p.7, No. 7) 12 24 1 13 his motherboard provides a 24-pin ATX power connector. Chassis Intrusion Header (2-pin CI1) (see p.7, No. 2) FAN_SPEED_CONTROL FAN_SPEED FAN_VOLTAGE GND 4 his motherboard pro3 vides a 4-Pin CPU fan 2 1 (Quiet Fan) connector. If you plan to connect a 3-... use a 20-pin ATX power supply, please plug it to Pin 1-3. CPU Fan Connector (4-pin CPU_FAN1) (see p.7, No. 10) GND Signal his motherboard 1 supports CASE OPEN detection feature that detects if the chassis cove has been removed.

User Manual
Page 32
his function is workable only when you power of your computer and unplug the power supply. English 25 Fatal1ty Z170 Gaming-ITX/ac Series 2.6 Smart Switch he motherboard has one smart switche: Clear CMOS Switch, allowing users to quickly clear the CMOS values. Clear CMOS Switch (CLRCBTN) (see p.10, No. 11) Clear CMOS Switch allows users to clear the CMOS values.
his function is workable only when you power of your computer and unplug the power supply. English 25 Fatal1ty Z170 Gaming-ITX/ac Series 2.6 Smart Switch he motherboard has one smart switche: Clear CMOS Switch, allowing users to quickly clear the CMOS values. Clear CMOS Switch (CLRCBTN) (see p.10, No. 11) Clear CMOS Switch allows users to clear the CMOS values.

User Manual
Page 33
... by a SATA-type M.2 device, SATA3_0, SATA3_1 and the SATA function of the SATA Express connector will be used. Installing the M.2_SSD (NGFF) Module Step 1 his motherboard supports M.2_SSD (NGFF) module type 2260 and 2280 only. Please be noted that if the Ultra M.2 Socket (M2_1) is a small size and versatile card edge...
... by a SATA-type M.2 device, SATA3_0, SATA3_1 and the SATA function of the SATA Express connector will be used. Installing the M.2_SSD (NGFF) Module Step 1 his motherboard supports M.2_SSD (NGFF) module type 2260 and 2280 only. Please be noted that if the Ultra M.2 Socket (M2_1) is a small size and versatile card edge...

User Manual
Page 34
B A B A B A B A B A Fatal1ty Z170 Gaming-ITX/ac Series Step 3 he standof is type 2280. Step 4 Peel of the yellow protective ilm on the motherboard. English 27 Step 5 Align and gently insert the M.2 (NGFF) SSD module into the nut location A on the nut location A. Step 6 Tighten the screw with a screwdriver ...
B A B A B A B A B A Fatal1ty Z170 Gaming-ITX/ac Series Step 3 he standof is type 2280. Step 4 Peel of the yellow protective ilm on the motherboard. English 27 Step 5 Align and gently insert the M.2 (NGFF) SSD module into the nut location A on the nut location A. Step 6 Tighten the screw with a screwdriver ...

User Manual
Page 36
... drivers. Utilities Menu he Utilities Menu shows the application sotware that enhance the motherboard's features. Fatal1ty Z170 Gaming-ITX/ac Series Chapter 3 Software and Utilities Operation 3.1 Installing Drivers he Support CD that comes with the motherboard contains necessary drivers and useful utilities that the motherboard supports. Drivers Menu he drivers compatible to display the menu. If the Main...
... drivers. Utilities Menu he Utilities Menu shows the application sotware that enhance the motherboard's features. Fatal1ty Z170 Gaming-ITX/ac Series Chapter 3 Software and Utilities Operation 3.1 Installing Drivers he Support CD that comes with the motherboard contains necessary drivers and useful utilities that the motherboard supports. Drivers Menu he drivers compatible to display the menu. If the Main...

User Manual
Page 41
... category panel contains several category tabs or buttons that when selected the information panel below displays the relative information. Double-click utility. With ASRock APP Shop, you can quickly and easily install various apps and support utilities, such as USB Key, XFast LAN, XFast RAM and ...the currently selected category and allows users to perform job-related tasks. 3.3 ASRock Live Update & APP Shop he ASRock Live Update & APP Shop is an online store for purchasing and downloading sotware applications for your motherboard up to date simply with a few clicks. on the image to ...
... category panel contains several category tabs or buttons that when selected the information panel below displays the relative information. Double-click utility. With ASRock APP Shop, you can quickly and easily install various apps and support utilities, such as USB Key, XFast LAN, XFast RAM and ...the currently selected category and allows users to perform job-related tasks. 3.3 ASRock Live Update & APP Shop he ASRock Live Update & APP Shop is an online store for purchasing and downloading sotware applications for your motherboard up to date simply with a few clicks. on the image to ...

User Manual
Page 51
... Enhanced Host Controller Interface (EHCI - Requirements • A Windows® 7 installation disk or USB drive • USB 3.0 drivers (included in the ASRock Support CD or website) • A Windows® PC • Win7 USB Patcher (included in UEFI SETUP UTILITY > Advanced > USB Coniguration, which... to install Windows® 7 OS. 3.5 Enabling USB Ports for Windows® 7 Installation Intel® Braswell and Skylake has removed their motherboard won't work. USB2.0) and only kept the eXtensible Host Controller Interface (XHCI - hen use the new patched Windows® 7 installation USB...
... Enhanced Host Controller Interface (EHCI - Requirements • A Windows® 7 installation disk or USB drive • USB 3.0 drivers (included in the ASRock Support CD or website) • A Windows® PC • Win7 USB Patcher (included in UEFI SETUP UTILITY > Advanced > USB Coniguration, which... to install Windows® 7 OS. 3.5 Enabling USB Ports for Windows® 7 Installation Intel® Braswell and Skylake has removed their motherboard won't work. USB2.0) and only kept the eXtensible Host Controller Interface (XHCI - hen use the new patched Windows® 7 installation USB...

User Manual
Page 57
... your system performance. 4.3 OC Tweaker Screen In the OC Tweaker screen, you see on your screen. It should be done at your GPU and motherboard. his option appears only when you adopt K-Series CPU. 50 English his option appears only when your CPU supports this option to your own risk... GPU overclocking setting. Please note that overclocking may cause damage to load optimized CPU overclocking setting. It should be done at your CPU and motherboard. his option appears only when you adopt K-Series CPU. Load Optimized GPU OC Setting You can use this function.
... your system performance. 4.3 OC Tweaker Screen In the OC Tweaker screen, you see on your screen. It should be done at your GPU and motherboard. his option appears only when you adopt K-Series CPU. 50 English his option appears only when your CPU supports this option to your own risk... GPU overclocking setting. Please note that overclocking may cause damage to load optimized CPU overclocking setting. It should be done at your CPU and motherboard. his option appears only when you adopt K-Series CPU. Load Optimized GPU OC Setting You can use this function.

