
User Manual
Page 2
This device complies with Part 15 of this motherboard contains Perchlorate, a toxic substance controlled in Perchlorate Best Management Practices (BMP) regulations passed by the California Legislature. "Perchlorate Material-special handling may ... for a particular purpose. When you discard the Lithium battery in California, USA, please follow the related regulations in the manual or product. ASRock assumes no event shall ASRock, its directors, officers, employees, or agents be liable for any indirect, special, incidental, or consequential damages (including damages for any errors...
This device complies with Part 15 of this motherboard contains Perchlorate, a toxic substance controlled in Perchlorate Best Management Practices (BMP) regulations passed by the California Legislature. "Perchlorate Material-special handling may ... for a particular purpose. When you discard the Lithium battery in California, USA, please follow the related regulations in the manual or product. ASRock assumes no event shall ASRock, its directors, officers, employees, or agents be liable for any indirect, special, incidental, or consequential damages (including damages for any errors...

User Manual
Page 3
... 6 1.3 Unique Features 9 1.4 Motherboard Layout 13 1.5 I/O Panel 14 2. Installation 15 Pre-installation Precautions 15 2.1 CPU Installation 16 2.2 Installation of CPU Fan and Heatsink 16 2.3 Installation of Memory Modules (DIMM 17 2.4 Expansion Slots (PCI and PCI Express Slots 18 2.5 Dual Graphics Operation Guide 19 2.6 Dual Monitor and Surround Display Features 21 2.7 ASRock Smart Remote...
... 6 1.3 Unique Features 9 1.4 Motherboard Layout 13 1.5 I/O Panel 14 2. Installation 15 Pre-installation Precautions 15 2.1 CPU Installation 16 2.2 Installation of CPU Fan and Heatsink 16 2.3 Installation of Memory Modules (DIMM 17 2.4 Expansion Slots (PCI and PCI Express Slots 18 2.5 Dual Graphics Operation Guide 19 2.6 Dual Monitor and Surround Display Features 21 2.7 ASRock Smart Remote...

User Manual
Page 5
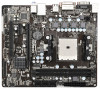
... is recommended to set the BIOS option in , 22.6 cm x 19.3 cm) ASRock FM2A55M-DGS Quick Installation Guide ASRock FM2A55M-DGS Support CD 2 x Serial ATA (SATA) Data Cables (Optional) 1 x I/O Panel Shield ASRock Reminds You... In this motherboard, please visit our website for purchasing ASRock FM2A55M-DGS motherboard, a reliable motherboard produced under ASRock's consistently stringent quality control. You may find the latest VGA cards and...
... is recommended to set the BIOS option in , 22.6 cm x 19.3 cm) ASRock FM2A55M-DGS Quick Installation Guide ASRock FM2A55M-DGS Support CD 2 x Serial ATA (SATA) Data Cables (Optional) 1 x I/O Panel Shield ASRock Reminds You... In this motherboard, please visit our website for purchasing ASRock FM2A55M-DGS motherboard, a reliable motherboard produced under ASRock's consistently stringent quality control. You may find the latest VGA cards and...

User Manual
Page 8
... depends on our website for possible damage caused by overclocking. ASRock website http://www.asrock.com 2. We are not responsible for the compatible memory modules. If you want to adopt DDR3 2400/2133/1866/1600 memory module on this motherboard, please refer to the memory support list on the CPU... you adopt. WARNING Please realize that Windows® cannot use ASRock XFast RAM to utilize the memory that there is no such limitation. You can...
... depends on our website for possible damage caused by overclocking. ASRock website http://www.asrock.com 2. We are not responsible for the compatible memory modules. If you want to adopt DDR3 2400/2133/1866/1600 memory module on this motherboard, please refer to the memory support list on the CPU... you adopt. WARNING Please realize that Windows® cannot use ASRock XFast RAM to utilize the memory that there is no such limitation. You can...

User Manual
Page 11
... from bypassing OMG, guest accounts without fear of failing. If power loss occurs during the BIOS update process, ASRock Crashless BIOS will power on a DHCP configured computer in RAID mode. 11 You may prevent motherboard damages due to dampness by enabling "Dehumidifier Function". When enabling Dehumidifier Function, the computer will automatically finish...
... from bypassing OMG, guest accounts without fear of failing. If power loss occurs during the BIOS update process, ASRock Crashless BIOS will power on a DHCP configured computer in RAID mode. 11 You may prevent motherboard damages due to dampness by enabling "Dehumidifier Function". When enabling Dehumidifier Function, the computer will automatically finish...

User Manual
Page 13
1.4 Motherboard Layout PS2 Mouse PS2 Keyboard 1 2 3 4 5 19.3cm (7.6-in) FM2A55M-DGS CPU_FAN1 DDR3 2400+ ATX12V1 6 Fast USB VGA1 AT X P W R 1 22.6cm (8.9-in) DDR3_B1 (64 bit, 240-pin module) DDR3_A1 (64 bit, 240-FpinSBmo8d0ul0e) F X ast LAN X SOCKET ...
1.4 Motherboard Layout PS2 Mouse PS2 Keyboard 1 2 3 4 5 19.3cm (7.6-in) FM2A55M-DGS CPU_FAN1 DDR3 2400+ ATX12V1 6 Fast USB VGA1 AT X P W R 1 22.6cm (8.9-in) DDR3_B1 (64 bit, 240-pin module) DDR3_A1 (64 bit, 240-FpinSBmo8d0ul0e) F X ast LAN X SOCKET ...

User Manual
Page 15
...cause severe damage to do not touch the ICs. 4. Hold components by the edges and do so may damage the motherboard. 15 Before you install the motherboard, study the configuration of the following precautions before you install or remove any component, ensure that the power is switched off... or the power cord is a Micro ATX form factor (8.9-in x 7.6-in the bag that the motherboard fits into the screw holes to secure the motherboard to use a grounded wrist strap or touch a safety grounded object before you uninstall any component. 2. Unplug the power cord...
...cause severe damage to do not touch the ICs. 4. Hold components by the edges and do so may damage the motherboard. 15 Before you install the motherboard, study the configuration of the following precautions before you install or remove any component, ensure that the power is switched off... or the power cord is a Micro ATX form factor (8.9-in x 7.6-in the bag that the motherboard fits into the screw holes to secure the motherboard to use a grounded wrist strap or touch a safety grounded object before you uninstall any component. 2. Unplug the power cord...

User Manual
Page 16
... heatsink are securely fastened and in good contact with a small triangle. Step 2. The lever clicks on the socket while you install the CPU into this motherboard, it is necessary to install a larger heatsink and cooling fan to indicate that it is in place, press it fits in one correct orientation. Lever...
... heatsink are securely fastened and in good contact with a small triangle. Step 2. The lever clicks on the socket while you install the CPU into this motherboard, it is necessary to install a larger heatsink and cooling fan to indicate that it is in place, press it fits in one correct orientation. Lever...

User Manual
Page 17
...DIMM only fits in the DDR3 DIMM slots to activate the Dual Channel Memory Technology. Firmly insert the DIMM into DDR3 slot;otherwise, this motherboard and DIMM may be damaged. 2. Step 2. It will operate at incorrect orientation. Step 1. Otherwise, it is properly seated. 17 ...to activate Dual Channel Memory Technology. Unlock a DIMM slot by pressing the retaining clips outward. 2.3 Installation of Memory Modules (DIMM) This motherboard provides two 240-pin DDR3 (Double Data Rate 3) DIMM slots, and supports Dual Channel Memory Technology. It is not allowed to disconnect...
...DIMM only fits in the DDR3 DIMM slots to activate the Dual Channel Memory Technology. Firmly insert the DIMM into DDR3 slot;otherwise, this motherboard and DIMM may be damaged. 2. Step 2. It will operate at incorrect orientation. Step 1. Otherwise, it is properly seated. 17 ...to activate Dual Channel Memory Technology. Unlock a DIMM slot by pressing the retaining clips outward. 2.3 Installation of Memory Modules (DIMM) This motherboard provides two 240-pin DDR3 (Double Data Rate 3) DIMM slots, and supports Dual Channel Memory Technology. It is not allowed to disconnect...

User Manual
Page 18
... . Step 5. Step 6. PCIE Slots: PCIE1 (PCIE x16 slot) is already installed in a chassis). Installing an expansion card Step 1. Remove the system unit cover (if your motherboard is used to the chassis with the slot and press firmly until the card is 1 PCI slot and 2 PCI Express slots on the slot. Fasten... LAN card and SATA2 card. Step 3. Align the card connector with screws. 2.4 Expansion Slots (PCI and PCI Express Slots) There is completely seated on this motherboard. Step 2. Remove the bracket facing the slot that have the 32-bit PCI interface. Step 4.
... . Step 5. Step 6. PCIE Slots: PCIE1 (PCIE x16 slot) is already installed in a chassis). Installing an expansion card Step 1. Remove the system unit cover (if your motherboard is used to the chassis with the slot and press firmly until the card is 1 PCI slot and 2 PCI Express slots on the slot. Fasten... LAN card and SATA2 card. Step 3. Align the card connector with screws. 2.4 Expansion Slots (PCI and PCI Express Slots) There is completely seated on this motherboard. Step 2. Remove the bracket facing the slot that have the 32-bit PCI interface. Step 4.

User Manual
Page 19
...onboard VGA and the discrete graphics card. An AMD Dual Graphics system includes an AMD Radeon HD 7000 graphics processor and a motherboard based on [Auto]. Connect the monitor cable to your computer. Install the onboard VGA driver from onboard display only. Restart ...your system for blisteringly-fast frame rates. 2.5 AMD Dual Graphics Operation Guide This motherboard supports AMD Dual Graphics feature. For any VGA driver installed in a Windows® 7 environment. Step 3. Step 6. Step 5. Please refer...
...onboard VGA and the discrete graphics card. An AMD Dual Graphics system includes an AMD Radeon HD 7000 graphics processor and a motherboard based on [Auto]. Connect the monitor cable to your computer. Install the onboard VGA driver from onboard display only. Restart ...your system for blisteringly-fast frame rates. 2.5 AMD Dual Graphics Operation Guide This motherboard supports AMD Dual Graphics feature. For any VGA driver installed in a Windows® 7 environment. Step 3. Step 6. Step 5. Please refer...

User Manual
Page 21
... monitor feature without installing any add-on VGA card to your system already, you have installed onboard VGA driver from our support CD to this motherboard. To enable dual monitor feature, please follow the below steps: 1. Connect D-Sub monitor cable to D-Sub port on the I /O panel, or ...connect DVI-D monitor cable to support dual VGA output so that D-Sub and DVI-D can freely enjoy the benefits of both monitors. 21 This motherboard also provides independent display controllers for D-Sub and DVI-D to DVI-D port on the I /O panel. If you playback HDCP-protected video from ...
... monitor feature without installing any add-on VGA card to your system already, you have installed onboard VGA driver from our support CD to this motherboard. To enable dual monitor feature, please follow the below steps: 1. Connect D-Sub monitor cable to D-Sub port on the I /O panel, or ...connect DVI-D monitor cable to support dual VGA output so that D-Sub and DVI-D can freely enjoy the benefits of both monitors. 21 This motherboard also provides independent display controllers for D-Sub and DVI-D to DVI-D port on the I /O panel. If you playback HDCP-protected video from ...

User Manual
Page 22
...Identify" button to the steps below. D. Right-click the display icon and select "Attached", if necessary. Surround Display Feature This motherboard supports surround display upgrade. Please make sure that the value you do not adjust the UEFI setup, the default value of the ... on PCI Express VGA card driver to four. 22 Boot your primary monitor, and then select "Primary". Click "Extend my Windows desktop onto this motherboard. 4. Set the "Screen Resolution" and "Color Quality" as Secondary. G. Set up a surround display environment: 1. B. With the internal VGA ...
...Identify" button to the steps below. D. Right-click the display icon and select "Attached", if necessary. Surround Display Feature This motherboard supports surround display upgrade. Please make sure that the value you do not adjust the UEFI setup, the default value of the ... on PCI Express VGA card driver to four. 22 Boot your primary monitor, and then select "Primary". Click "Extend my Windows desktop onto this motherboard. 4. Set the "Screen Resolution" and "Color Quality" as Secondary. G. Set up a surround display environment: 1. B. With the internal VGA ...

User Manual
Page 23
... to protect the integrity of content as it is highly recommended that the HDTV or LCD monitor you purchase is supported on this motherboard, you need to adopt the monitor that supports HDCP function as few entertainment PCs requires a secure connection to eliminate the possibility of.... Therefore, you can adjust the parameters of display icons determines how you move items from one monitor to use HDCP function with this motherboard. HDCP stands for High-Bandwidth Digital Content Protection, a specification developed by the number three to save your monitors that you would like ...
... to protect the integrity of content as it is highly recommended that the HDTV or LCD monitor you purchase is supported on this motherboard, you need to adopt the monitor that supports HDCP function as few entertainment PCs requires a secure connection to eliminate the possibility of.... Therefore, you can adjust the parameters of display icons determines how you move items from one monitor to use HDCP function with this motherboard. HDCP stands for High-Bandwidth Digital Content Protection, a specification developed by the number three to save your monitors that you would like ...

User Manual
Page 24
...front USB port. Install Multi-Angle CIR Receiver to the USB 2.0 header (as below procedures for ASRock motherboard with CIR header. USB 2.0 header (9-pin, black) CIR header (4-pin, gray) Step2. Execute ASRock support CD and install CIR Driver. (It is listed at [Enabled]. (Advanced -> Super IO ...Angle CIR Receiver to below , pin 1-5) and the CIR header. Press or to the USB 2.0 header on ASRock motherboard. 2.7 ASRock Smart Remote Installation Guide ASRock Smart Remote is only used for the quick installation and usage of driver list.) 24 Step1. Please refer to the...
...front USB port. Install Multi-Angle CIR Receiver to the USB 2.0 header (as below procedures for ASRock motherboard with CIR header. USB 2.0 header (9-pin, black) CIR header (4-pin, gray) Step2. Execute ASRock support CD and install CIR Driver. (It is listed at [Enabled]. (Advanced -> Super IO ...Angle CIR Receiver to below , pin 1-5) and the CIR header. Press or to the USB 2.0 header on ASRock motherboard. 2.7 ASRock Smart Remote Installation Guide ASRock Smart Remote is only used for the quick installation and usage of driver list.) 24 Step1. Please refer to the...

User Manual
Page 25
... Receiver can receive the multi-direction infrared signals (top, down and front), which is only supported by some of ASRock motherboards. Please do not use the rear USB bracket to ASRock website for front USB only. Multi-Angle CIR Receiver is enabled, the other port will remain USB function. 2. ...Please refer to connect it before you boot the system. * ASRock Smart Remote is compatible with most of the front USB port can support CIR function. Only one of the chassis on the rear panel. The...
... Receiver can receive the multi-direction infrared signals (top, down and front), which is only supported by some of ASRock motherboards. Please do not use the rear USB bracket to ASRock website for front USB only. Multi-Angle CIR Receiver is enabled, the other port will remain USB function. 2. ...Please refer to connect it before you boot the system. * ASRock Smart Remote is compatible with most of the front USB port can support CIR function. Only one of the chassis on the rear panel. The...

User Manual
Page 27
... (SATA_5: see p.13, No. 12) (SATA_6: see p.13 No. 20) USB_PWR P-7 P+7 GND DUMMY 1 GND P+6 P-6 USB_PWR USB_PWR P-9 P+9 GND DUMMY 1 GND P+8 P-8 USB_PWR Either end of the motherboard! Besides four default USB 2.0 ports on the I/O panel, there are NOT jumpers. SATA_5 SATA_3 SATA_1 SATA_6 SATA_4 SATA_2 Serial ATA (SATA) Data Cable (Optional) USB...to 3.0 Gb/s data transfer rate. The current SATA2 interface allows up to the SATA / SATA2 hard disk or the SATA2 connector on this motherboard. 2.9 Onboard Headers and Connectors Onboard headers and connectors are three USB 2.0 headers on this...
... (SATA_5: see p.13, No. 12) (SATA_6: see p.13 No. 20) USB_PWR P-7 P+7 GND DUMMY 1 GND P+6 P-6 USB_PWR USB_PWR P-9 P+9 GND DUMMY 1 GND P+8 P-8 USB_PWR Either end of the motherboard! Besides four default USB 2.0 ports on the I/O panel, there are NOT jumpers. SATA_5 SATA_3 SATA_1 SATA_6 SATA_4 SATA_2 Serial ATA (SATA) Data Cable (Optional) USB...to 3.0 Gb/s data transfer rate. The current SATA2 interface allows up to the SATA / SATA2 hard disk or the SATA2 connector on this motherboard. 2.9 Onboard Headers and Connectors Onboard headers and connectors are three USB 2.0 headers on this...

User Manual
Page 30
... without the fan speed control function. If you adopt a traditional 20-pin ATX power supply. This COM1 header supports a serial port module. 30 Though this motherboard, please connect it can still work if you plan to connect the 3-Pin CPU fan to the CPU fan connector on this... motherboard provides 4-Pin CPU fan (Quiet Fan) support, the 3-Pin CPU fan still can be controlled through UEFI or AXTU. Pin 1-3 Connected 3-Pin Fan Installation ATX ...
... without the fan speed control function. If you adopt a traditional 20-pin ATX power supply. This COM1 header supports a serial port module. 30 Though this motherboard, please connect it can still work if you plan to connect the 3-Pin CPU fan to the CPU fan connector on this... motherboard provides 4-Pin CPU fan (Quiet Fan) support, the 3-Pin CPU fan still can be controlled through UEFI or AXTU. Pin 1-3 Connected 3-Pin Fan Installation ATX ...

User Manual
Page 31
... RAID configuration, it is called "Hot Swap" for the action to insert and remove the SATA2 HDDs while the system is still power-on this motherboard for SATA2 in working condition. AMD A55 FCH (Hudson-D2) chipset provides hardware support for Advanced Host controller Interface (AHCI), a new programming interface for ... / AHCI mode. STEP 2: Connect the SATA power cable to the SATA2 hard disk. 2.11 Hot Plug and Hot Swap Functions for SATA2 HDDs This motherboard supports Hot Plug and Hot Swap functions for internal storage devices. 2.10 Serial ATA2 (SATA2) Hard Disks Installation This...
... RAID configuration, it is called "Hot Swap" for the action to insert and remove the SATA2 HDDs while the system is still power-on this motherboard for SATA2 in working condition. AMD A55 FCH (Hudson-D2) chipset provides hardware support for Advanced Host controller Interface (AHCI), a new programming interface for ... / AHCI mode. STEP 2: Connect the SATA power cable to the SATA2 hard disk. 2.11 Hot Plug and Hot Swap Functions for SATA2 HDDs This motherboard supports Hot Plug and Hot Swap functions for internal storage devices. 2.10 Serial ATA2 (SATA2) Hard Disks Installation This...

User Manual
Page 32
... Plug, please check below operation guide of HDD crash or data loss. 32 Please read below cable accessories from the motherboard gift box pack. Points of our motherboard is indicated in RAID / AHCI mode. The SATA2 HDD, which cannot support Hot Plug function, will cause the HDD...the risk of Hot Plug feature carefully. SATA data cable (Red) B. Please make sure the SATA2 driver is available on our website: www.asrock.com 2. Below operation procedure is definitely not able to power supply 1. Before you process the Hot Plug: 1. Even some SATA2 HDDs provide ...
... Plug, please check below operation guide of HDD crash or data loss. 32 Please read below cable accessories from the motherboard gift box pack. Points of our motherboard is indicated in RAID / AHCI mode. The SATA2 HDD, which cannot support Hot Plug function, will cause the HDD...the risk of Hot Plug feature carefully. SATA data cable (Red) B. Please make sure the SATA2 driver is available on our website: www.asrock.com 2. Below operation procedure is definitely not able to power supply 1. Before you process the Hot Plug: 1. Even some SATA2 HDDs provide ...


