User Manual
Page 5
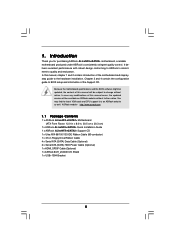
It delivers excellent performance with robust design conforming to ASRock's commitment to BIOS setup and information of the Support CD. ASRock website http://www.asrock.com 1.1 Package Contents 1 x ASRock ALiveNF5-eSATA2+ Motherboard (ATX Form Factor: 12.0-in x 8.0-in, 30.5 cm x 20.3 cm) 1 x ASRock ALiveNF5-eSATA2+ Quick Installation Guide 1 x ASRock ALiveNF5-eSATA2+ Support CD 1 x Ultra ATA 66/100/133 IDE Ribbon Cable (80-conductor) 1 x 3.5-in...
It delivers excellent performance with robust design conforming to ASRock's commitment to BIOS setup and information of the Support CD. ASRock website http://www.asrock.com 1.1 Package Contents 1 x ASRock ALiveNF5-eSATA2+ Motherboard (ATX Form Factor: 12.0-in x 8.0-in, 30.5 cm x 20.3 cm) 1 x ASRock ALiveNF5-eSATA2+ Quick Installation Guide 1 x ASRock ALiveNF5-eSATA2+ Support CD 1 x Ultra ATA 66/100/133 IDE Ribbon Cable (80-conductor) 1 x 3.5-in...
User Manual
Page 8
...will overclock the chipset/CPU reference clock. For audio output, this function will update it back again. Please read "Untied Overclocking Technology" on the motherboard functions properly... and unplug the power cord, then plug it to our website in the BIOS setup, the memory performance will automatically shutdown. Please visit our website for all... Memory Technology. This motherboard supports ASRock AM2 Boost overclocking technology. This motherboard supports eSATAII interface, the external SATAII specification. ASRock website http://www.asrock.com 8 See APPENDIX on page...
...will overclock the chipset/CPU reference clock. For audio output, this function will update it back again. Please read "Untied Overclocking Technology" on the motherboard functions properly... and unplug the power cord, then plug it to our website in the BIOS setup, the memory performance will automatically shutdown. Please visit our website for all... Memory Technology. This motherboard supports ASRock AM2 Boost overclocking technology. This motherboard supports eSATAII interface, the external SATAII specification. ASRock website http://www.asrock.com 8 See APPENDIX on page...
User Manual
Page 17
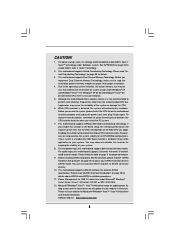
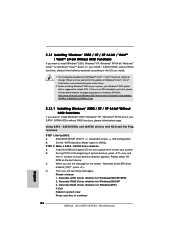
However, please do the clear-CMOS action. 17 If you need to clear the CMOS when you just finish updating the BIOS, you must boot up events. When the jumper cap is placed on pins, the jumper is "Open". After waiting for 15 seconds, use a jumper cap ... +5VSB (standby) for 5 seconds. To clear and reset the system parameters to enable (see p.10, No. 9) 1_2 2_3 Default Clear CMOS Note: CLRCMOS1 allows you update the BIOS. 2.5 Jumpers Setup The illustration shows how jumpers are "Short" when jumper cap is placed on these 2 pins. The data in CMOS.
However, please do the clear-CMOS action. 17 If you need to clear the CMOS when you just finish updating the BIOS, you must boot up events. When the jumper cap is placed on pins, the jumper is "Open". After waiting for 15 seconds, use a jumper cap ... +5VSB (standby) for 5 seconds. To clear and reset the system parameters to enable (see p.10, No. 9) 1_2 2_3 Default Clear CMOS Note: CLRCMOS1 allows you update the BIOS. 2.5 Jumpers Setup The illustration shows how jumpers are "Short" when jumper cap is placed on these 2 pins. The data in CMOS.
User Manual
Page 31
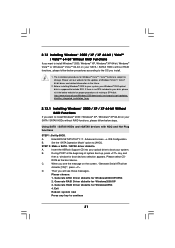
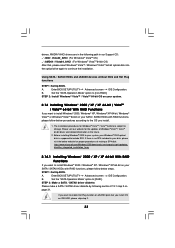
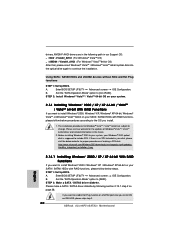
...updates of system boot-up, press key, and then a window for proper procedures of making a SP4 disk: http://www.microsoft.com/Windows2000/downloads/servicepacks/sp4/spdeploy. Before installing Windows® 2000 to your system, your Windows® 2000 optical disk is no SP4 included in the future. 2. A. Insert the ASRock... Support CD into your optical drive to include SP4. Please select CD- If there is supposed to boot your system. Using SATA / SATAII HDDs and eSATAII devices with NCQ and Hot Plug functions STEP 1: Set Up BIOS. Enter BIOS SETUP UTILITY ...
...updates of system boot-up, press key, and then a window for proper procedures of making a SP4 disk: http://www.microsoft.com/Windows2000/downloads/servicepacks/sp4/spdeploy. Before installing Windows® 2000 to your system, your Windows® 2000 optical disk is no SP4 included in the future. 2. A. Insert the ASRock... Support CD into your optical drive to include SP4. Please select CD- If there is supposed to boot your system. Using SATA / SATAII HDDs and eSATAII devices with NCQ and Hot Plug functions STEP 1: Set Up BIOS. Enter BIOS SETUP UTILITY ...
User Manual
Page 33
...information in your SATA / SATAII HDDs with RAID functions, please follow below website for the updates of making a SP4 disk: http://www.microsoft.com/Windows2000/downloads/servicepacks/sp4/spdeploy. Enter BIOS SETUP UTILITY Advanced screen IDE Configuration. STEP 2: Make a SATA / SATAII driver diskette. ...® 2000 / Windows® XP / Windows® XP 64-bit on IDE HDD, please skip step 2. 33 drivers. Enter BIOS SETUP UTILITY Advanced screen IDE Configuration. htm#the_integrated_installation_fmay 2.14.1 Installing Windows® 2000 / XP / XP 64-bit With RAID Functions If...
...information in your SATA / SATAII HDDs with RAID functions, please follow below website for the updates of making a SP4 disk: http://www.microsoft.com/Windows2000/downloads/servicepacks/sp4/spdeploy. Enter BIOS SETUP UTILITY Advanced screen IDE Configuration. STEP 2: Make a SATA / SATAII driver diskette. ...® 2000 / Windows® XP / Windows® XP 64-bit on IDE HDD, please skip step 2. 33 drivers. Enter BIOS SETUP UTILITY Advanced screen IDE Configuration. htm#the_integrated_installation_fmay 2.14.1 Installing Windows® 2000 / XP / XP 64-bit With RAID Functions If...
User Manual
Page 36
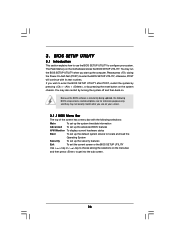
...they may also restart by pressing the reset button on the menu bar, and then press to get into the sub screen. 36 Because the BIOS software is constantly being updated, the following selections: Main To set up the system time/date information Advanced To set up the advanced... BIOS features H/W Monitor To display current hardware status Boot To set up the default system device to locate and load the Operating System Security To ...
...they may also restart by pressing the reset button on the menu bar, and then press to get into the sub screen. 36 Because the BIOS software is constantly being updated, the following selections: Main To set up the system time/date information Advanced To set up the advanced... BIOS features H/W Monitor To display current hardware status Boot To set up the default system device to locate and load the Operating System Security To ...
User Manual
Page 37
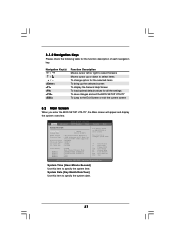
...System Overview System Time System Date [17:00:09] [Fri 01/12/2007] BIOS Version : ALiveNF5-eSATA2+ BIOS P1.0 Processor Type : AMD Athlon(tm) 64 X2 Dual Core Processor 4400+ (64bit supported) Processor Speed : 2892MHz Microcode Update : 60FB1/0 L1 Cache Size : 256KB L2 Cache Size : 1024KB Total Memory ...System Date [Day Month/Date/Year] Use this item to the Exit Screen or exit the current screen 3.2 Main Screen When you enter the BIOS SETUP UTILITY, the Main screen will appear and display the system overview. Navigation Key(s) / / + / Function Description Moves cursor left or right...
...System Overview System Time System Date [17:00:09] [Fri 01/12/2007] BIOS Version : ALiveNF5-eSATA2+ BIOS P1.0 Processor Type : AMD Athlon(tm) 64 X2 Dual Core Processor 4400+ (64bit supported) Processor Speed : 2892MHz Microcode Update : 60FB1/0 L1 Cache Size : 256KB L2 Cache Size : 1024KB Total Memory ...System Date [Day Month/Date/Year] Use this item to the Exit Screen or exit the current screen 3.2 Main Screen When you enter the BIOS SETUP UTILITY, the Main screen will appear and display the system overview. Navigation Key(s) / / + / Function Description Moves cursor left or right...
Quick Installation Guide
Page 4
... BIOS software might be updated, the content of this manual will be subject to quality and endurance. You may find the latest VGA cards and CPU support lists on ASRock website without notice. ASRock website http://www.asrock.com 1.1 Package Contents 1 x ASRock ALiveNF5-eSATA2+ Motherboard (ATX Form Factor: 12.0-in x 8.0-in, 30.5 cm x 20.3 cm) 1 x ASRock ALiveNF5-eSATA2+ Quick Installation Guide 1 x ASRock ALiveNF5-eSATA2...
... BIOS software might be updated, the content of this manual will be subject to quality and endurance. You may find the latest VGA cards and CPU support lists on ASRock website without notice. ASRock website http://www.asrock.com 1.1 Package Contents 1 x ASRock ALiveNF5-eSATA2+ Motherboard (ATX Form Factor: 12.0-in x 8.0-in, 30.5 cm x 20.3 cm) 1 x ASRock ALiveNF5-eSATA2+ Quick Installation Guide 1 x ASRock ALiveNF5-eSATA2...
Quick Installation Guide
Page 7
... can also connect SATA hard disk to our website in the future. ASRock website http://www.asrock.com 7 ASRock ALiveNF5-eSATA2+ Motherboard English This motherboard supports Untied Overclocking Technology. Before you enable this.... CAUTION! 1. Please read the installation guide of "User Manual" in the BIOS setup, the memory performance will automatically shutdown. If you implement Dual Channel Memory .../ XP SP1 or SP2 / 2000 SP4. 12. For microphone input, this function will update it is strongly recommended to read "Untied Overclocking Technology" on page 3 for details. ...
... can also connect SATA hard disk to our website in the future. ASRock website http://www.asrock.com 7 ASRock ALiveNF5-eSATA2+ Motherboard English This motherboard supports Untied Overclocking Technology. Before you enable this.... CAUTION! 1. Please read the installation guide of "User Manual" in the BIOS setup, the memory performance will automatically shutdown. If you implement Dual Channel Memory .../ XP SP1 or SP2 / 2000 SP4. 12. For microphone input, this function will update it is strongly recommended to read "Untied Overclocking Technology" on page 3 for details. ...

Quick Installation Guide
Page 14
Short Open Jumper Setting PS2_USB_PW1 Short pin2, pin3 to enable (see p.2, No. 9) Default Clear CMOS Note: CLRCMOS1 allows you update the BIOS. If you need to clear the data in CMOS includes system setup information such as system password, date, time, and system ... Amp and higher standby current provided by power supply. English 14 ASRock ALiveNF5-eSATA2+ Motherboard Note: To select +5VSB, it down before you do not clear the CMOS right after you to clear the CMOS when you just finish updating the BIOS, you must boot up events. After waiting for 15 seconds, use...
Short Open Jumper Setting PS2_USB_PW1 Short pin2, pin3 to enable (see p.2, No. 9) Default Clear CMOS Note: CLRCMOS1 allows you update the BIOS. If you need to clear the data in CMOS includes system setup information such as system password, date, time, and system ... Amp and higher standby current provided by power supply. English 14 ASRock ALiveNF5-eSATA2+ Motherboard Note: To select +5VSB, it down before you do not clear the CMOS right after you to clear the CMOS when you just finish updating the BIOS, you must boot up events. After waiting for 15 seconds, use...
Quick Installation Guide
Page 28
...ASRock ALiveNF5-eSATA2+ Motherboard English Using SATA / SATAII HDDs and eSATAII devices with NCQ and Hot Plug functions STEP 1: Set Up BIOS. ROM as the boot device. C. A. B. A. Exit Reboot system now Press any key to include SP4. Please visit our website for the updates...: 1. STEP 2: Make a SATA / SATAII driver diskette. Generate RAID Driver diskette for WindowsXP64 4. Enter BIOS SETUP UTILITY Advanced screen IDE Configuration. Insert the ASRock Support CD into your optical drive to the OS you install. 1. During POST at the beginning of making...
...ASRock ALiveNF5-eSATA2+ Motherboard English Using SATA / SATAII HDDs and eSATAII devices with NCQ and Hot Plug functions STEP 1: Set Up BIOS. ROM as the boot device. C. A. B. A. Exit Reboot system now Press any key to include SP4. Please visit our website for the updates...: 1. STEP 2: Make a SATA / SATAII driver diskette. Generate RAID Driver diskette for WindowsXP64 4. Enter BIOS SETUP UTILITY Advanced screen IDE Configuration. Insert the ASRock Support CD into your optical drive to the OS you install. 1. During POST at the beginning of making...
Quick Installation Guide
Page 30
...eSATAII devices without NCQ and Hot Plug functions STEP 1: Set Up BIOS. Enter BIOS SETUP UTILITY Advanced screen IDE Configuration. STEP 1: Set Up BIOS. If there is supposed to the OS you install. 1. Enter BIOS SETUP UTILITY Advanced screen IDE Configuration. Please make a SATA /...the updates of making a SP4 disk: http://www.microsoft.com/Windows2000/downloads/servicepacks/sp4/spdeploy. drivers. Please visit our website for Windows® VistaTM / VistaTM 64-bit are in the following section 2.13.1 step 2 on IDE HDD, please skip step 2. 30 ASRock ALiveNF5-eSATA2+ ...
...eSATAII devices without NCQ and Hot Plug functions STEP 1: Set Up BIOS. Enter BIOS SETUP UTILITY Advanced screen IDE Configuration. STEP 1: Set Up BIOS. If there is supposed to the OS you install. 1. Enter BIOS SETUP UTILITY Advanced screen IDE Configuration. Please make a SATA /...the updates of making a SP4 disk: http://www.microsoft.com/Windows2000/downloads/servicepacks/sp4/spdeploy. drivers. Please visit our website for Windows® VistaTM / VistaTM 64-bit are in the following section 2.13.1 step 2 on IDE HDD, please skip step 2. 30 ASRock ALiveNF5-eSATA2+ ...


