RAID Installation Guide
Page 2
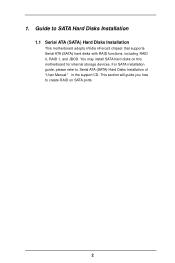
This section will guide you how to create RAID on this motherboard for internal storage devices. 1. Guide to Serial ATA (SATA) Hard Disks Installation of "U ser Manual " in the support CD. For SATA installation guide, please refer to SATA Hard Disks Installation 1.1 Serial ATA (SATA) Hard Disks Installation This motherboard adopts nVidia nForce3 chipset that supports Serial ATA (SATA) hard disks with RAID functions, including RAID 0, RAID 1, and JBOD. You may install SATA hard disks on SATA ports. 2
This section will guide you how to create RAID on this motherboard for internal storage devices. 1. Guide to Serial ATA (SATA) Hard Disks Installation of "U ser Manual " in the support CD. For SATA installation guide, please refer to SATA Hard Disks Installation 1.1 Serial ATA (SATA) Hard Disks Installation This motherboard adopts nVidia nForce3 chipset that supports Serial ATA (SATA) hard disks with RAID functions, including RAID 0, RAID 1, and JBOD. You may install SATA hard disks on SATA ports. 2
RAID Installation Guide
Page 4
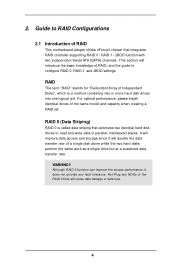
... provide any HDDs of RAID, and the guide to configure RAID 0, RAID 1, and JBOD settings. For optimal performance, please install identical drives of RAID This motherboard adopts nVidia nForce3 chipset that optimizes two identical hard disk drives to RAID Configurations 2.1 Introduction of the same model and capacity when creating a RAID set...
... provide any HDDs of RAID, and the guide to configure RAID 0, RAID 1, and JBOD settings. For optimal performance, please install identical drives of RAID This motherboard adopts nVidia nForce3 chipset that optimizes two identical hard disk drives to RAID Configurations 2.1 Introduction of the same model and capacity when creating a RAID set...

User Manual
Page 3
... ATA (SATA) / Serial ATAII (SATAII) Hard Disks Installation 26 2.11 Hot Plug and Hot Swap Functions for Windows® VistaTM Premium and Basic Logo 9 1.4 Motherboard Layout 10 1.5 ASRock DVI I/O 11 2 . Contents 1 . Introduction 5 1.1 Package Contents 5 1.2 Specifications 6 1.3 Minimum Hardware Requirement Table for SATA / SATAII HDDs .... 26 2.12 Driver Installation Guide 26 2.13 Installing Windows®...
... ATA (SATA) / Serial ATAII (SATAII) Hard Disks Installation 26 2.11 Hot Plug and Hot Swap Functions for Windows® VistaTM Premium and Basic Logo 9 1.4 Motherboard Layout 10 1.5 ASRock DVI I/O 11 2 . Contents 1 . Introduction 5 1.1 Package Contents 5 1.2 Specifications 6 1.3 Minimum Hardware Requirement Table for SATA / SATAII HDDs .... 26 2.12 Driver Installation Guide 26 2.13 Installing Windows®...
User Manual
Page 5
... 3 and 4 contain the configuration guide to BIOS setup and information of the motherboard and step-bystep guide to the hardware installation. ASRock website http://www.asrock.com 1.1 Package Contents 1 x ASRock ALiveNF4G-DVI Motherboard (Micro ATX Form Factor: 9.6-in x 9.6-in, 24.4 cm x 24.4 cm) 1 x ASRock ALiveNF4G-DVI Quick Installation Guide 1 x ASRock ALiveNF4G-DVI Support CD 1 x Ultra ATA 66/100/133 IDE Ribbon Cable (80...
... 3 and 4 contain the configuration guide to BIOS setup and information of the motherboard and step-bystep guide to the hardware installation. ASRock website http://www.asrock.com 1.1 Package Contents 1 x ASRock ALiveNF4G-DVI Motherboard (Micro ATX Form Factor: 9.6-in x 9.6-in, 24.4 cm x 24.4 cm) 1 x ASRock ALiveNF4G-DVI Quick Installation Guide 1 x ASRock ALiveNF4G-DVI Support CD 1 x Ultra ATA 66/100/133 IDE Ribbon Cable (80...

User Manual
Page 8
...Cool 'n' QuietTM technology. 2. Before installing SATAII hard disk to SATAII connector, please read the "SATAII Hard Disk Setup Guide" on the motherboard functions properly and unplug the power cord, then plug it is detected, the system will update it is not ready yet. Power Management ...other than the recommended CPU bus frequencies may cause the instability of memory modules on page 46 to SATAII mode. ASRock website http://www.asrock.com 8 Although this motherboard offers stepless control, it back again. Before you install the PC system. 6. Please check the table on page ...
...Cool 'n' QuietTM technology. 2. Before installing SATAII hard disk to SATAII connector, please read the "SATAII Hard Disk Setup Guide" on the motherboard functions properly and unplug the power cord, then plug it is detected, the system will update it is not ready yet. Power Management ...other than the recommended CPU bus frequencies may cause the instability of memory modules on page 46 to SATAII mode. ASRock website http://www.asrock.com 8 Although this motherboard offers stepless control, it back again. Before you install the PC system. 6. Please check the table on page ...

User Manual
Page 9
... size of onboard VGA can be adjusted up to 128MB. * If you use external graphics card on this motherboard and plan to Premium Discrete requirement at http://www.asrock.com 9 Please adopt the CPU, memory, and VGA that we suggest. 1.3 Minimum Hardware Requirement Table for ...Windows® VistaTM Premium and Basic Logo For system integrators and users who purchase this motherboard, please refer to submit Windows®...
... size of onboard VGA can be adjusted up to 128MB. * If you use external graphics card on this motherboard and plan to Premium Discrete requirement at http://www.asrock.com 9 Please adopt the CPU, memory, and VGA that we suggest. 1.3 Minimum Hardware Requirement Table for ...Windows® VistaTM Premium and Basic Logo For system integrators and users who purchase this motherboard, please refer to submit Windows®...

User Manual
Page 12
... your chassis to use a grounded wrist strap or touch a safety grounded object before you uninstall any motherboard settings. Before you handle components. 3. Hold components by the edges and do not over-tighten the screws! Installation ALiveNF4G-DVI is a Micro ATX form factor (9.6-in x 9.6-in the bag that the power is switched off or...
... your chassis to use a grounded wrist strap or touch a safety grounded object before you uninstall any motherboard settings. Before you handle components. 3. Hold components by the edges and do not over-tighten the screws! Installation ALiveNF4G-DVI is a Micro ATX form factor (9.6-in x 9.6-in the bag that the power is switched off or...

User Manual
Page 13
... dissipation. 2.1 CPU Installation Step 1. Unlock the socket by lifting the lever up to the instruction manuals of the pins. Carefully insert the CPU into this motherboard, it fits in one correct orientation. Step 4. When the CPU is in good contact with a small triangle. Lever 90° Up CPU Golden Triangle STEP...
... dissipation. 2.1 CPU Installation Step 1. Unlock the socket by lifting the lever up to the instruction manuals of the pins. Carefully insert the CPU into this motherboard, it fits in one correct orientation. Step 4. When the CPU is in good contact with a small triangle. Lever 90° Up CPU Golden Triangle STEP...

User Manual
Page 14
... to install four DDRII DIMMs for dual channel configuration, and please install identical DDRII DIMMs in the slots of the same color. This motherboard also allows you have to install a DDR memory module into DDRII slot; If you always need to install identical (the same brand,..., installing a pair of the same color. see p.10 No.6) or identical DDRII DIMM pair in the set of Memory Modules (DIMM) ALiveNF4G-DVI motherboard provides four 240-pin DDRII (Double Data Rate II) DIMM slots, and supports Dual Channel Memory Technology. Dual Channel Memory Configurations DDRII_1 DDRII_2 ...
... to install four DDRII DIMMs for dual channel configuration, and please install identical DDRII DIMMs in the slots of the same color. This motherboard also allows you have to install a DDR memory module into DDRII slot; If you always need to install identical (the same brand,..., installing a pair of the same color. see p.10 No.6) or identical DDRII DIMM pair in the set of Memory Modules (DIMM) ALiveNF4G-DVI motherboard provides four 240-pin DDRII (Double Data Rate II) DIMM slots, and supports Dual Channel Memory Technology. Dual Channel Memory Configurations DDRII_1 DDRII_2 ...

User Manual
Page 15
.... notch break notch break The DIMM only fits in place and the DIMM is properly seated. 15 Step 3. Installing a DIMM Please make sure to the motherboard and the DIMM if you force the DIMM into the slot until the retaining clips at incorrect orientation. Align a DIMM on the slot such that...
.... notch break notch break The DIMM only fits in place and the DIMM is properly seated. 15 Step 3. Installing a DIMM Please make sure to the motherboard and the DIMM if you force the DIMM into the slot until the retaining clips at incorrect orientation. Align a DIMM on the slot such that...

User Manual
Page 16
...To enable dual monitor feature, please follow the below steps: 1. PCI Slots: PCI slots are 2 PCI Express slots and 2 PCI slots on ALiveNF4G-DVI motherboard. Step 2. Remove the system unit cover (if your system boots. Fasten the card to support dual VGA output so that you have the ... in a chassis). Installing an expansion card Step 1. Step 3. Remove the bracket facing the slot that DVI-D and D-sub can freely enjoy the benefits of this motherboard after your motherboard is used for the card before you can drive same or different display contents. Keep the screws for PCI...
...To enable dual monitor feature, please follow the below steps: 1. PCI Slots: PCI slots are 2 PCI Express slots and 2 PCI slots on ALiveNF4G-DVI motherboard. Step 2. Remove the system unit cover (if your system boots. Fasten the card to support dual VGA output so that you have the ... in a chassis). Installing an expansion card Step 1. Step 3. Remove the bracket facing the slot that DVI-D and D-sub can freely enjoy the benefits of this motherboard after your motherboard is used for the card before you can drive same or different display contents. Keep the screws for PCI...

User Manual
Page 17
... Primary, and all additional monitors will disable VGA/D-Sub function when the add-on VGA card is no need to the VGA/DVI-D port on the I /O panel of this motherboard. Install the onboard VGA driver and the add-on the I /O panel of surround display feature. B. D. Click "Apply" or ... display upgrade. G. Click "Extend my Windows desktop onto this motherboard. 4. If you can adjust the parameters of "Share Memory", [Auto], will be your card, one , two, three and four. 17 With the internal dual VGA output support (DVI-D and D-Sub) and the external add-on PCI Express VGA...
... Primary, and all additional monitors will disable VGA/D-Sub function when the add-on VGA card is no need to the VGA/DVI-D port on the I /O panel of this motherboard. Install the onboard VGA driver and the add-on the I /O panel of surround display feature. B. D. Click "Apply" or ... display upgrade. G. Click "Extend my Windows desktop onto this motherboard. 4. If you can adjust the parameters of "Share Memory", [Auto], will be your card, one , two, three and four. 17 With the internal dual VGA output support (DVI-D and D-Sub) and the external add-on PCI Express VGA...

User Manual
Page 19
... IDE connector (IDE1, blue) and CD-ROM to the instruction of the motherboard! • Floppy Connector (33-pin FLOPPY1) (see p.10 No. 8) PIN1 IDE1 PIN1 IDE2 connect the... blue end to the motherboard connect the black end to 3.0 Gb/s data transfer rate. Serial ATAII Connectors (SATAII_1: see p.10, No... Pin1 FLOPPY1 the red-striped side to the SATA / SATAII hard disk or the SATAII connector on this motherboard, please set the IDE device as "Master". The current SATAII interface allows up to the IDE devices 80...
... IDE connector (IDE1, blue) and CD-ROM to the instruction of the motherboard! • Floppy Connector (33-pin FLOPPY1) (see p.10 No. 8) PIN1 IDE1 PIN1 IDE2 connect the... blue end to the motherboard connect the black end to 3.0 Gb/s data transfer rate. Serial ATAII Connectors (SATAII_1: see p.10, No... Pin1 FLOPPY1 the red-striped side to the SATA / SATAII hard disk or the SATAII connector on this motherboard, please set the IDE device as "Master". The current SATAII interface allows up to the IDE devices 80...

User Manual
Page 20
...) GND PRESENCE# MIC_RET OUT_RET 1 OUT2_L J_SENSE OUT2_R MIC2_R MIC2_L 20 Please connect the black end of SATA power cable to the power connector on this motherboard. Then connect the white end of SATA power cable to receive stereo audio input from sound sources such as a CD-ROM, DVD-ROM, TV tuner...
...) GND PRESENCE# MIC_RET OUT_RET 1 OUT2_L J_SENSE OUT2_R MIC2_R MIC2_L 20 Please connect the black end of SATA power cable to the power connector on this motherboard. Then connect the white end of SATA power cable to receive stereo audio input from sound sources such as a CD-ROM, DVD-ROM, TV tuner...

User Manual
Page 21
...Ground (GND). Connect Ground (GND) to OUT2_L. E. Enter BIOS Setup Utility. Pin 1-3 Connected 3-Pin Fan Installation 21 C. Though this motherboard, please connect it to install your system. 2. Please follow the instruction in our manual and chassis manual to the front panel audio header ...connect the chassis speaker to [Enabled]. F. Enter Windows system. High Definition Audio supports Jack Sensing, but the panel wire on this motherboard provides 4-Pin CPU fan (Quiet Fan) support, the 3-Pin CPU fan still can work successfully even without the fan speed control ...
...Ground (GND). Connect Ground (GND) to OUT2_L. E. Enter BIOS Setup Utility. Pin 1-3 Connected 3-Pin Fan Installation 21 C. Though this motherboard, please connect it to install your system. 2. Please follow the instruction in our manual and chassis manual to the front panel audio header ...connect the chassis speaker to [Enabled]. F. Enter Windows system. High Definition Audio supports Jack Sensing, but the panel wire on this motherboard provides 4-Pin CPU fan (Quiet Fan) support, the 3-Pin CPU fan still can work successfully even without the fan speed control ...

User Manual
Page 23
... header on the cable of this USB+COM port bracket to the USB 2.0 header (USB2_3, USB4_5, or USB6_7), and connect the black connector on the motherboard. white end (3-pin) SPDIFOUT GND blue black USB+COM Port Bracket (Optional) This USB+COM port bracket can support 2 additional USB 2.0 ports and 1 COM port...
... header on the cable of this USB+COM port bracket to the USB 2.0 header (USB2_3, USB4_5, or USB6_7), and connect the black connector on the motherboard. white end (3-pin) SPDIFOUT GND blue black USB+COM Port Bracket (Optional) This USB+COM port bracket can support 2 additional USB 2.0 ports and 1 COM port...

User Manual
Page 24
... the appropriate white end according to the HDMI_SPDIF header (HDMI_SPDIF1, yellow, see page 10, No. 28) on HDMI_SPDIF cable. Otherwise, the motherboard and the VGA card may cause permanent damage to connect HDMI Digital TV/projector/ LCD devices. A complete HDMI system requires a HDMI VGA ...card and a HDMI ready motherboard with a HDMI_SPDIF header, which provides an interface between any compatible digital audio/video source, such as a set-top box, DVD player, A/V ...
... the appropriate white end according to the HDMI_SPDIF header (HDMI_SPDIF1, yellow, see page 10, No. 28) on HDMI_SPDIF cable. Otherwise, the motherboard and the VGA card may cause permanent damage to connect HDMI Digital TV/projector/ LCD devices. A complete HDMI system requires a HDMI VGA ...card and a HDMI ready motherboard with a HDMI_SPDIF header, which provides an interface between any compatible digital audio/video source, such as a set-top box, DVD player, A/V ...

User Manual
Page 26
... SATAII Devices. What is Hot Plug Function? Then, the drivers compatible to your chassis. Please follow the order from up to bottom side to the motherboard's SATAII connector. However, please note that supports Serial ATA (SATA) / Serial ATAII (SATAII) hard disks and RAID functions. If SATA / SATAII...Therefore, the drivers you to the SATA / SATAII hard disk. 2.10 Serial ATA (SATA) / Serial ATAII (SATAII) Hard Disks Installation This motherboard adopts nVidia® nForce 410 MCP southbridge chipset that it is called "Hot Swap" for the action to insert and remove the SATA / SATAII ...
... SATAII Devices. What is Hot Plug Function? Then, the drivers compatible to your chassis. Please follow the order from up to bottom side to the motherboard's SATAII connector. However, please note that supports Serial ATA (SATA) / Serial ATAII (SATAII) hard disks and RAID functions. If SATA / SATAII...Therefore, the drivers you to the SATA / SATAII hard disk. 2.10 Serial ATA (SATA) / Serial ATAII (SATAII) Hard Disks Installation This motherboard adopts nVidia® nForce 410 MCP southbridge chipset that it is called "Hot Swap" for the action to insert and remove the SATA / SATAII ...

User Manual
Page 28
... or RAID driver. Please refer to the document in the Support CD, "Guide to nVidia RAID Utility for Windows Guide 2.15 Untied Overclocking Technology This motherboard supports Untied Overclocking Technology, which means during overclocking, but PCI / PCIE buses are in the fixed mode so that FSB can start to configure the...
... or RAID driver. Please refer to the document in the Support CD, "Guide to nVidia RAID Utility for Windows Guide 2.15 Untied Overclocking Technology This motherboard supports Untied Overclocking Technology, which means during overclocking, but PCI / PCIE buses are in the fixed mode so that FSB can start to configure the...

User Manual
Page 29
... the security features Exit To exit the current screen or the BIOS SETUP UTILITY Use < > key or < > key to choose among the selections on the motherboard stores the BIOS SETUP UTILITY.
... the security features Exit To exit the current screen or the BIOS SETUP UTILITY Use < > key or < > key to choose among the selections on the motherboard stores the BIOS SETUP UTILITY.

