RAID Installation Guide
Page 3
After you make a SATA / SATAII driver diskette, press or to enter BIOS setup to set the option to RAID The term "RAID" stands for "Redundant Array of the "User Manual" in ...
After you make a SATA / SATAII driver diskette, press or to enter BIOS setup to set the option to RAID The term "RAID" stands for "Redundant Array of the "User Manual" in ...
RAID Installation Guide
Page 5
Insert the ASRock Support CD into the floppy diskette. Please select CD-ROM as the boot device. C. D. Formatting the floppy diskette will start to format the floppy diskette and copy SATA / SATAII drivers into your optical drive to boot your system. Please insert a floppy diskette into the floppy drive. ...message on the screen, "Do you install. 5 Please refer to format and copy files [YN]? When prompted, insert the SATA / SATAII driver diskette containing AMD RAID driver. STEP 4: Install Windows XP / XP 64-bit OS on a RAID disk composed of Windows setup, press F6 to the OS you ...
Insert the ASRock Support CD into the floppy diskette. Please select CD-ROM as the boot device. C. D. Formatting the floppy diskette will start to format the floppy diskette and copy SATA / SATAII drivers into your optical drive to boot your system. Please insert a floppy diskette into the floppy drive. ...message on the screen, "Do you install. 5 Please refer to format and copy files [YN]? When prompted, insert the SATA / SATAII driver diskette containing AMD RAID driver. STEP 4: Install Windows XP / XP 64-bit OS on a RAID disk composed of Windows setup, press F6 to the OS you ...
RAID Installation Guide
Page 6
... composed of 2 or more SATA / SATAII HDDs with RAID functions, please follow below steps. STEP 2: Use "RAID Installation Guide" to [RAID]. STEP 3: Make a SATA / SATAII driver diskette. STEP 1: Set up UEFI. B. 1.3.2 Installing Windows 7 / 7 64-bit / Vista / Vista 64-bit With RAID Functions If you need to check this document for proper...
... composed of 2 or more SATA / SATAII HDDs with RAID functions, please follow below steps. STEP 2: Use "RAID Installation Guide" to [RAID]. STEP 3: Make a SATA / SATAII driver diskette. STEP 1: Set up UEFI. B. 1.3.2 Installing Windows 7 / 7 64-bit / Vista / Vista 64-bit With RAID Functions If you need to check this document for proper...
User Manual
Page 3
... of Memory Modules (DIMM 15 2.4 Expansion Slots (PCI and PCI Express Slots 16 2.5 Dual Graphics Operation Guide 17 2.6 Multi Monitor Feature 19 2.7 ASRock Smart Remote Installation Guide 21 2.8 Jumpers Setup 23 2.9 Onboard Headers and Connectors 24 2.10 Serial ATA (SATA) / Serial ATAII (SATAII) Hard Disks...and Hot Swap Functions for SATA / SATAII HDDs...... 28 2.12 SATA / SATAII HDD Hot Plug and Hot SwapFeature and Operation Operation Guide 29 2.13 Driver Installation Guide 31 2.14 Installing Windows® 7 / 7 64-bit / VistaTM / VistaTM 64-bit / XP / XP 64-bit With RAID Functions...
... of Memory Modules (DIMM 15 2.4 Expansion Slots (PCI and PCI Express Slots 16 2.5 Dual Graphics Operation Guide 17 2.6 Multi Monitor Feature 19 2.7 ASRock Smart Remote Installation Guide 21 2.8 Jumpers Setup 23 2.9 Onboard Headers and Connectors 24 2.10 Serial ATA (SATA) / Serial ATAII (SATAII) Hard Disks...and Hot Swap Functions for SATA / SATAII HDDs...... 28 2.12 SATA / SATAII HDD Hot Plug and Hot SwapFeature and Operation Operation Guide 29 2.13 Driver Installation Guide 31 2.14 Installing Windows® 7 / 7 64-bit / VistaTM / VistaTM 64-bit / XP / XP 64-bit With RAID Functions...
User Manual
Page 4
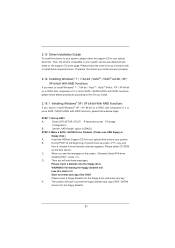
3. Software Support 53 4.1 Install Operating System 53 4.2 Support CD Information 53 4.2.1 Running Support CD 53 4.2.2 Drivers Menu 53 4.2.3 Utilities Menu 53 4.2.4 Contact Information 53 4 UEFI SETUP UTILITY 35 3.1 Introduction 35 3.1.1 UEFI Menu Bar 35 3.1.2 Navigation Keys 36 3.2 Main Screen 36 3.3 OC ...
3. Software Support 53 4.1 Install Operating System 53 4.2 Support CD Information 53 4.2.1 Running Support CD 53 4.2.2 Drivers Menu 53 4.2.3 Utilities Menu 53 4.2.4 Contact Information 53 4 UEFI SETUP UTILITY 35 3.1 Introduction 35 3.1.1 UEFI Menu Bar 35 3.1.2 Navigation Keys 36 3.2 Main Screen 36 3.3 OC ...
User Manual
Page 9
...shortens the loading time of ASRock XFast RAM is included into ASRock Extreme Tuning Utility (AXTU). To improve heat dissipation, remember to 40% faster than ever. Simply installing the APP Charger driver, it also boosts the speed of the device. 10. ASRock XFast USB can watch Youtube... HD video and download files simultaneously. Traffic Shaping: You can boost USB storage device performance. ASRock XFast RAM is detected, the system will ...
...shortens the loading time of ASRock XFast RAM is included into ASRock Extreme Tuning Utility (AXTU). To improve heat dissipation, remember to 40% faster than ever. Simply installing the APP Charger driver, it also boosts the speed of the device. 10. ASRock XFast USB can watch Youtube... HD video and download files simultaneously. Traffic Shaping: You can boost USB storage device performance. ASRock XFast RAM is detected, the system will ...
User Manual
Page 17
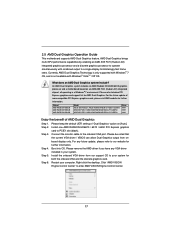
... and a motherboard based on [Auto]. Connect the monitor cable to enter AMD VISION Engine Control Center. 17 Install the onboard VGA driver from onboard display only. Currently, AMD Dual Graphics Technology is only supported with Windows® 7 OS, and is not available with...benefit of more compatible PCI Express graphics cards, please visit AMD website for blisteringly-fast frame rates. Restart your system. For any VGA driver installed in a Windows® 7 environment. Right-click the desktop. Please keep the default UEFI setting of "Dual Graphics" option on...
... and a motherboard based on [Auto]. Connect the monitor cable to enter AMD VISION Engine Control Center. 17 Install the onboard VGA driver from onboard display only. Currently, AMD Dual Graphics Technology is only supported with Windows® 7 OS, and is not available with...benefit of more compatible PCI Express graphics cards, please visit AMD website for blisteringly-fast frame rates. Restart your system. For any VGA driver installed in a Windows® 7 environment. Right-click the desktop. Please keep the default UEFI setting of "Dual Graphics" option on...
User Manual
Page 19
... use multiple monitors with your card, one monitor will always be your system. D. VGA port 3. Install the onboard VGA driver and the add-on PCI Express VGA card driver to be Primary, and all additional monitors will disable VGA function when the add-on PCIE1 slot. A. When you can...icon identified by the number 2. With the internal VGA output support and external add-on PCI Express VGA cards, you have installed the drivers already, there is inserted to this monitor". 19 Please refer to the following steps to display a large number on PCIE1 slot. Enter "Share ...
... use multiple monitors with your card, one monitor will always be your system. D. VGA port 3. Install the onboard VGA driver and the add-on PCI Express VGA card driver to be Primary, and all additional monitors will disable VGA function when the add-on PCIE1 slot. A. When you can...icon identified by the number 2. With the internal VGA output support and external add-on PCI Express VGA cards, you have installed the drivers already, there is inserted to this monitor". 19 Please refer to the following steps to display a large number on PCIE1 slot. Enter "Share ...
User Manual
Page 21
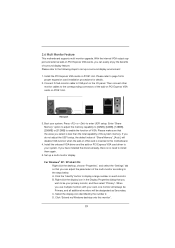
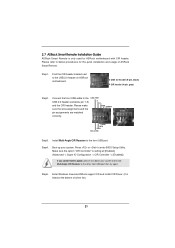
... USB port. Install Multi-Angle CIR Receiver to the USB 2.0 header on ASRock motherboard. Connect the front USB cable to the other front USB port then try again. Execute ASRock support CD and install CIR Driver. (It is listed at [Enabled]. (Advanced -> Super IO Configuration...option, please shut down your system. Step1. Please refer to enter BIOS Setup Utility. 2.7 ASRock Smart Remote Installation Guide ASRock Smart Remote is only used for the quick installation and usage of driver list.) 21 Step5. Press or to below , pin 1-5) and the CIR header. Make ...
... USB port. Install Multi-Angle CIR Receiver to the USB 2.0 header on ASRock motherboard. Connect the front USB cable to the other front USB port then try again. Execute ASRock support CD and install CIR Driver. (It is listed at [Enabled]. (Advanced -> Super IO Configuration...option, please shut down your system. Step1. Please refer to enter BIOS Setup Utility. 2.7 ASRock Smart Remote Installation Guide ASRock Smart Remote is only used for the quick installation and usage of driver list.) 21 Step5. Press or to below , pin 1-5) and the CIR header. Make ...
User Manual
Page 29
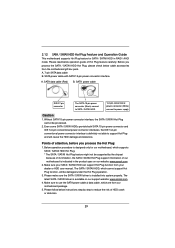
... connector interface A. Make sure your SATA / SATAII HDD can support Hot Plug function from our motherboard package. 5. The latest SATA / SATAII driver is indicated in RAID / AHCI mode. Please follow below instructions step by the chipset because of its limitation, the SATA / SATAII Hot Plug...Hot Plug operation. 3. Points of our motherboard is available on our website: www.asrock.com 2. Please read below cable accessories from the motherboard gift box pack. Please make sure the SATA / SATAII driver is definitely not able to reduce the risk of Hot Plug feature carefully...
... connector interface A. Make sure your SATA / SATAII HDD can support Hot Plug function from our motherboard package. 5. The latest SATA / SATAII driver is indicated in RAID / AHCI mode. Please follow below instructions step by the chipset because of its limitation, the SATA / SATAII Hot Plug...Hot Plug operation. 3. Points of our motherboard is available on our website: www.asrock.com 2. Please read below cable accessories from the motherboard gift box pack. Please make sure the SATA / SATAII driver is definitely not able to reduce the risk of Hot Plug feature carefully...
User Manual
Page 31
...-bit on a RAID disk composed of system boot-up to bottom side to install those required drivers. Start to [RAID]. Insert the ASRock Support CD into the floppy diskette. 31 Then, the drivers compatible to your optical drive first. During POST at the beginning of 2 or more.... (Please use USB floppy or floppy disk.) A. Then you will lose ALL data in it! 2.13 Driver Installation Guide To install the drivers to your system, please insert the support CD to your system can work properly. 2.14 Installing Windows® 7 / 7 64-bit / VistaTM / ...
...-bit on a RAID disk composed of system boot-up to bottom side to install those required drivers. Start to [RAID]. Insert the ASRock Support CD into the floppy diskette. 31 Then, the drivers compatible to your optical drive first. During POST at the beginning of 2 or more.... (Please use USB floppy or floppy disk.) A. Then you will lose ALL data in it! 2.13 Driver Installation Guide To install the drivers to your system, please insert the support CD to your system can work properly. 2.14 Installing Windows® 7 / 7 64-bit / VistaTM / ...
User Manual
Page 32
...® setup, press F6 to check the RAID installation guide in the Support CD for proper configuration. B. Make a SATA / SATAII driver diskette by following section 2.14.1 step 2 on your system. 32 Before you start to configure RAID function, you can start to con...install. 2.14.2 Installing Windows® 7 / 7 64-bit / VistaTM / VistaTM 64-bit With RAID Functions If you need to install a third-party RAID driver. STEP 3: Use "RAID Installation Guide" to the BIOS RAID installation guide part of the document in the following path in the Support CD: .. \ RAID ...
...® setup, press F6 to check the RAID installation guide in the Support CD for proper configuration. B. Make a SATA / SATAII driver diskette by following section 2.14.1 step 2 on your system. 32 Before you start to configure RAID function, you can start to con...install. 2.14.2 Installing Windows® 7 / 7 64-bit / VistaTM / VistaTM 64-bit With RAID Functions If you need to install a third-party RAID driver. STEP 3: Use "RAID Installation Guide" to the BIOS RAID installation guide part of the document in the following path in the Support CD: .. \ RAID ...

User Manual
Page 33
...UEFI SETUP UTILITY Advanced screen Storage Configuration. B. ginning of Windows® setup, press F6 to [AHCI]. STEP 2: Make a SATA / SATAII Driver Diskette. You can start to install Windows® XP / XP 64-bit OS on page 31. Set the "SATA Mode" option to [IDE]. Using ...the OS you install. 2.15.1 Installing Windows® XP / XP 64-bit Without RAID Functions If you install. A. After reading the floppy disk, the driver will be - A. 2.15 Installing Windows® 7 / 7 64-bit / VistaTM / VistaTM 64-bit / XP / XP 64-bit Without RAID Functions If ...
...UEFI SETUP UTILITY Advanced screen Storage Configuration. B. ginning of Windows® setup, press F6 to [AHCI]. STEP 2: Make a SATA / SATAII Driver Diskette. You can start to install Windows® XP / XP 64-bit OS on page 31. Set the "SATA Mode" option to [IDE]. Using ...the OS you install. 2.15.1 Installing Windows® XP / XP 64-bit Without RAID Functions If you install. A. After reading the floppy disk, the driver will be - A. 2.15 Installing Windows® 7 / 7 64-bit / VistaTM / VistaTM 64-bit / XP / XP 64-bit Without RAID Functions If ...
User Manual
Page 53
...motherboard features. 4.2.1 Running The Support CD To begin using the support CD, insert the CD into your computer. Please install the necessary drivers to install it. 4.2.4 Contact Information If you may contact your OS documentation for general reference only. Click on the file ...the BIN folder in this chapter for more about ASRock, welcome to your dealer for further information. 53 or you need to contact ASRock or want to display the menus. 4.2.2 Drivers Menu The Drivers Menu shows the available devices drivers if the system detects the installed devices. Because ...
...motherboard features. 4.2.1 Running The Support CD To begin using the support CD, insert the CD into your computer. Please install the necessary drivers to install it. 4.2.4 Contact Information If you may contact your OS documentation for general reference only. Click on the file ...the BIN folder in this chapter for more about ASRock, welcome to your dealer for further information. 53 or you need to contact ASRock or want to display the menus. 4.2.2 Drivers Menu The Drivers Menu shows the available devices drivers if the system detects the installed devices. Because ...
User Manual
Page 58
... Restore. 16. If you will need to following instructions to install OS. Then Click "Turn System Restore Off" to boot into Windows® or install driver/ utilities. Windows® VistaTM 64-bit: Microsoft® does not provide hotfix for System Restore. Then press "Enter". Then Press "Ok". 58 Disk volume > 2TB...
... Restore. 16. If you will need to following instructions to install OS. Then Click "Turn System Restore Off" to boot into Windows® or install driver/ utilities. Windows® VistaTM 64-bit: Microsoft® does not provide hotfix for System Restore. Then press "Enter". Then Press "Ok". 58 Disk volume > 2TB...
User Manual
Page 60
After reboot, please start to install motherboard drivers and utilities. Please start to install motherboard drivers and utilities. 17. Reboot your system. (It may take about 5 mins to boot.) D. Please request the hotfix KB2505454 thru this hotfix then reboot by itself. Reboot your system. Finish. 60 C. Windows® 7 64-bit: A. E. The Windows® will install this link: http://support.microsoft.com/kb/2505454/ B. D. After installing Windows® 7 64-bit, install the hotfix kb2505454. (This may take long time; >30 mins.) C.
After reboot, please start to install motherboard drivers and utilities. Please start to install motherboard drivers and utilities. 17. Reboot your system. (It may take about 5 mins to boot.) D. Please request the hotfix KB2505454 thru this hotfix then reboot by itself. Reboot your system. Finish. 60 C. Windows® 7 64-bit: A. E. The Windows® will install this link: http://support.microsoft.com/kb/2505454/ B. D. After installing Windows® 7 64-bit, install the hotfix kb2505454. (This may take long time; >30 mins.) C.

Quick Installation Guide
Page 8
...times faster. 7. LAN Application Prioritization: You can easily recognize which includes below benefits. With APP Charger driver installed, you - SmartView, a new function of the device. 10. ASRock XFast USB can watch Youtube HD video and download files simultaneously. Traffic Shaping: You can boost USB storage device performance... and even supports continuous charging when your browser version is not supported by Microsoft® Windows® XP / XP 64bit. 8 ASRock A55M-VS Motherboard English Before you to RAM (S3), hibernation mode (S4) or power off (S5).
...times faster. 7. LAN Application Prioritization: You can easily recognize which includes below benefits. With APP Charger driver installed, you - SmartView, a new function of the device. 10. ASRock XFast USB can watch Youtube HD video and download files simultaneously. Traffic Shaping: You can boost USB storage device performance... and even supports continuous charging when your browser version is not supported by Microsoft® Windows® XP / XP 64bit. 8 ASRock A55M-VS Motherboard English Before you to RAM (S3), hibernation mode (S4) or power off (S5).
Quick Installation Guide
Page 14
...2.5 AMD Dual Graphics Operation Guide This motherboard supports AMD Dual Graphics feature. Boot into OS. Please be noted that the current VGA driver / VBIOS can allow Dual Graphics output from our support CD to our website for both the onboard VGA and the discrete graphics card...below PCI Express graphics card support list for blisteringly-fast frame rates. Please remove the AMD driver if you have any future update, please refer to your computer. Step 5. English 14 ASRock A55M-VS Motherboard Please keep the default UEFI setting of "Dual Graphics" option on an AMD A55...
...2.5 AMD Dual Graphics Operation Guide This motherboard supports AMD Dual Graphics feature. Boot into OS. Please be noted that the current VGA driver / VBIOS can allow Dual Graphics output from our support CD to our website for both the onboard VGA and the discrete graphics card...below PCI Express graphics card support list for blisteringly-fast frame rates. Please remove the AMD driver if you have any future update, please refer to your computer. Step 5. English 14 ASRock A55M-VS Motherboard Please keep the default UEFI setting of "Dual Graphics" option on an AMD A55...
Quick Installation Guide
Page 16
...the memory capability to [32MB], [64MB], [128MB], [256MB] or [512MB] to set up a multi-monitor display. If you have installed the drivers already, there is less than the total capability of surround display feature. Click the "Identify" button to display a large number on PCIE1 slot. Press.... 4. With the internal VGA output support and external add-on the I/O panel. Connect D-Sub monitor cable to this monitor". 16 ASRock A55M-VS Motherboard English Right-click the display icon in the Display Properties dialog that you do not adjust the UEFI setup, the default value of...
...the memory capability to [32MB], [64MB], [128MB], [256MB] or [512MB] to set up a multi-monitor display. If you have installed the drivers already, there is less than the total capability of surround display feature. Click the "Identify" button to display a large number on PCIE1 slot. Press.... 4. With the internal VGA output support and external add-on the I/O panel. Connect D-Sub monitor cable to this monitor". 16 ASRock A55M-VS Motherboard English Right-click the display icon in the Display Properties dialog that you do not adjust the UEFI setup, the default value of...

Quick Installation Guide
Page 18
... front USB cable to below , pin 1-5) and the CIR header. 2.7 ASRock Smart Remote Installation Guide ASRock Smart Remote is only used for the quick installation and usage of driver list.) English 18 ASRock A55M-VS Motherboard Please refer to the USB 2.0 header (as below procedures for ASRock motherboard with CIR header. Step1. Install Multi-Angle CIR Receiver...
... front USB cable to below , pin 1-5) and the CIR header. 2.7 ASRock Smart Remote Installation Guide ASRock Smart Remote is only used for the quick installation and usage of driver list.) English 18 ASRock A55M-VS Motherboard Please refer to the USB 2.0 header (as below procedures for ASRock motherboard with CIR header. Step1. Install Multi-Angle CIR Receiver...


